Manage Attendance
Tour the Attendance page
By default, when you open attendance, you'll see the Meeting view for the current day even if you haven't finished marking a previous meeting. In the Overall view, you can view several meetings and see overall course statistics. You can mark or edit attendance from either view.
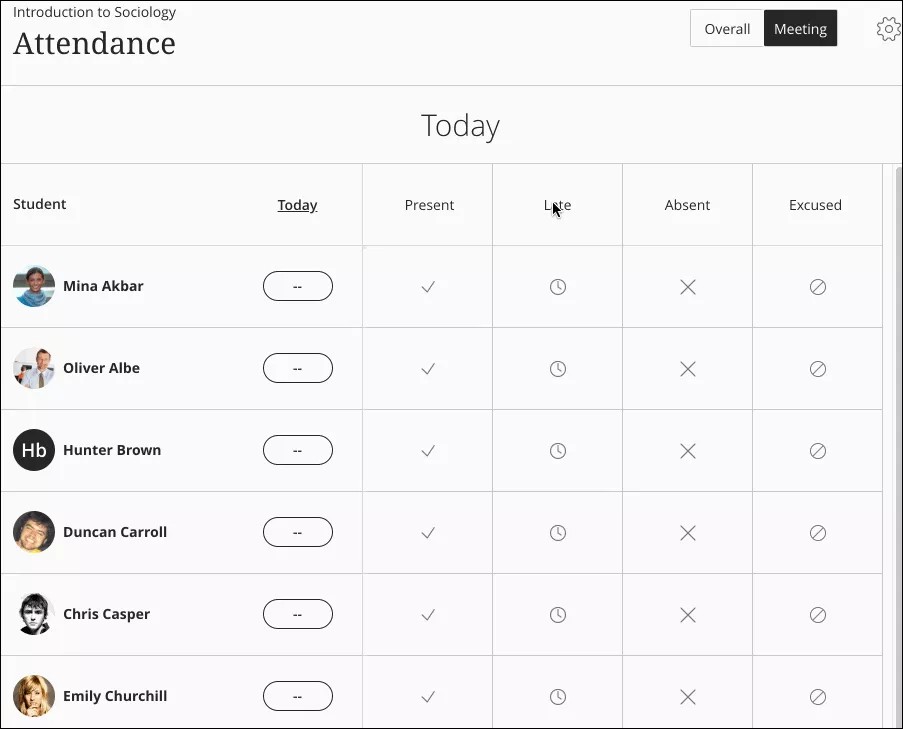
Meeting view
In the Meeting view, you can mark each student's attendance. You can also use the menu in a status's heading to mark all students present or absent. Then, you can change individual students' statuses or clear all marks. Your work is saved as you go.
As you mark students' attendance, their attendance grades are posted automatically. If you change students' attendance or clear marks, students see the changes immediately.
Note
Meeting view is the only view that appears on small devices.
Select the date column header to open the menu and perform these actions:
Clear all student marks for a meeting
Choose another status for all students
Exempt the meeting
Edit the meeting
Delete the meeting
Statuses
If you mark all students the same status and want to change to another status, you'll receive an override confirmation.
Present: Set at 100%. You can't change the percentage at this time.
Late: Default is set at 50%. Adjust the percentage in the Settings panel.
Absent: Set at 0%. You can't change the percentage at this time.
Excused: Counts as Present for scoring purposes. You can choose whether to include Excused in calculations.
The Meeting view scores are always percentages regardless of the schema you chose in the Settings panel. Because the Meeting view shows only one status, you'll see the percentage because it's the weight of that one status.
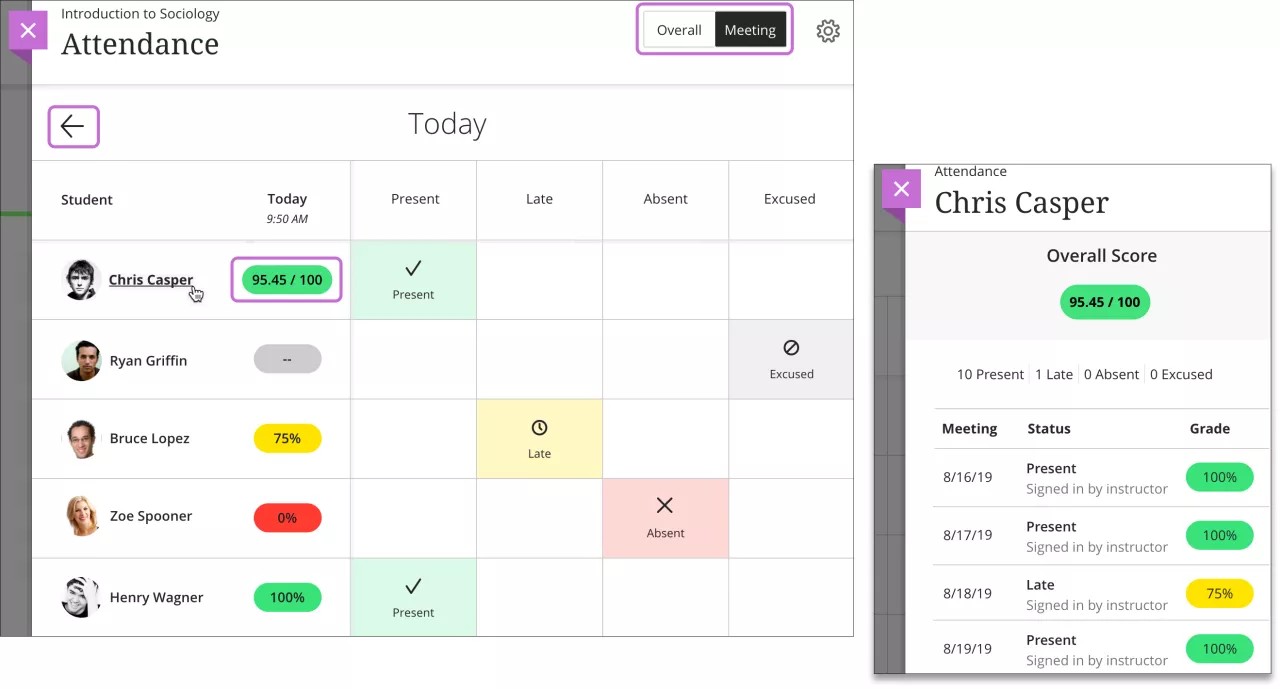
Select student names to view summaries of their overall attendance records. You can see how many class meetings each student has missed. Each student's Overall Score appears with the schema you chose in the Settings panel. This view is read-only.
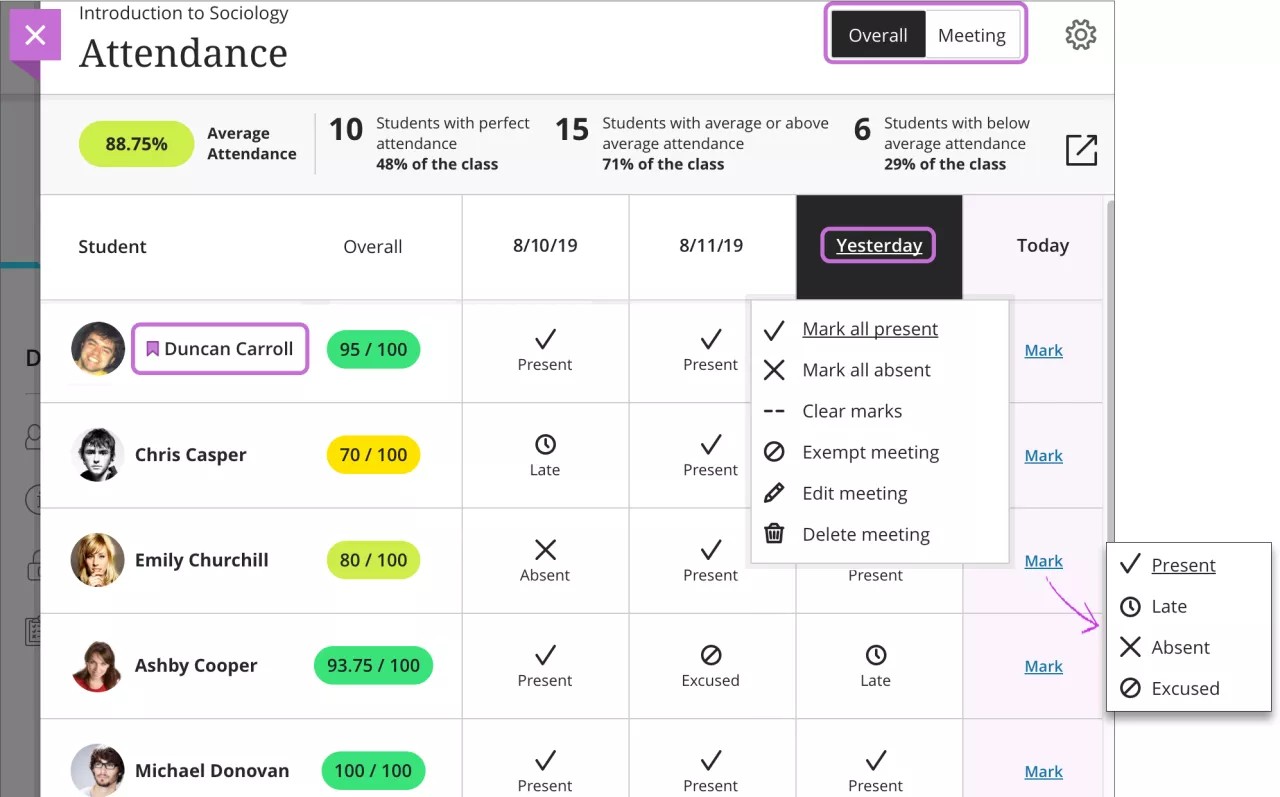
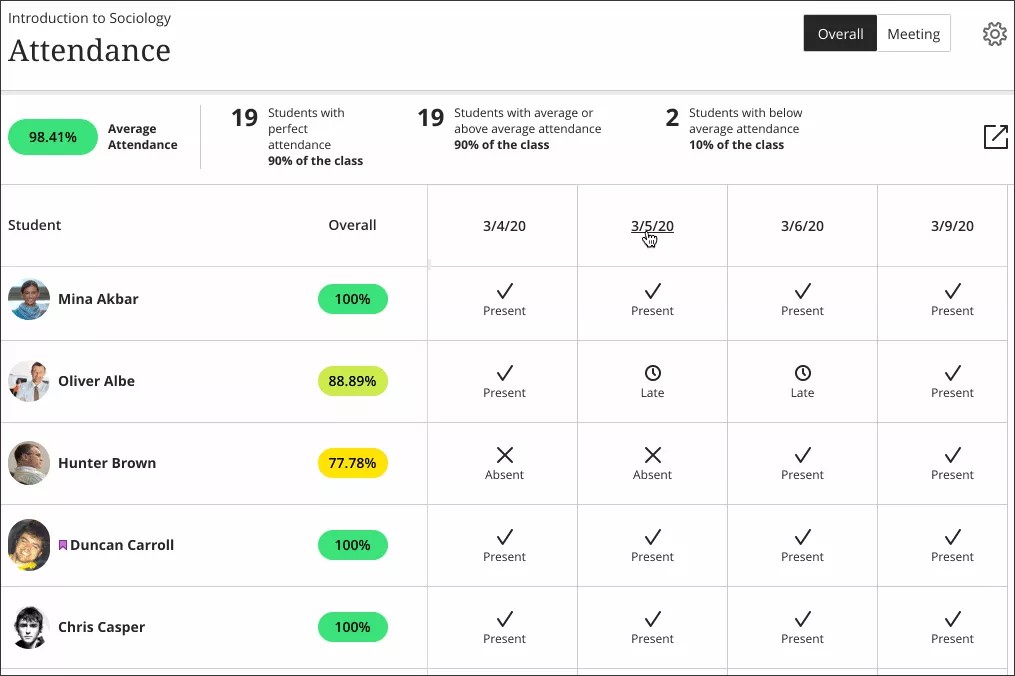
Overall view
In the Overall view, you can mark attendance, view attendance history and class summary statistics, and create new meetings.
As you mark students' attendance, their attendance grades are posted automatically. If you change students' attendance or clear marks, students see the changes immediately.
The most recent meeting you need to mark appears on the right side of the screen. The column is purple until you add marks for all students.
You can use the menu in a column heading to mark all students present or absent. Then, you can change individual students' statuses from their cells as needed. Your work is saved as you go.
If you mark all students the same status and want to change to another status, you'll receive an override confirmation.
In the Ultra Course View, you'll see an icon next to students with accommodations.
Student summary in grade pill
The grade pill for each student displays the overall attendance grade with the schema you chose in the Settings panel, such as A+ instead of 100. Select student names to view summaries of their overall attendance records. You can see how many class meetings each student has missed. This view is read-only. If you change students' attendance or clear marks, the students see the change in their overall grades immediately.
Overall course summary
The Overall view displays course summary statistics about your students' attendance.
These statistics are included:
Course average displayed in the grade pill
Perfect attendance
Average or above average attendance: Students with perfect attendance are included
Below average attendance

If a student has only excused records, no records at all, or is removed from your course, the student's attendance isn't included in the course summary statistics. The number of students listed for each statistic might not equal your total student count.
If every student has an attendance record, the average/above average and below average statistics add up to all students.
Unavailable students' information appears read-only and their previous attendance grades won't be included in the course summary statistics.
Edit a meeting
Select the date column header to open the menu and select Edit meeting. You can choose a new date from the pop-up calendar. If you change the date of a meeting or select Go to Today, all meetings are chronologically sorted when you close and open the Attendance page.
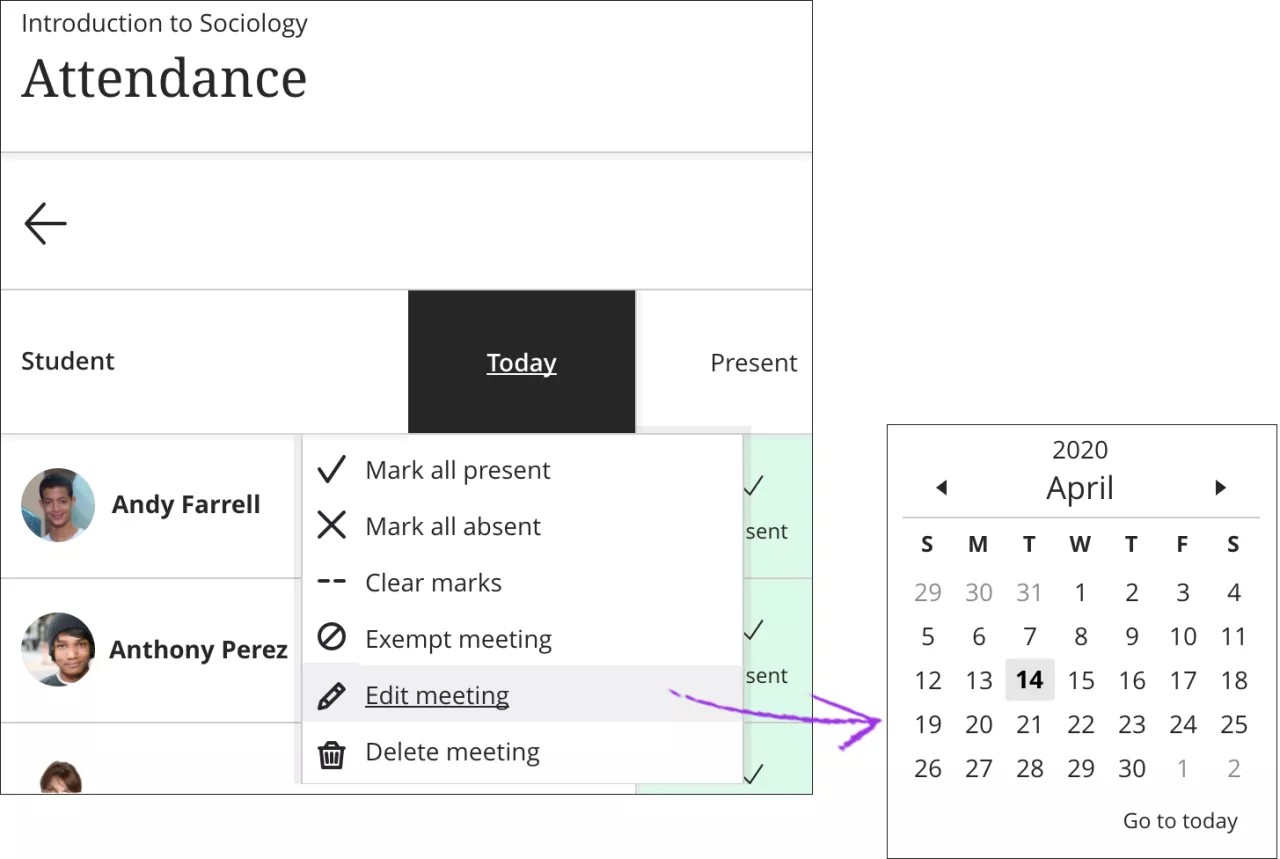
You can choose a meeting date in the future. If you have one or more meetings in the future, the Meeting view still opens to the most recent Today meeting.
Add a meeting
In the Overall view, you can add more than one meeting for attendance on a day. For example, if your class met for a field trip after your regularly scheduled class, you can add a meeting and mark who was present. Select the plus icon next to an existing meeting's date to add a new meeting.
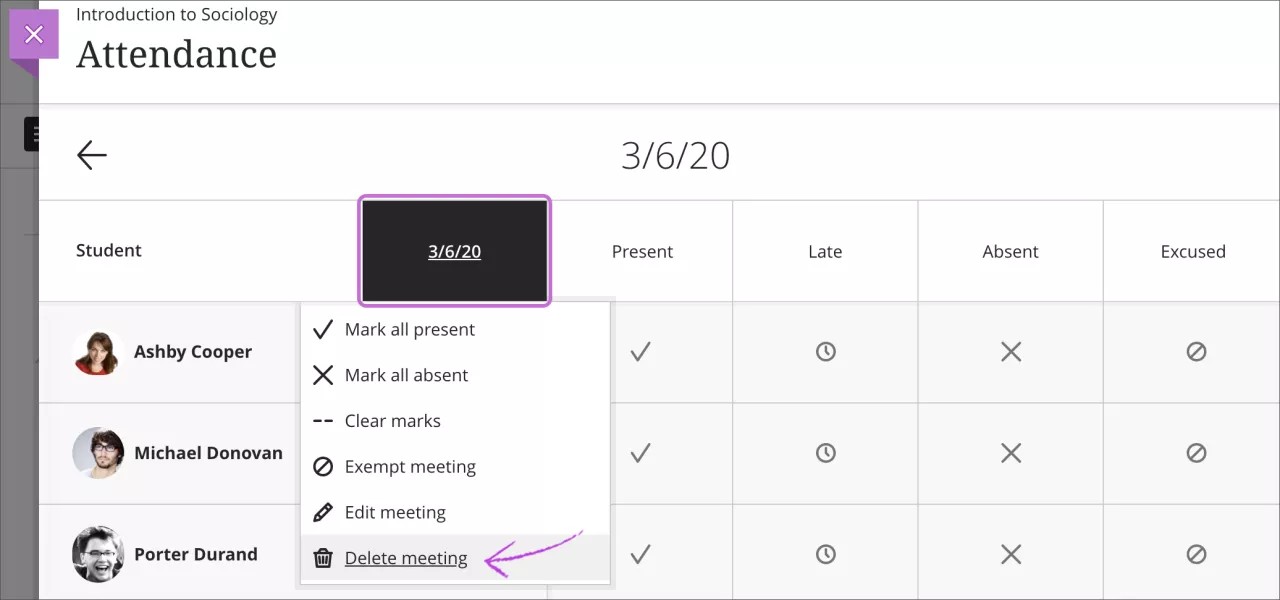
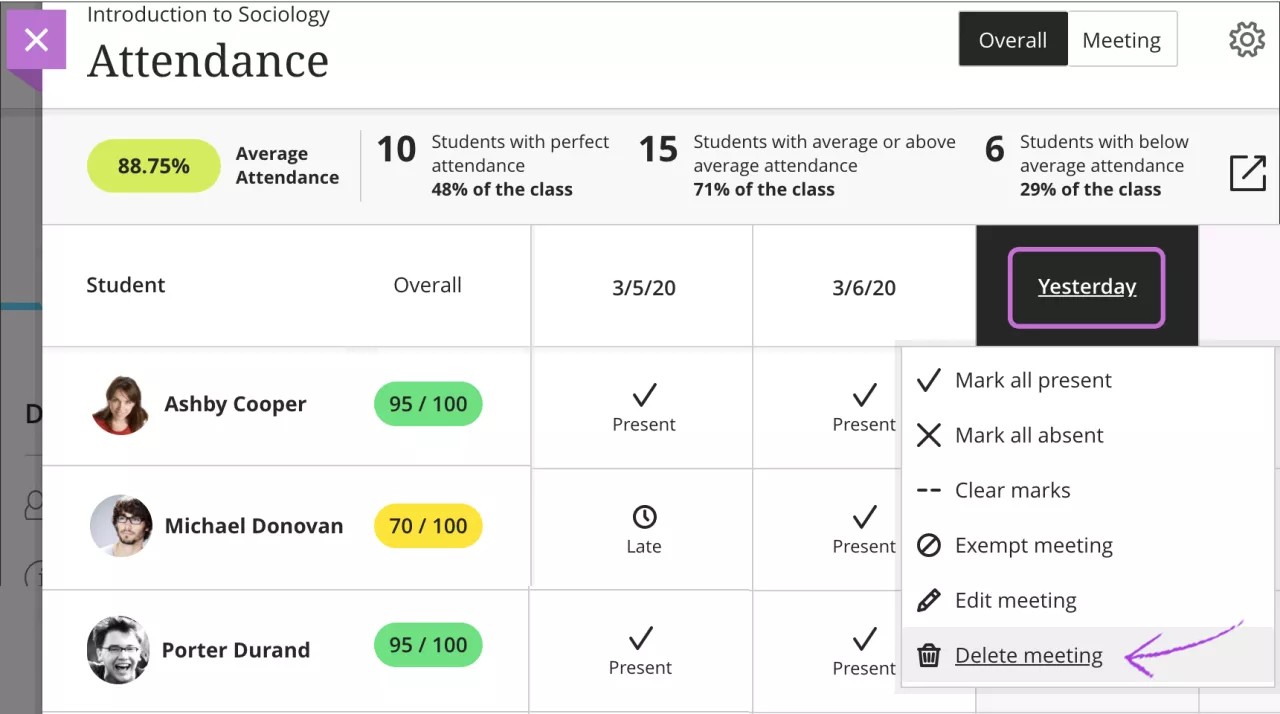
Delete a meeting
You can delete a meeting in either view, but at least one meeting must remain. You can't have an empty Attendance page. If you have only one meeting and you delete it, a new Today meeting replaces it.
Students' overall attendance grades update to not include the deleted meeting.
In the Meeting view, select the date column header to open the menu and select Delete meeting.
In the Overall view, select a date column header to open the menu and select Delete meeting.
Exempt a meeting
In the Meeting or Overall view, you can exempt a meeting that no longer requires an attendance grade. Students' overall attendance grades update to not include the exempted meeting, even if you've marked some or all student cells. You can also clear the exemption in both views.
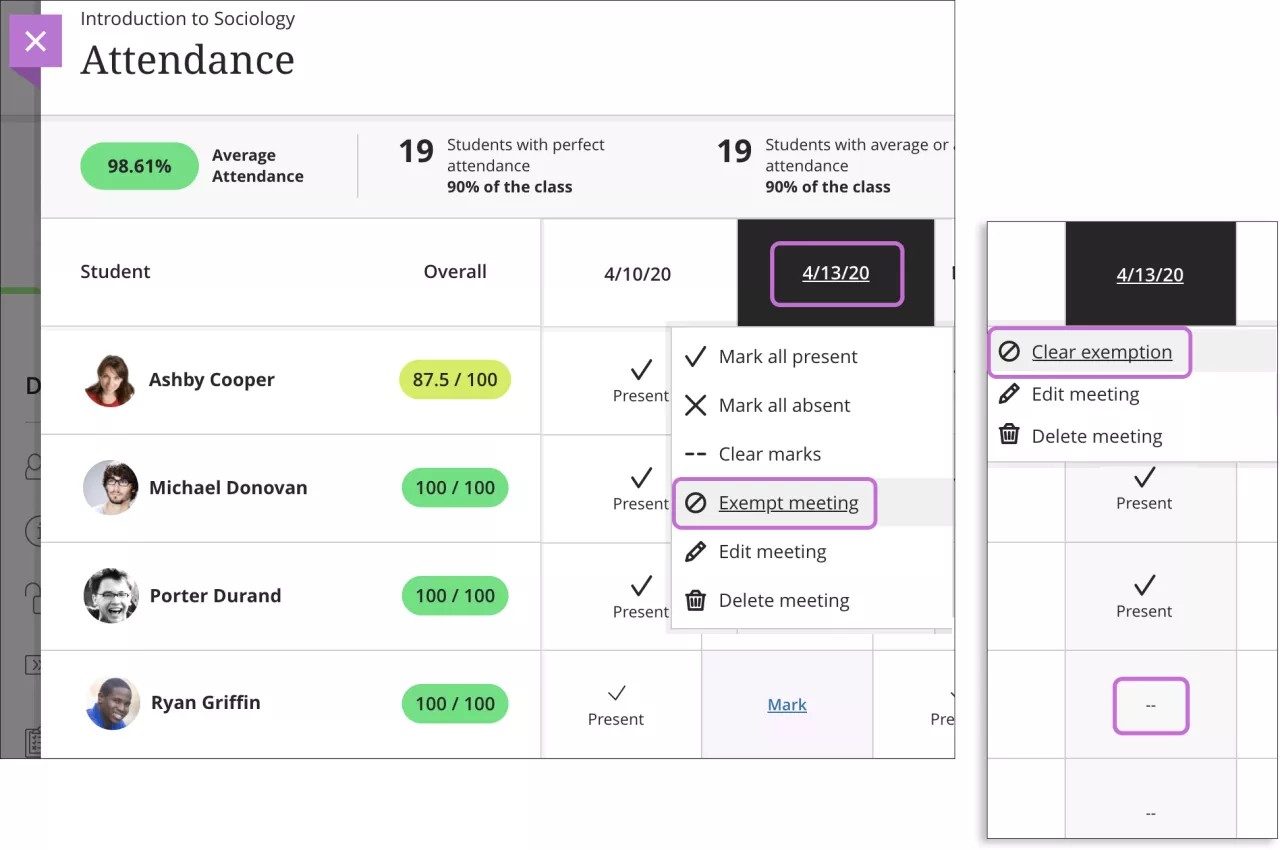
When you exempt a meeting, that meeting's column header menu no longer contains options to mark all students present or absent. Also, the menu option Exempt meeting changes to Clear exemption.
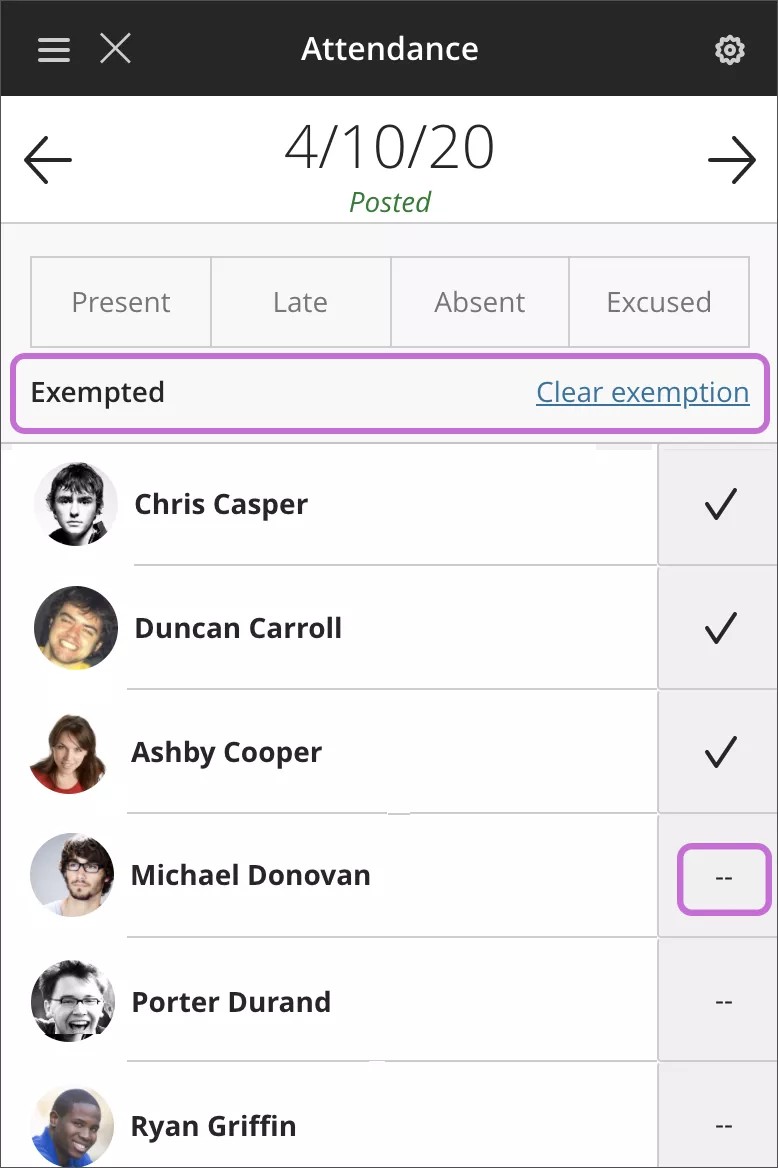
Exempt meeting columns appear gray and all grid cell menus are disabled. A null or empty value (--) appears for all students without a mark. If you marked students with a status, those statuses remain but are read-only and you can't change them.
On smaller devices, you can only view attendance in the Meeting view. When you exempt a meeting, the status options are disabled until you clear the exemption.