Create Groups
On the groups page, a partial list of your students appears in the Unassigned students section. Select Show All to view the entire list. You can create multiple groups to deliver the assignment to. You can also select the plus sign below the student list to create a custom group and add students.
Note
Your teaching assistants can create and manage group enrollments. Your graders can only grade group assignments.
Students who aren't assigned to a group won't have access to the group assignment because it won't appear on their Course Content pages. If you ask students to self-enroll in a group, they can't access the assignment until they join a group.

You can divide your students among groups in these ways:
Custom
Randomly assign
Self-enrollment
Reuse groups
Tip
The students' avatars in this view are hidden, to help people with vision impairment navigate through cards more efficiently.
Custom
You can create as many groups as you want, with any number of students in each group. You can also create new groups or remove groups based on how many you want for this assignment.
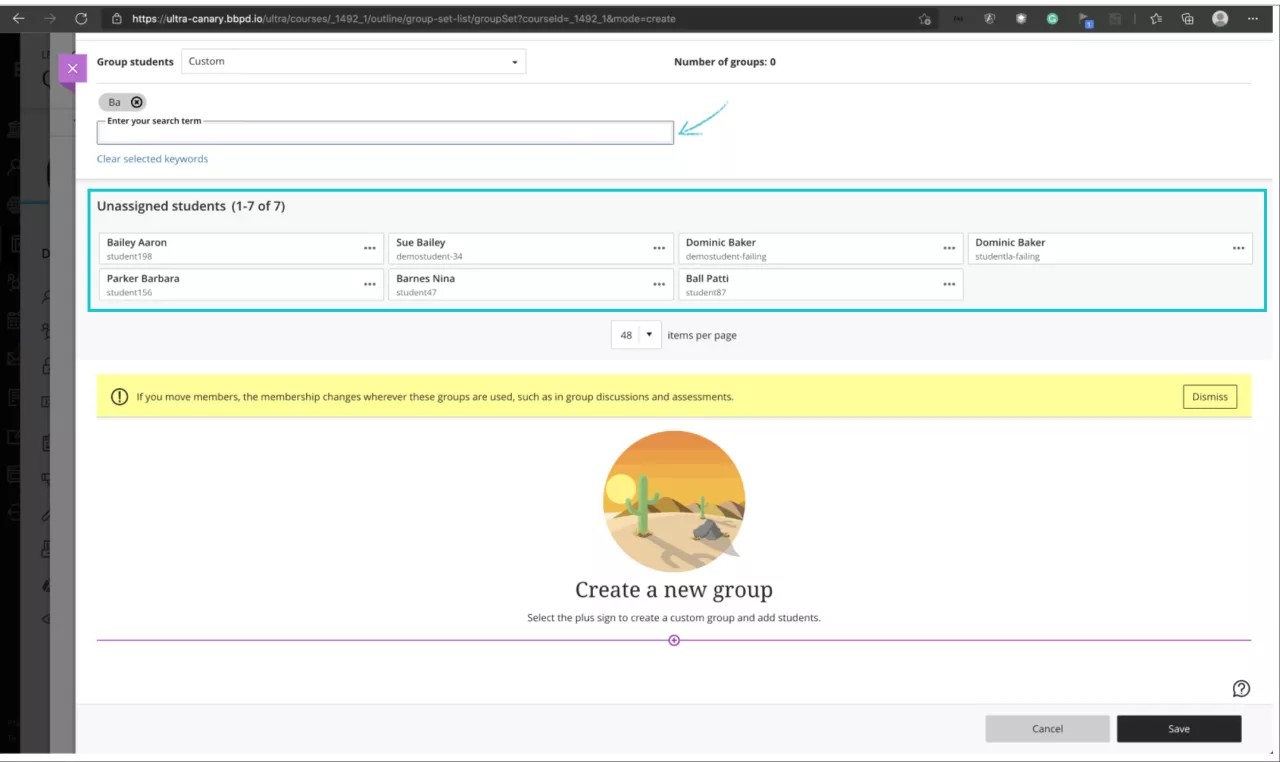
In the Group students menu, select Custom.
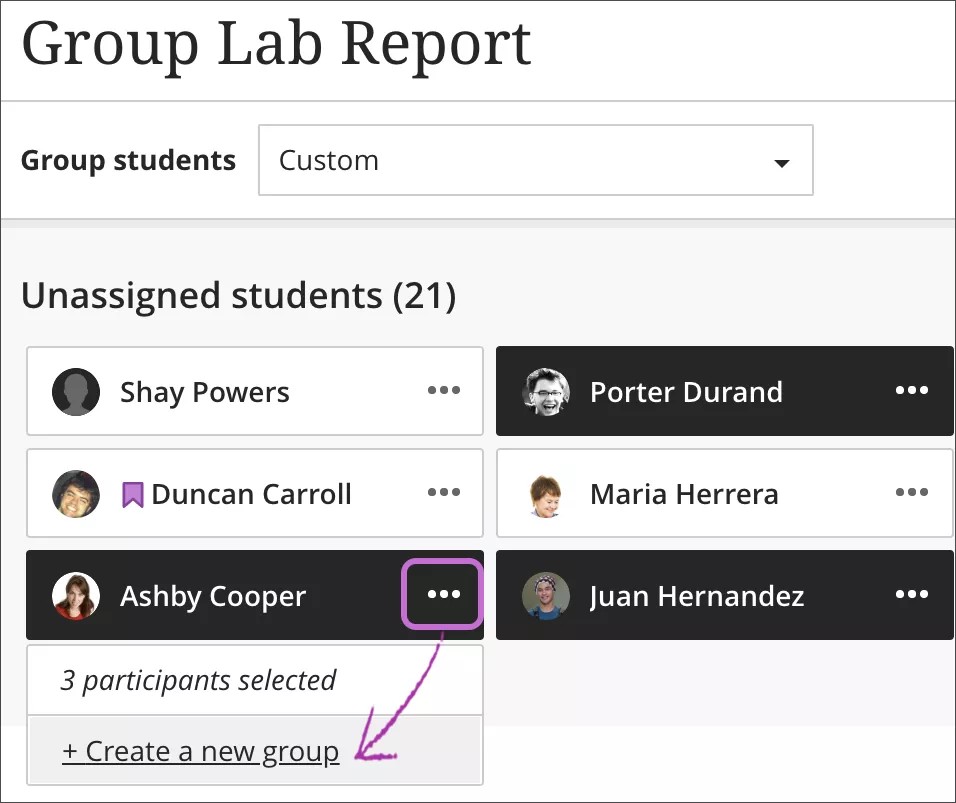
Select each student's name to select them at the same time. Select a student's name again to remove the selection.
After you select the students, open the menu next to one of their names and select Create a new group. You can also move multiple students to a group listed in the menu. You can't move students to a group with submitted work.
Edit the group name if you want to change the default naming.
Optionally, provide a group description that only appears to you at this time. You have no limit on the number of characters.
Select the plus sign wherever you want to add another group.
Warning
At this time, if you save a Custom group set, return to the group set, and select Custom again, your groups are deleted.
Randomly assign
Students are randomly assigned to the number of groups you choose. You need at least four students so the system can randomly assign students to at least two groups.
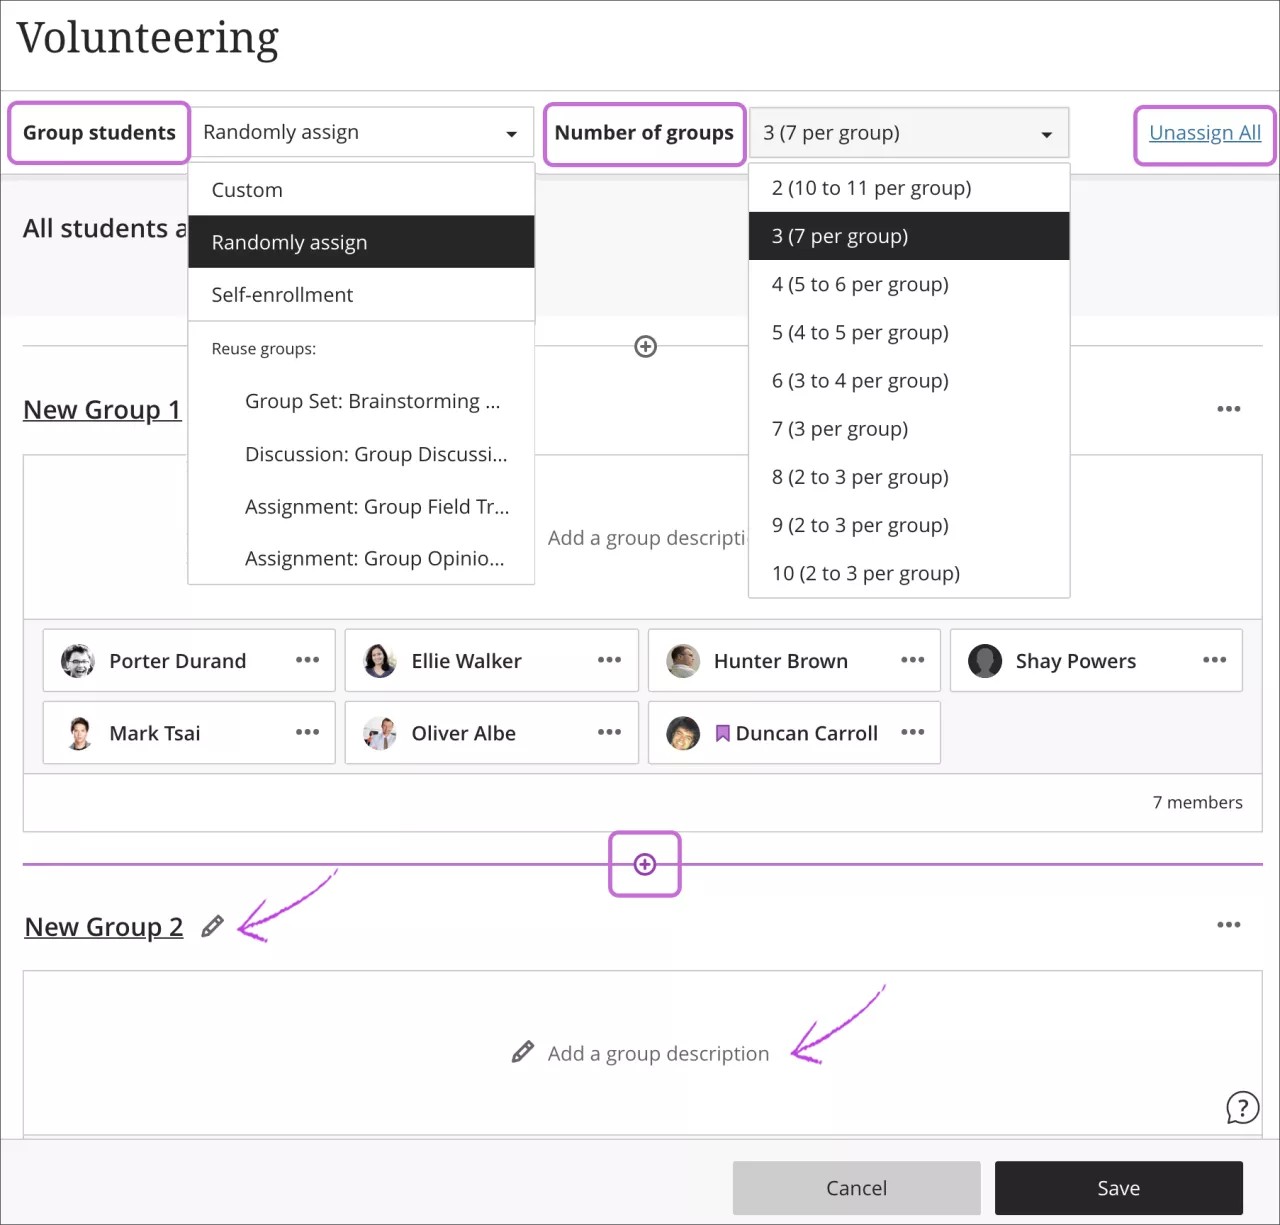
In the Group students menu, select Randomly assign.
In the Number of groups menu, select how many groups to create. You need to create at least two. Students are equally assigned to the number of groups you choose. Be careful as you make changes before you save. If you create four groups with titles and optional descriptions, and then use the menu and change to six groups, your groups redistribute and the titles and descriptions are removed.
To remove all students from the current group set, select Unassign All at the top of the page. The setting changes to Custom if you move students to different groups after they're grouped and before you save.
Edit each group name if you want to change the default naming.
Optionally, add group descriptions that only appear to you at this time. You have no limit on the number of characters.
Select the plus sign wherever you want to create a group in addition to the groups the system created.
Self-enrollment
You can ask students to self-enroll in groups to complete a group assignment. Only students may join.
Students see the group assignment on the Course Content page and a link to enroll. You can also add an enrollment period. Students are notified when the enrollment deadline approaches. When the enrollment period ends, students can no longer join groups, and they aren’t enrolled automatically. Students need to ask you to add them so they can view the group assignment. You can add unenrolled students to the groups you choose if those groups haven’t submitted work.
Warning
You can't add to or change membership in groups with submitted work. You also can’t delete groups with submitted work.
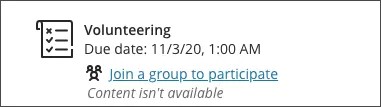
If you want to release the group assignment in the future, students can't access the content, but they can join a group.
If you choose to release the group assignment based on performance on another item, students can’t access the content until they achieve a certain score on an item or gradebook column. However, if one of the group members meets the performance criterion, that member can submit on behalf of the entire group. Any member who hasn’t met the performance criterion also receives the grade you assign. You can change individual members’ grades before you post the grades.
On the groups page, you can create as many groups as you want, with any number of students in each group. You can also create new groups or remove groups based on how many you want for this assignment. You need to create at least two self-enrollment groups.
A partial list of your students appears in the Unassigned students section. Select Show All to view the entire list.
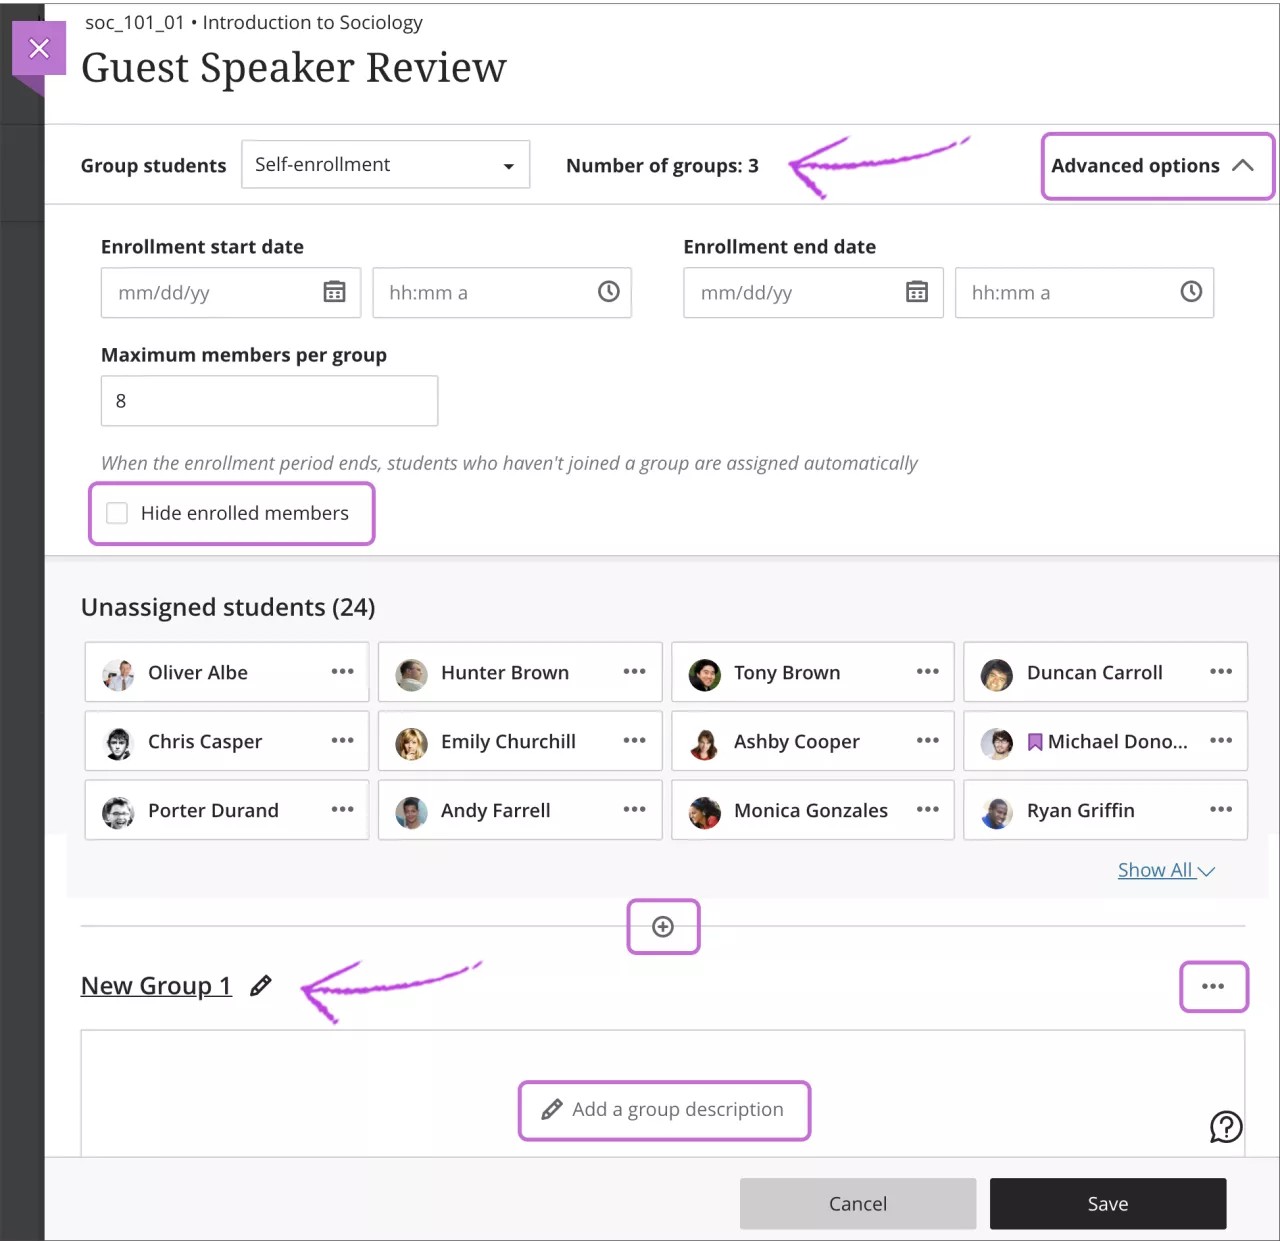
In the Group students menu, select Self-enrollment.
Your students are evenly divided among the groups listed next to Number of groups. Select the plus sign wherever you want to add another group. The Number of groups updates automatically. You can add and delete groups even after students have started to join. If you delete a group that students have already joined, they’re moved to the unassigned list. You’ll need to notify them to join one of the remaining groups or you can add them to a group. Reminder: You can’t delete groups with submitted work.
Optionally, add an enrollment start and end date. Students can see the groups page and the assignment only after the enrollment period opens. Select the arrow next to Advanced options to collapse the enrollment section. Reminder: When the enrollment period ends, students can no longer join groups and need to ask you to add them.
Optionally, change or clear the Maximum number of members per group that appears by default. The optional maximum must be 2 or greater. If you added or deleted groups, the maximum number doesn’t update.
Warning
Pay attention to the Maximum members per group and the Number of groups. For example, if you lower the maximum number, some students won’t be allowed to enroll in a group at the end of the enrollment period. You’ll need to create new groups and enroll the students so that they can access the group assignment.
To allow unlimited members per group, leave blank. Students see the maximum number allowed when they make their group selections. If you allow an unlimited number per group, students see the total number of students in their class. For example, if you've set up four field trips, you can allow all students to join all groups.
You can override the maximum membership for a group. For example, you can add a newly enrolled student to a group that hasn't submitted work.
Select the Hide enrolled members check box if you don't want students to see who's already joined.
Edit each group name if you want to change the default naming.
Optionally, add group descriptions. If each group works on a different topic or meets at a certain time or destination, add that information to help students choose a group. You have no limit on the number of characters.
Open the menu next to a group to access the management options.
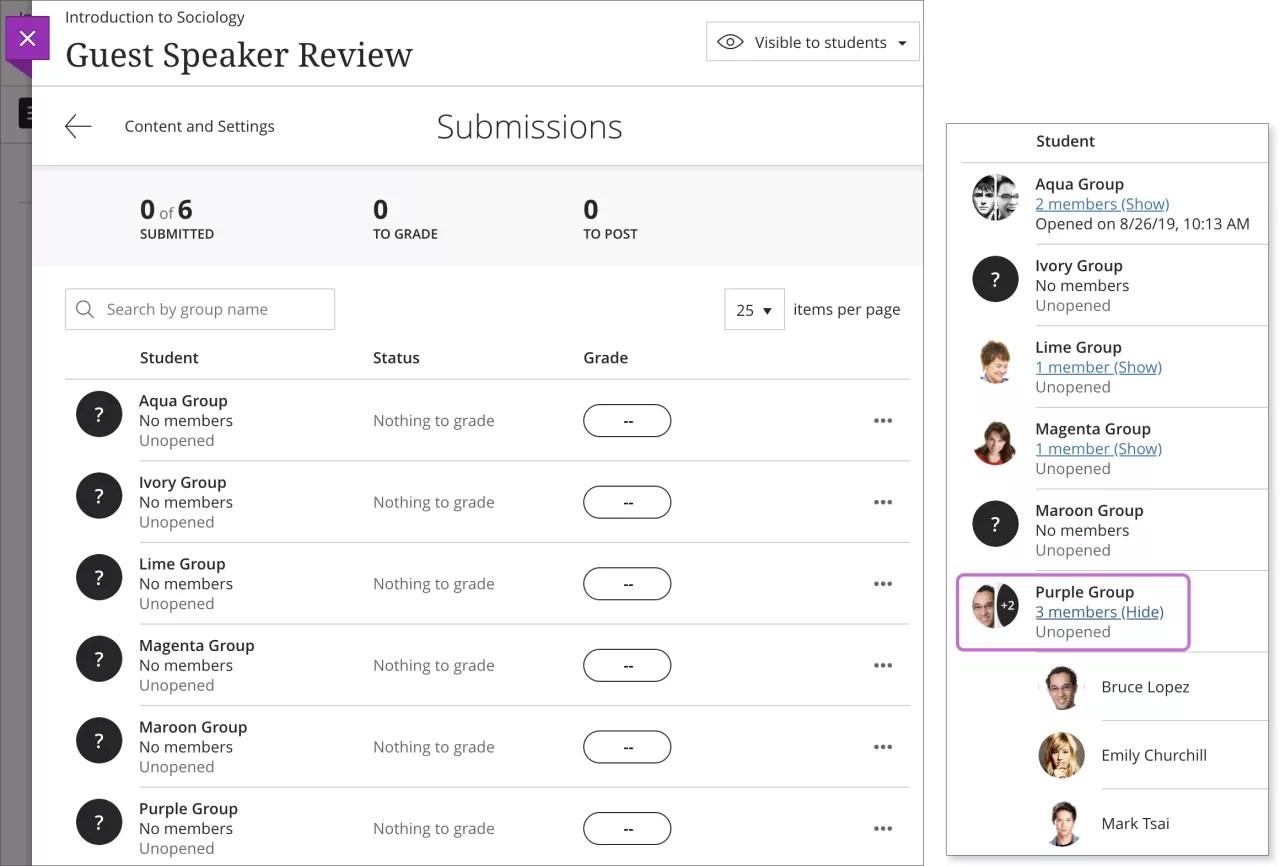
After you create self-enroll groups, each group appears with a question mark icon on the Submissions page in the gradebook. After students join groups, select the members link to show or hide the list.
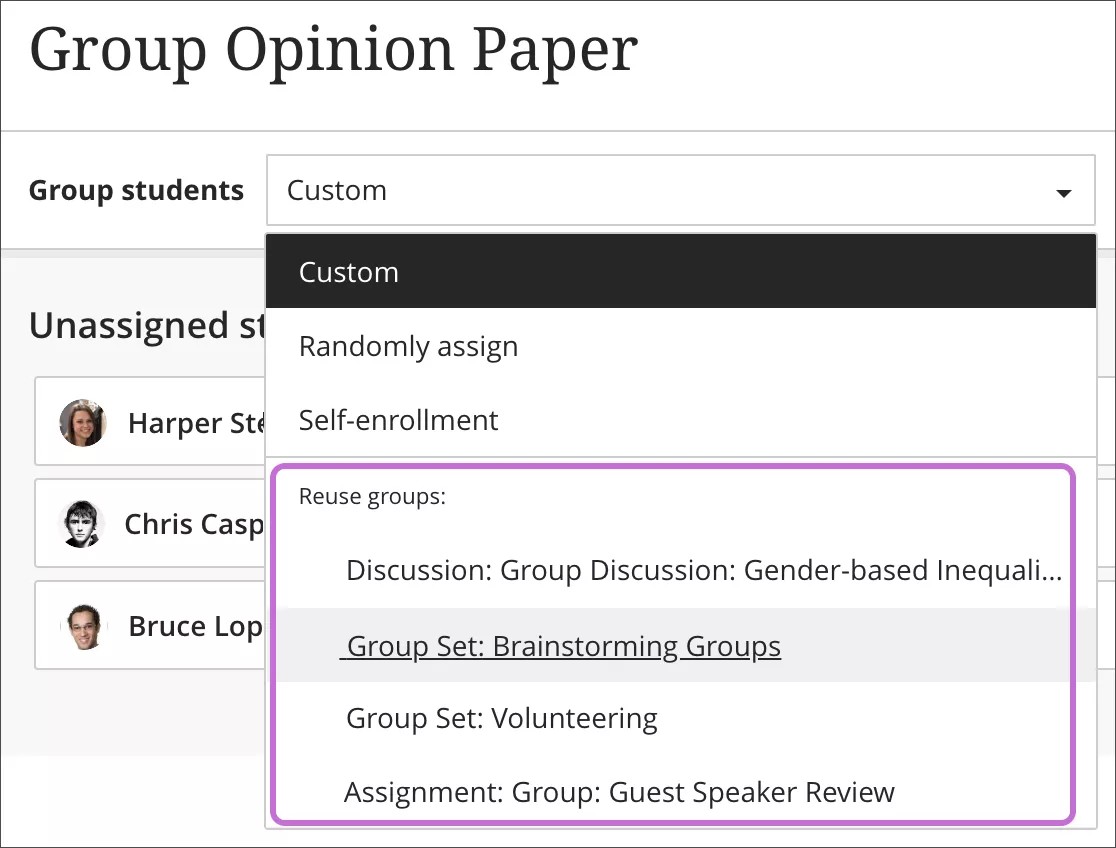
Reuse groups
You can reuse groups from an existing group assessment, discussion, or course group set. Titles for your existing course group sets start with "Group Set."
Important
If you reuse a group set and make changes to the group set, those changes affect the group assignment.
In the Group students menu, select a title from the Reuse group section.
The same students are added to your new assignment. If you move members, the membership changes wherever these groups appear, including the course group set.
Edit the individual group names as needed.
Optionally, add group descriptions that only appear to you at this time. You have no limit on the number of characters.
You may need to add new students added to your course to your new groups.