Create Tests
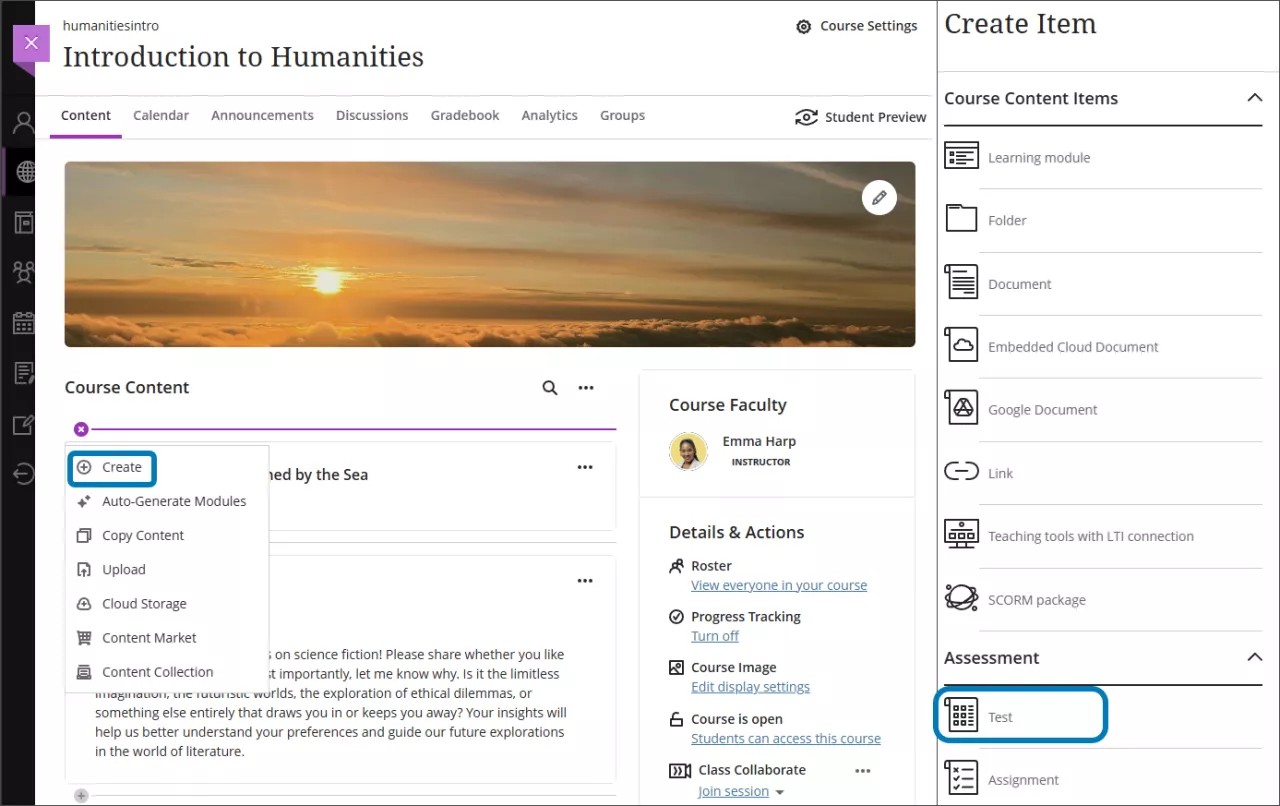
You can create tests alongside the other content students need as they prepare. On the Course Content page, select the plus sign wherever you want to add a test. In the menu, select Create to open the Create Item panel and select Test. The New Test page opens.
Note
Students can't see what you add until you make your tests visible.
You can also expand or create a folder or learning module and add a test.
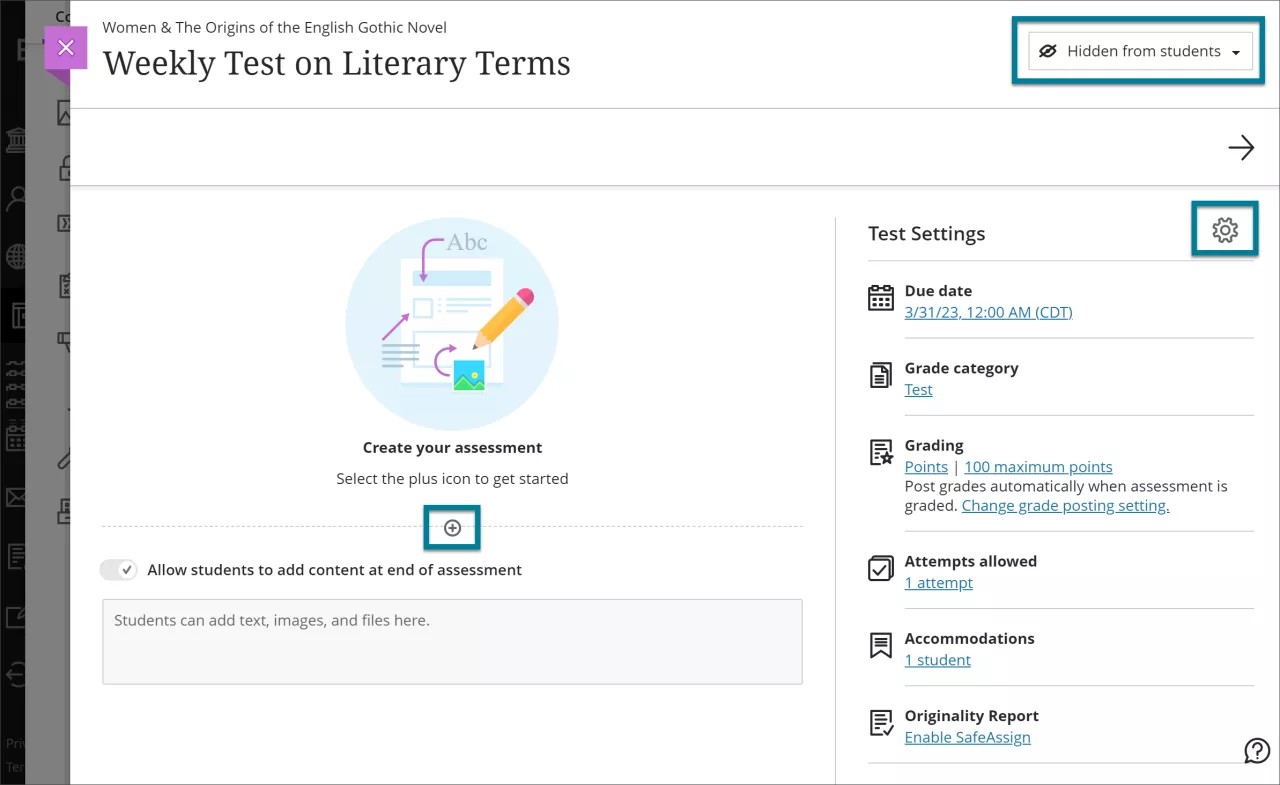
When you create a test, a gradebook item is created automatically. A test's score consists of the sum of all the questions' points.
After you post test grades, students can view their scores on their grades pages or in the activity stream. They can also access a test, their submissions, your feedback, and their grades from the test link on the Course Content page and via the Gradebook.
Watch a video about creating tests
The following narrated video provides a visual and auditory representation of some of the information included on this page. For a detailed description of what is portrayed in the video, open the video on Vimeo.
About the New Test page
Distinguishing Assignments and Tests in Ultra
Assignments and Tests (grouped under Assessments in the Course Content Items panel) share the same user interface and options. Many options in the settings are enabled or disabled based on whether at least one question is included in the assessment.
In practice, instructors use these assessments differently. For example, you might create an assignment with instructions for students to submit a file for a grade. In a test, students may answer a series of questions you’ve added to the assessment.
To distinguish between assignments and tests, and to highlight workflows with and without questions, the discussion of tests will emphasize a workflow with added questions.
Note
For a description of a workflow without added questions, go to Create and Edit Assignments.
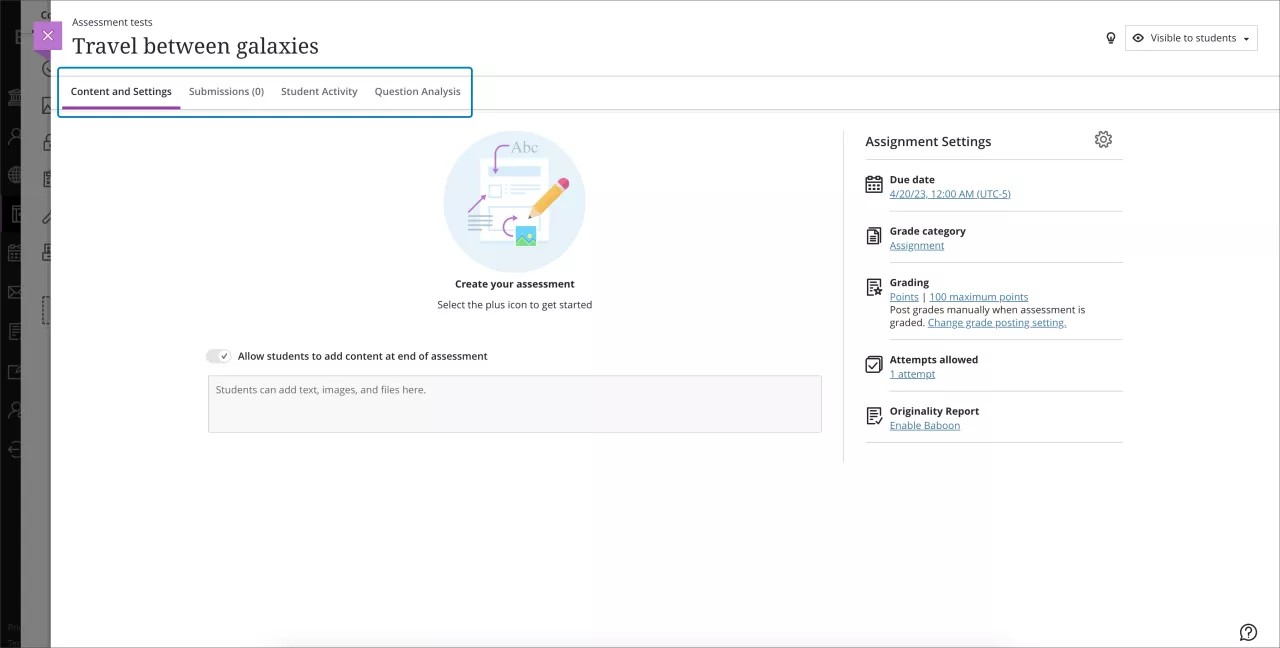
The New Test page
There are three customizable components on the new test page:
add test content
control test visibility to students
apply test settings
Provide a descriptive title so students can easily find the test among your course content. On the Course Content page, the title appears as the link students select to view the materials. If you don't add a title, "New Test" and the date appear in the content list. If you don't add content, the test won't appear on the Course Content page.
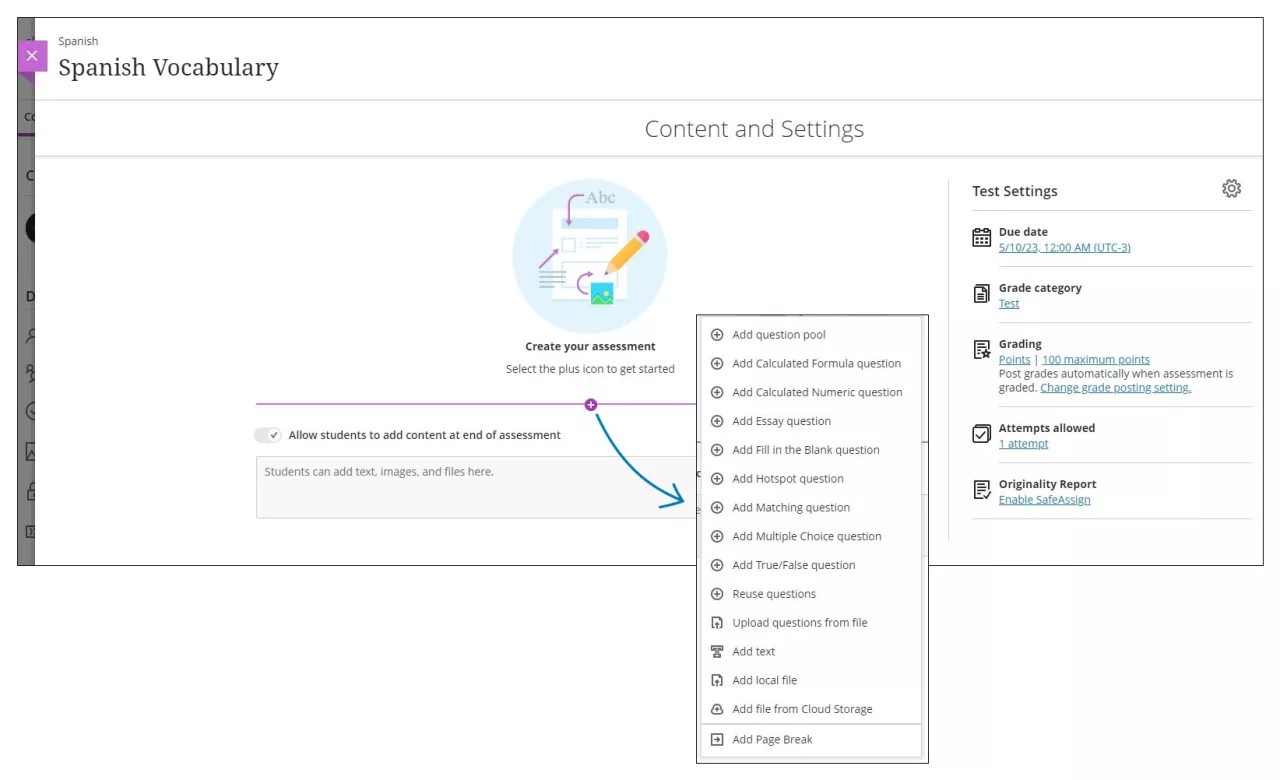
Adding Test Content
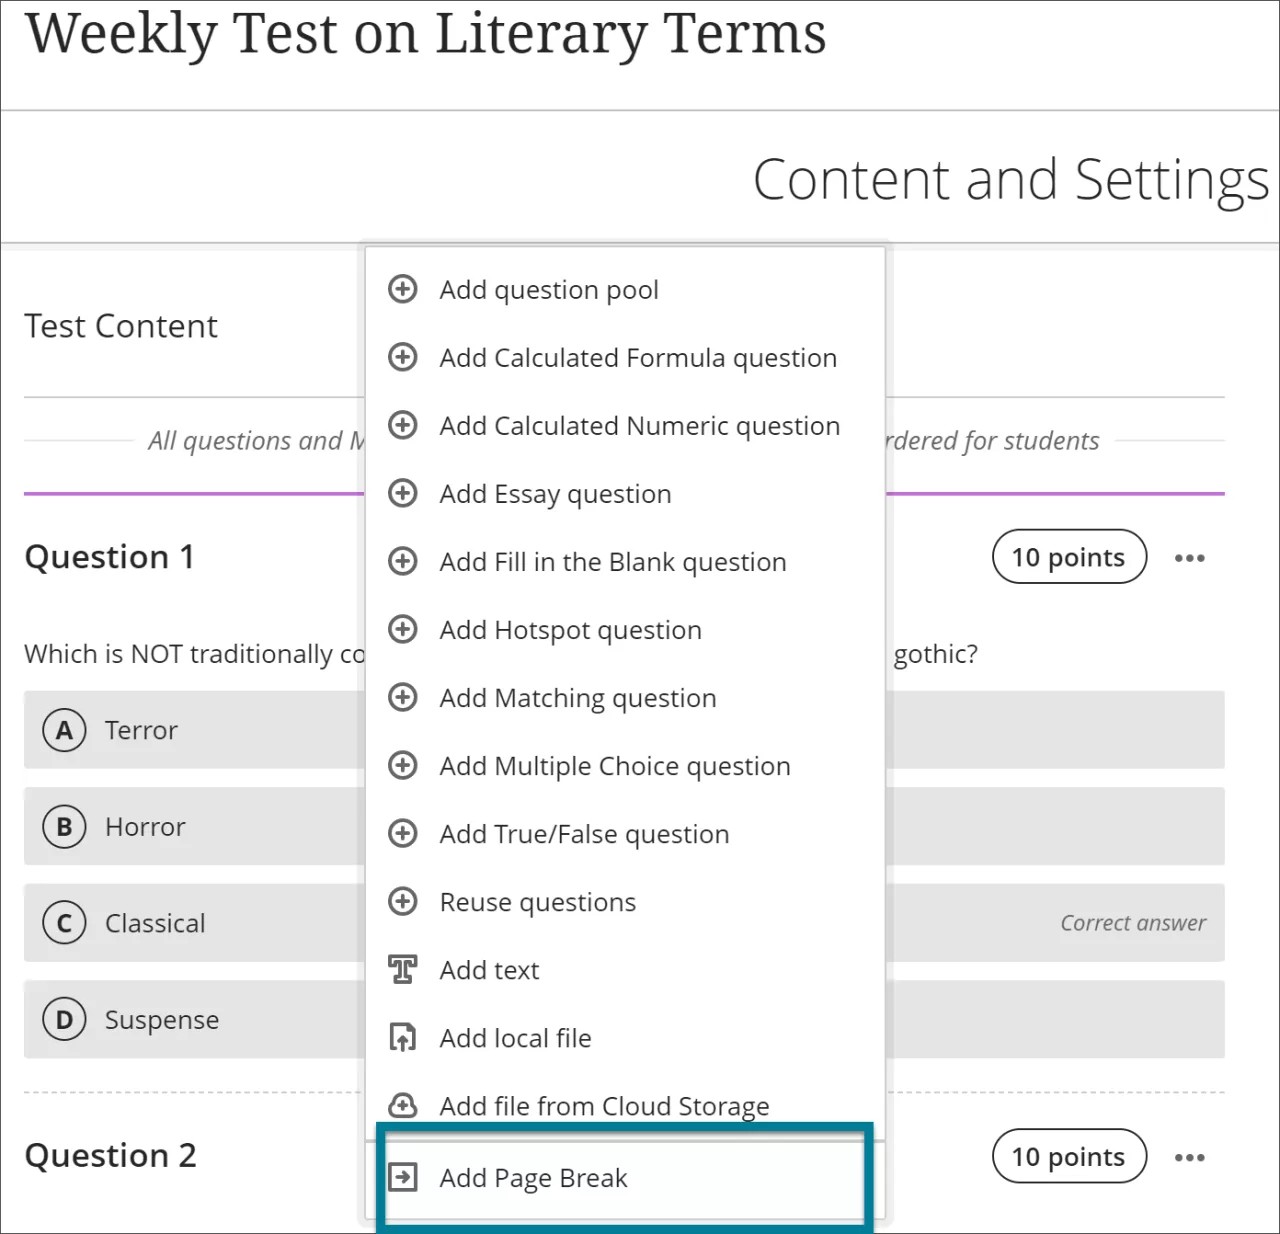
Select the plus sign to open the menu to add questions and more.

You can choose a question type, add a question pool, upload questions from a file or reuse questions and content from existing assessments. You can also add files and text, such as instructions for the test. You can also add files from cloud storage, such as OneDrive® and Google Drive™.

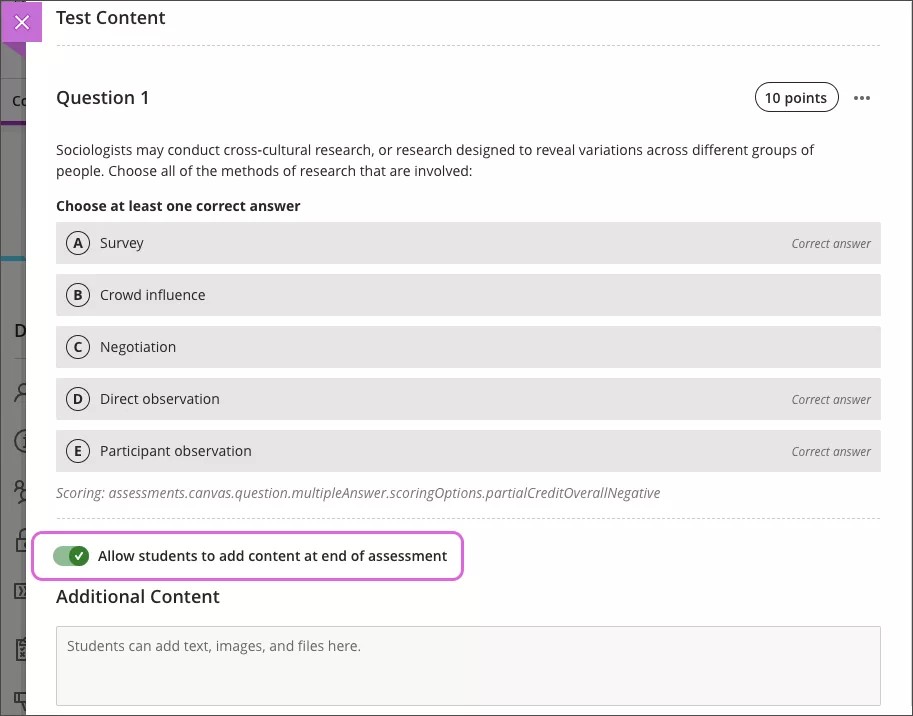
Once you've added a question to a test, you can choose if you want students to add additional content, like text, supporting files, or attachments. By default, this feature is turned on for your test. Toggle this feature off if you don't want students to add additional content.
Test Visibility

Students can't see a test until you choose to show it. You can create all your content ahead of time and choose what you want students to see based on your schedule. You can also set availability conditions based on date, time, and performance on other items in the course gradebook. On the Course Content page, students can see when you set the test to show.
Add questions to a test
When you create a new test, select the plus sign to open the menu and select a question type. You can also reuse questions and content from existing assessments. If you add questions to a test, you can't enable parallel grading.
The Test Content area opens where you type the question and answer choices if required, such as for Multiple Choice questions. Questions have a default value of 1 point. Select the Points box to type a new value.
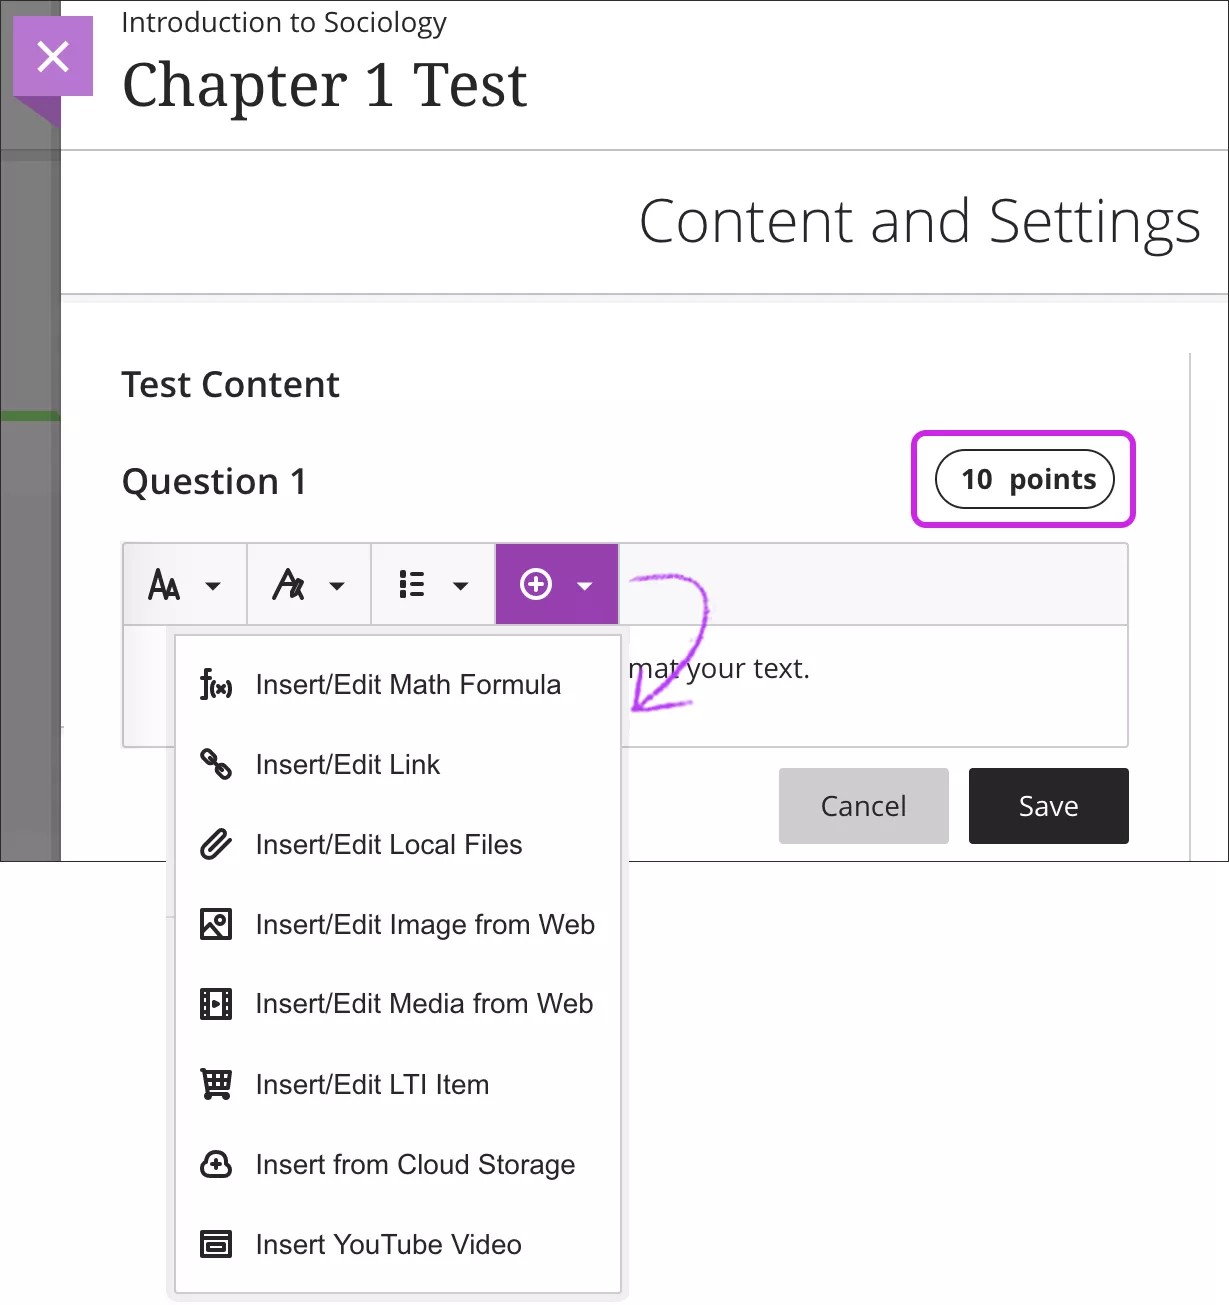
You can use the options in the editor to format the text.
Tip
To use your keyboard to jump to the editor toolbar, press ALT + F10. On a Mac, press Fn + ALT + F10. Use the arrow keys to select an option, such as a numbered list.
To help keep your test content organized, you can add files within individual questions. Make a selection from the editor's Insert Content menu, such as Insert from Cloud Storage.
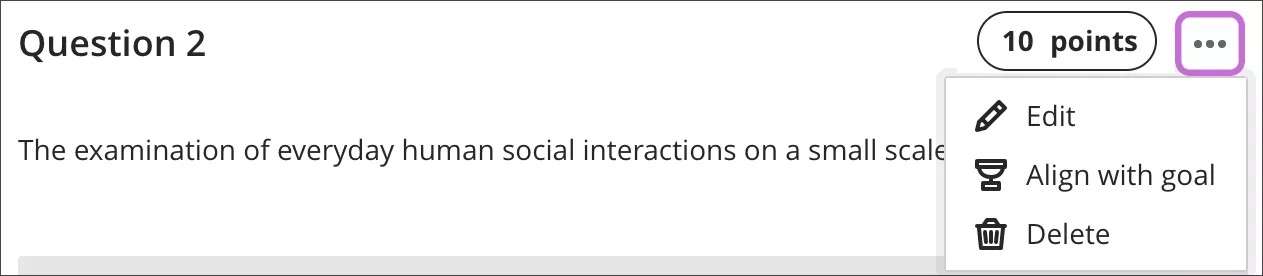
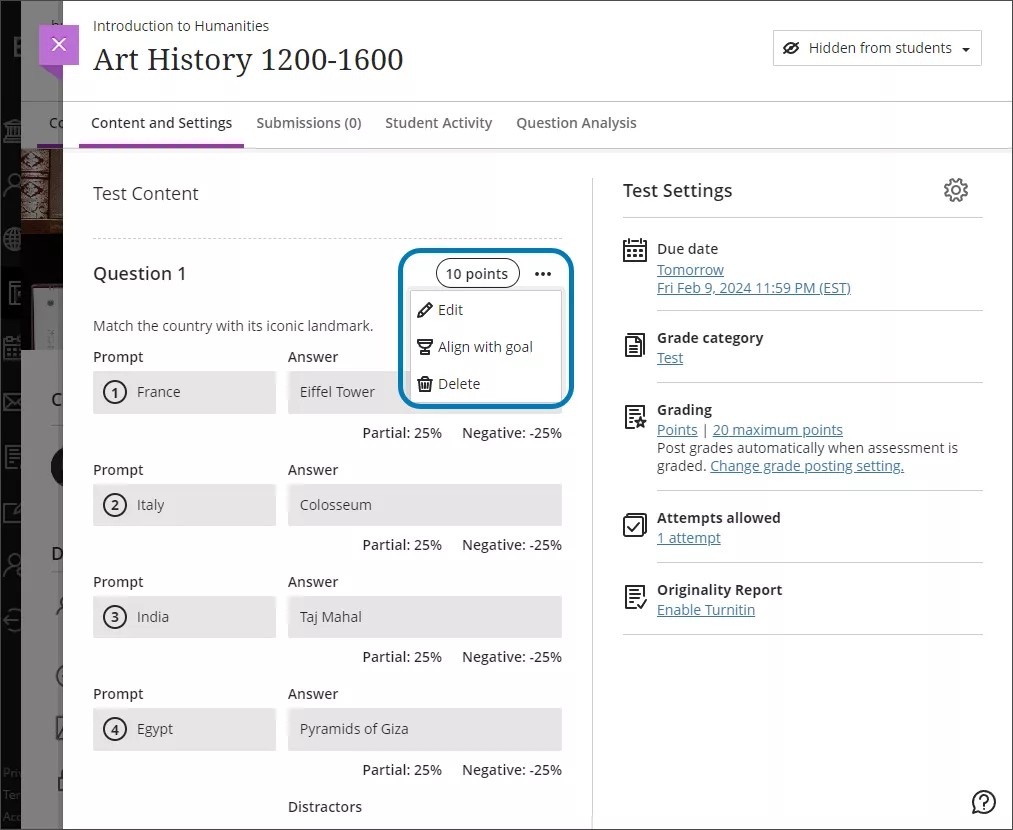
Align questions to goals
You can align goals with individual assessment questions to help your institution measure achievement. After you make the assessment available, students can view information for the goals you align with questions so they know your expectations.
Access a question's menu, select Align with goal, and select goals.
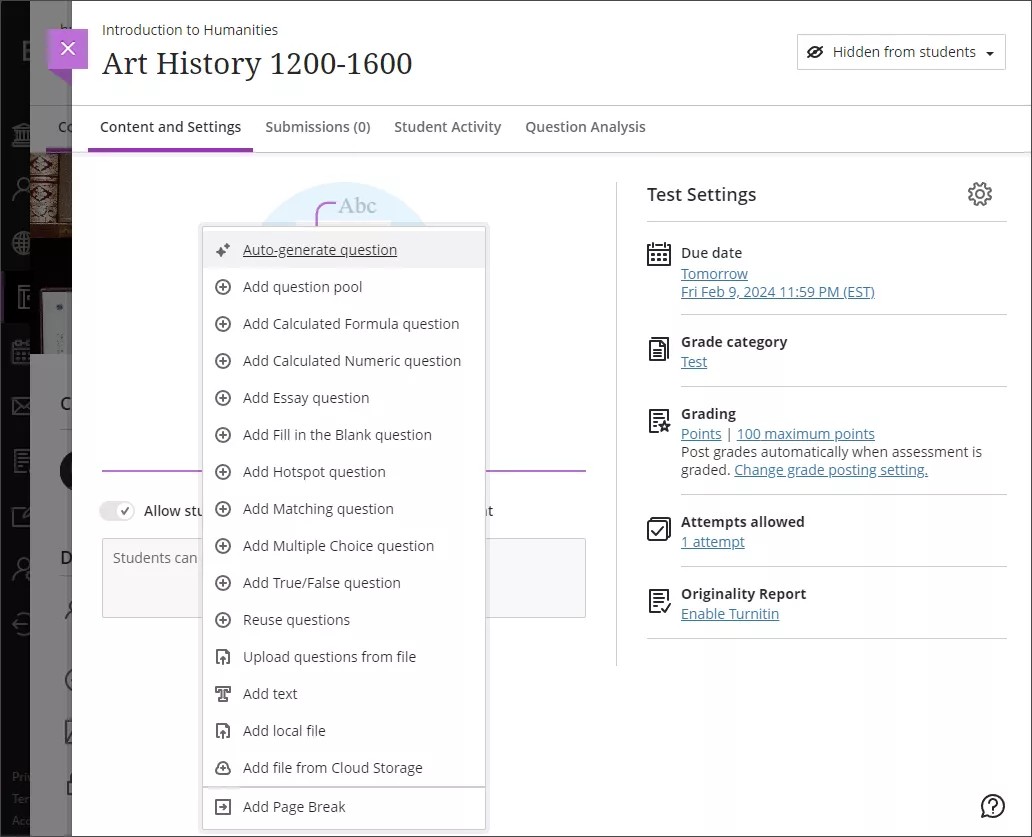
Test question generation
Creating test questions takes a significant amount of time. The AI Design Assistant can offer suggestions for test questions, giving you extra time to focus on more complicated tasks. The AI Design Assistant is beneficial for both formative and summative assessments. Test questions are generated based on the course context that you select.
On the test creation page, select Auto-generate question from the new question menu.
You have several ways to refine the test questions that the AI Design Assistant generates.
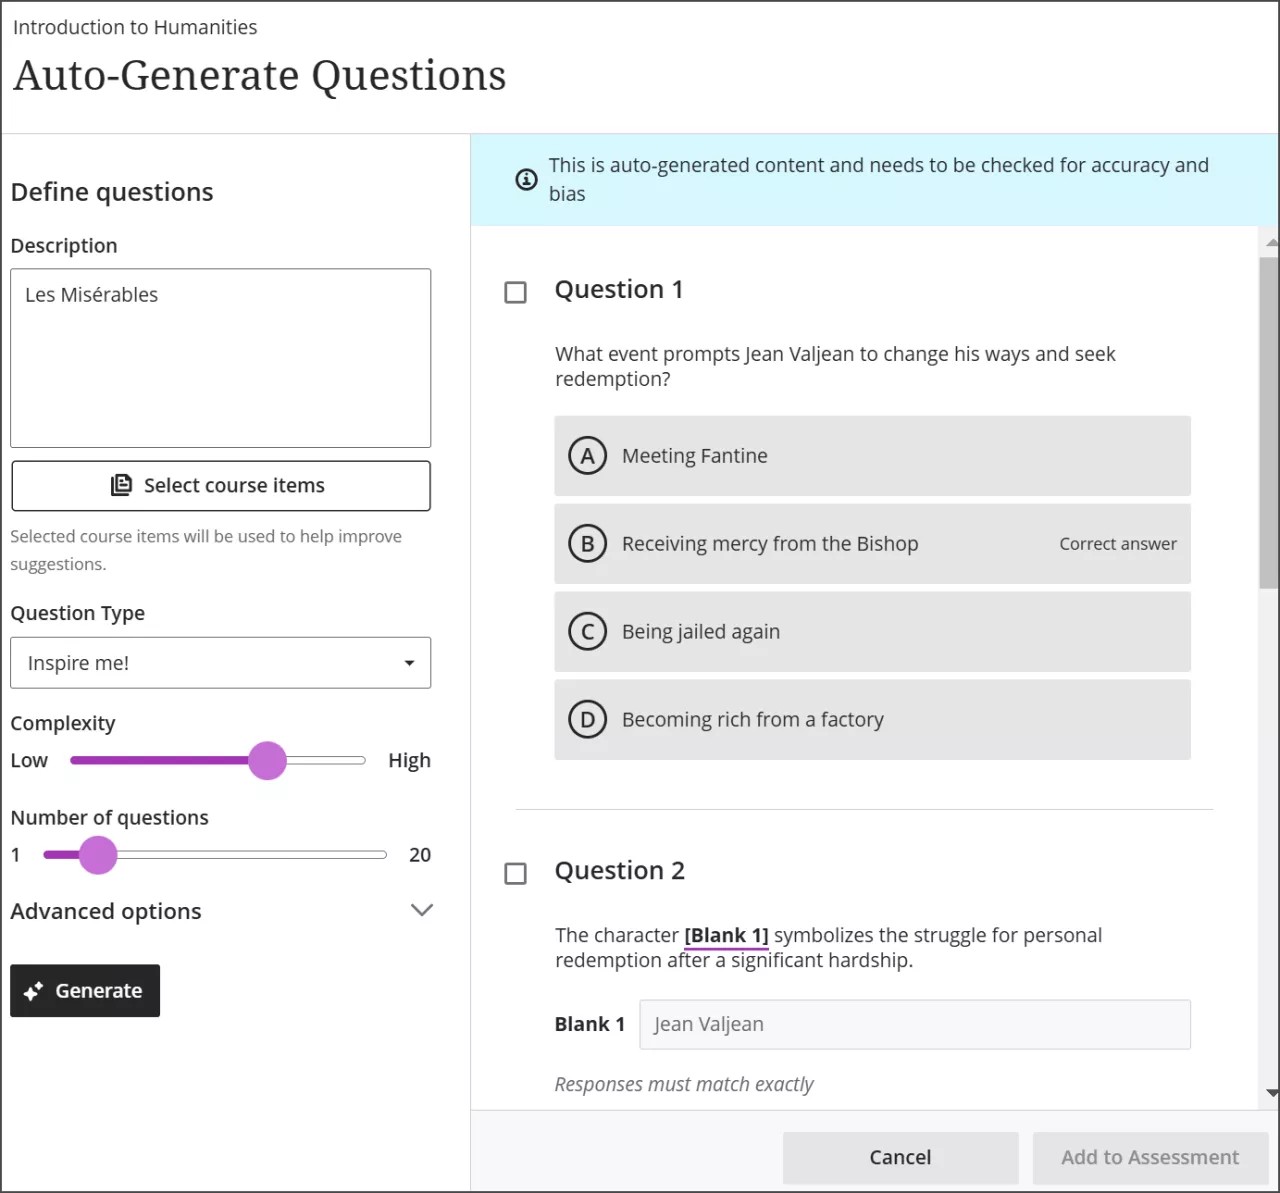
Enter an optional description (limited to 2000 characters) to narrow the focus of the questions
Adjust the complexity of the questions
Select the number of questions
Select Advanced options to change the output language
You can select from the following question types:
Essay
Fill in the blank
Matching
Multiple choice
True/False
The "Inspire me!" question type suggests a variety of question types to give you more options.
Optionally, you can select which course items you’d like the AI Design Assistant to provide context for test questions. Select Select course items to start.
Select any course content item to include it in the context for your test.
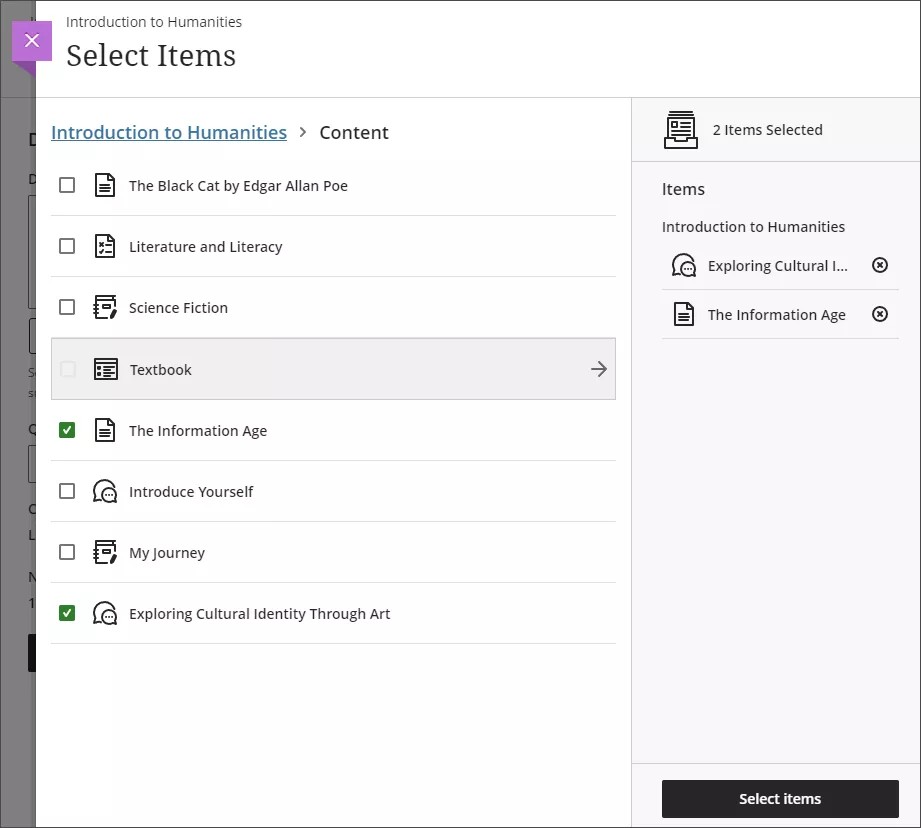
You can select a folder or learning module to include items from them. When you’ve finished choosing items for context, select Select items to return to question generation.
Note
The context picker does not draw context from items that are attached to an Ultra document. Only items that appear on the context picker’s menu are used by the context picker.
Once you’ve finalized all of your settings, select Generate. Choose the questions that you’d like to add to your assessment, then select Add to Assessment.
Review each question for accuracy and bias. You can also edit questions to better fit your learning goals.
Add files and text blocks to tests
Edit a test. Select the plus sign to open the menu wherever you want to add questions, text, or a file. You can add as many text blocks and files as you want.
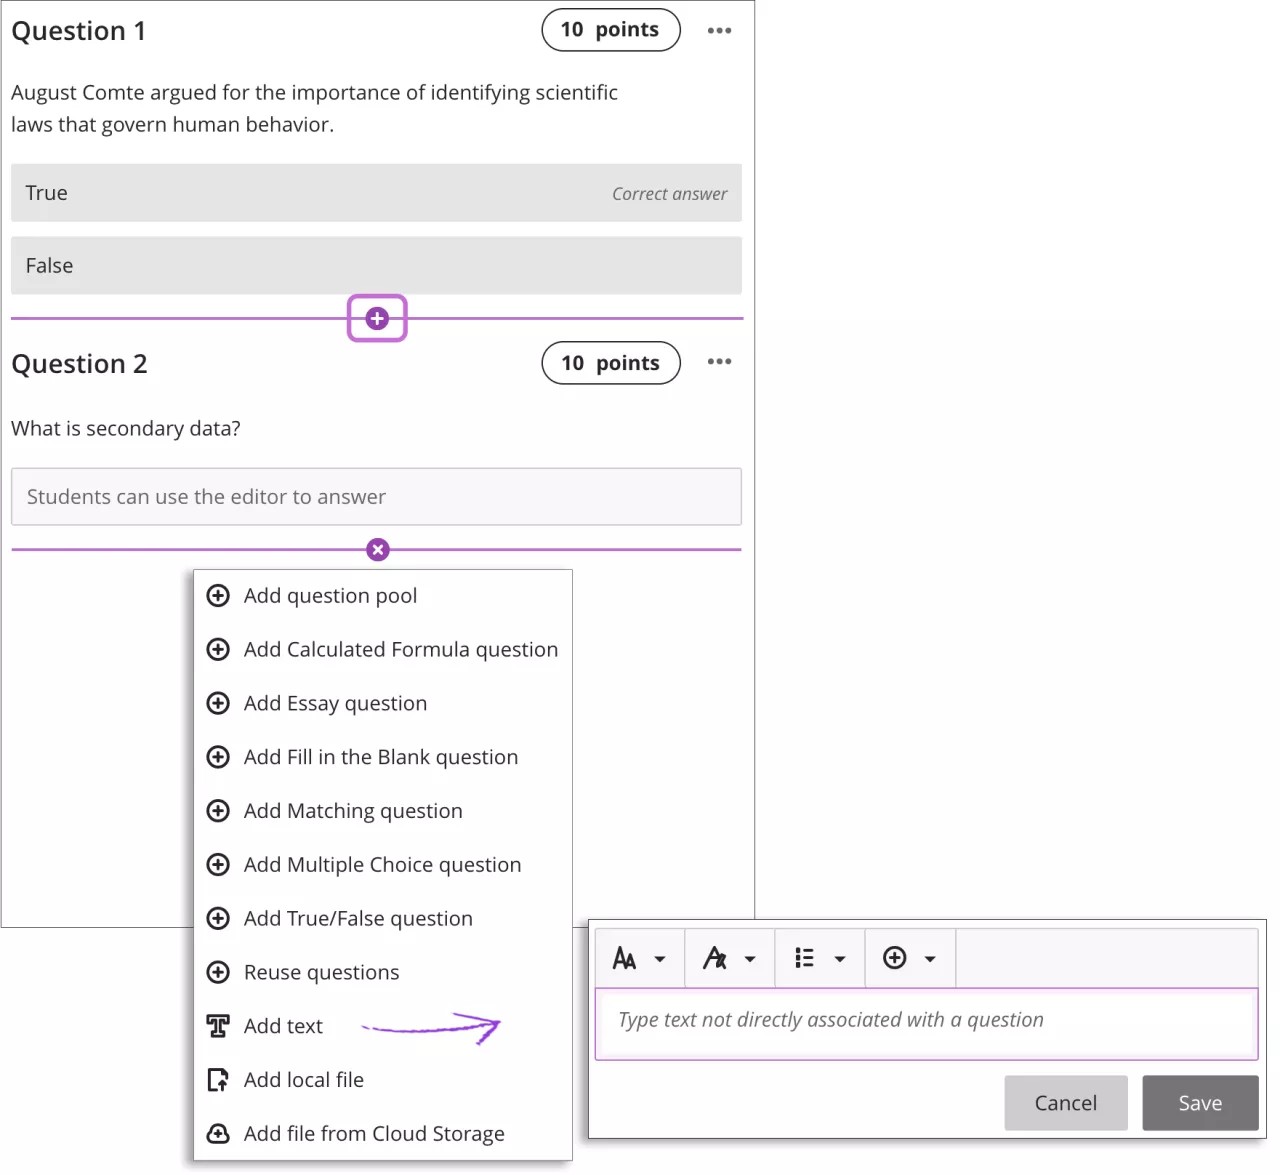
Add text blocks. Select Add text to open the editor. You can include instructions for a section of the test or introductory text for an audio file or image. You can also paste text from a Word doc.
If you create a test that only includes text blocks, you can manually change the Maximum score in the Test Settings panel. For example, you may want students to upload submissions or use the freeform text fields.
Add files. Select Add local file to browse for files on your computer. Your institution controls the maximum size of a file that you can upload. You can't add a folder of files.
Add file from Cloud Storage: You can instantly connect to multiple web apps where you store files, such as OneDrive. The files you add are copies. If you make a change to a file in cloud storage, you need to upload a new copy in your course. If your browser allows, media files you add from cloud storage display inline.
Media file viewing options
Media file viewing options
If your browser allows, media files you add to assessments display inline by default. If your browser can't display a media file inline, it appears as an attachment. Files you add from cloud storage behave in the same way.
Images that display inline are embedded in a 768-pixel block at the biggest breakpoints. The closer to that size the images are, the less padding appears around them.
Access a media file's menu and select Edit.

To edit the file's alternative text or display behavior, select the file in the editor and then select the Edit Attachment icon.
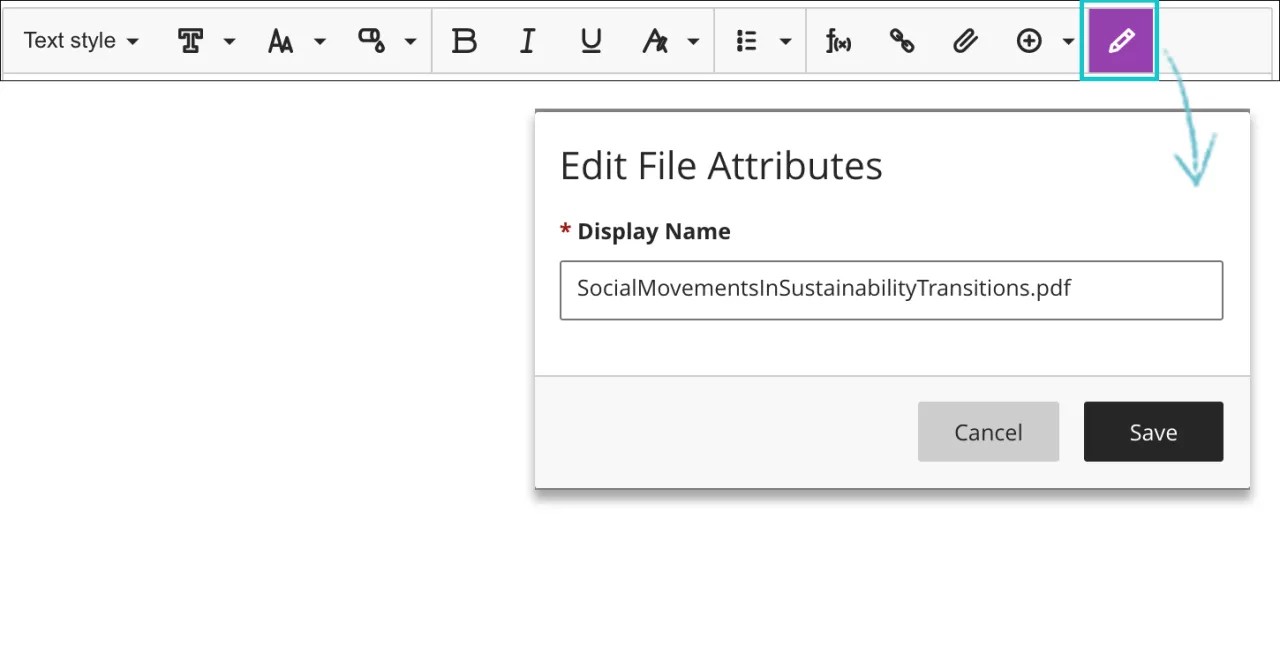
In the Edit File Attributes window, you can choose how your video, audio, or image file appears in the assessment: inline or as an attachment. For example, you can display extremely large files as attachments that students can download. You can edit the file names for files displayed as attachments.
You can also add alternative text to describe images you add. Alternative text describes the image for people who use screen readers or visit web pages with images turned off.
For video and audio files that appear inline, students have controls for play, pause, and volume control. For video files, students can view the video in full screen.
For media files that appear as attachments, students access the menu and select Preview File or Download Original File. Instructors have the additional options of move, edit, and delete.
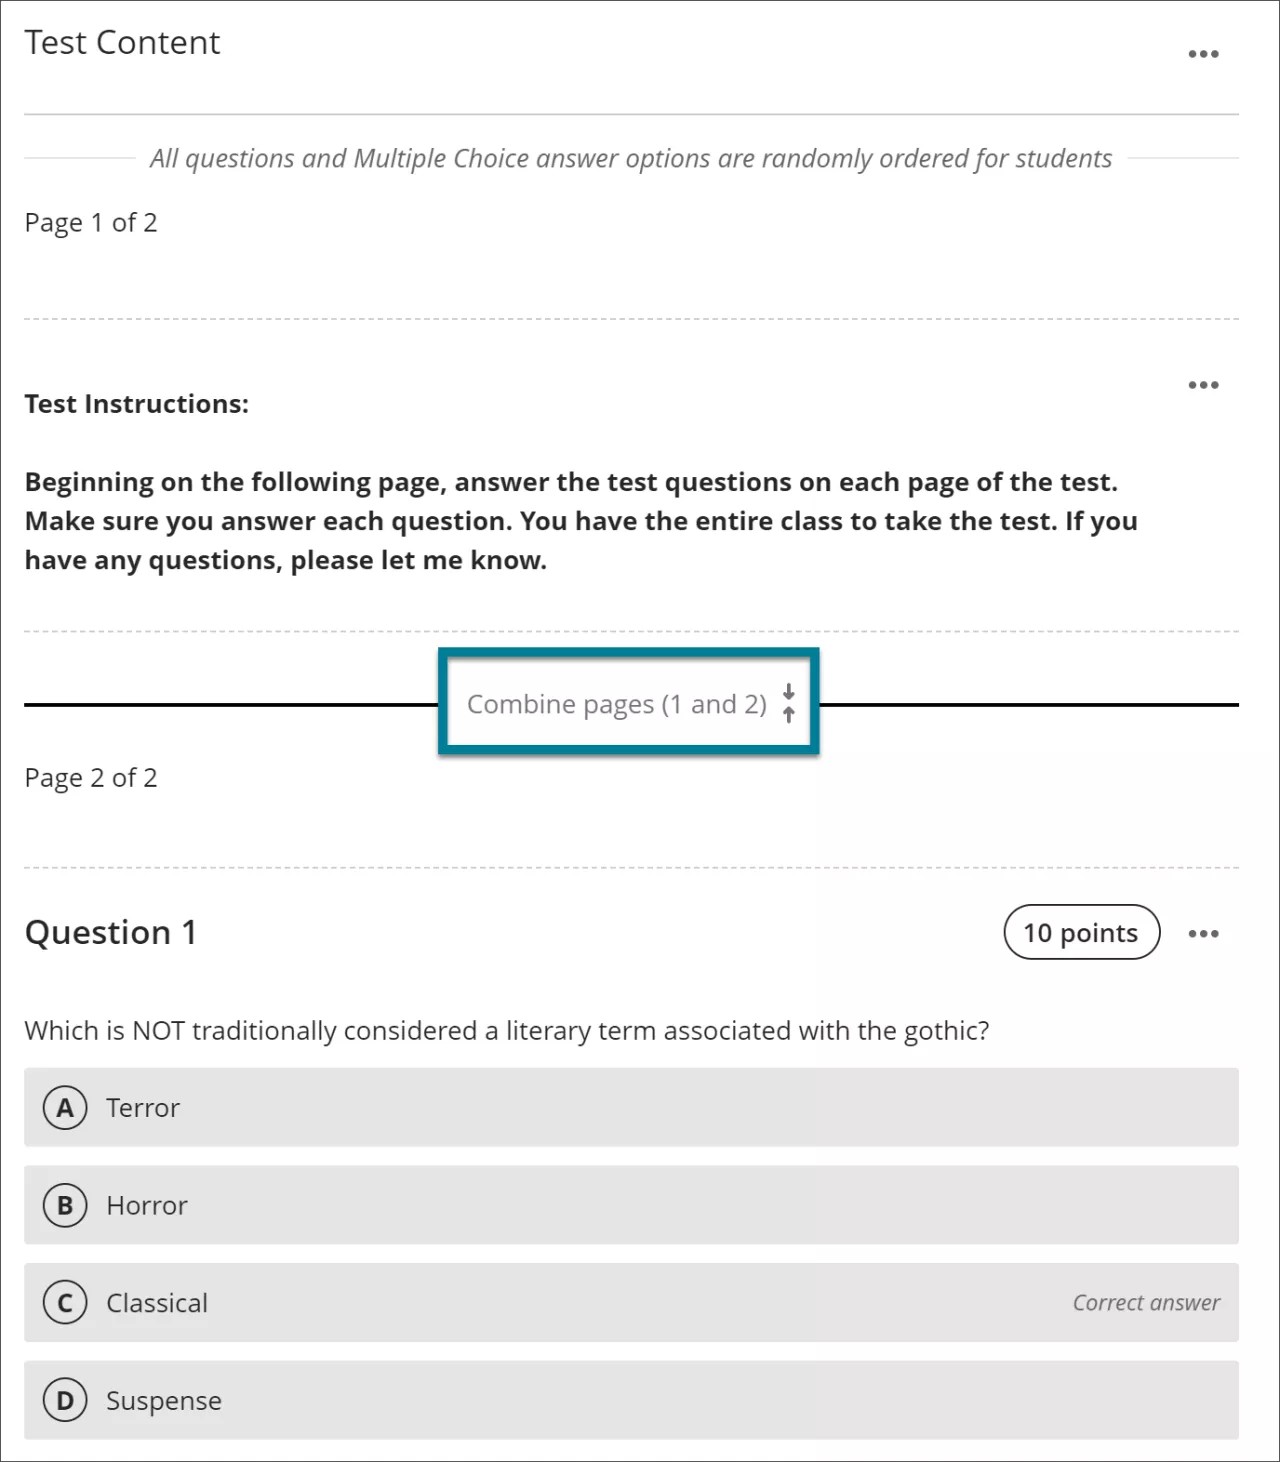
Add page breaks to tests
Page breaks allow for easy creation of sections within an assessment and afford flexibility in the presentation of assessment content. For example, you can add a page with test instructions at the beginning of the test, or group related questions around a topic on a single page. When students navigate a paged test, they will see all the information that you have added to a page all at once.
Select the plus sign to open the menu wherever you want to add a page break. Add Page Break is at the very bottom of the menu.
To combine two separate pages, select Combine pages anywhere along the line that separates these two pages. Selecting this will combine these two pages into one.
Reorder questions, text, and files in a test
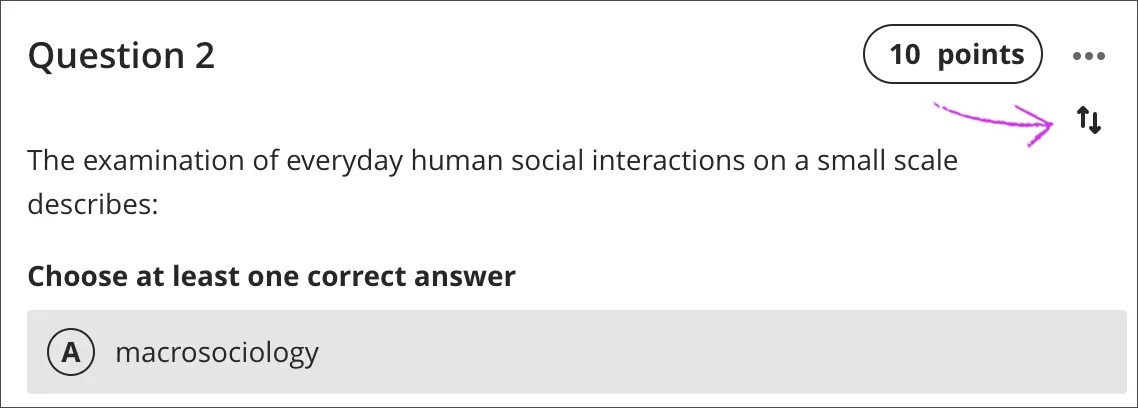
Questions are numbered automatically in the order you add them. The question numbers update when you reorder. Before students open the test, you can reorder the elements of your test.
Edit a test. Point to a test item to access the Move icon. Press and drag the question, text block, or file to a new location.
Tip
You can use your keyboard to move an item.
Tab to an item's Move icon.
Press Enter to activate move mode.
Use the arrow keys to choose a location.
Press Enter to drop the item in the new location.
Navigate the test interface
You can navigate the tabs at the top of an assessment you have created, to easily access information such as:
Content and settings
Submissions
Student Activity
Question Analysis
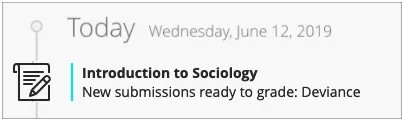
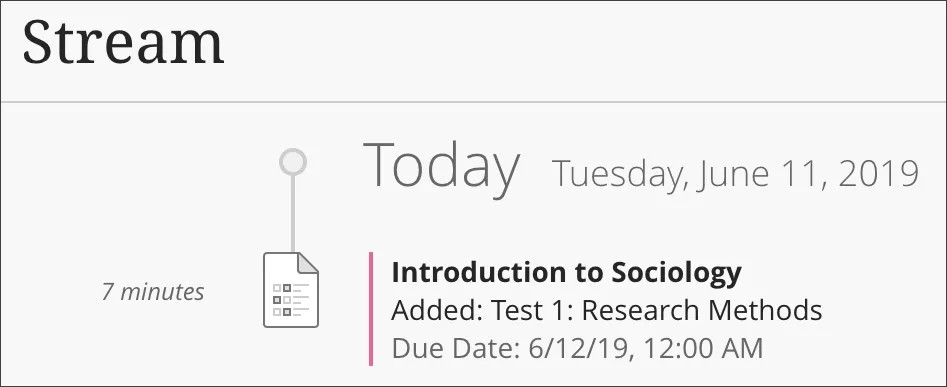
Tests and the activity stream
When you create a test and make it visible to students, they're notified in their activity streams.
After you post test grades, students can select View your grade to display their grades. Any feedback you provide appears after the test title.
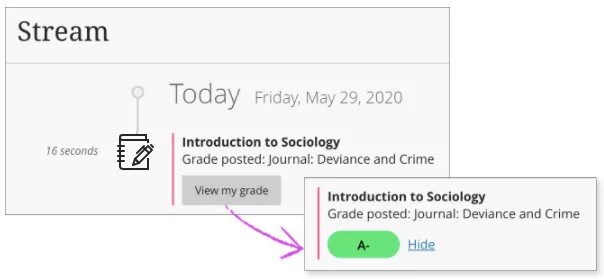
You'll see an alert in the stream when you have submissions to grade. Select the test title to begin grading on the test submissions page.