Conversations
What if your students have questions about some of the course content?
If you enable class conversations for individual content items, students can discuss the content with you and their classmates. They can ask for help, share sources, or answer questions others have. As the conversation develops, it appears only with the relevant content. Conversations don't appear on the discussions page.
You can enable conversations for these content items:
Documents
Assignments
Group assignments
Tests
Group tests
Offline submissions
Links to teaching tools
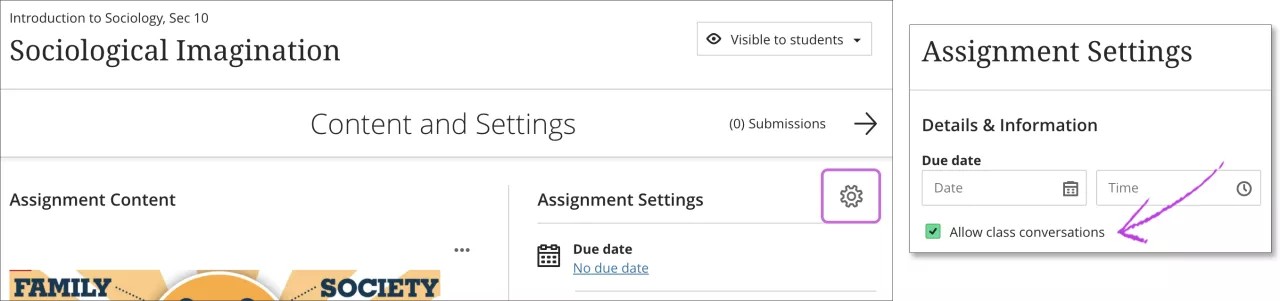
Enable conversations
Select the item's Settings icon to open the panel with the item's details and information. Select Allow class conversations.
Access conversations
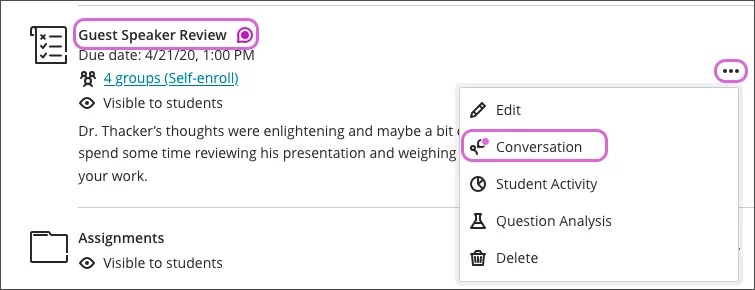
When someone contributes to a conversation, an icon appears next to the item's title on the Course Content page. Open the item's menu and select Conversation to open the conversation in a new layer.
Note
Conversation only appears in the menu if you selected Allow class conversations in the item's settings.
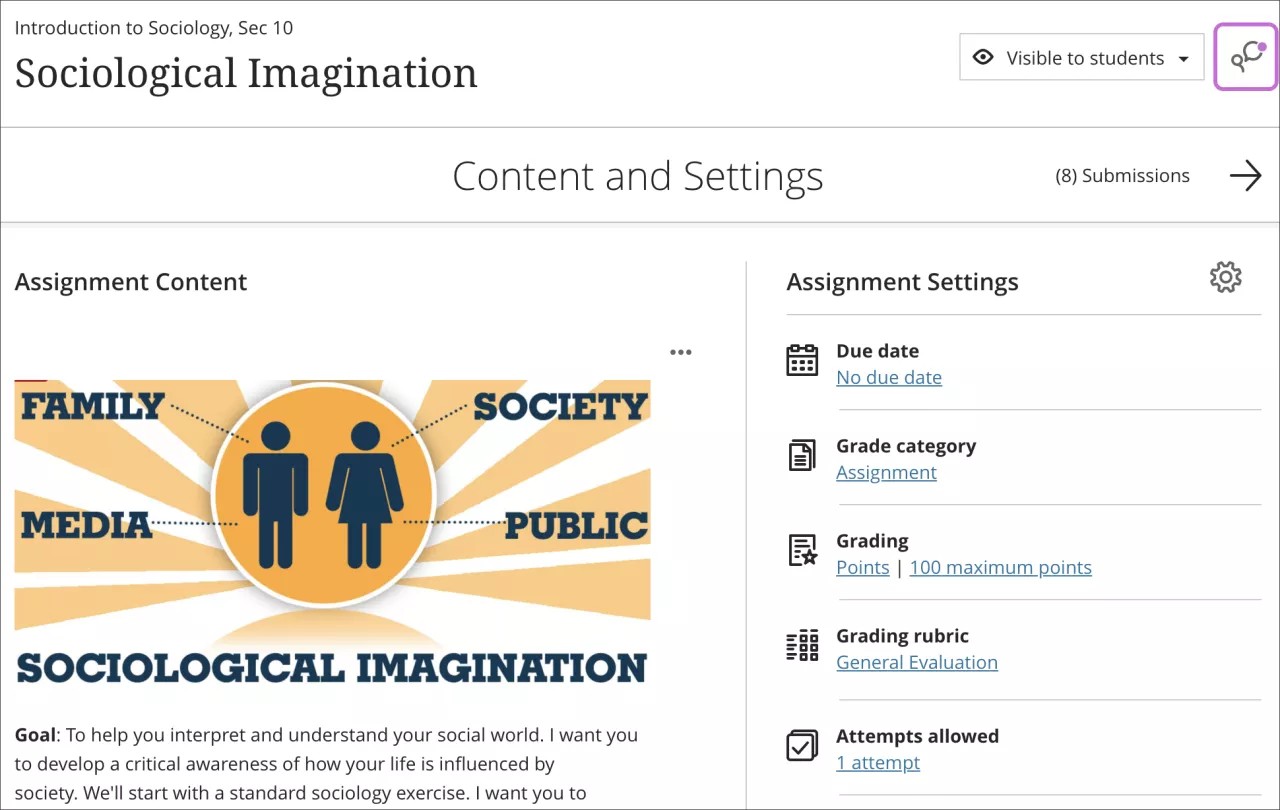
Or select the Open class conversation icon in the upper-right corner of an item's page or submissions page. A colored circle appears with the icon to indicate new activity.
Conversations layer
Conversations are set up the same as discussions. Two levels of replies are allowed for each first-level response.
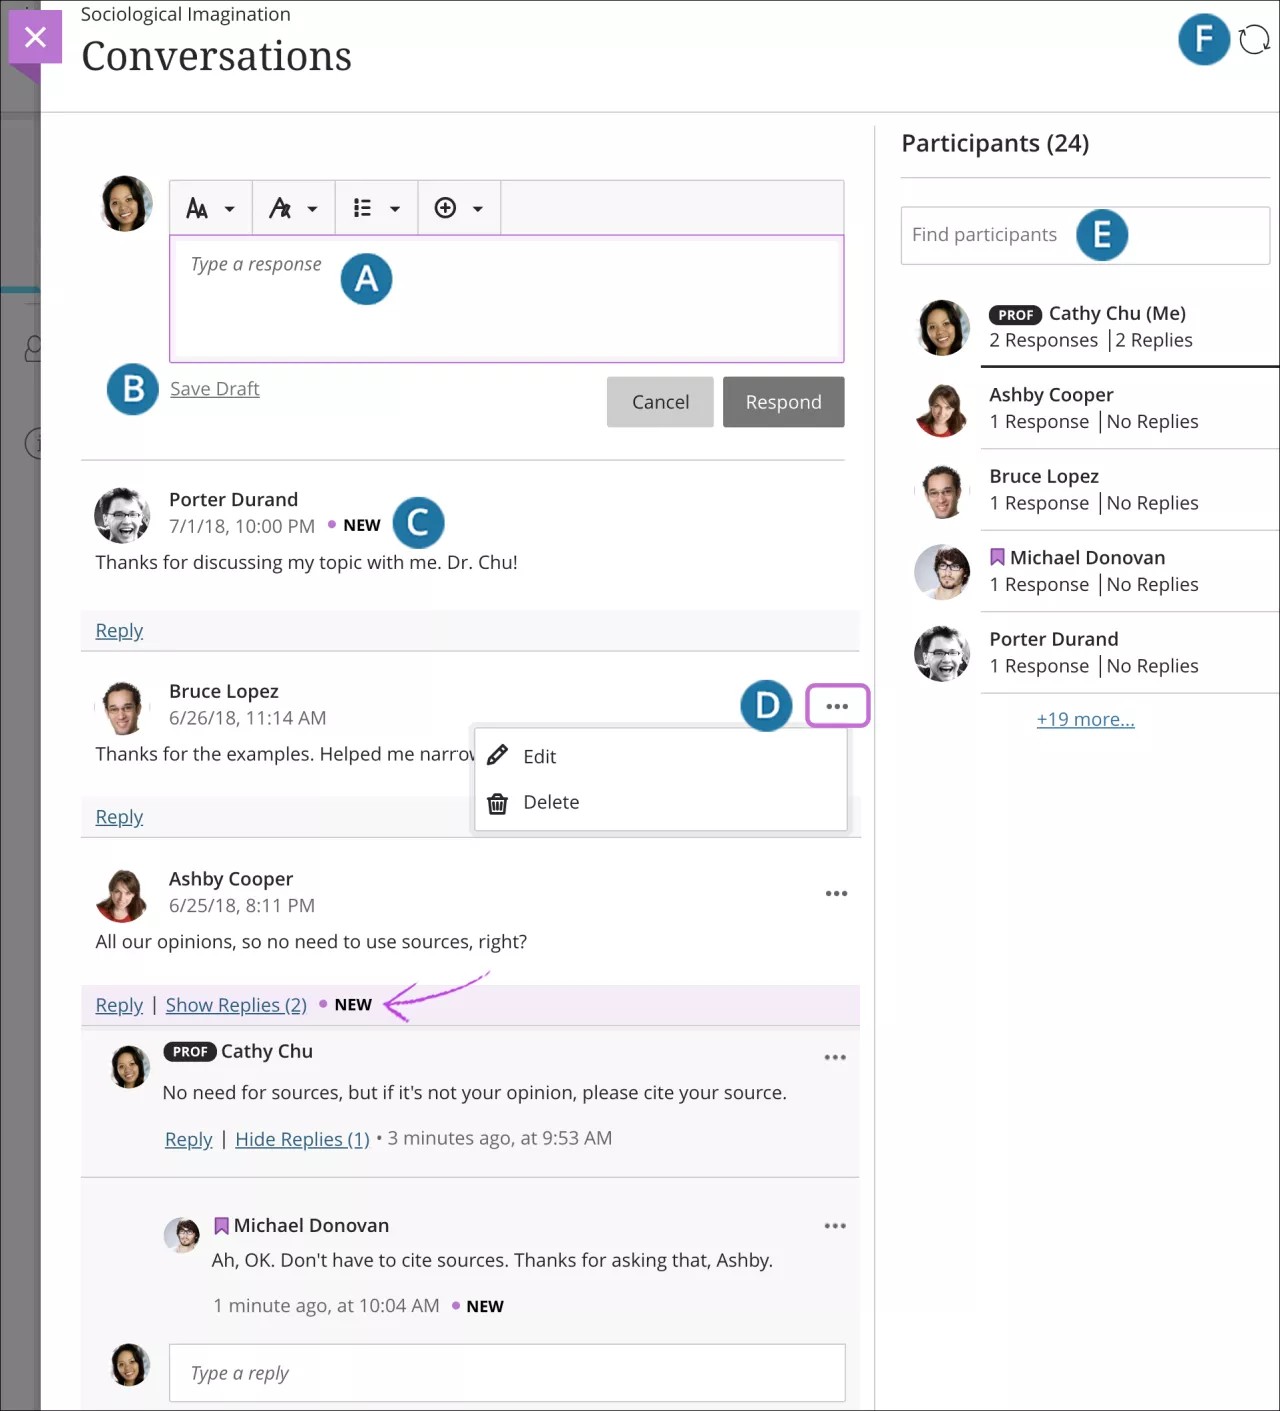
What do you want to say? Add a response or reply to a student. Optionally, use the functions in the editor to format your response.
Tip
To use your keyboard to jump to the editor toolbar, press ALT + F10. On a Mac, press Fn + ALT + F10. Use the arrow keys to select an option, such as a numbered list.
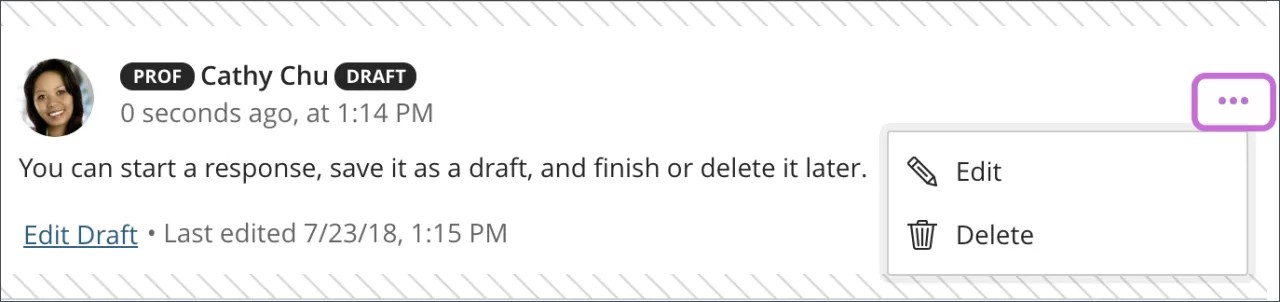
Save a draft. You can start a response, save it as a draft, and finish it later.
What's new? New responses and replies appear with a New icon.
Edit and delete contributions. Open a response's menu and select Edit or Delete. As an instructor, you can edit or delete any course member's response. Students can delete their own responses, but they can't make edits.
View activity and search for participants. View the list of participants and their activity and search for a specific participant.
Refresh your view. Check for new activity since you opened the conversation.
Example: Save a draft
Saved drafts appear with a border and a Draft badge so you can easily locate them. Open the menu and select Edit or Delete.
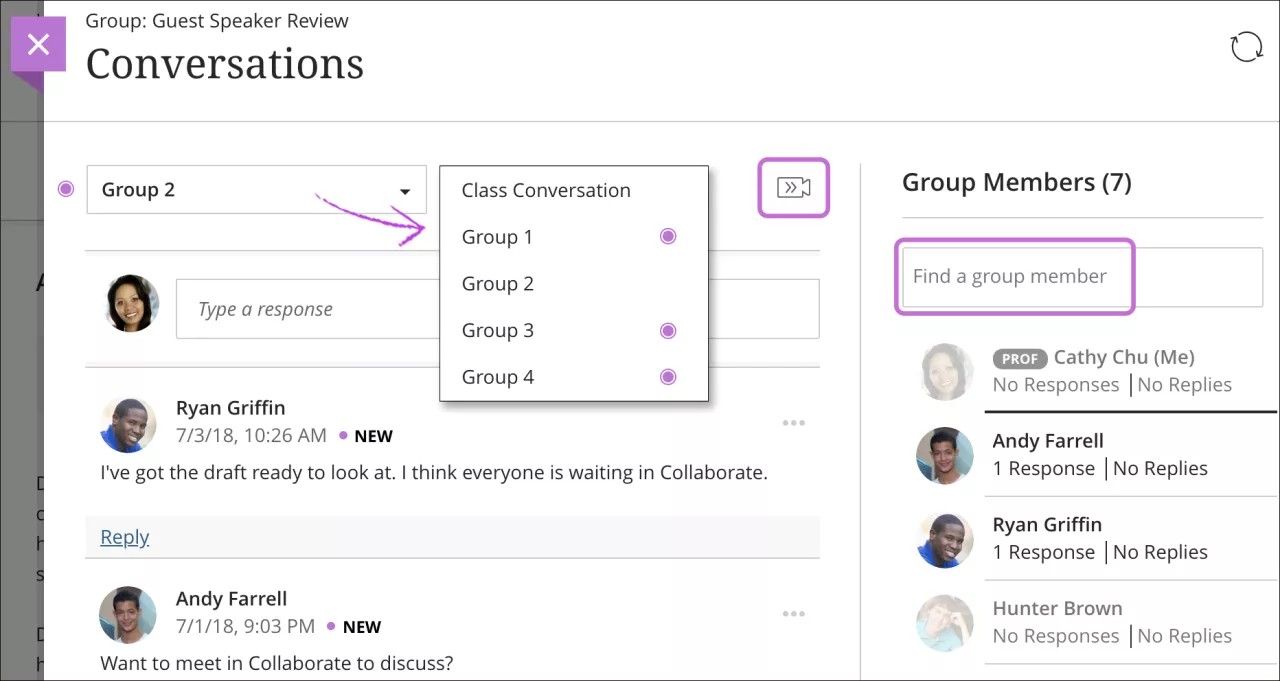
Group conversations
You can view and participate in the conversations for each group or the class. Select the group title to access the list and make a selection. A purple circle indicates new activity.
For large groups, you can search for a specific group member in the group currently displayed.
You can also use Class Collaborate to meet virtually with groups if your course uses Collaborate and you enabled conversations. To open a group's Collaborate room, select Open Collaborate room.