Grade Discussions
To motivate students to post insightful contributions, you can make discussions count for a grade.
Turn on grading for a discussion
When you enable grading for a discussion, a column is created automatically in the Gradebook.
On the discussion, select the settings icon to open the Discussion Settings panel.
In the Details & Information section, select Grade discussion.
Configure the grading options:
Post first in the Details & Information section: hide discussion activity from students until they respond to the discussion. If you want to use both post first and groups, select Post first before you assign groups.
Participation due date: hide the discussion after the due date so students can no longer add responses and replies or edit their previous posts. Time limit accommodations don't apply to discussions.
Grade using: Points, Percentage, Complete/Incomplete, or Letter. Specify the maximum points possible.
Assign a rubric (optional): After you select Grade discussion, you can create or add an existing rubric so students can view the requirements of the graded work. Rubrics can help you evaluate student submissions based on key criteria that you define. You may associate only one rubric to each discussion.
Align goals with the discussion (optional): You and your institution can use goals to measure student achievement across programs and curriculums. When you create a discussion, you can align one or multiple goals. Select Align with goals to search for available goals. After you make the discussion visible, students can view the goals so they know your expectations.
Use groups (optional): You can create discussion groups and grade their contributions.
Select Save when you’re finished. You can edit grade settings until you begin to grade.
When you're ready to share with students, ensure the visibility setting is set to Visible to students.
Grade a discussion
In graded discussions, grades are based on each student's total contributions, not each individual post. Students can contribute and edit their posts until the due date.
On the discussion page, go to the Grades & Participation tab.
Select students' names to open pages with their contributions. Students' responses and replies are highlighted on their submission pages.
Note
All responses and replies are counted in the participants list of the discussion. However, only discussion contributions submitted before the due date are counted on the Grades & Participation page.
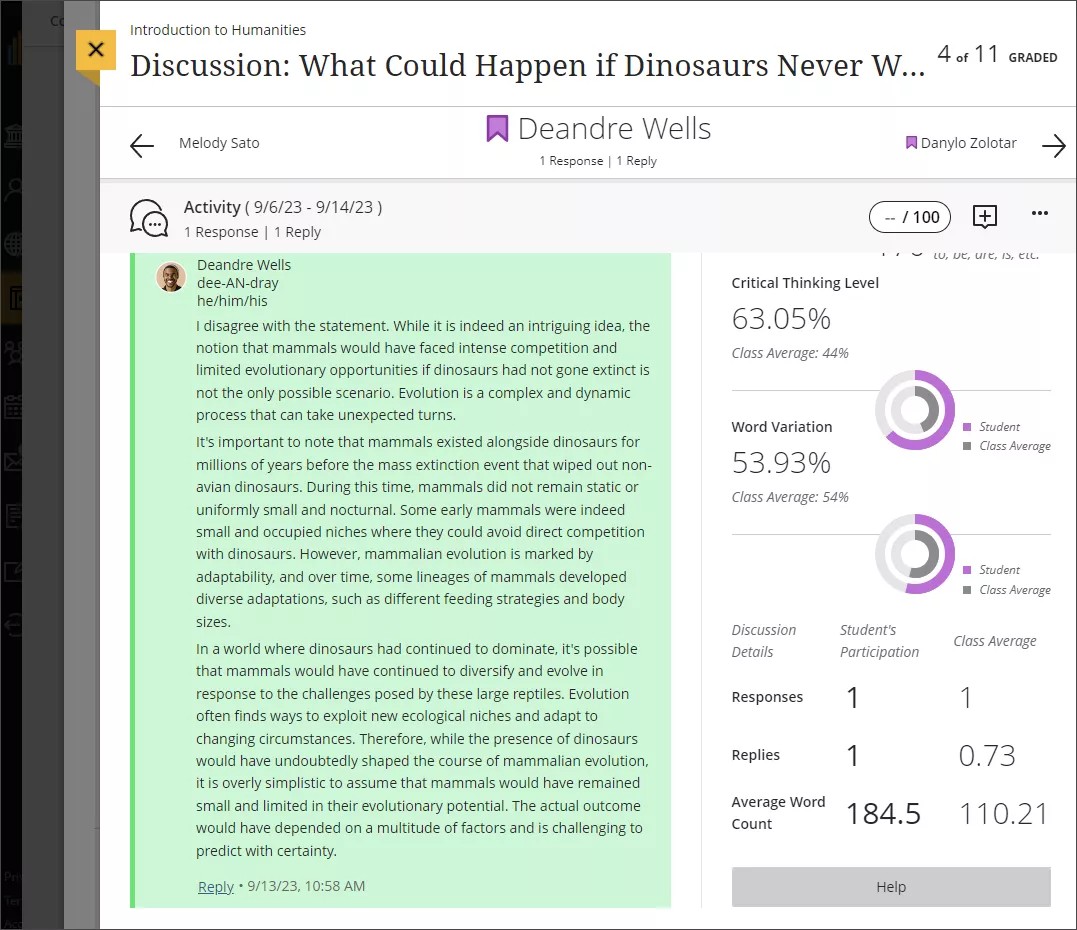
You can view the discussion analysis for an in-depth look at each student’s discussion participation, sentence complexity, critical thinking level. These performance-based insights show who has low participation or may need assistance. You shouldn’t use discussion analysis metrics as your sole guideline for grading. Discussion analysis algorithms are meant to inform your decisions but can’t replace reading student responses. Go to View Discussion Performance and Analytics for more detail.
At least one discussion must be graded for discussion analytics to be generated.
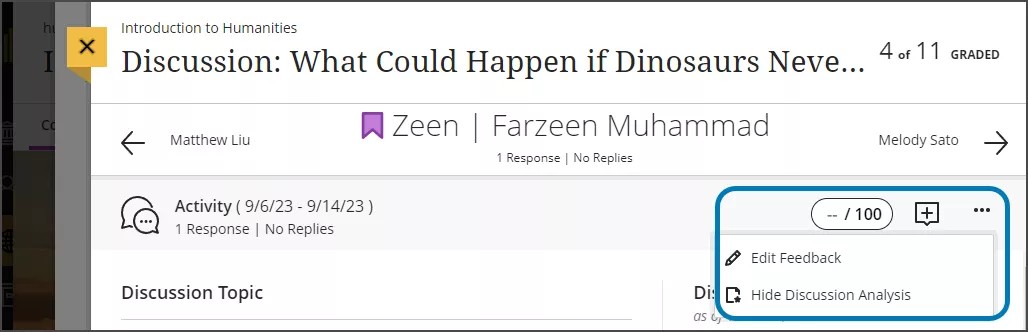
If you don’t want to see discussion analysis, go to the More options menu and select Hide Discussion Analysis.
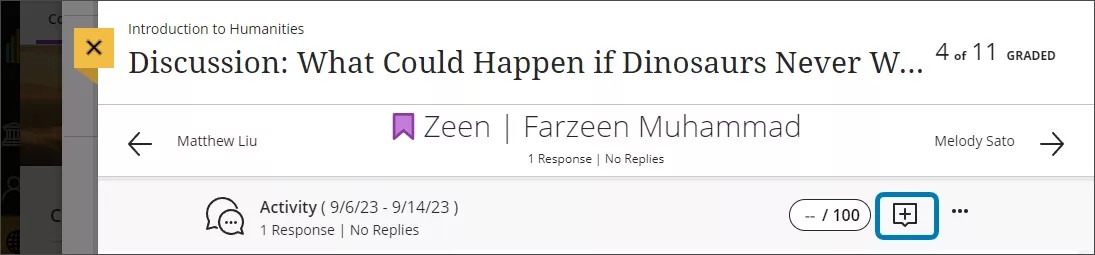
Enter a grade and feedback for this student at the top of the page. You can add a numeric value of five or fewer digits and two digits after a decimal point. Select the Feedback icon, which appears as a plus sign, next to the grade pill to open the feedback panel.
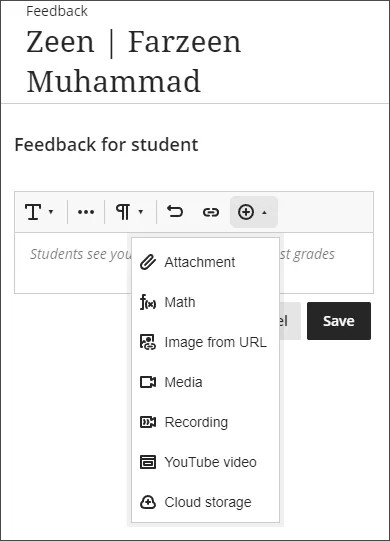
The feedback panel persists on the side of the screen so you can scroll through the page and add overall feedback. You can also embed an audio/video recording of your feedback in the editor as you grade. Students can watch or listen to your feedback alongside any text you include.
If you've assigned a rubric to the discussion, select the grade pill with the rubric icon to open the rubric panel. You can directly enter a grade or select values from the rubric to add to the grade.
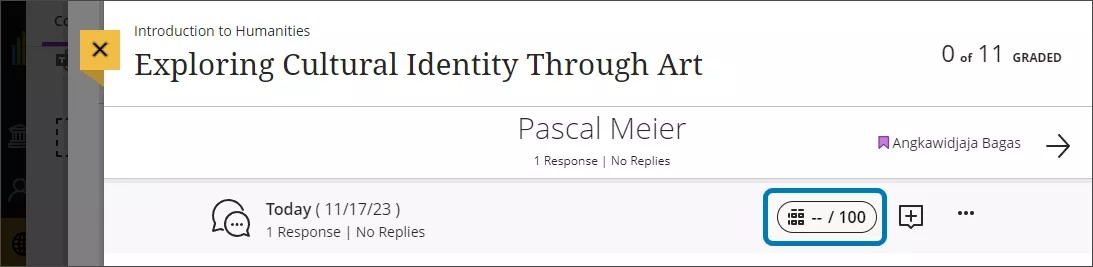
When you're ready to reveal the grade to the student, open the More options menu and select Post. You can also post grades from the Grades & Participation page or your Gradebook.
Watch a video about How to Grade Discussions
The following narrated video provides a visual and auditory representation of some of the information included on this page. For a detailed description of what is portrayed in the video, open the video on Vimeo.