Edit and Manage Video Studio Content
Once you have created or uploaded a Video Studio recording, you can edit and manage it directly within your course. Video Studio automatically generates captions and transcripts for all recordings, which you can edit for accuracy and download for offline use. You and your students can also control playback speed, caption display, and transcript visibility to suit different viewing preferences.
This topic covers the tools available for managing your Video Studio content, including editing captions and transcripts, downloading recordings, navigating recordings using transcript timestamps, and accessing analytics to monitor student engagement.
Managing Video Studio playback
Video Studio remembers where users stop watching and resumes playback from that point when they return to the recording. You can can start a video on one device and pick up where you left off on another.
Skip forward or backward in a recording
Note
A user isn’t able to skip forward or backward in a Video Studio recording that is sized at one-quarter size.
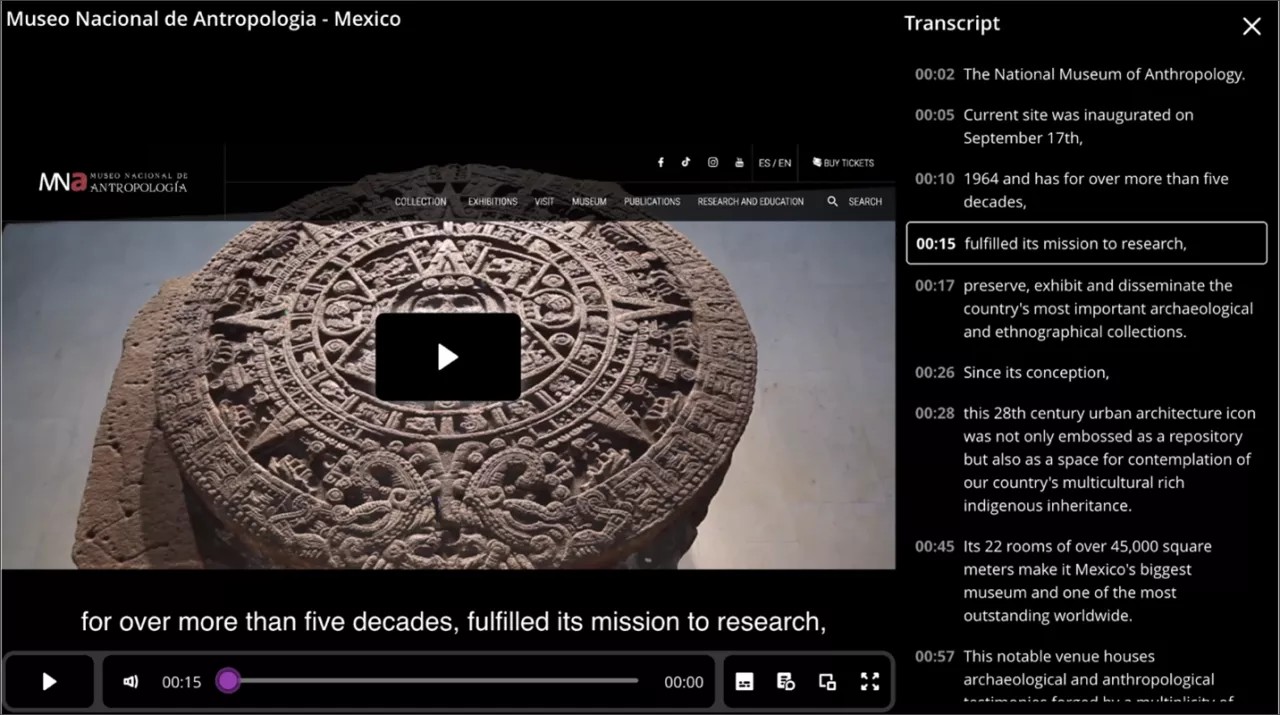
You can skip to a specific part of a recording by selecting a time stamp in the transcript. Select a specific timestamp from the transcript, and the recording plays from the corresponding time selected.
For example, a student who views a recorded lecture can skip forward to a specific portion of the video. They can also replay any part of the video by selecting the desired timestamp in the transcript.
Control recording speed and display captions and transcripts
In Video Studio, you and your students can control the speed of the recording playback, as well as the display of captions and transcription.
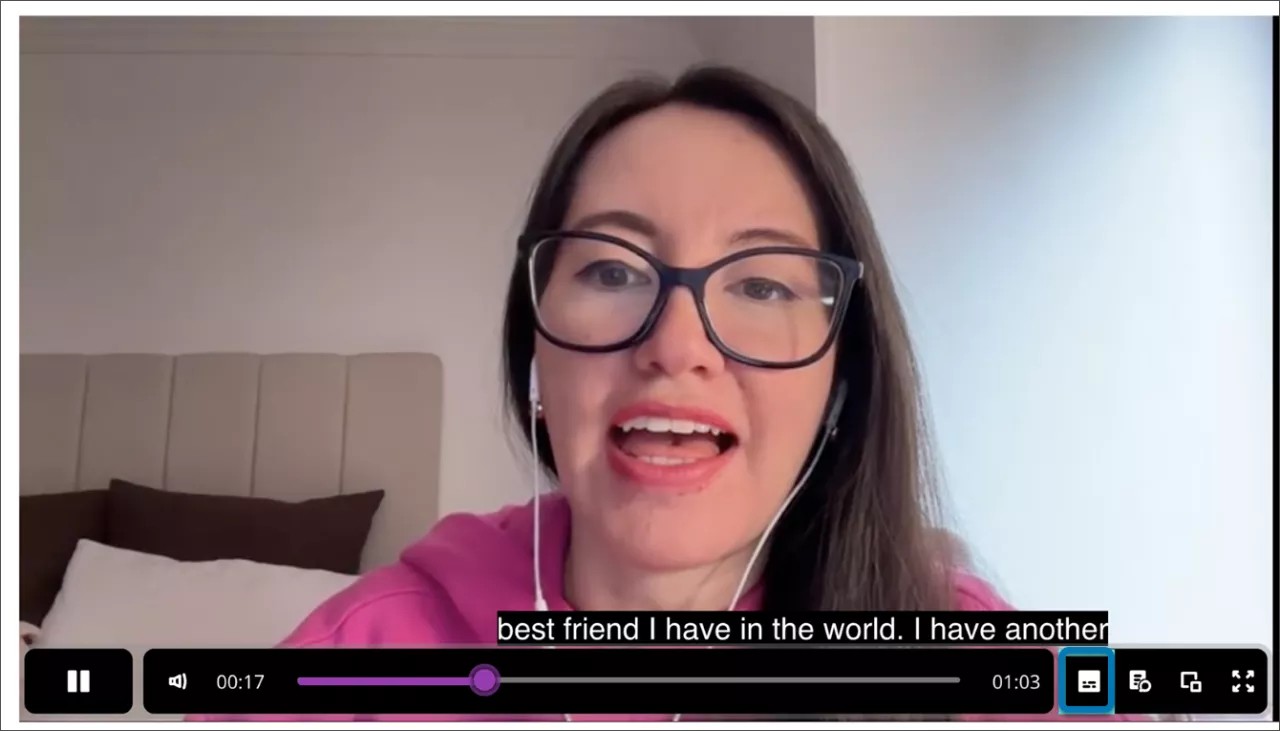
Video Studio makes recordings more accessible by automatically displaying captions. To accommodate diverse learner preferences, individual users turn captions on or off. For example, a student can close the auto-generated captions if they do not want to view them. To turn off captions, select the captions button next to the progress bar at the bottom of the video.
Video Studio also automatically generates a transcript for created or uploaded recordings. As with captions, students can control the display of the transcript.
To view the transcript, select Settings (the button shaped like a gear) next to the progress bar at the bottom of the video. The transcript displays as a panel on the side of the screen.
Students can view the transcript in-line and in full screen in Documents when videos are displayed three and four columns wide. When videos are one to two columns wide, the transcript displays in full screen.
Access transcripts for one-quarter sized recordings
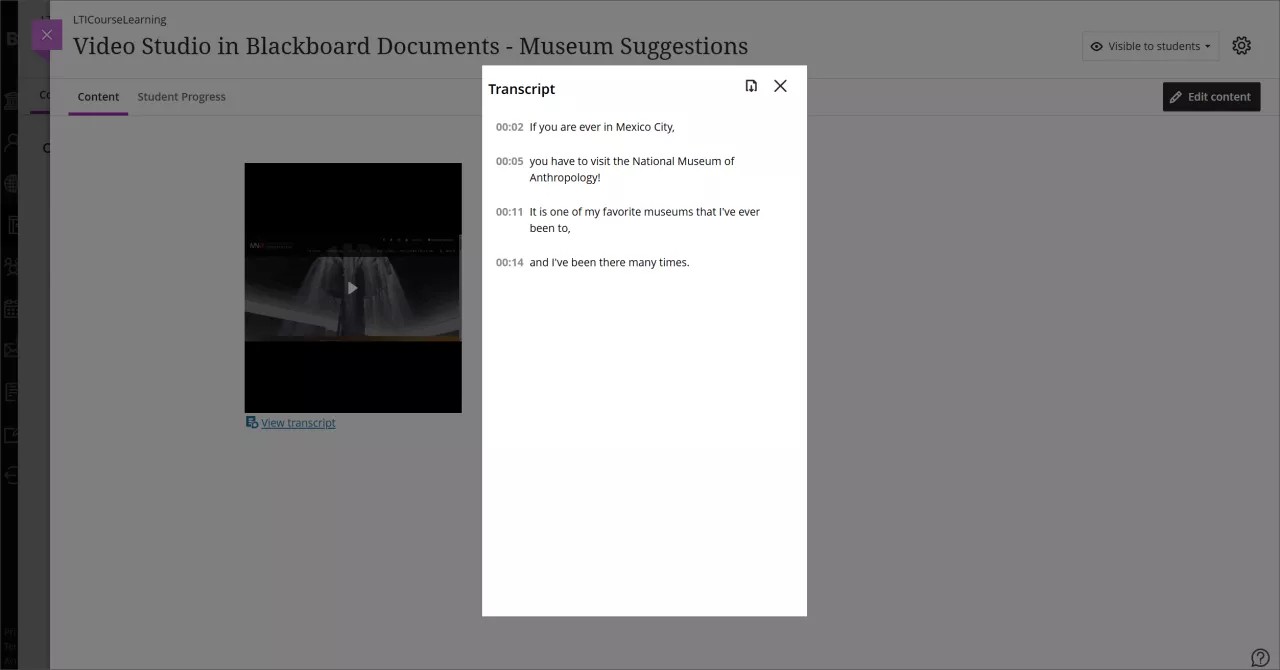
When you create a recording at one quarter size, a user accesses the transcript via a modal window that is displayed when they access a recording transcript. Underneath the recording screen, select View Transcript.
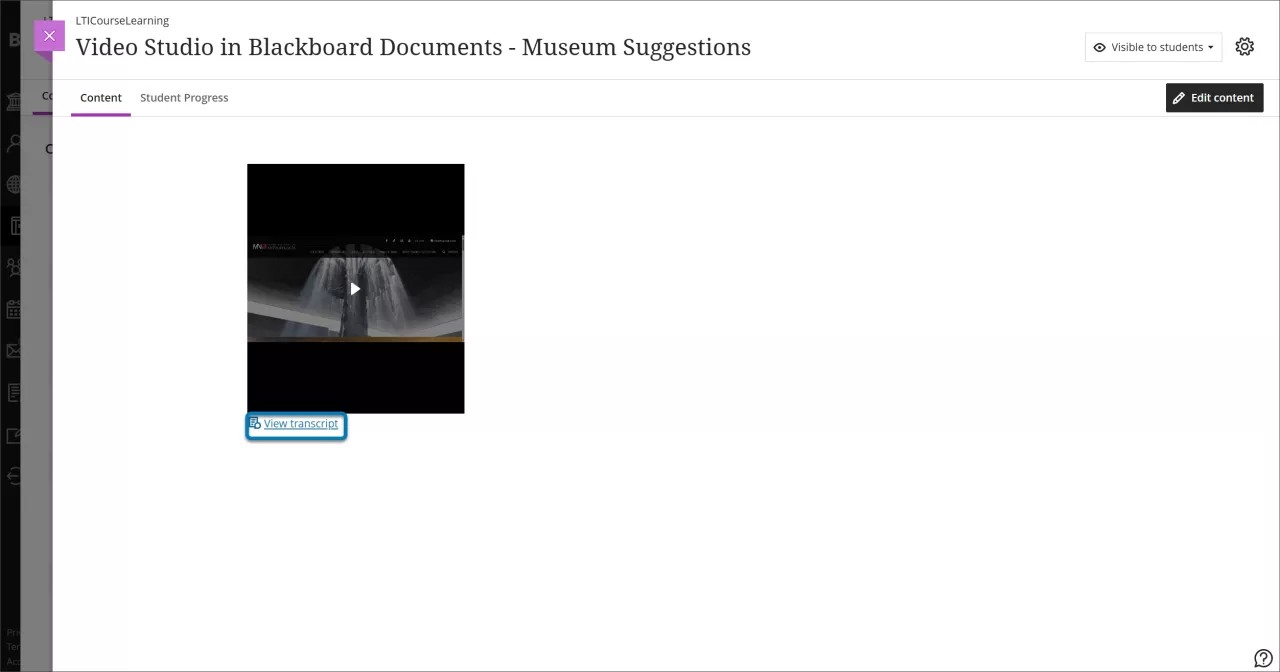
Selecting View Transcript opens a modal window containing the recording transcript in read-only mode. The transcript editing functionality is unchanged for a recording displayed at one-quarter size of the default full width.
Add Audio Descriptions for Inclusive Learning
You can add audio descriptions directly within Video Studio to make your recordings more accessible for students who are visually impaired or have low vision. Audio descriptions are spoken narrations that describe important visual elements — such as actions, settings, and on-screen text — that aren't conveyed through audio alone. Adding audio descriptions strengthens your video's accessibility, supports compliance with standards such as WCAG, and improves engagement for all learners.
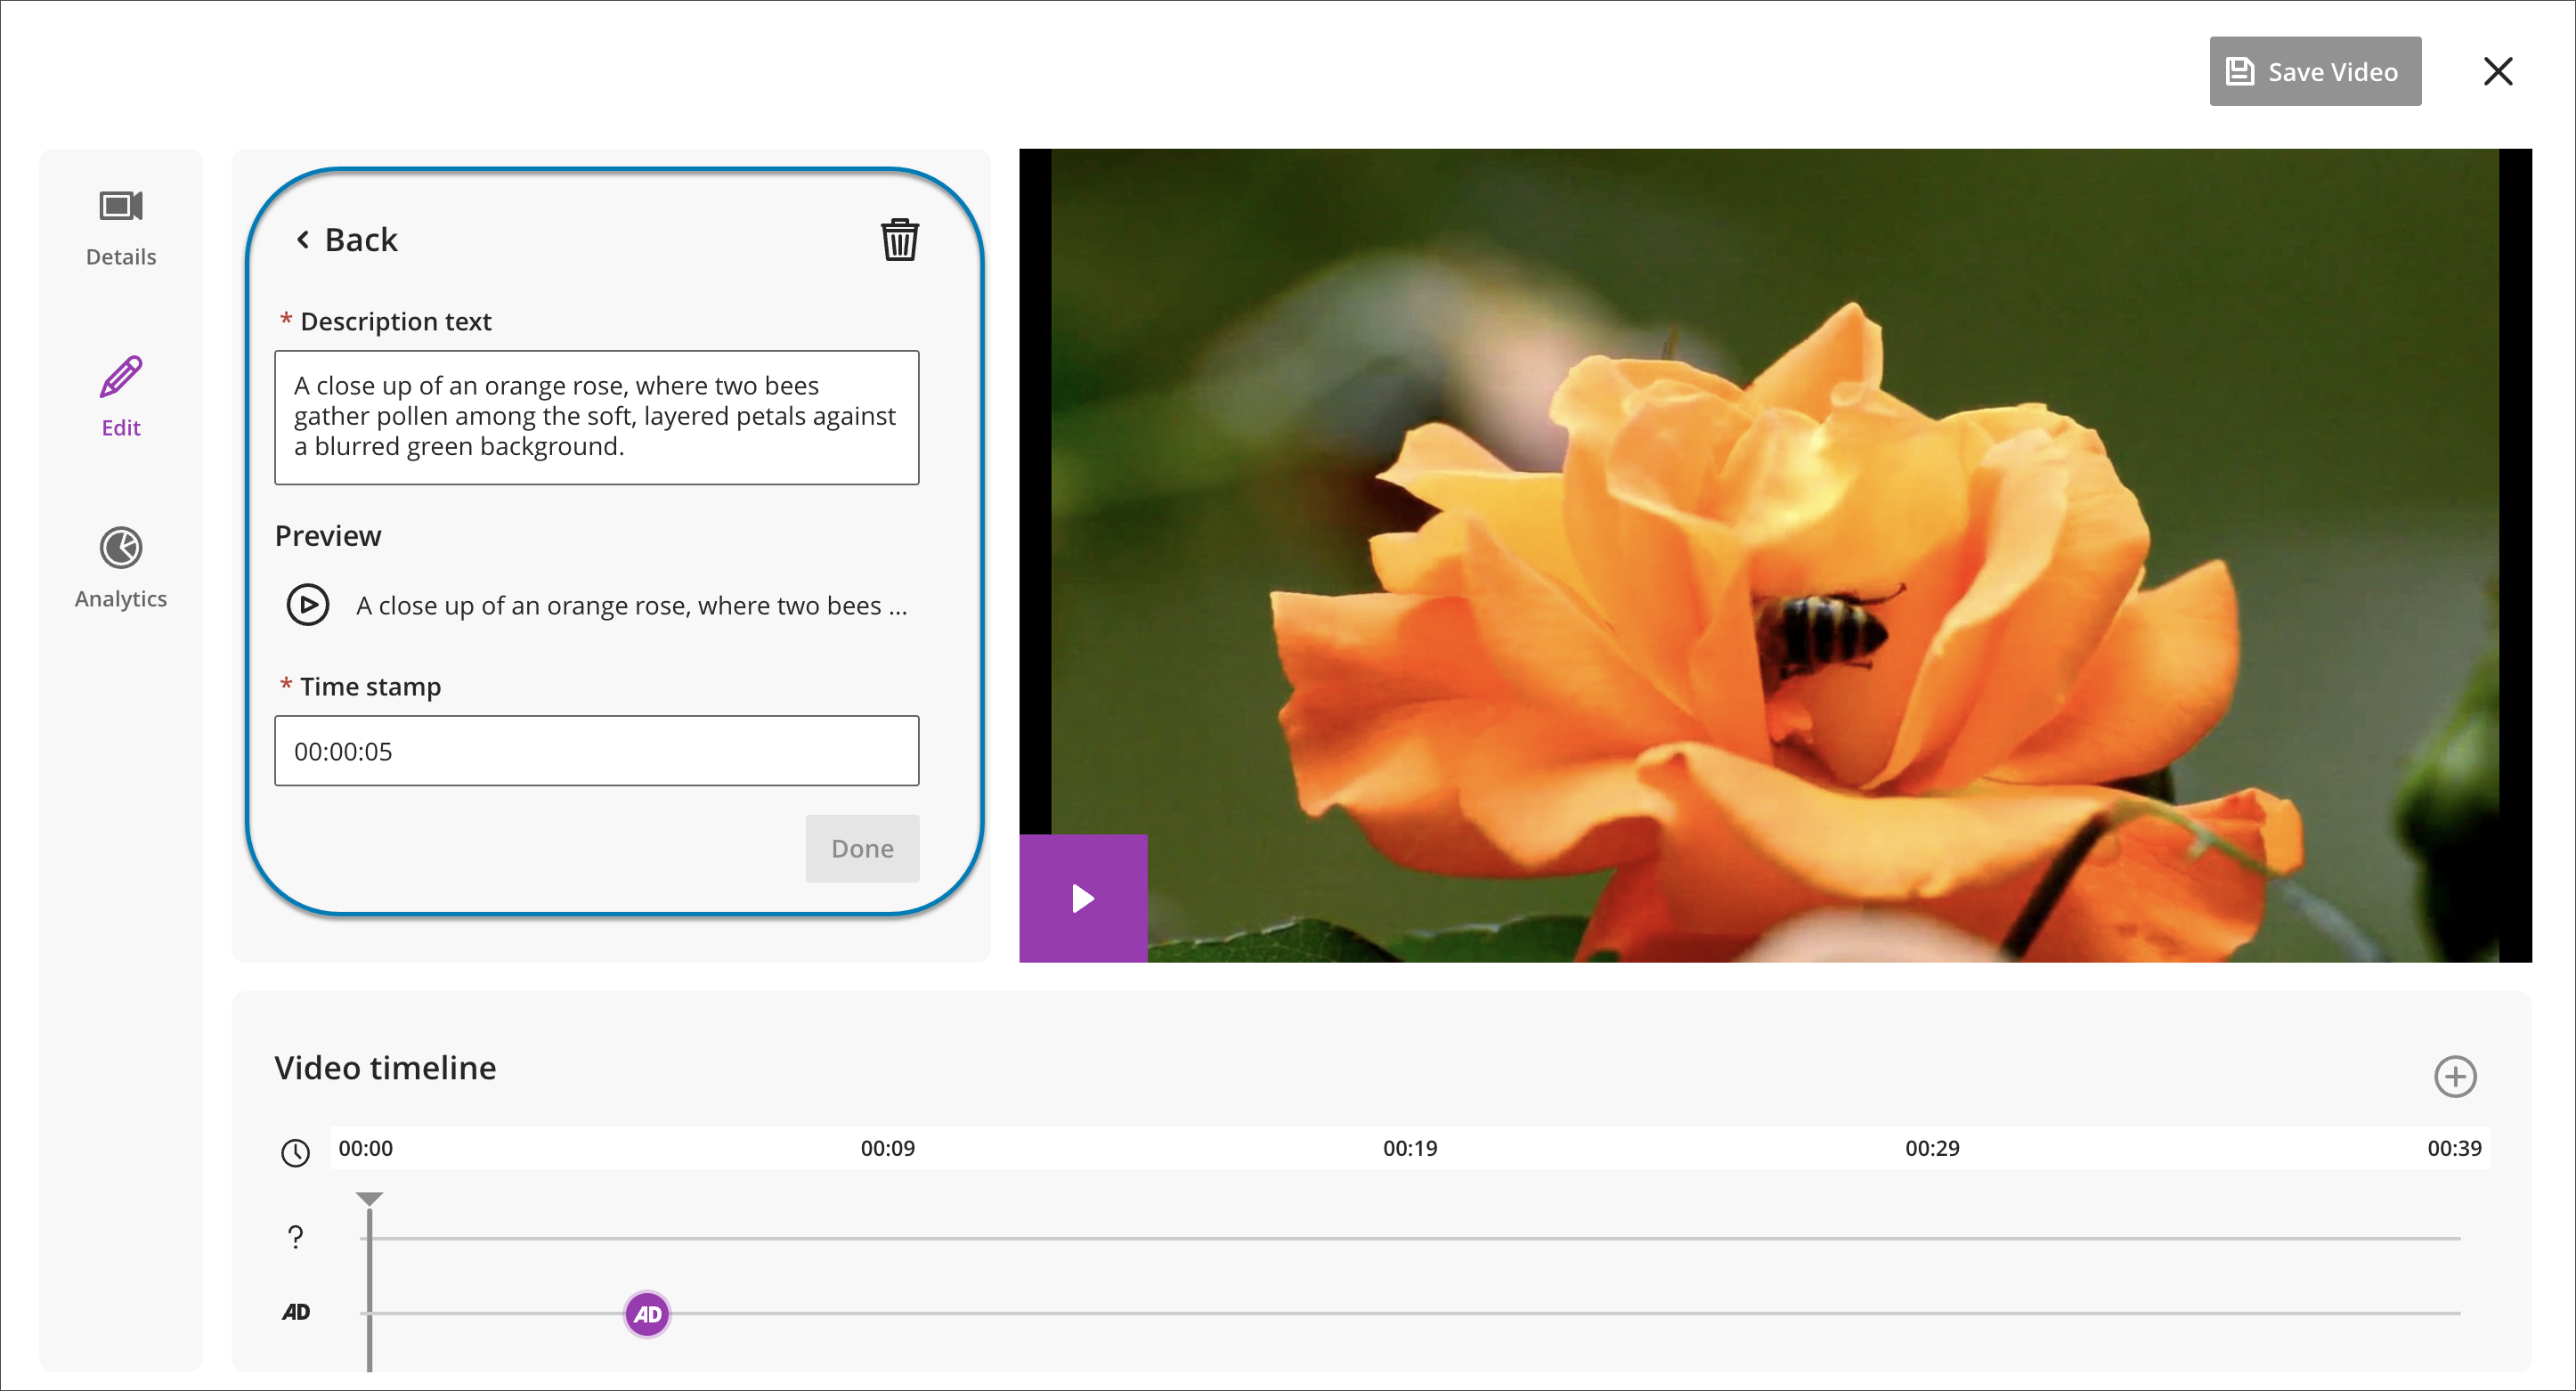
To add audio descriptions, type descriptive text in the audio description editor and assign it to specific timestamps in the video. Video Studio automatically converts the text into spoken audio using text-to-speech technology, so you don't need to record or upload a separate audio track.
You can preview, edit, or delete audio description entries before publishing to ensure accuracy, clarity, and quality. There is no character limit for audio description text, so you can provide meaningful context wherever it's needed.
When students watch a recording with audio descriptions enabled, the video pauses while each description plays and then resumes automatically. The description text also appears in the synchronized transcript, and downloaded videos reflect the selected audio track.
Edit Captions and Transcripts
Note
Resizing the display of Video Studio recordings to one quarter size of the default full width display is possible when creating recordings within Documents (navigate to Control display of captions and transcript). On the Course Content page, Video Studio recordings are displayed at full width. If a user reduces the size of the browser window, the recording can be reduced to a minimum of half width of the full size.
Captions and transcripts are automatically generated for a recording. The automated transcription also identifies and segments individual speakers in a recording (up to 30 speakers). You can edit captions, transcripts, and speaker name labels for content created using Video Studio. This allows you to correct minor errors and add clarity to the captions and transcripts that are automatically generated. When editing speaker names, you can choose to edit one instance of an individual speaker label or change all labels for that speaker throughout the full transcript.
To edit captions and transcripts of a recording,
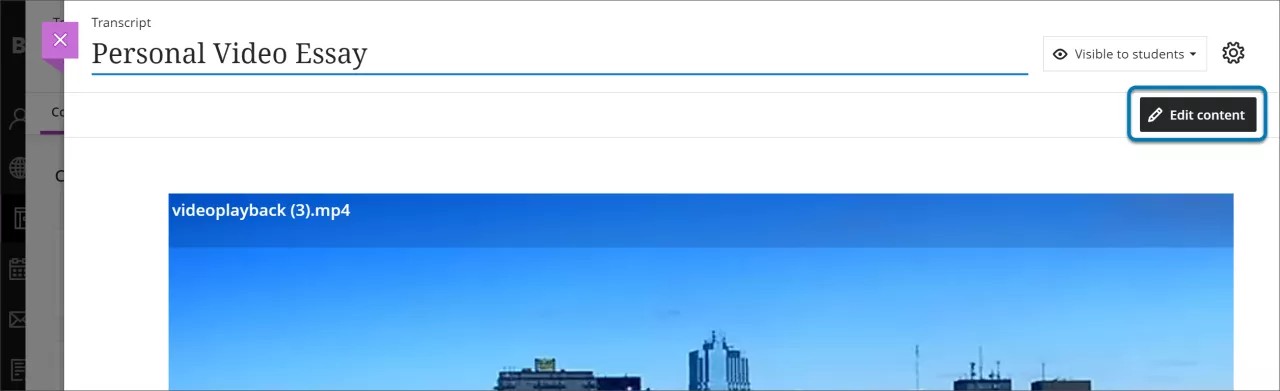
1. Select Edit Content.
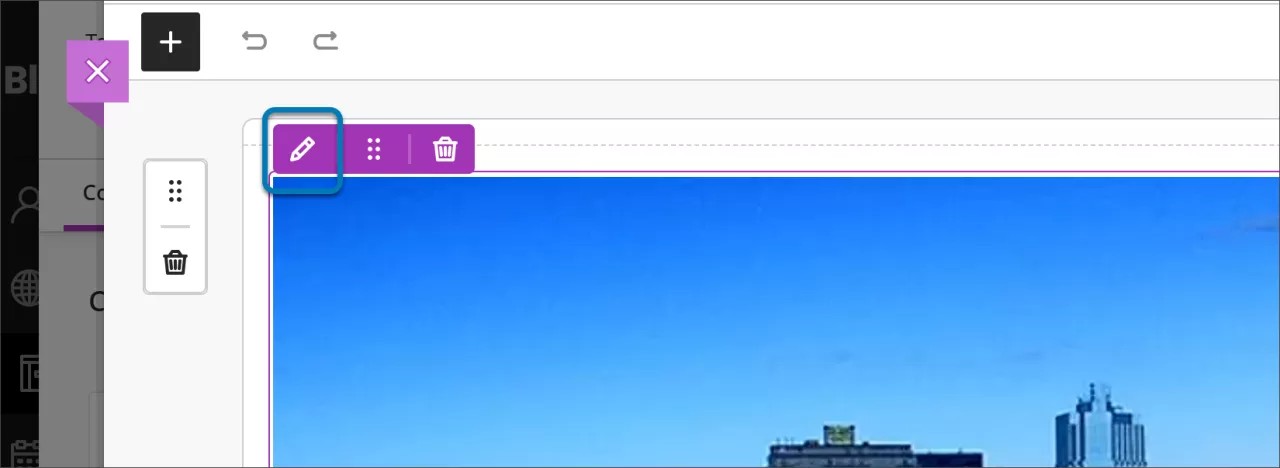
2. Hover your cursor over the video to display the option to edit (the button labeled with a pencil icon). If navigating with your keyboard, you can also select tab until you focus on the screen, which then displays the editing options. Select the button labeled with a pencil.
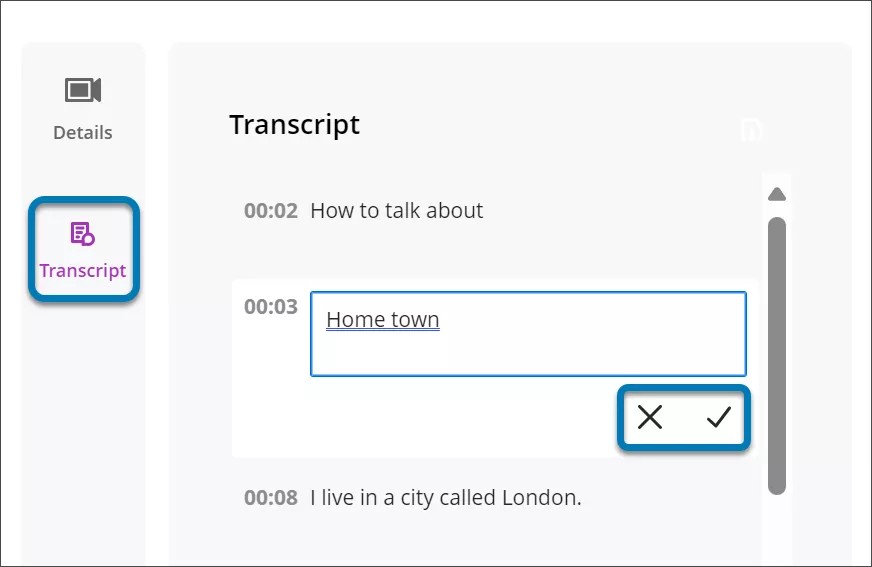
3. Next, select Transcript after opening Settings (the button shaped like a gear), which displays the transcript. Select the pencil next to the text you want to edit within the transcript. Once you make your edits to the text or name labels, select the checkmark to save the edit or select X to discard changes. Once you finish making all your edits, select Save Video . The changes now appear in both the captions and the transcript.
Download Recordings and Transcripts
You and your students download Video Studio recordings directly to your local devices for offline access. This allows users more flexibility to access recordings without an internet connection.
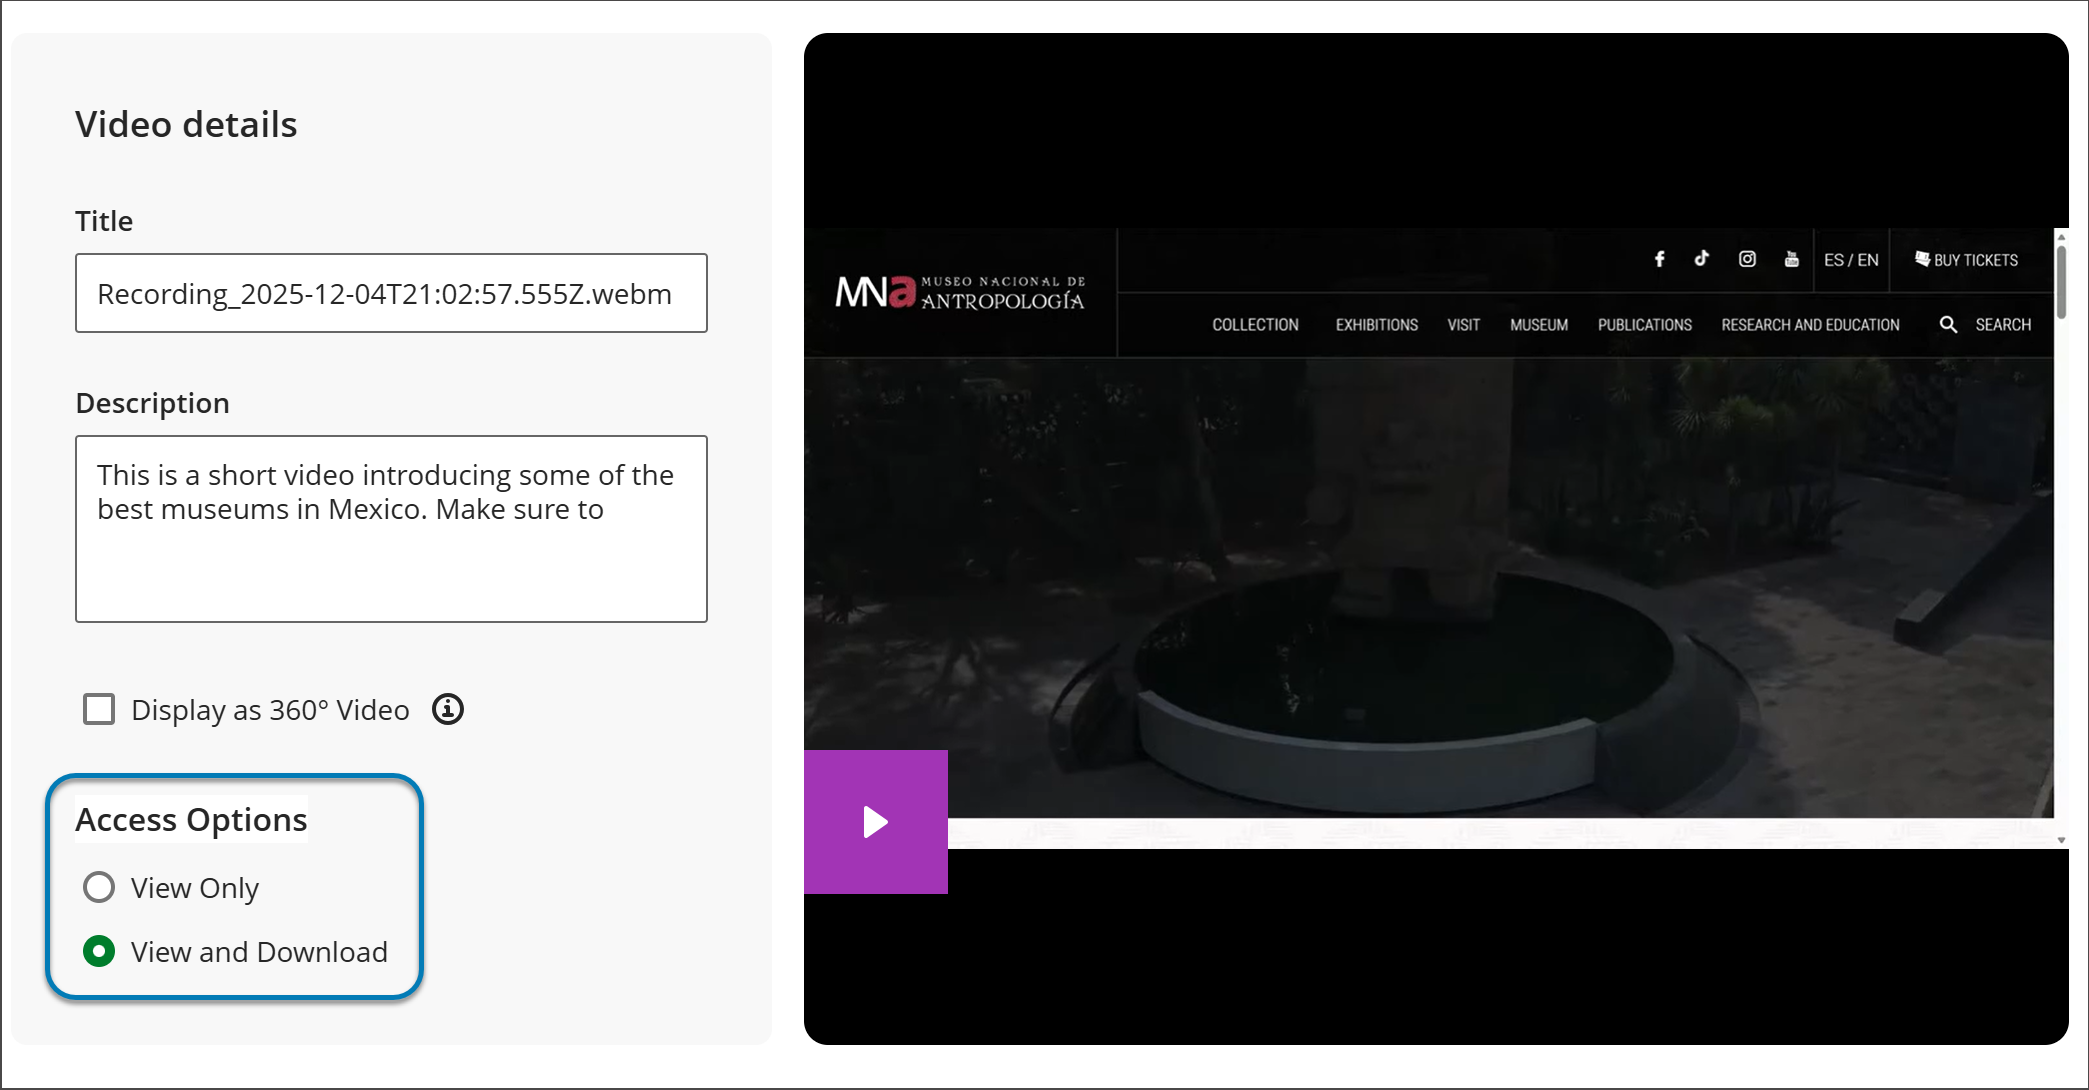
You have control over what recordings you allow students to download by turning the download option on or off for each recording.
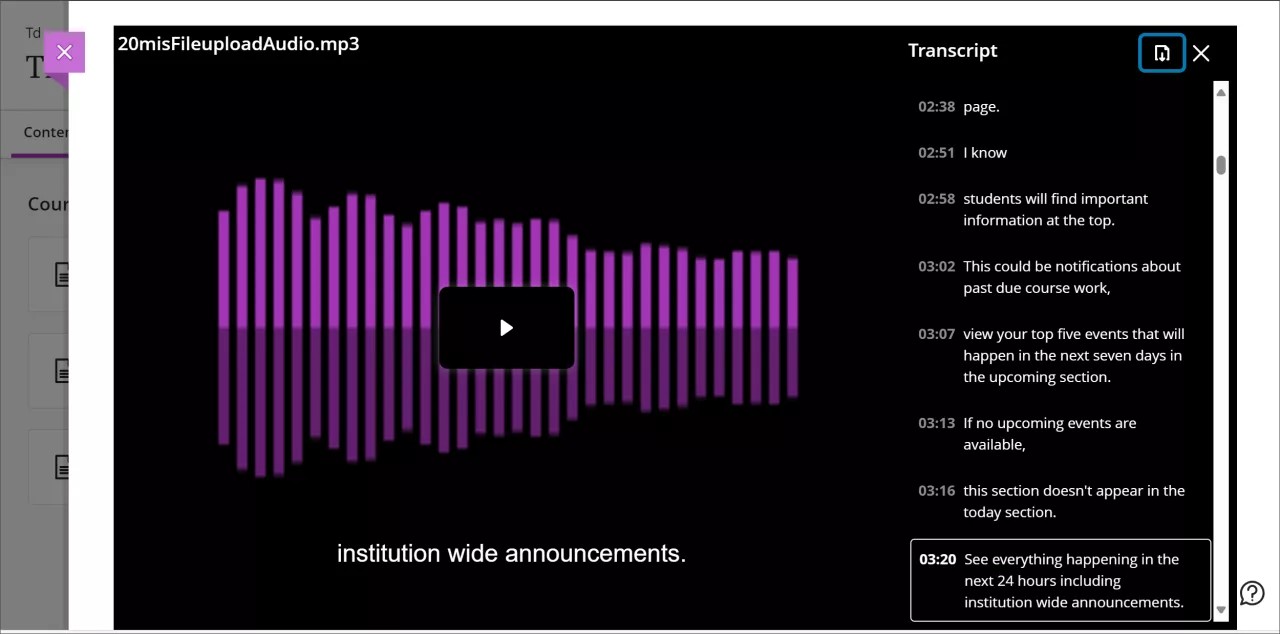
To download transcripts, play your selected recording, select Settings (the button shaped like a gear) next to the progress bar at the bottom of the video. This opens the transcript panel displaying the text of the transcript. Select the download button at the top of transcript column. The transcript is downloaded as a VTT file that includes time stamps and speaker narration.
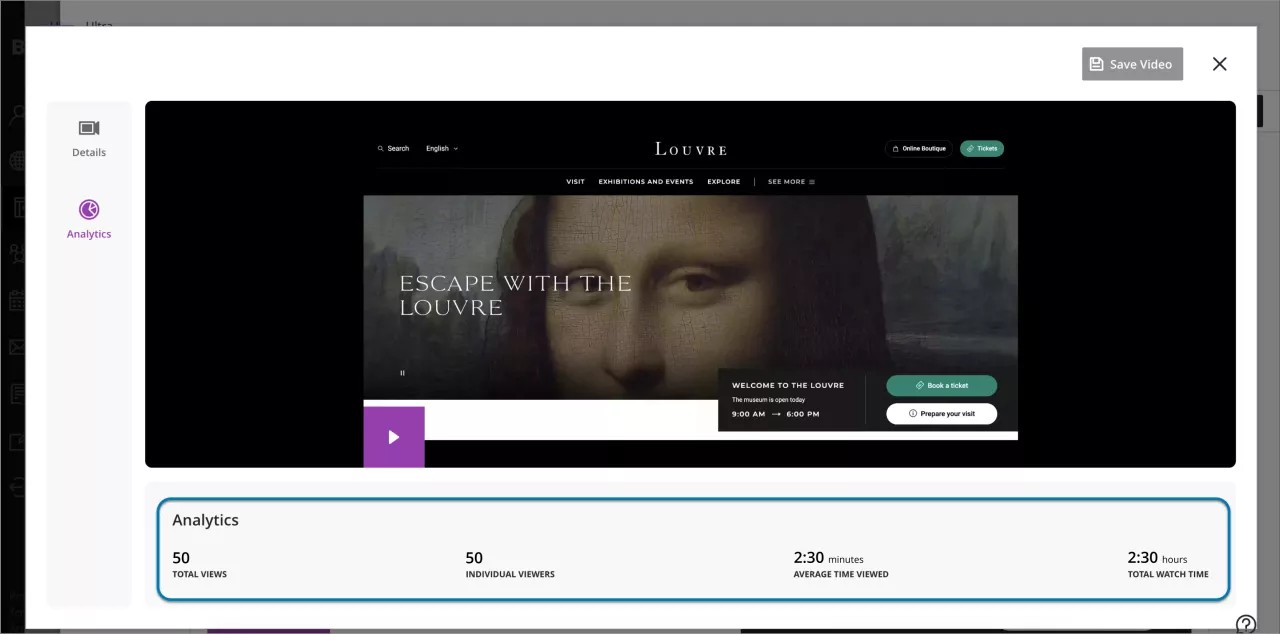
Use analytics for student engagement
You can access analytics to gain insights into student engagement with recordings. This can help you make data-informed decisions about your recording content and instructional strategies to promote engagement with a course.
You can access recording analytics from the editing workflow. Select Edit Content and then the pencil button that appears when you hover over or tab to the recording screen. On the panel that appears, select Analytics.
Total Views: Track the total number of times a recording has been accessed by students.
Individual Users: Identify the unique users who have opened a recording.
Average Time Viewed: Monitor the average duration students spend listening to or watching a recording.
Total Watch Time: Know the total duration of time students spend listening to or watching a recording.
These analytics can reveal which parts of a recording are most and least engaging by analyzing engagement patterns and timestamps.