Insert Learning Object Repository Objects Into Courses
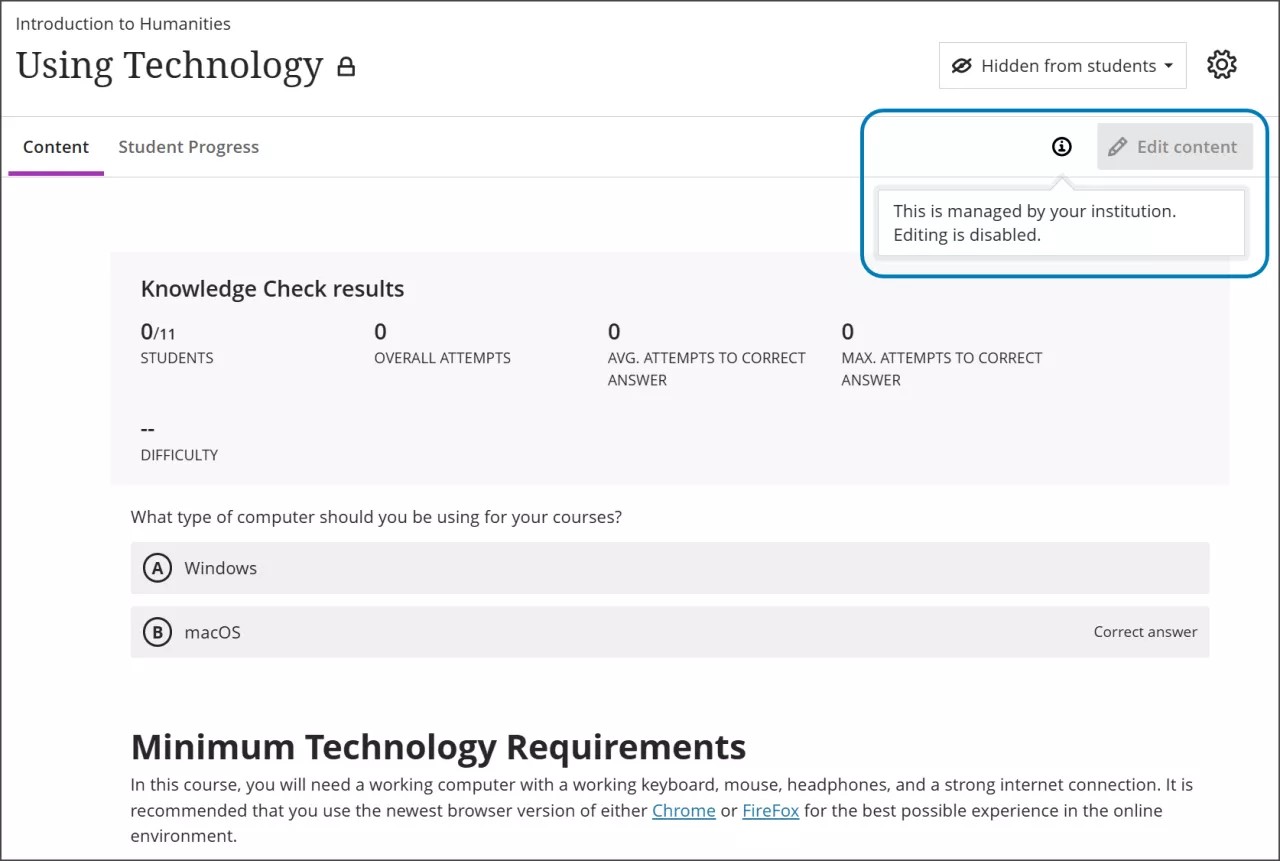
After you set up your Learning Object Repository (LOR), instructors and course builders can insert objects directly into course content pages. Users with editing privileges on the Course Content page will be notified that the object is managed by your institution and won't be able to modify it.
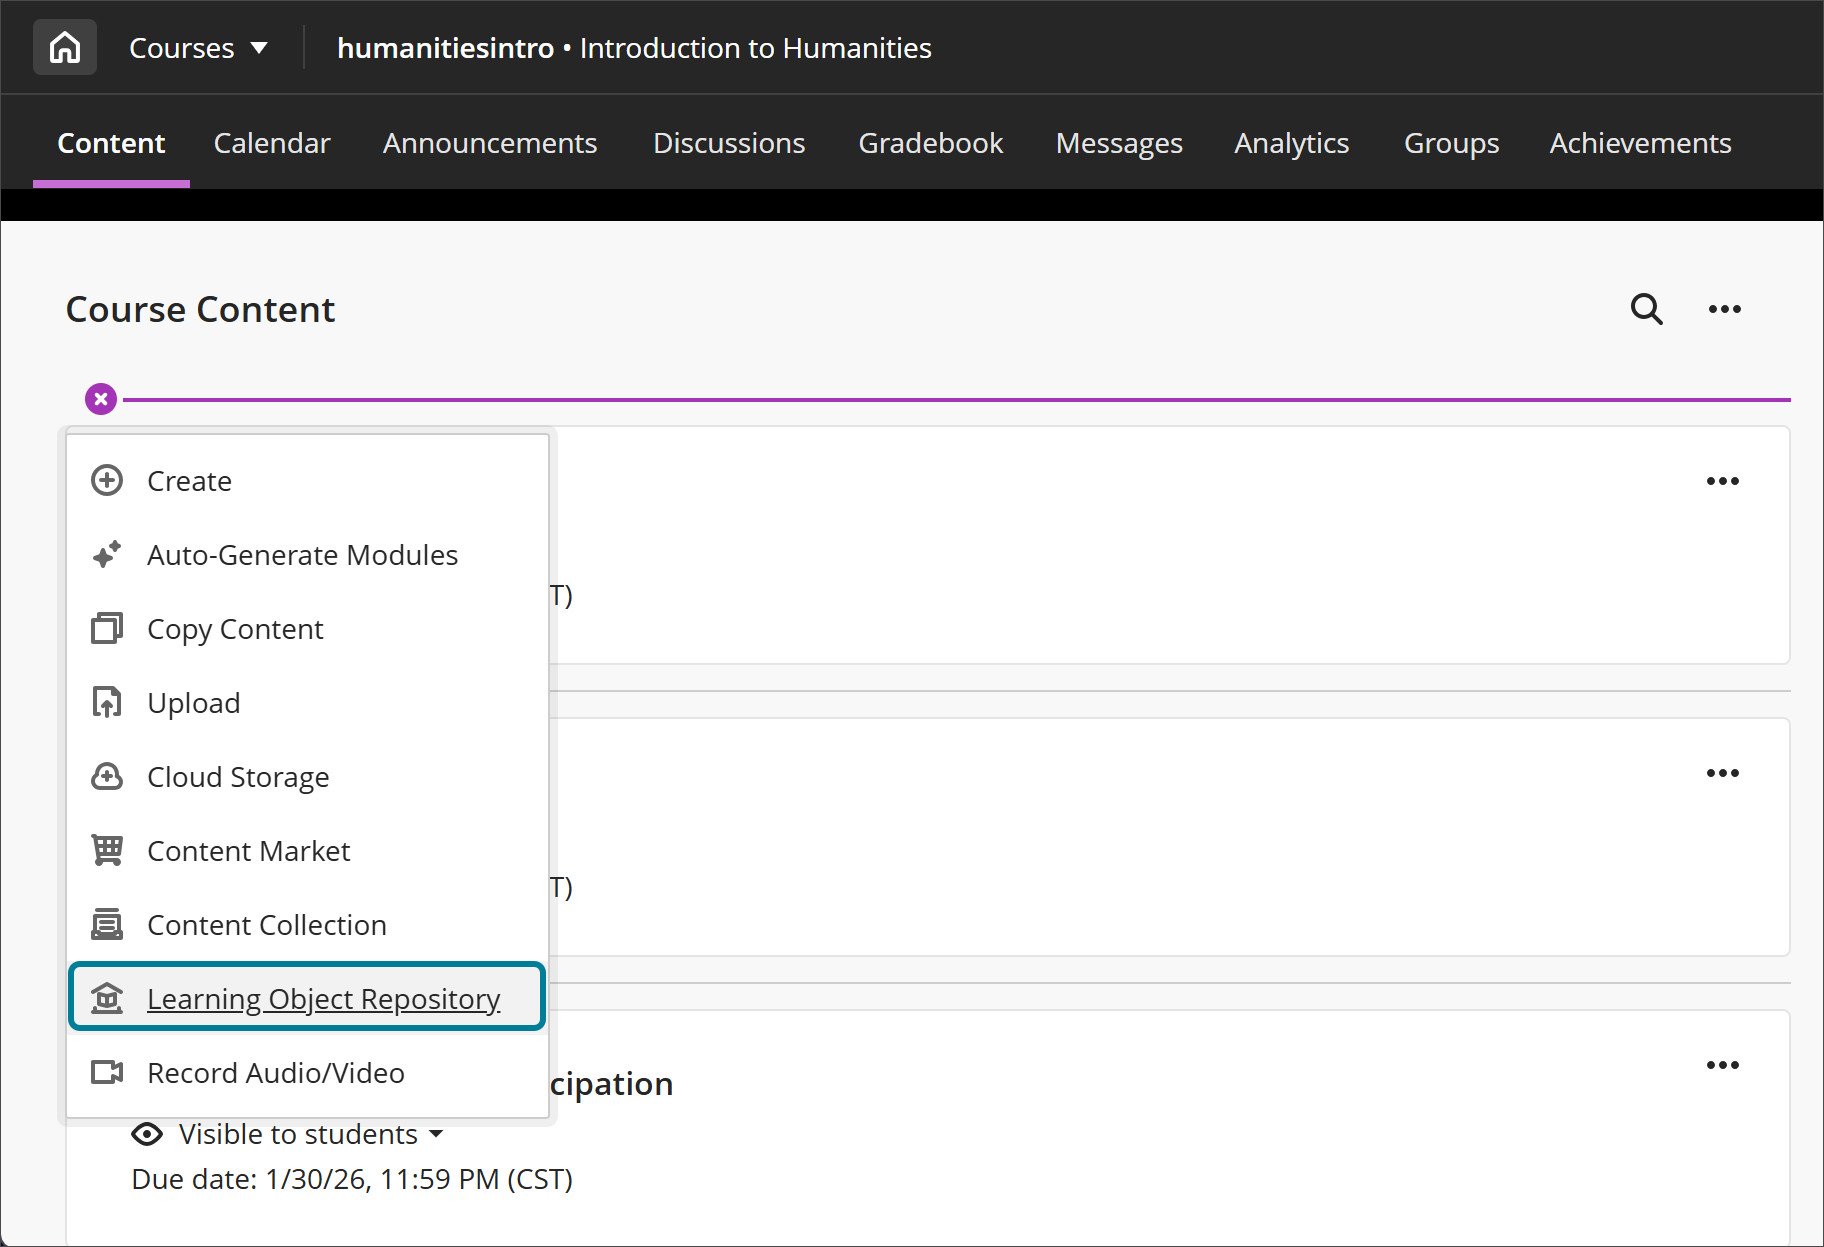
Insert a learning object into the Course Content page
Create a new item on the Course Content page and select Learning Object Repository.
Select one or more objects stored in the LOR. You can select an object from a page listing all the objects stored in the LOR or use the search field.
Note
If you have access to more than one repository, a list of repositories appears. Select the repository you want to choose items from and then select your items.
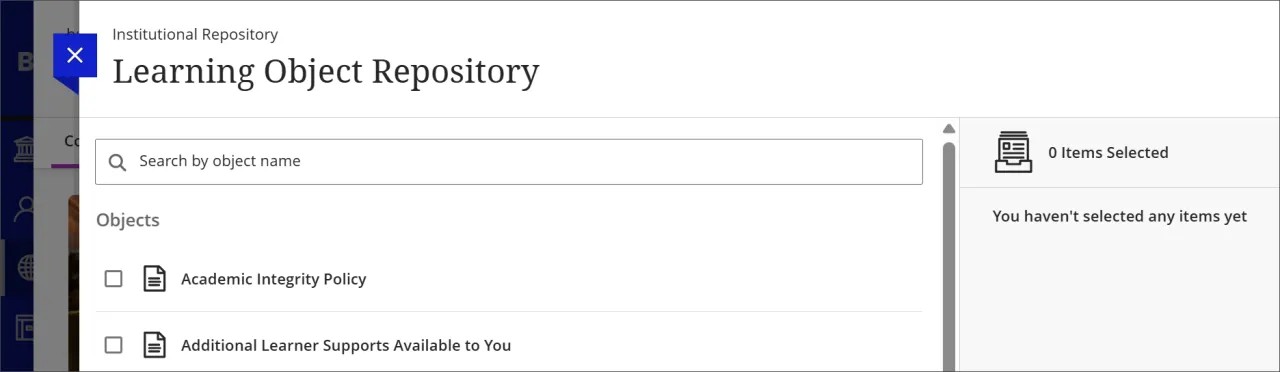
Select Insert Object(s).
Note
A copy process will start. The page will refresh after the process has completed.
Inserted objects have locked down attributes
All users who have editing privileges on the Course/Organization Content page are told that an object from the LOR is managed by their institution. Students and other roles that don't have the option to edit will not be notified. When an instructor tries to edit an object from the LOR, there will be cues that inform them that they can't modify it. For example, instructors can't edit the title, description, or body of a Document inserted into the LOR.