Badgr Integration
Being rewarded is a powerful extrinsic motivator. One of the best rewards is recognition for a job well done. You can reward your students with badges throughout your course to keep students motivated and create a map of what they can learn. You can award badges for the completion of a project, skill proficiency, or levels of experience. Students' badge collections can represent the key learning milestones that they met. Earned badges show a complete view of a person's skills and achievements. You can use Badgr to provide these badges which detail exactly what students achieved in your course.
Requirements
The Badgr integration is available in any Blackboard course. Your institution needs to meet these requirements to use Badgr:
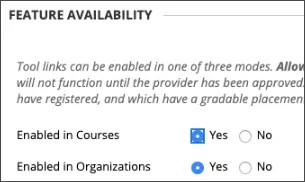
LTI must be enabled for use in courses. From the Admin Panel choose LTI Tool Providers then Manage Global Properties. Enable LTI for course use and optionally for organization use. Select Submit.
The Badgr Support team enables the Spaces feature on an existing issuer or Organization.
Add the Badgr LTI 1.3 tool
On the Administrator Panel, select LTI Tool Providers.
Select Register LTI 1.3 Tool.
In the Client ID field, type the ID from the list below that corresponds to your Blackboard and Badgr environments.
Badgr environment
Blackboard Application/Client ID
Badgr Production Servers
Blackboard Production Applications
https://badgr.com
fc137814-b079-40b6-ac59-0d850c26c5de
https://eu.badgr.com
914f5374-455c-4ae8-8861-d96c1cb37f1a
https://ca.badgr.com
a1e07c13-9817-420b-8b73-137352e7a0d5
https://au.badgr.com
b5f77aa4-dd84-4b70-b40a-5521906052a0
In Tool Status, select Enabled.
Select Submit.
Add the REST tool
On the Administrator Panel, navigate to Integrations and select Rest API Integrations.
Select Create Integration.
In the Application ID field, type the ID from the list below that corresponds to your Blackboard and Badgr environments.
Badgr environment
Blackboard Application/Client ID
Badgr Production Servers
Blackboard Production Applications
https://badgr.com
fc137814-b079-40b6-ac59-0d850c26c5de
https://eu.badgr.com
914f5374-455c-4ae8-8861-d96c1cb37f1a
https://ca.badgr.com
a1e07c13-9817-420b-8b73-137352e7a0d5
https://au.badgr.com
b5f77aa4-dd84-4b70-b40a-5521906052a0
Type a user for this integration. This user will be the one with home API access from which the application is associated. We recommend creating a unique system user that has the following system permissions:
Course/Organization Roles (Content Areas) > View Material Settings
Course/Organization Roles Control Panel(Grade Center) > View Attempts
Course/Organization Roles Control Panel(Grade Center) > View Grade Center Items and Settings
Course Organization Roles Control Panel(Grade Center) > View Grades
Course/Organization Roles(Tools) > Tests, Surveys, and Pools > Tests
Course/Organization Control Panel (Users and Groups) > Users
Read-only access to the Content System filesystem
Select Submit.
Setup Badgr preauthorizations
Navigate to Achievements under Tools and Utilities in the Administrator Panel. Badgr should successfully load and offer to preauthorize Orgs or Issuers.
Create issuers
An issuer is the authority that hands out the badge. You can create unlimited issuers with different levels of badge permissions. Use your program or institutional name and email address for issuer credentials to lend credibility to the badge.
The Badgr Support team enables the Spaces feature on an existing issuer or Organization.
Add issuer
You can add as many issuers as you want. Use the different levels of badge permissions to determine which level you want to assign to each issuer.
Owner
Editor
Staff member
Create badges
It's important to think about the pathway and future of your badges when creating them. We recommend answering these questions when creating your badges:
Who is the issuer?
Who's the earner?
Why would an earner want this badge?
What does the earner have to do to earn this badge?
What is the assessment attached to this badge?
What's the next step after earning this badge?
Use Badgr in a course
Navigate to Books & Course Tools.
Launch Badgr and select an Issuer.
The Badgr Space is automatically provisioned.
Create Objectives to associate Blackboard course items with Badges, connect Pathways, and set up the Leaderboard.
You can add the Badgr tool to the course outline. Select the plus button next to the tool in Books & Course Tools to add to the course outline.
Note
If grades don't appear to be synched with Badges, there's a re-sync feature on the Integrations page of the Dashboard.