Catalog Settings
You can configure the catalog so that catalog items can have categories, requirements, and tags associated with them. These are visible to learners. You can determine what characteristics learners can use to filter items in the catalog while searching.
Select Administration on the home screen.
Select Settings.
Select the Catalog tab.
Categories
You can create categories that can be attached to catalog items, and learners can filter items based on the categories while searching. Categories can also be displayed on the homepage if that setting is enabled on the Homepage Settings screen.
Select Categories Settings.
Type a Category ID of your choice.
Select the toggle next to Hide this Category from the homepage if you don't want the category to show up among the categories displayed on the homepage. This setting will hide individual categories. To determine whether the Categories section of the homepage is displayed at all, select the Settings tab then the Homepage tab and choose Categories Settings.
Drag a file to the drop zone or select Upload to navigate to the file to add an image for the category. A unique image will make the category easier to identify on the homepage.
Note
The image must be at least 310 pixels wide, 126 pixels tall, and no more than 2 MB. It must be a JPG, PNG, or GIF file.
Choose a Language from the menu and type a Category Name.
Select Create.
Select the three dot menu on the category row in the Available Categories section.

To add a new language for the category, select Manage language. Select the additional language at the top of the screen and enter the Category Name in that language, then select Update.
To edit a category name, select Manage language. Choose the language you want to edit at the top of the screen. Edit the Category Name. Select Update.
Select Delete to delete your category. Select Delete in the confirmation dialog.
Select Save to save your changes.
Create a Category filter link
You can create a link to the catalog that is prefiltered to a specific category. When the link is sent to a user, it will take the user to a view of the catalog that shows only the items in that category.
In the Available Categories section, select the three dot menu on the category row.
Choose Filter Link.
Choose Generate Link.
Select the copy icon to copy the link; this link can be pasted wherever necessary.

Tags
You can create tags that can be attached to catalog items, and learners can filter items based on the tags while searching.
Select Tags Settings.
Type a Tag ID of your choice, choose a Language from the menu, and type a Tag Name.
Select Create.
In the Available Tags section, select the three dot menu on the tag row.
To add a new language for the tag, select Manage language. Select the additional language and type the Tag Name in that language, then select Update.
To edit a tag name, select Manage language. Choose the language you want to edit at the top of the screen. Edit the Tag Name. Select Update.
Select Delete to delete your tag. Select Delete in the confirmation dialog.
Select Save to save your changes.
Create a Tag filter link
You can create a link to the catalog that is prefiltered to a specific tag. When the link is sent to a user, it will take the user to a view of the catalog that shows only the items with that tag.
In the Available Tags section, select the three dot menu on the tag row.
Choose Filter Link.
Choose Generate Link.
Select the copy icon to copy the link; this link can be pasted wherever necessary.
Modalities
You can customize the name for each course modality.
Select Modalities Settings.
Choose the modality you want to rename from the Rename Modality menu, select a Language, and type the new name in the Modality Name box.
Select Create.
In the Available Modalities section, select the three dot menu on the modality row.
To add a new language for the modality, select Manage language. Select the additional language and type the Modality Name in that language, then select Update.
To edit a modality name, select Manage language. Choose the language you want to edit at the top of the screen. Edit the Modality Name. Select Update.
Select Delete to delete the modality. Select Delete in the confirmation dialog.
Select Save to save your changes.
Tabs
You can customize the "Courses" and "Programs" tab labels.
Select Tabs Settings.
Choose the tab you want to customize from the Select Tab menu, select a Language, and type the custom name in the Tab Name box.
Select Create.
In the Available Tabs section, select the three dot menu on the tab row.
To add a new language for the tab, select Manage language. Select the additional language and type the Tab Name in that language, then select Update.
To edit a tab name, select Manage language. Choose the language you want to edit at the top of the screen. Edit the Tab Name. Select Update.
Select Delete to delete the tab. Select Delete in the confirmation dialog.
Select Save to save your changes.
Create a Tab filter link
You can create a link to the catalog that is prefiltered to a specific custom tab. When the link is sent to a user, it will take the user to a view of the catalog that shows only the items with that custom tab.
In the Available Tabs section, select the three dot menu on the tab row.
Choose Filter Link.
Choose Generate Link.
Select the copy icon to copy the link; this link can be pasted wherever necessary.
Requirements
You can enter requirements that can be added to any course. Requirements are presented in the course details peek panel for any course they are associated with.
Select Requirements Settings.
Type a Requirement ID of your choice, choose a Language from the menu, and type a Requirement Name.
Select the Create button.
In the Available Requirements section, select the three dot menu on the requirement row, where you will see options to Manage language and Delete.
To add a new language for the requirement, ,select Manage language. Select the additional language and type the Requirement Name in that language, then select Update.
To edit a requirement name, select Manage language. Choose the language you want to edit at the top of the screen. Edit the Requirement Name. Select Update.
Select Delete to delete your requirement. Select Delete in the confirmation dialog.
Select Save to save your changes.
Prices
You can customize the "free" and "premium" price labels.
Select Prices Settings.
Choose the price you want to customize from the Select Price menu, select a Language, and type the custom name in the Price Name box.
Select Create.
In the Available Prices section, select the three dot menu on the tag row.
To add a new language for the price, select Manage language. Select the additional language and type the Price Name in that language, then select Update.
To edit a price name, select Manage language. Choose the language you want to edit at the top of the screen. Edit the Price Name. Select Update.
Select Delete to delete the price. Select Delete in the confirmation dialog.
Select Save to save your changes.
Create a Price filter link
You can create a link to the catalog that is prefiltered to a specific custom price. When the link is sent to a user, it will take the user to a view of the catalog that shows only the items with that custom price.
In the Available Prices section, select the three dot menu on the price row.
Choose Filter Link.
Choose Generate Link.
Select the copy icon to copy the link; this link can be pasted wherever necessary.
Filters
You can select which attributes are available to filter the catalog by on the catalog screen.
Select Filters Settings.
Select the attributes that you want to be available.
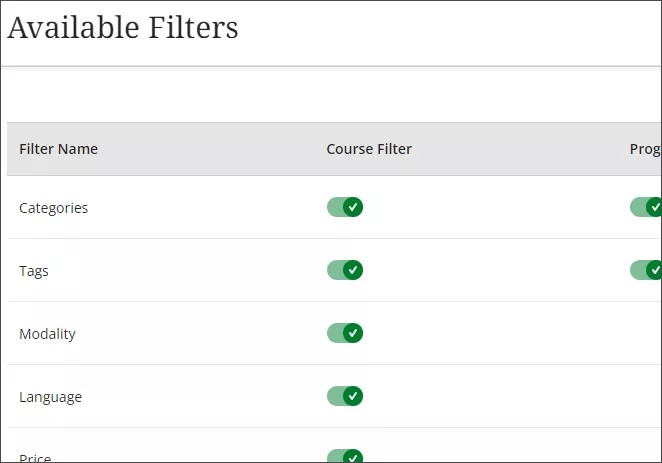
Select Save to save your choices.