Create Video Studio Recordings
Video Studio is an audio/video tool that allows you to create and experience engaging course content.
Video Studio requires a separate license to use the tool to its full capabilities but is available within Announcements and instructor feedback for submitted assignments and tests without a license. To learn whether you have access, contact your Blackboard LMS administrator.
This topic covers everything you need to get started with creating Video Studio content, from technical specifications to recording options.
Specifications
For the best experience using Video Studio, follow these specifications:
Recording duration: Videos recorded directly with Video Studio have a maximum duration of 5 minutes. However, there is no length limit for videos uploaded from other sources.
Note
Beginning with the July 2026 release, Video Studio recording times are extended:
Premium (Video Studio): Students and instructors can record videos up to 30 minutes
Core (Blackboard LMS): Instructors can record videos up to 10 minutes
Streaming quality: The player supports both HD (1080p, 8Mbps) and SD (480p, 1Mbps) streaming. It utilizes adaptive streaming technology to automatically adjust video quality based on the viewer’s internet speed, ensuring smooth playback with the best possible quality.
Upload file size limit: The maximum upload size for videos is 10GB.
Supported file formats: The player recognizes a wide range of file extensions, including:
Video: .mp4, .mov, .avi, .mkv, .wmv, .flv, .webm, .3gp, .m4v, .mpg, .mpeg, .m2v, .ts
Audio: .mp3, .m4a, .wav, .ogg, .flac, .opus, .weba, .aac
Add a recording
You can add Video Studio recordings to Discussions and Assignment and Test responses. When creating a recording, you can record from a camera, microphone, screen, or record your screen and camera simultaneously. You can also upload audio and video files. Video Studio also has the capability to upload 360° videos that can pan to the left or right. You can create recordings both on Blackboard LMS desktop version and Blackboard LMS App.
In a Discussion topic. In the Rich Text Editor, select the camera button to add Video Studio content.
In an Audio/Video content block, options include:
Camera
Audio
Screen
Audio & Screen
Screen and Camera (records your screen and camera simultaneously)
Upload from device
You can select the device used to record video and audio. By selecting the dropdown menu options for camera, mic, and screen, you can choose from any connected devices on your computer.
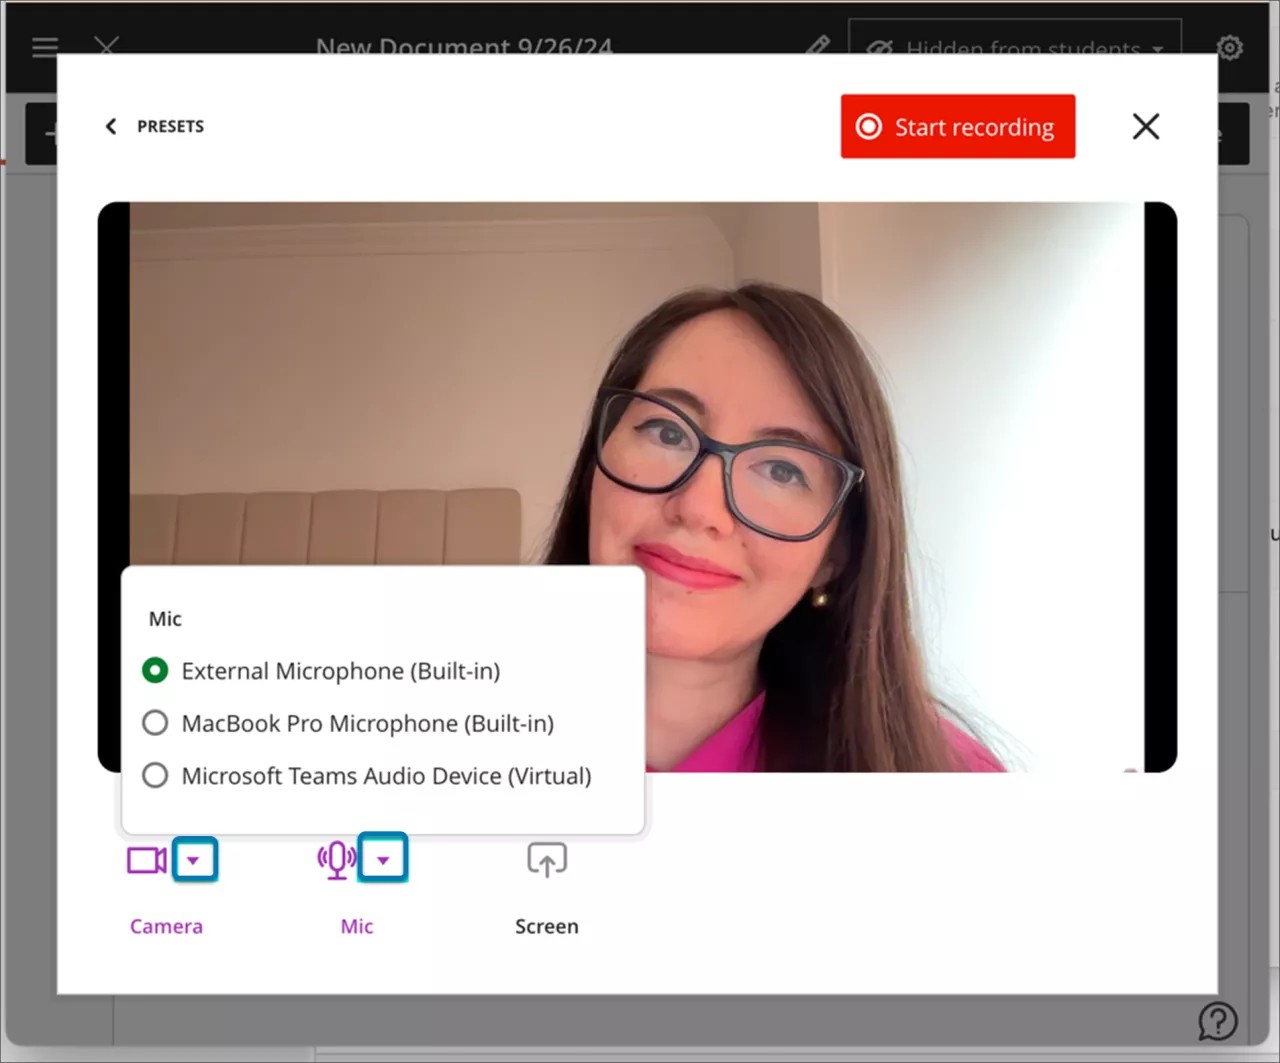
If you are creating a recording, select Start Recording. There is a three second countdown before recording begins. You can pause, resume, retake, or end the recording as needed.

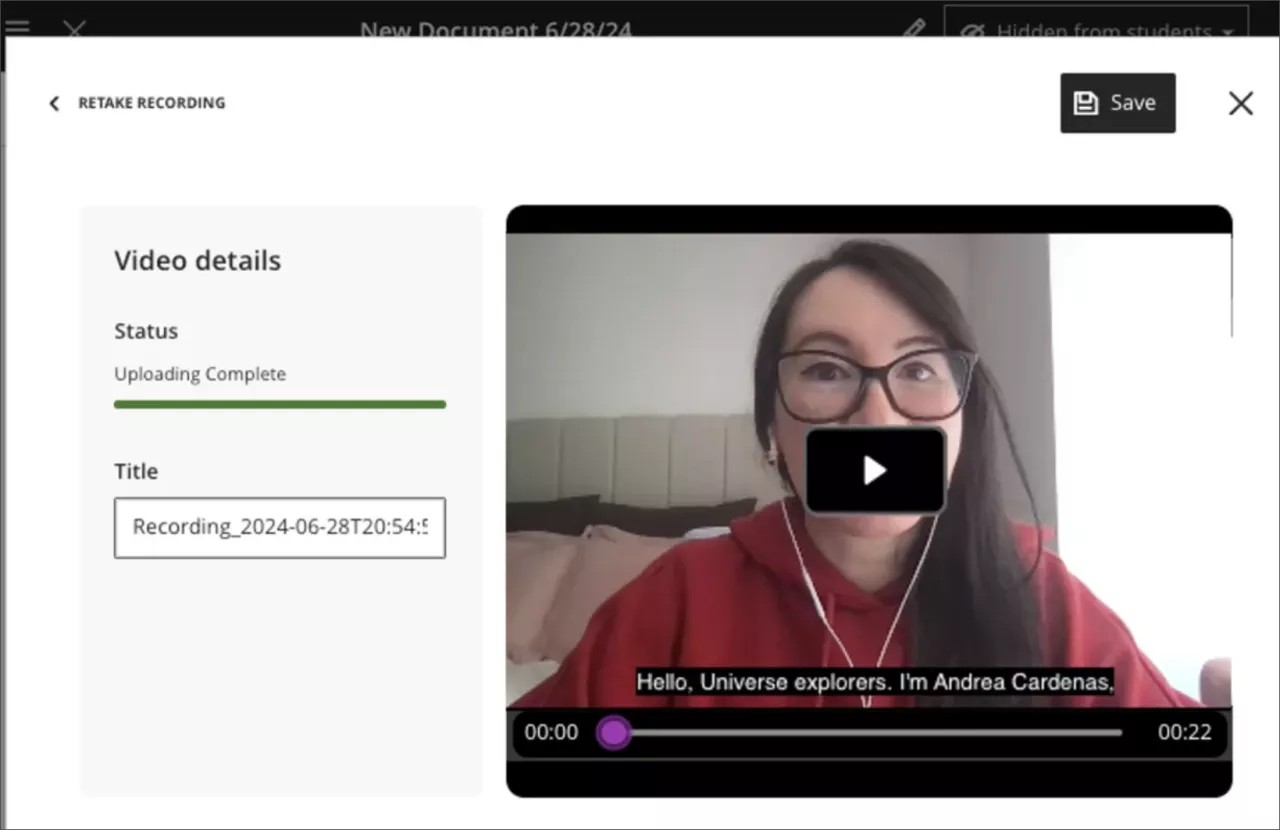
After you end the recording, the uploading process begins. During this time, you can preview the result, edit the title, and add a description. Select Save to add the audio or video into the document. You can go back and edit titles and descriptions for existing recordings as well by opening the settings of a recording, selecting Edit Video, and then selecting Details on the Edit page. There you can find the title and description to edit.
You can edit the title of a recording or uploaded file after it is saved. Select the pencil icon from the top left of the video block.

After selecting the pencil icon, the previously uploaded video displays in the Upload Video screen. You can edit your title.
Customize your recording background
You can customize their background when recording in Video Studio. When setting up a recording, open the camera options to choose how your background appears. You can:
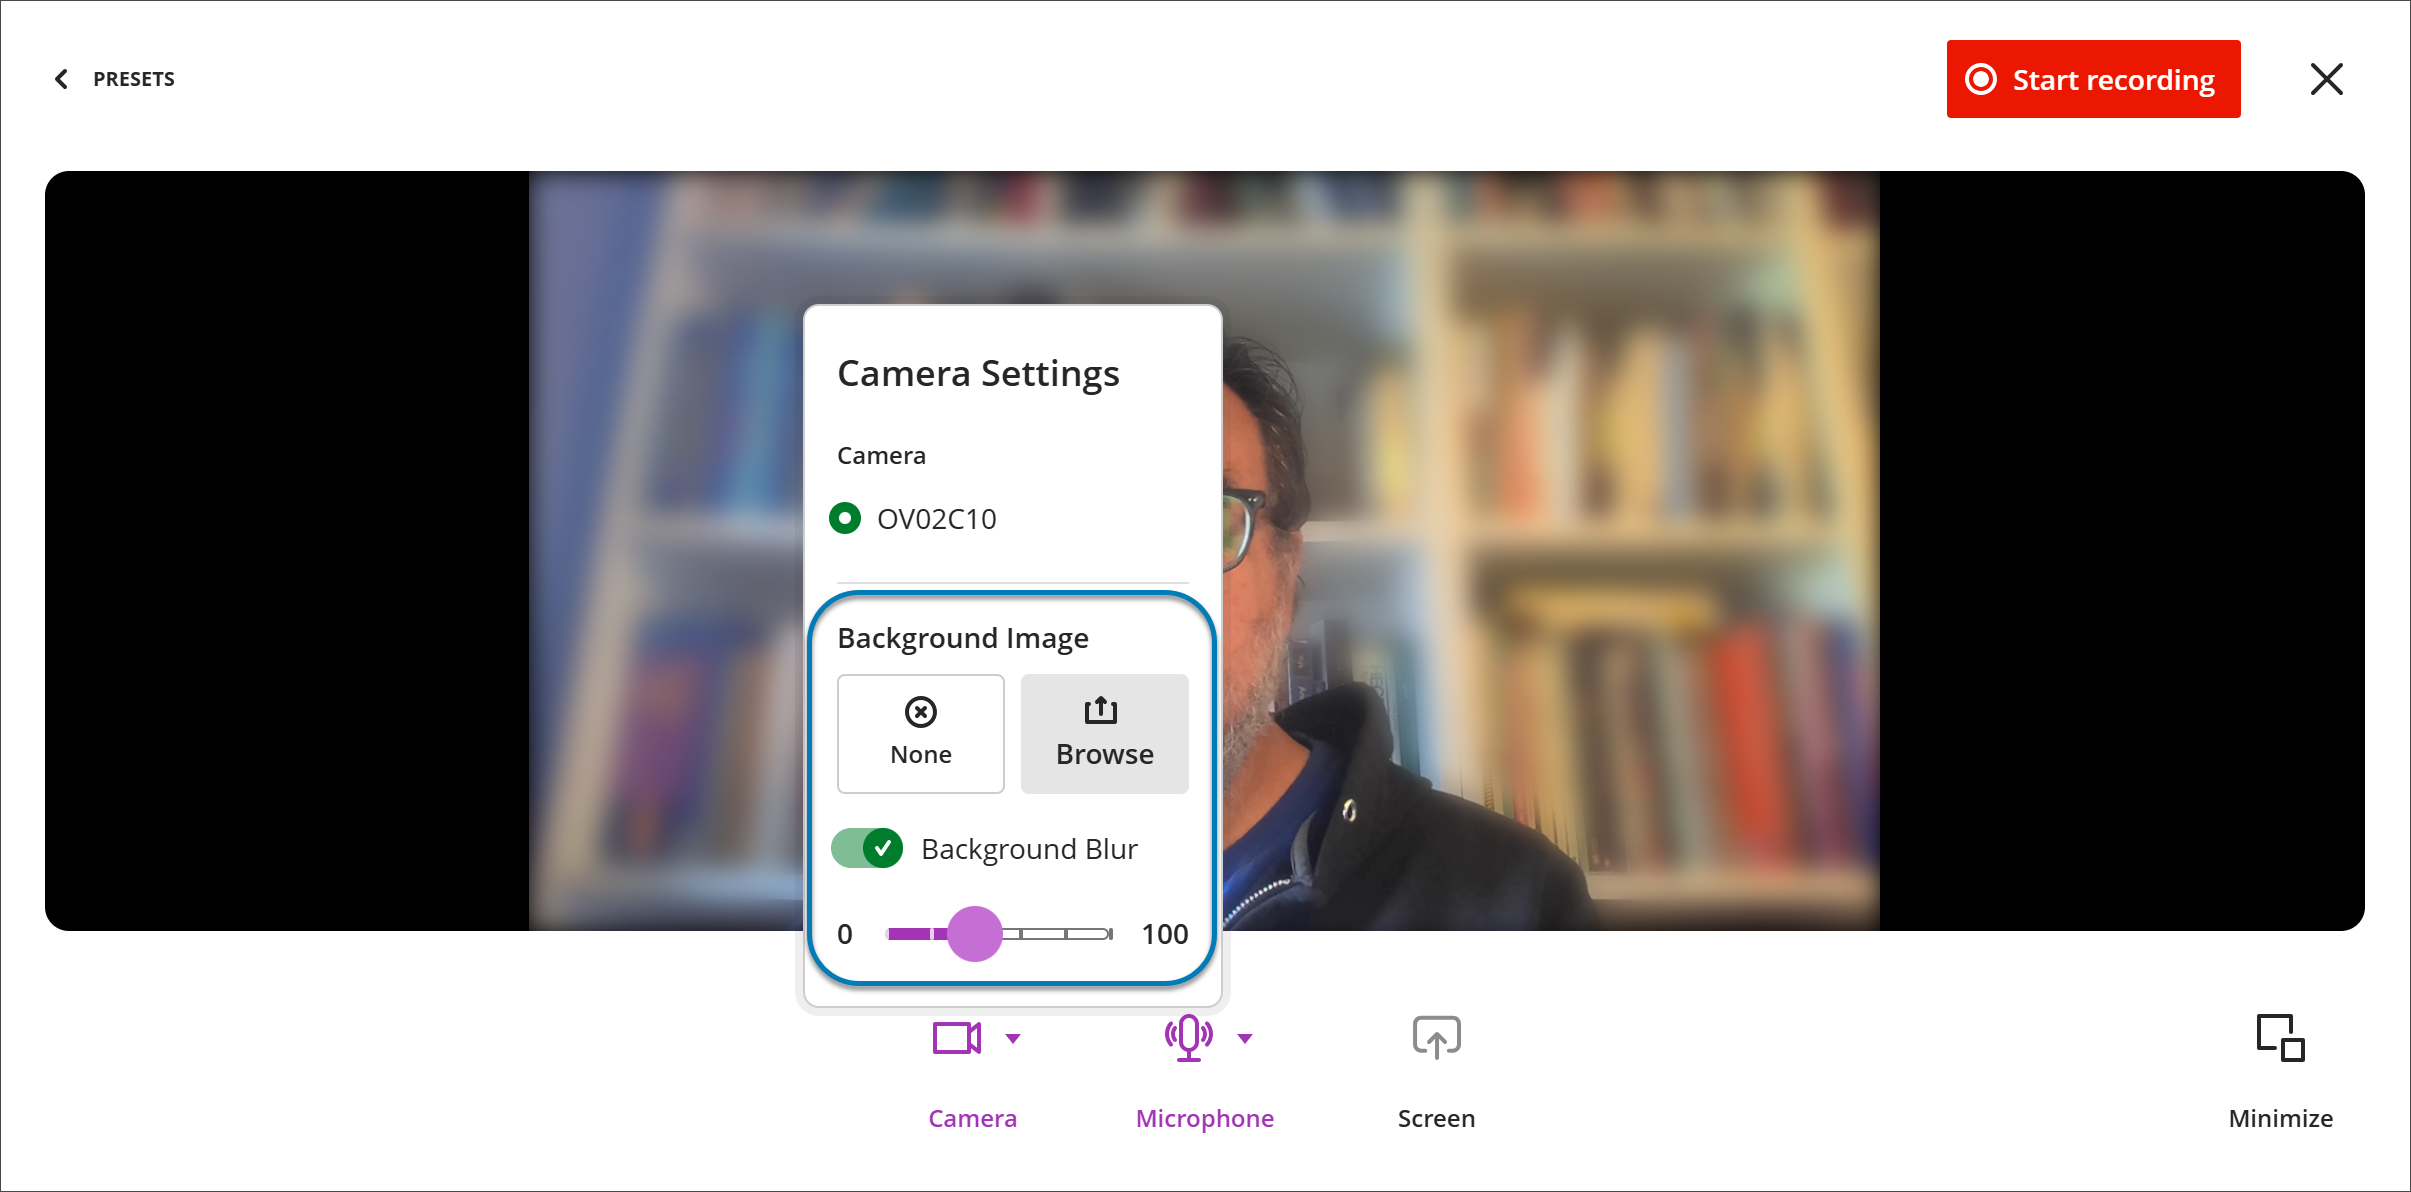
Blur your background. Turn on the background blur switch to soften your surroundings, similar to background blur in other video tools.
Use a background image. Upload an image from your device (such as JPEG or PNG). A real-time preview shows how it will look before you start recording.
When creating a recording, select Camera Settings and, under Background Images, select Background Blur or Browse to upload a background image.
You can use blur or a background image, but not both at once—selecting one replaces the other. Select None to return to your unmodified camera feed. You can change your background at any time before recording begins.
Record your screen and camera simultaneously
You can record your screen and camera at the same time in Video Studio. This lets you present your work in a more expressive and professional format – for example, recording yourself alongside a slideshow, a document, or other screen content.
When creating a new recording, select Screen & Camera from the recording options. Your camera appears as an inset overlay on top of your shared screen content. You can minimize, pause, resume, or restore the full camera view at any time during the recording.
This feature is available wherever Video Studio is supported. Screen and camera recording is also available in instructor feedback and flexible grading as part of Blackboard LMS, without requiring a separate Video Studio license.
Minimize Video Studio workflow
You can now minimize the camera view and Video Studio controls during a recording session. This update helps instructors and students focus on screen content while keeping the camera visible in a smaller overlay. The minimized view can be restored at any time, supporting flexible presentation styles.
When creating a recording, select Minimize at the bottom corner of the recording screen to minimize Video Studio workflow.
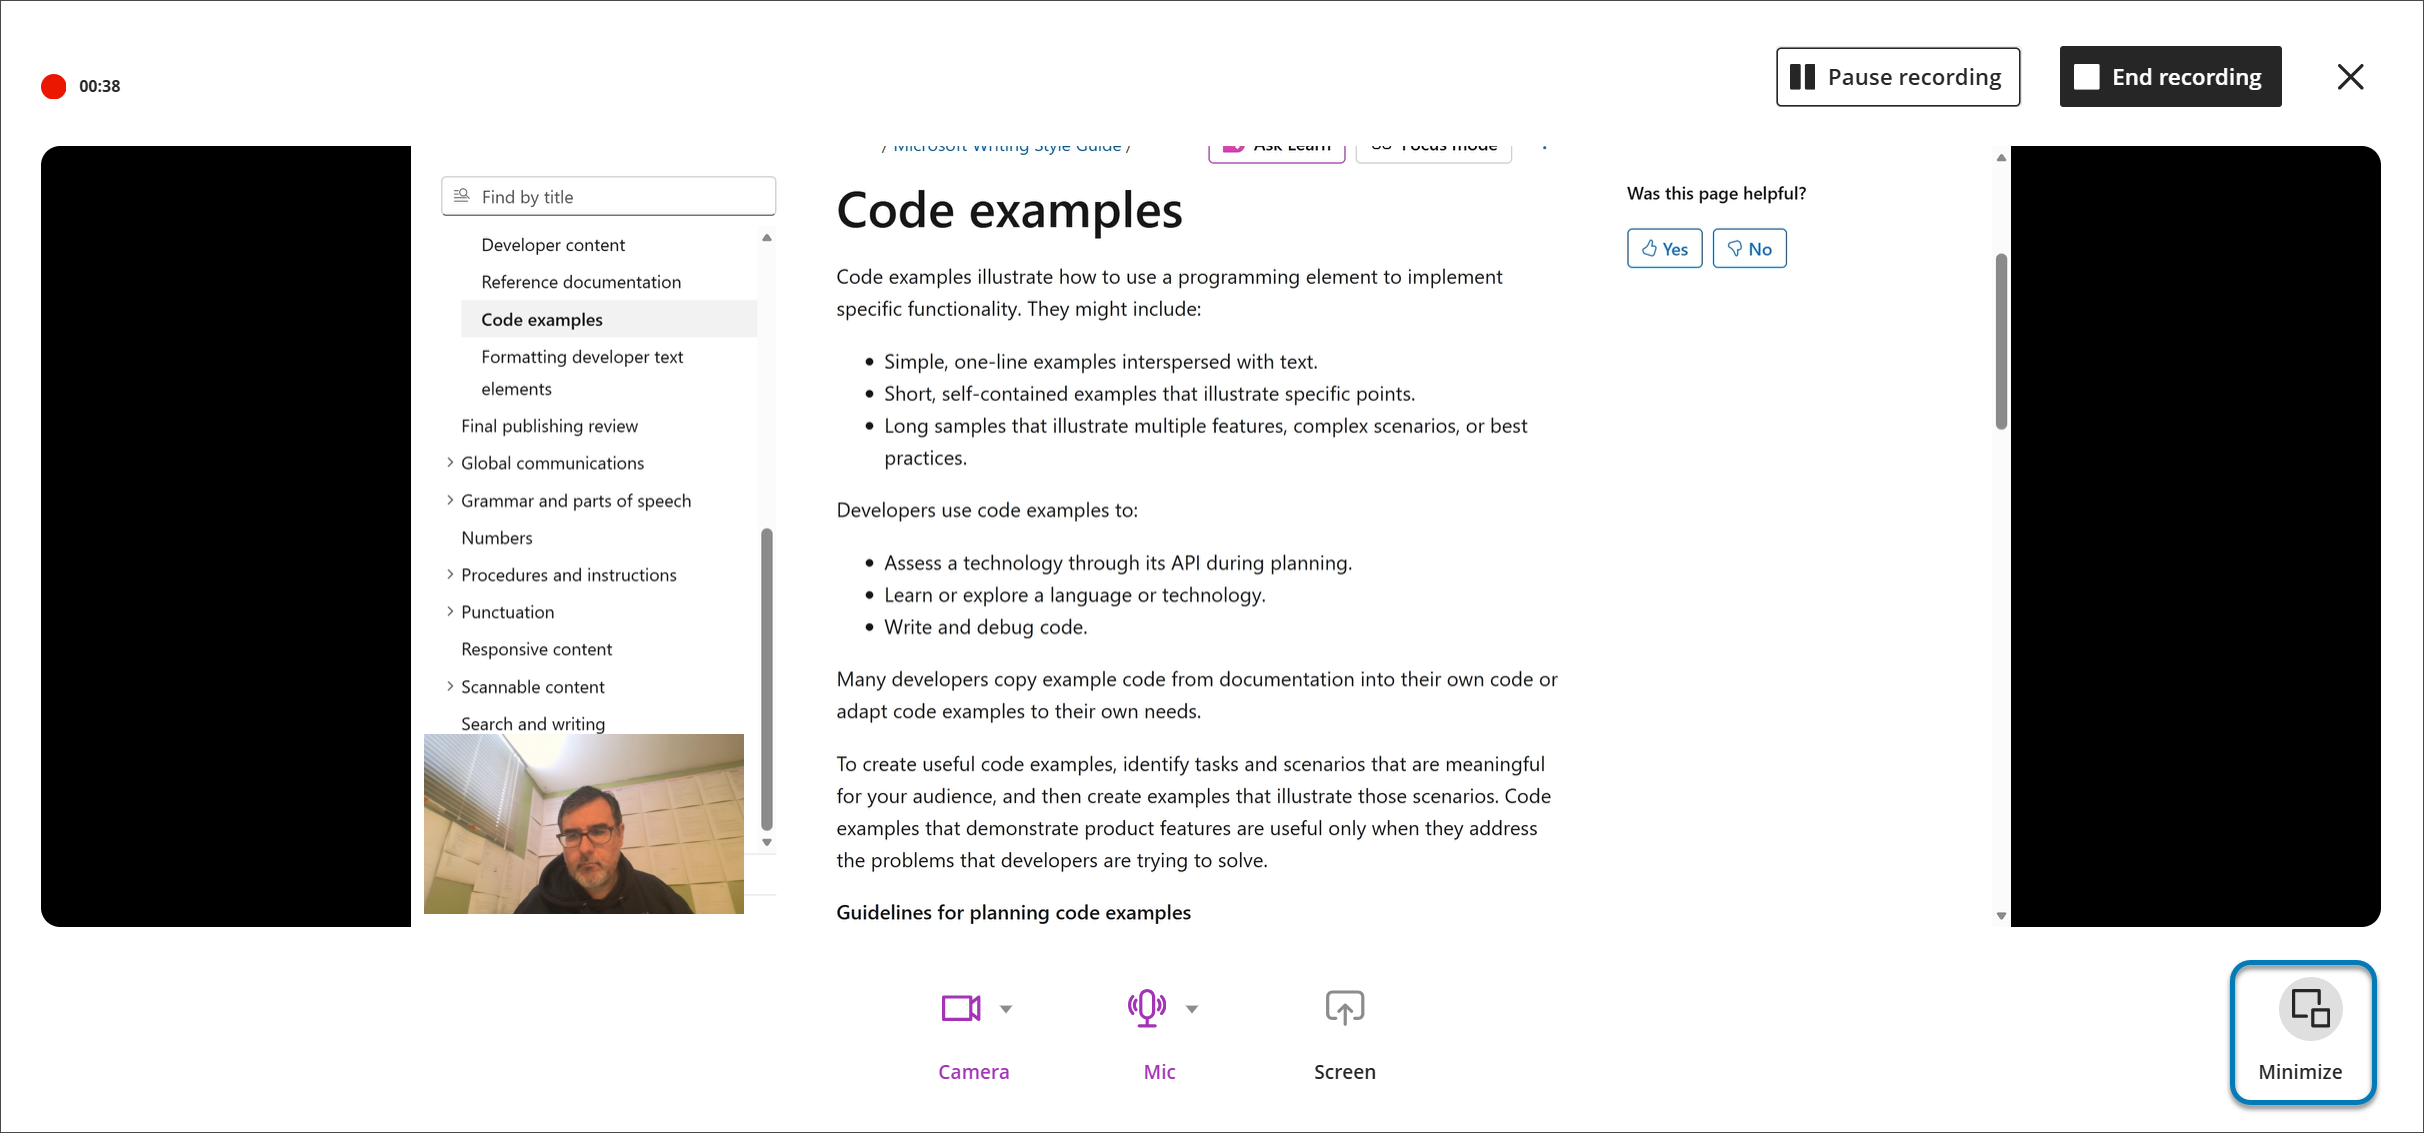
You can minimize the camera and controls while recording feedback or lectures. The camera appears as a small overlay, giving more options for presenting. You can pause, resume, or restore the full camera view during the recording. This workflow is available wherever Video Studio is supported.
Retry a failed video upload
If you upload a file in Video Studio and the upload fails, you can select Retry upload at the top right corner of the screen or Retry next to the Upload process bar.
Important
For administrators: These new video capabilities require a license for Video Studio. The videos created using Video Studio will not count towards your existing storage entitlement. The following existing privileges are used for the Video Studio solution:
Course/Organization (Content Areas) > Create Materials: To create videos. Includes all operations like save, finish, check Video upload Status. Not needed for playback.
Course/Organization (Content Areas) > Delete Materials: To delete videos.