January 2026 Release Notes (4000.6)
Release Information
Tip
For maintenance release build numbers and bug fixes, visit Maintenance Releases.
For release status and delays, visit Blackboard Status.
Instructional Design
Usability improvements for Document Block Layout
To improve usability and accessibility, we restructured the menu for document block layout. Previously, all options for changing the row, size, or position of a block were in a single dropdown list. Now, these options are organized by type of change (row, size, and position).
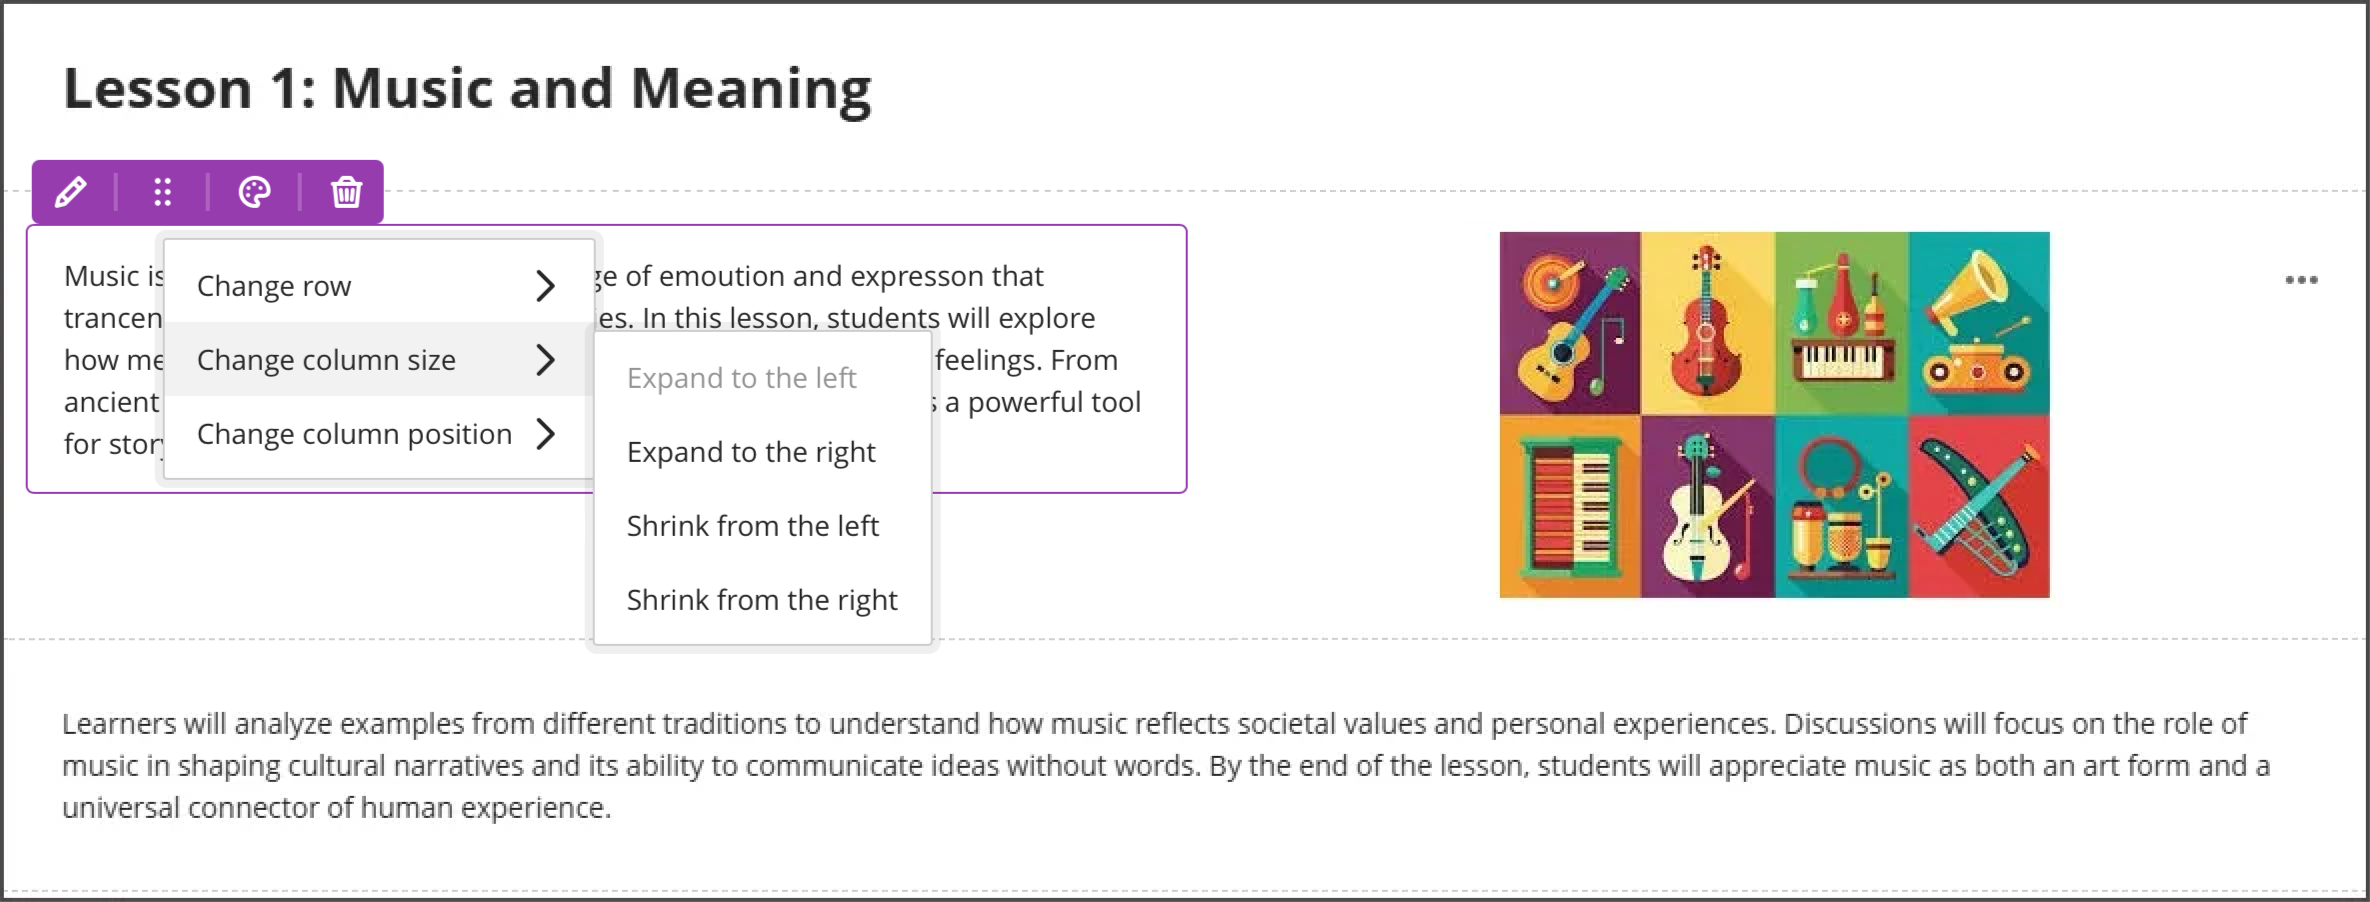
Selecting the edit icon for a block prompts a menu with three options: Change row, Change [block/column] size, and Change [block/column] position. Each of these options have a sub-menu, with the related actions.
Change row
Move to row above
Move to row below
New row above
Change [block/column] size
Expand to the left
Expand to the right
Shrink from the left
Shrink from the right
Change [block]column] position
Move to the left
Move to the right
Image 1: How document block styling options displayed before
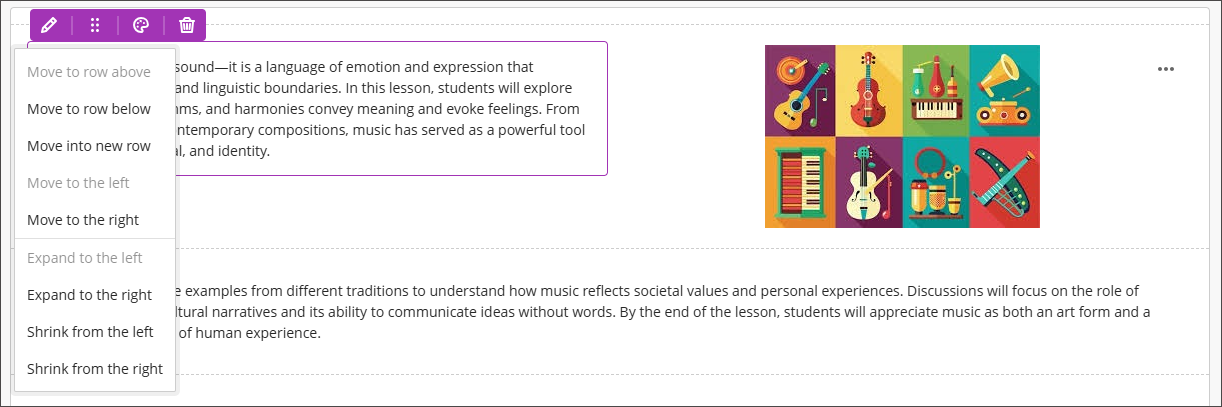
Image 2: How document block styling options display now
The following narrated video provides a visual and auditory representation of some of the information included on this page. For a detailed description of what is portrayed in the video, open the video on Vimeo.
Administrators
Availability: Available to all Ultra courses.
Activation: None needed.
Configuration: None needed.
Tests & Assignments
Expanded question options for true/false
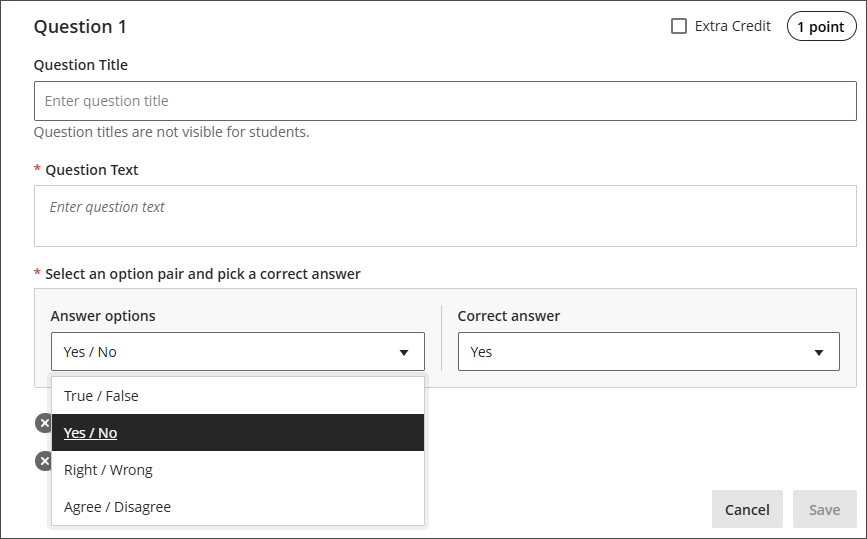
We expanded the display options for true/false questions to include:
True/False
Yes/No
Right/Wrong
Agree/Disagree
These additional answer options display when:
Instructors create or edit this question type when building a test or in a question bank
Students answer the question
Instructors grade the question
Students review their submission or graded question
Image 1: True/false questions now include additional options.
When converting courses, tests, or pools from Original to Ultra, questions with these display options convert to Ultra with the corresponding display option, Additionally, this enhancement includes improved keyboard navigation when creating true/false questions. We updated the styling of the answer selection for true/false questions to radio buttons.
Administrators
Availability: Available to all Ultra courses.
Activation: None needed.
Configuration: None needed.
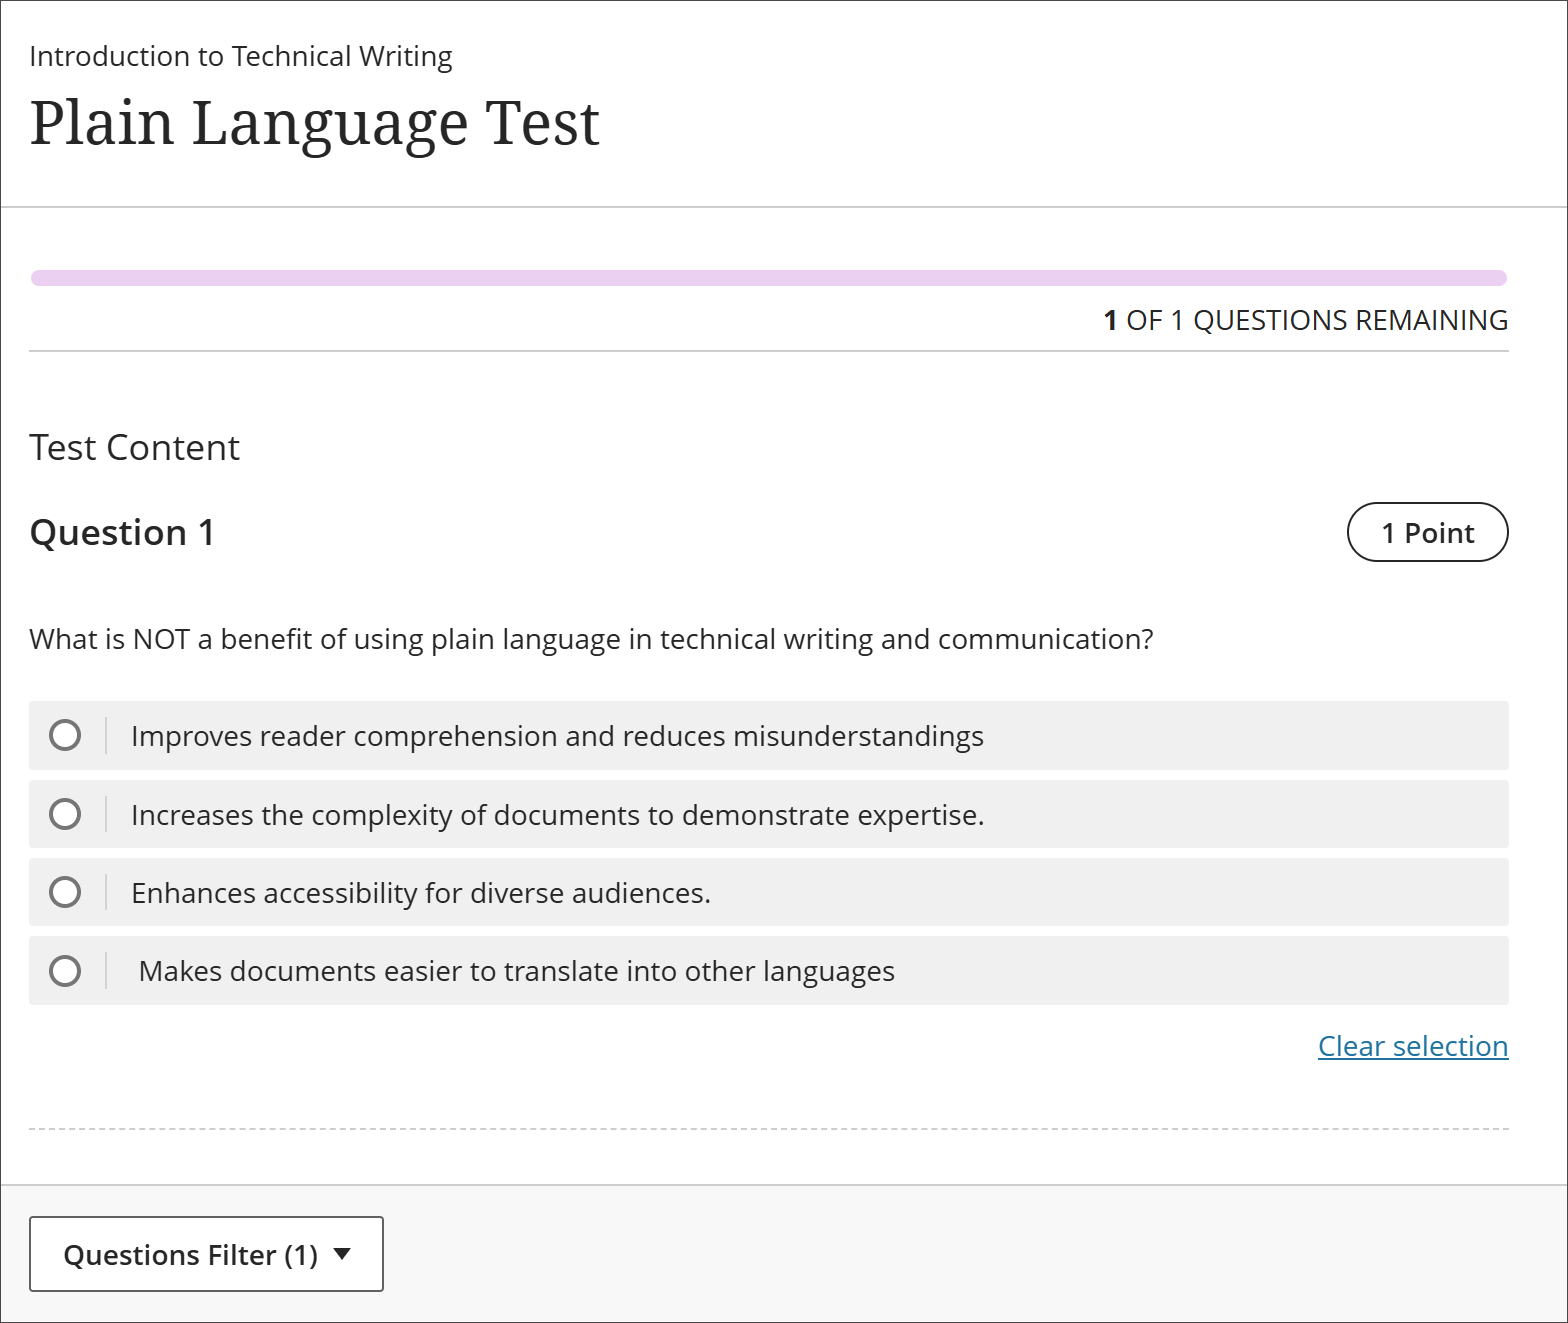
Enhanced multiple choice and multiple answer workflow
We updated question setup to provide a more intuitive experience, including updating the default answer options from three to four and improving controls for how students interact with questions. These changes support greater flexibility in assessment design and an improved experience for students.
Instructors
To reduce setup time when creating a multiple choice question, we changed the default number of answer options from three to four. Instructors can add or remove answer options.
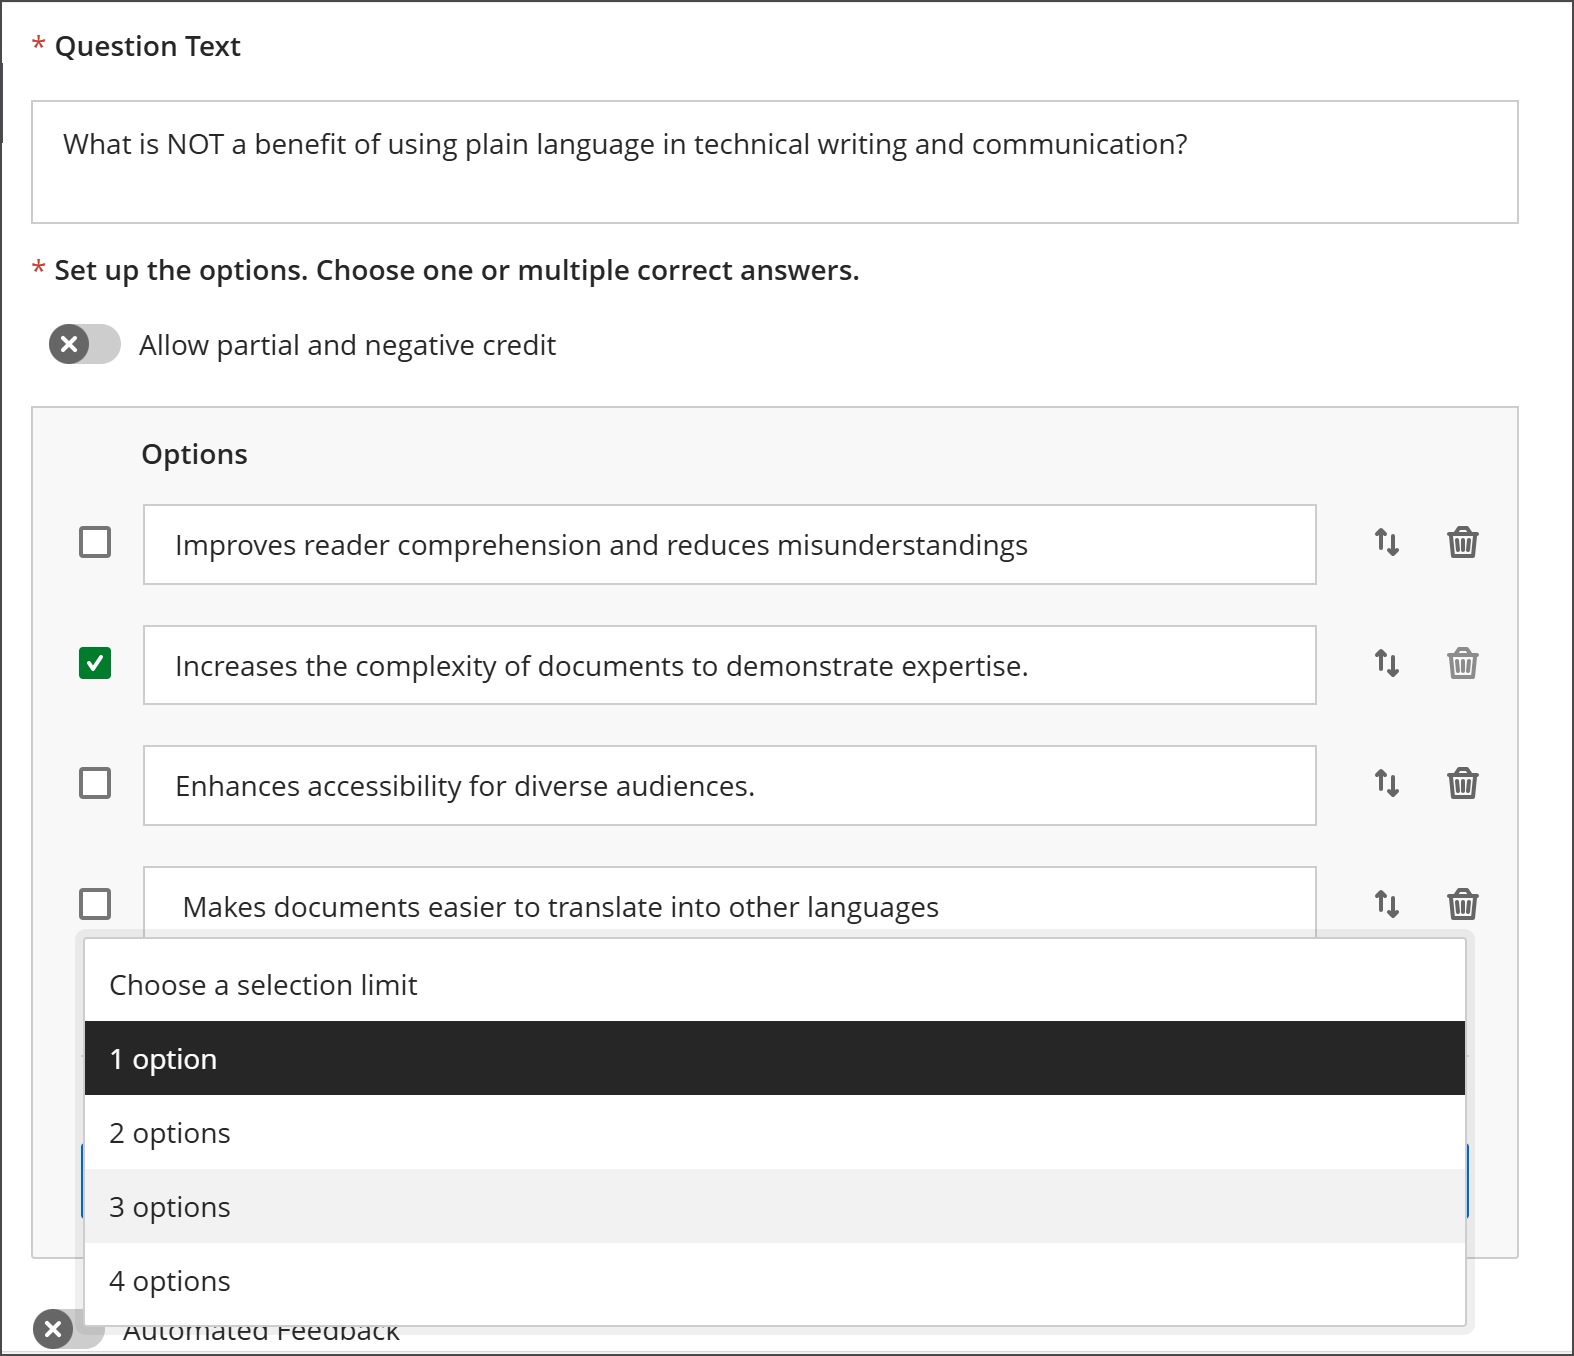
Instructors can now define the number of answer selections that a student can make for each multiple choice question. When the student takes the assessment, the system enforces the instructor’s selection limit.
The default is:
4 answer options
partial/negative credit is off (no additional changes made to partial/negative credit for this release)
students can select up to 4 answers
if additional answers are added, selection limit remains at 4
if answers are removed, instructor must select the selection limit
Note
No change was made to the number of answer options for existing questions (e.g., if a question had three an options, no additional answer option was added). The selection limit for existing questions is as follows:
If a question has 1 answer option, the selection is 1.
If a question has more than one answer option, the selection limit is 4. This mimics how the question performed prior to this update.
Image 1: Instructors can define the number of answer selections for each multiple choice question.
Students
For questions where students can select only one answer, the selection mechanism is radio buttons. For questions where students can select more than one answer, the selection mechanism is checkboxes.
Image 2: The student's selection mechanism of checkbox or radio button is determined by how many answers they can select.
Administrators
Availability: Available to all Ultra courses.
Activation: None needed.
Configuration: None needed.
Improved performance for large multiple choice or multiple answer tests
We've optimized rendering of MCQ and True/False questions, significantly improving load times for large tests. For example, a 200-question test now loads in ~5 seconds, down from ~25 seconds, which equates to an 80% improvement.
Administrators
Availability: Available to all Ultra courses.
Activation: None needed.
Configuration: None needed.
Gradebook
Improved Gradebook download option
In a previous release, we introduced an option for whether to include or exclude hidden items in the Gradebook download. In this release, we improved this functionality by making this option available only if the Gradebook has hidden items.
Administrators
Availability: Available to all Ultra courses.
Activation: None needed.
Configuration: None needed.
Learner Progression & Personalized Experience
View activity log for Automations
Note
This feature will be available in test/stage environments on Tuesday, 23 December 2025.
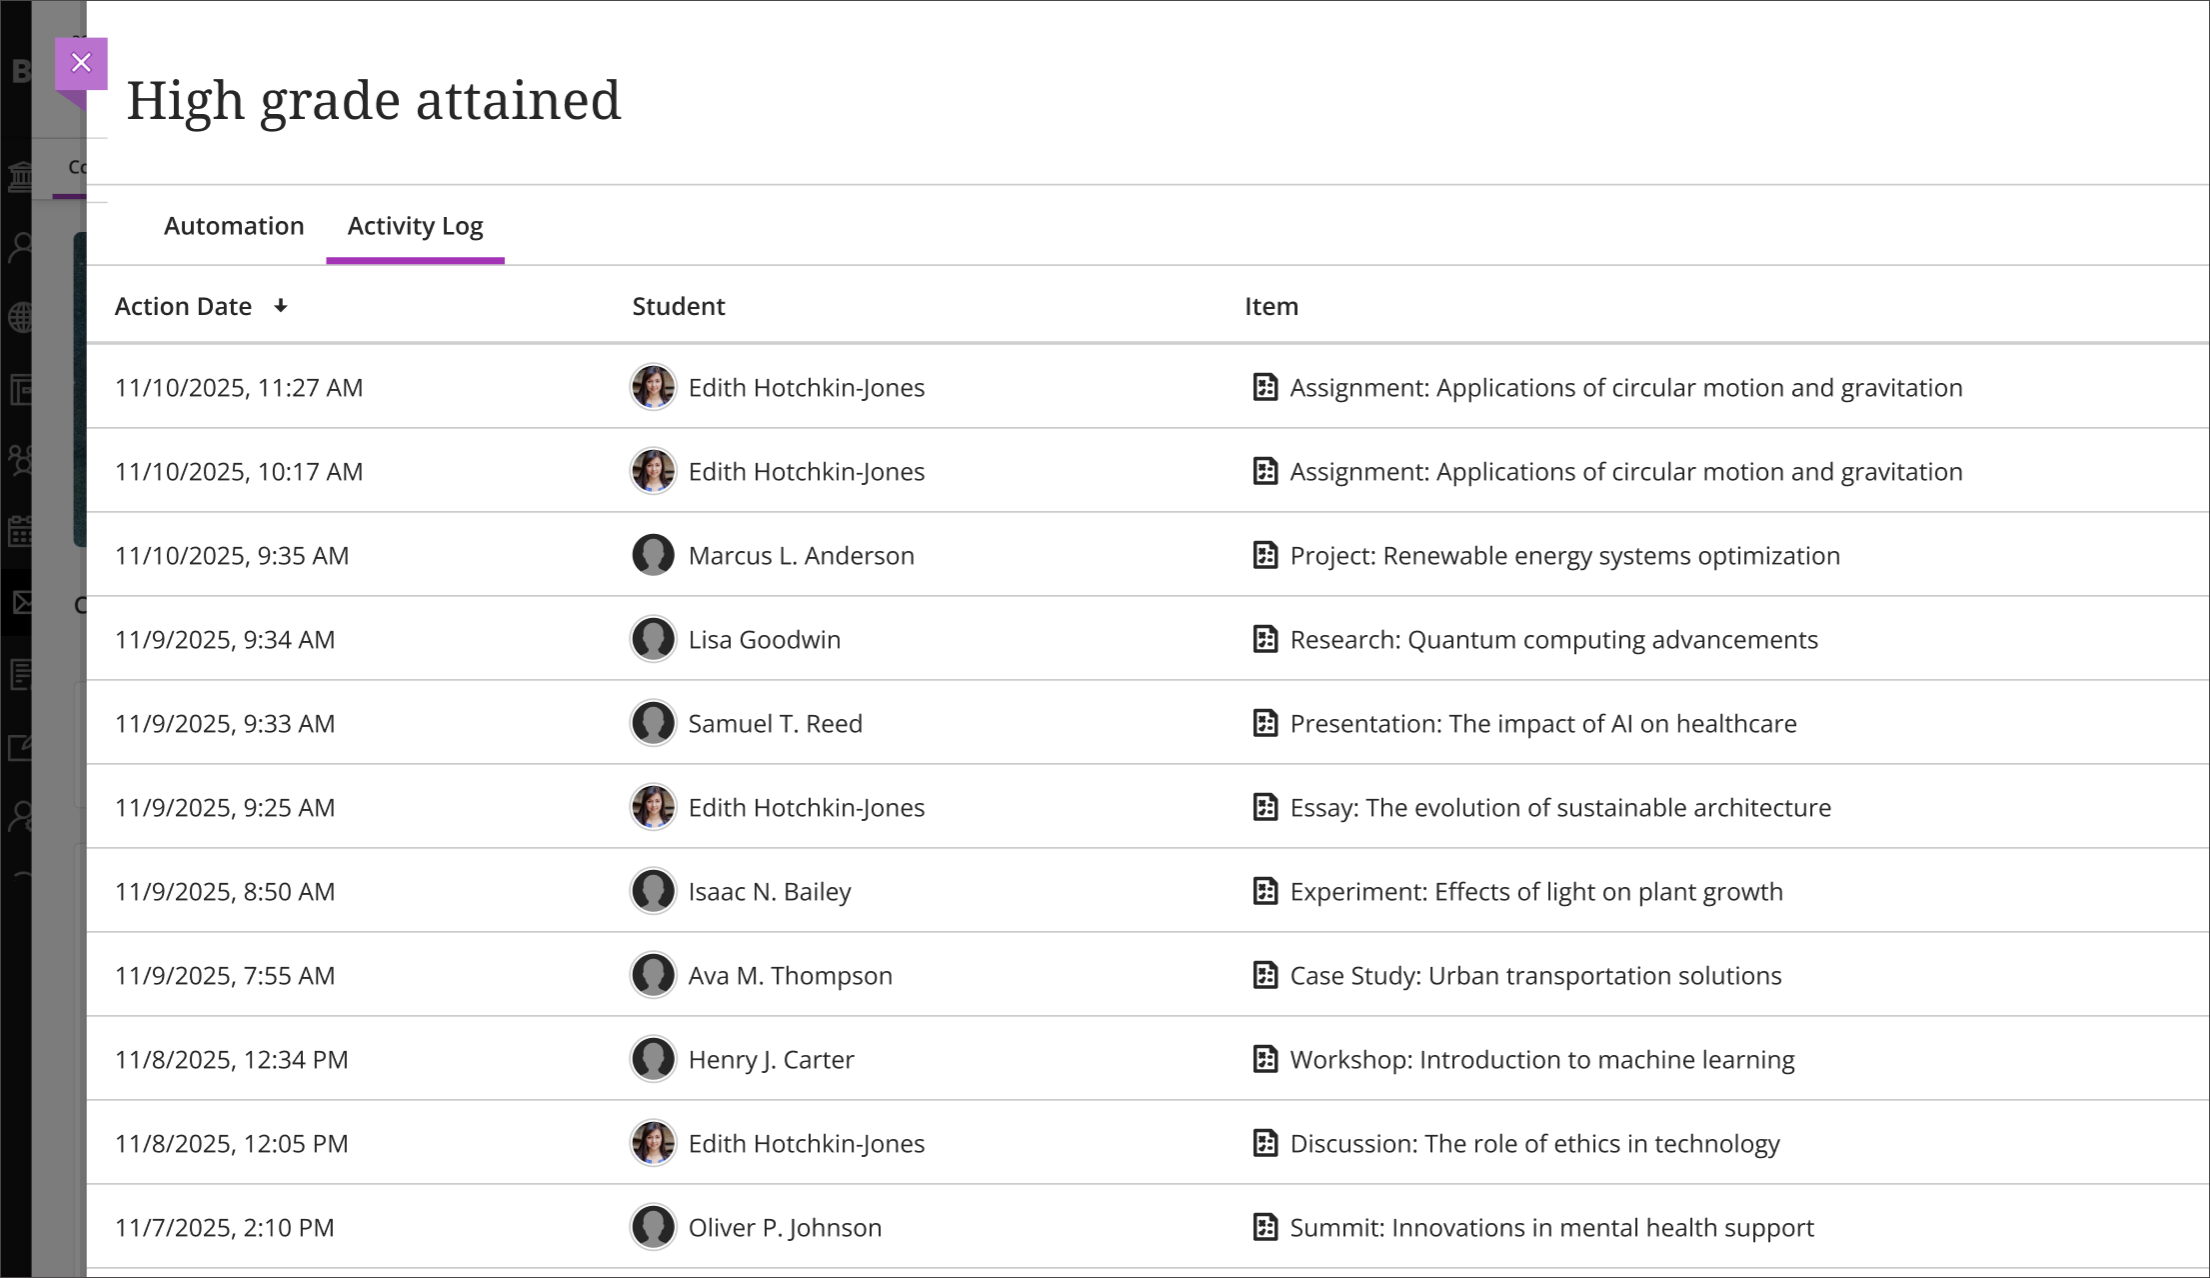
Instructors can now access an activity log for each automation in their courses. The activity log lists the action date and time the automation was triggered and identifies student and item that triggered it. This feature gives all instructors in the course visibility into when automations occur, and which students receive automated messages.
Instructors
To view the activity log for an automation, instructors select View Automations from Course Assistants on the Course Content page, then select an automation. They then select the Activity Log tab.
Image 1: The activity log shows when an automation was triggered, by which student, and by which item.
Administrators
Availability: Available to all Ultra courses.
Activation: None needed.
Configuration: Automations are off by default. Administrators can turn them on by going to the Administrator Panel. Select Configure in The Ultra Experience is Here! module. Select Automations to turn automations on or off.
Users need the following privileges to work with automations:
Course/Organization > Automations > Add allows users to create new automations.
Course/Organization > Automations > Delete allows users to delete automations.
Course/Organization > Automations > Edit allows users to edit existing automations.
Course/Organization > Automations > View allows users to view existing course automations.
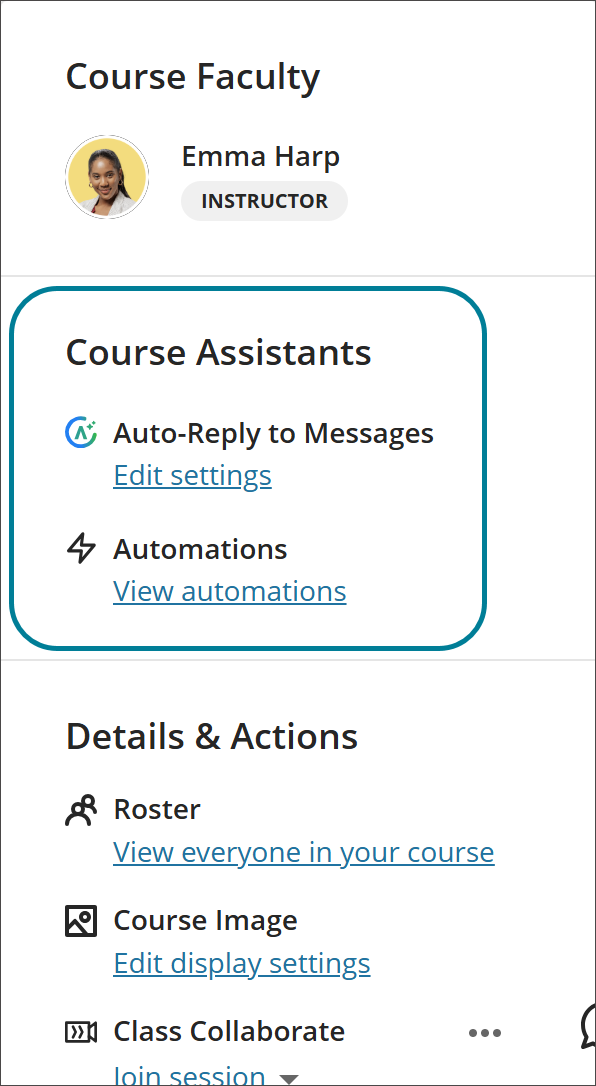
Improved Automation placement on Course Content page
The heading for the section on the Course Content page that includes automations is now Course Assistants instead of Virtual Assistant, and the AVA logo has been removed. This change clarifies that automations do not require an AVA license and helps prevent confusion for admins and instructors.
Image1: Automations appear in the Course Assistants section on the Course Content page.
Administrators
Availability: Available to all Ultra courses.
Activation: None needed.
Configuration: None needed.
Blackboard Core
Navigate courses and tools faster with refreshed user interface
We’re introducing a refreshed Blackboard interface designed to make teaching and learning more intuitive and efficient. These updates help you find information faster, reduce clicks, and simplify tasks such as managing courses, grading, and configuring settings.
The changes reflect extensive feedback from instructors, administrators, and students and aim to:
Use screen space more effectively
Reduce navigation errors, such as accidental exits
Improve performance and page load times
Provide clearer context and orientation
Minimize motion for smoother navigation
Changes include:
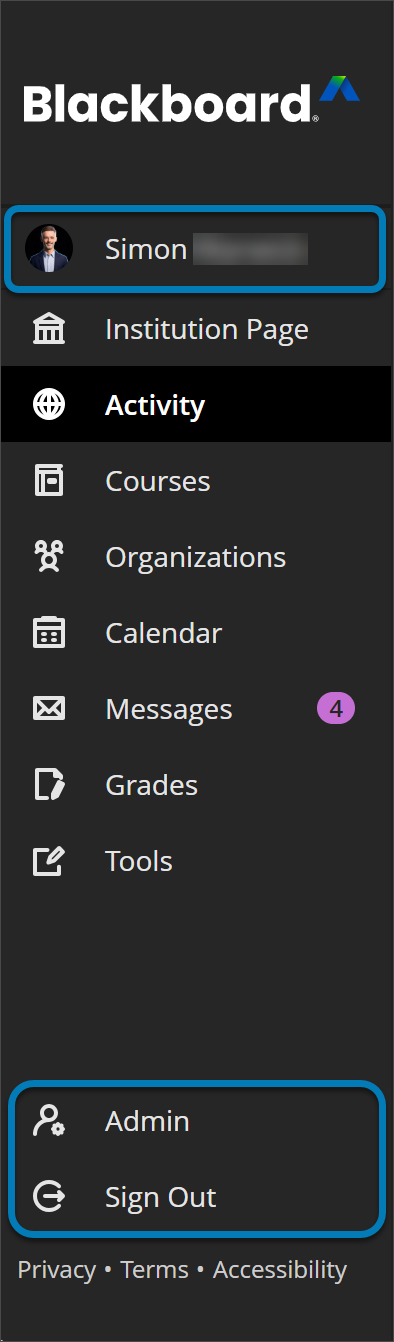
Refreshed Base Navigation
Cleaner layout for clear access to main navigation tabs with less clutter.
User profile now appears at the top of the navigation, complete with profile image for easier customization.
Admin and Sign Out options are moved to the bottom of the panel, separating them from other actions for clarity.
Administrators can now access base navigation directly from the administrator panel, streamlining workflow transitions.
Image 1: The refreshed Base Navigation menu moves Profile to the top of the menu. Admin and Sign Out are moved to the bottom of the panel. The cleaner layout improves clarity for users.
Course Panels Become Full-Screen Course Pages
Courses now open in full-screen mode to maximize horizontal space and reduce clutter. This update applies to top-level panels such as Course Content Homepage, Calendar, Announcements, Discussions, Gradebook, Analytics, Groups, and Achievements. Secondary panels will update in future releases.
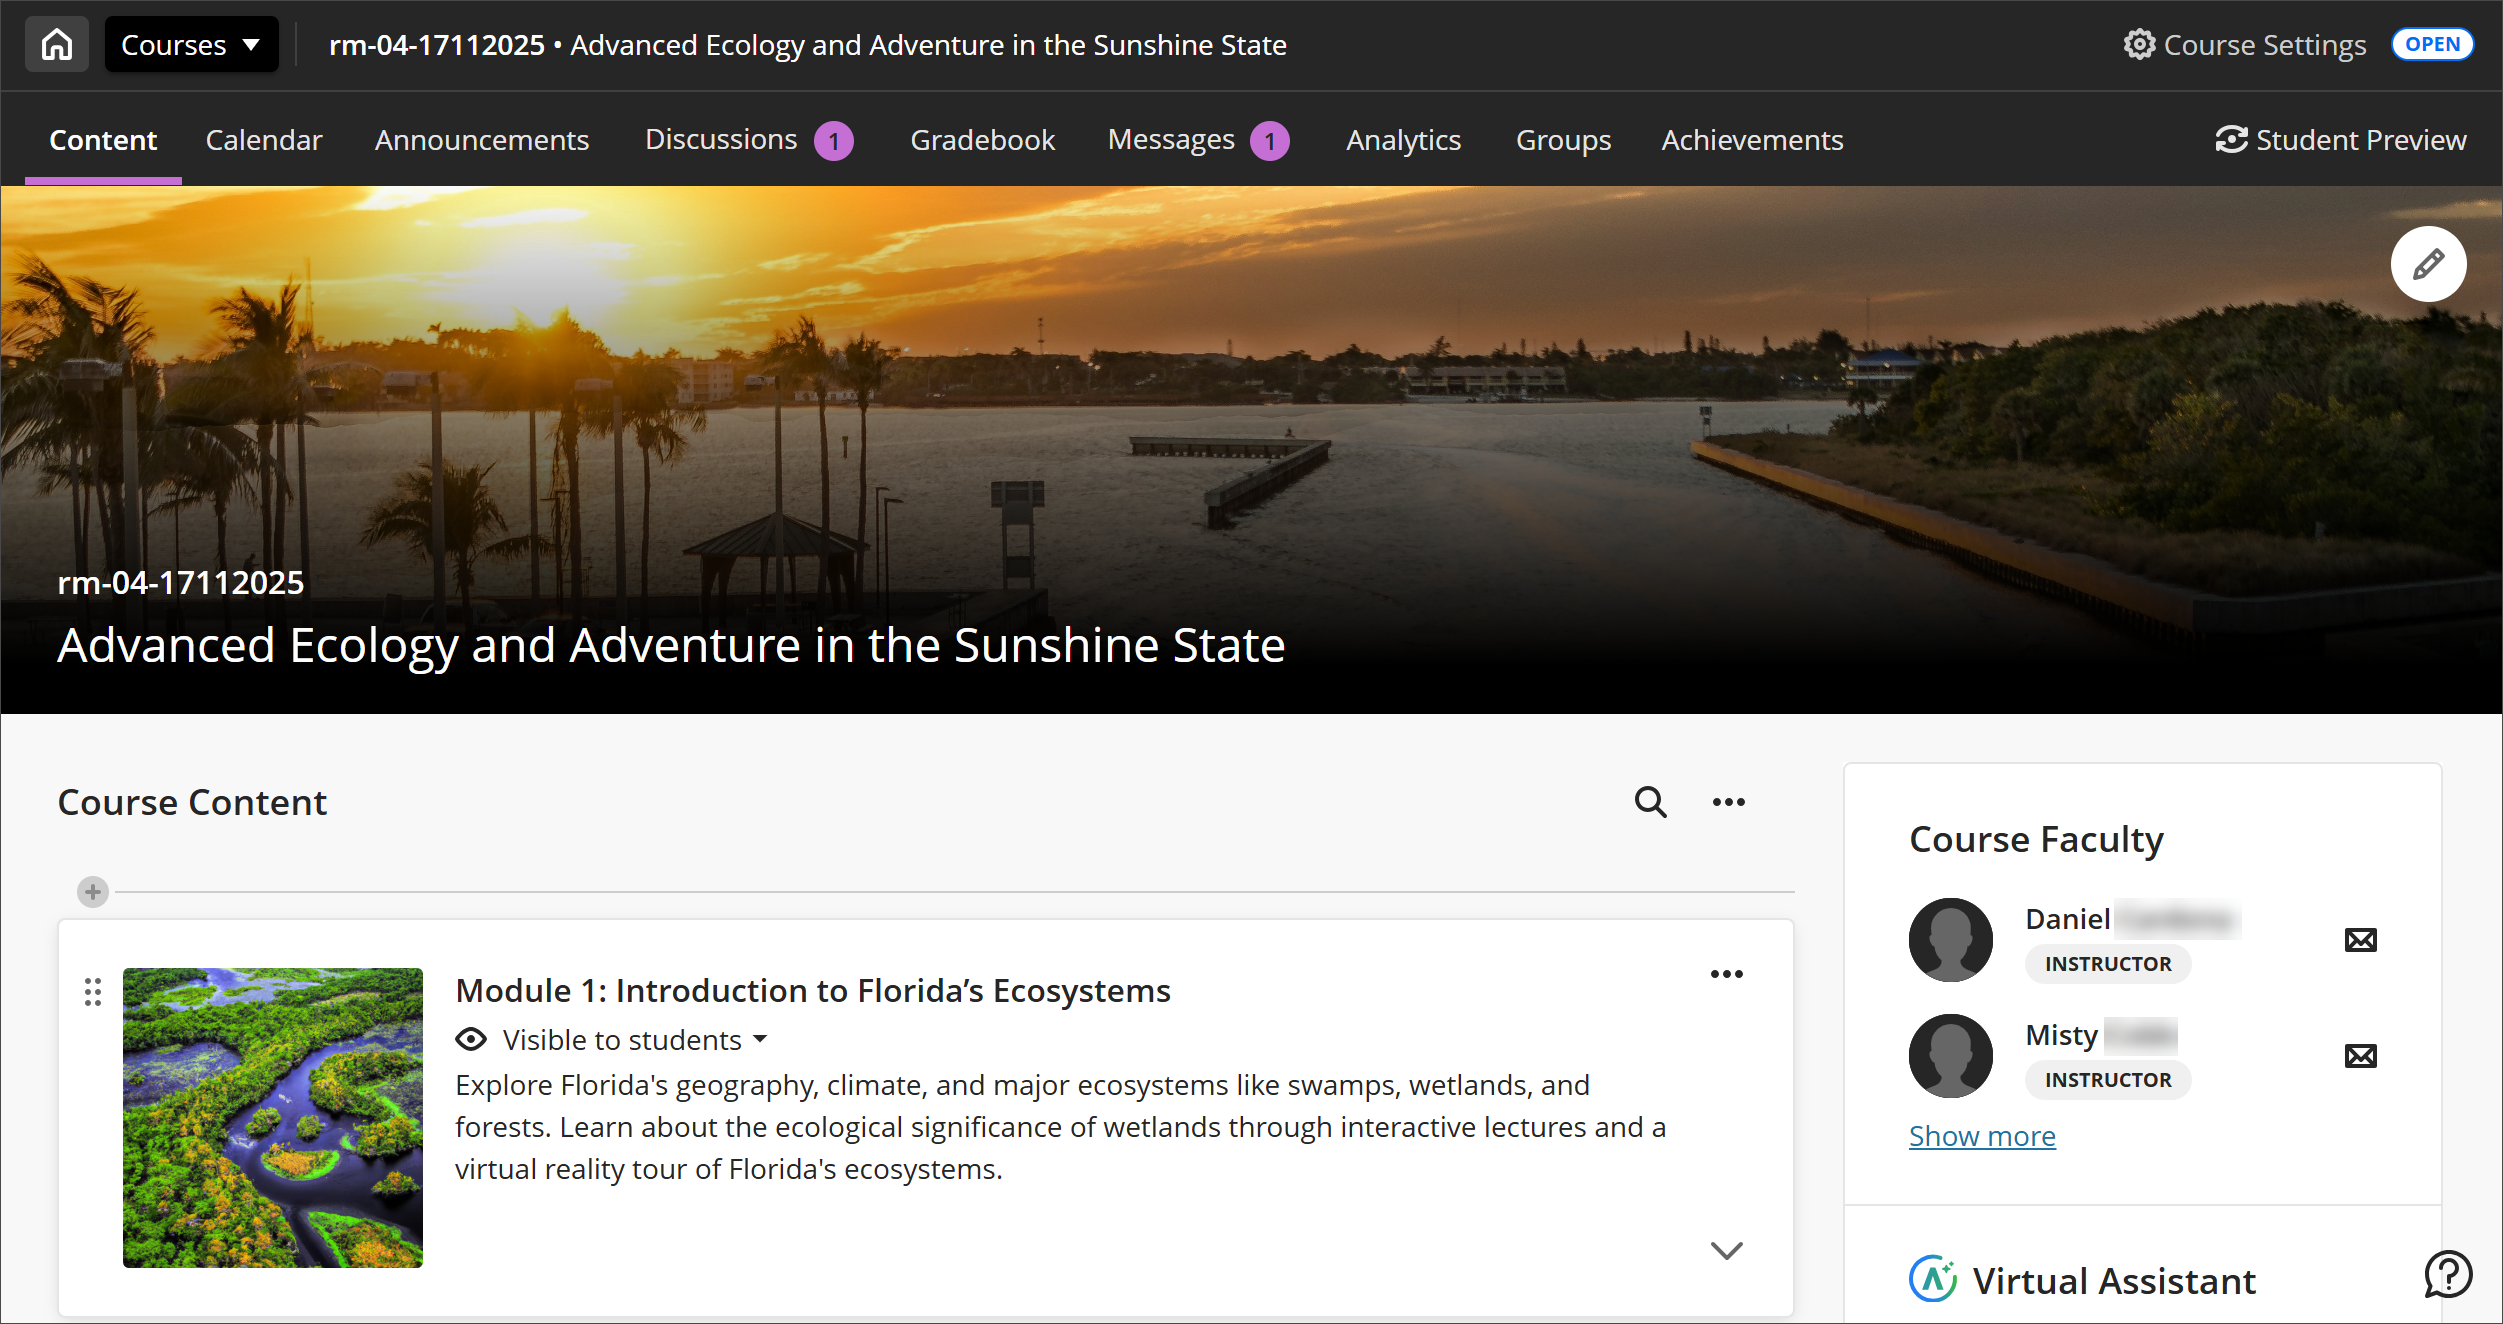
Image 2: The refreshed user interface in courses includes full-screen course pages and improvements to enhance the amount of screen space for users to engage with their course.
Home Button Replaces Exit
The “X” to exit a course is replaced with a Home button that returns you to your institution’s landing page (Activity Stream, Institution page, or Courses page). The “X” remains for lower-level panels like learning modules for now.
Course ID and Title in the Header Bar
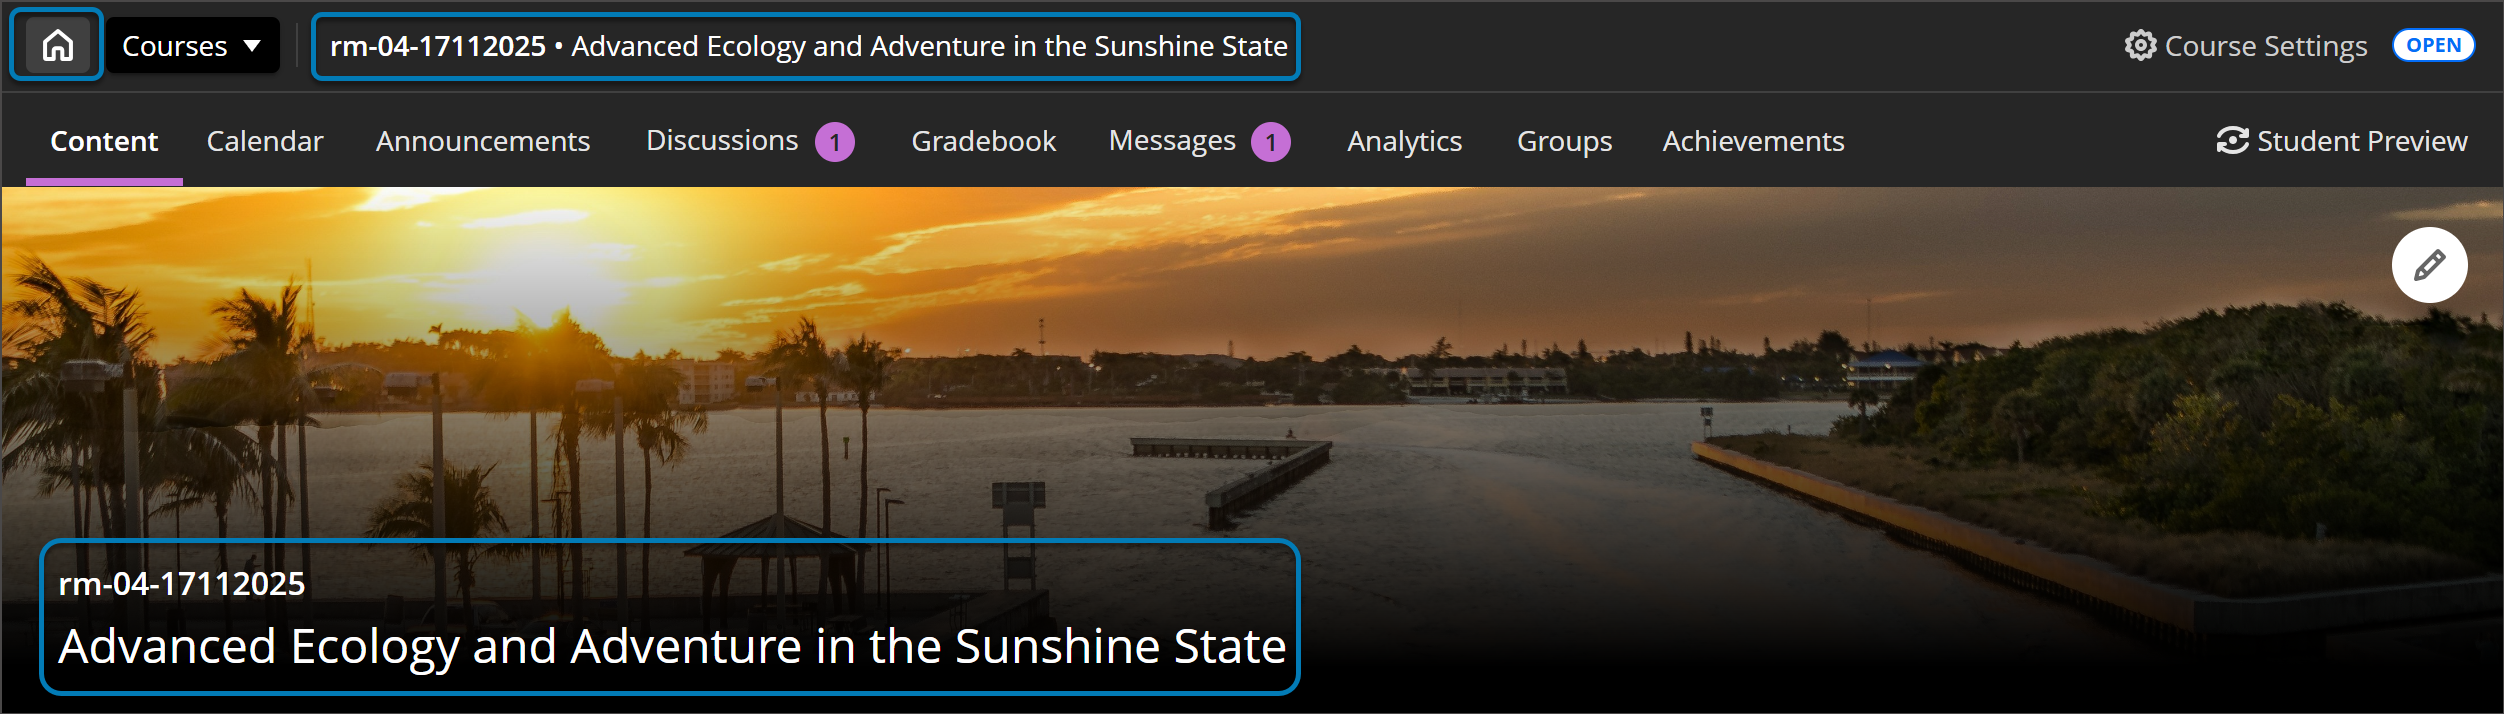
The header now displays the course ID and title for better context. Breadcrumbs will be added in a future update to improve navigation further.
System navigation changes affect how the course ID and course title appear within the course experience. You can set and update these display options as part of the brand workflow, choosing how the course title and ID are shown.
Image 3: The Course menu has been moved further to the top of the screen to make better use of screen space for users. Additionally, the menu reflects an institution’s branding, using colors and styles from your theme settings.
Full-Width Banner
The course banner spans the full width of the screen with the course ID and title on a darker background for better clarity and accessibility. To improve accessibility, we recommend that your banner image not include text.
If a course doesn’t have a selected banner, a placeholder image will appear at the top. When using brands, this image will adopt a hue of the brand color you set, ensuring visual consistency across all courses.
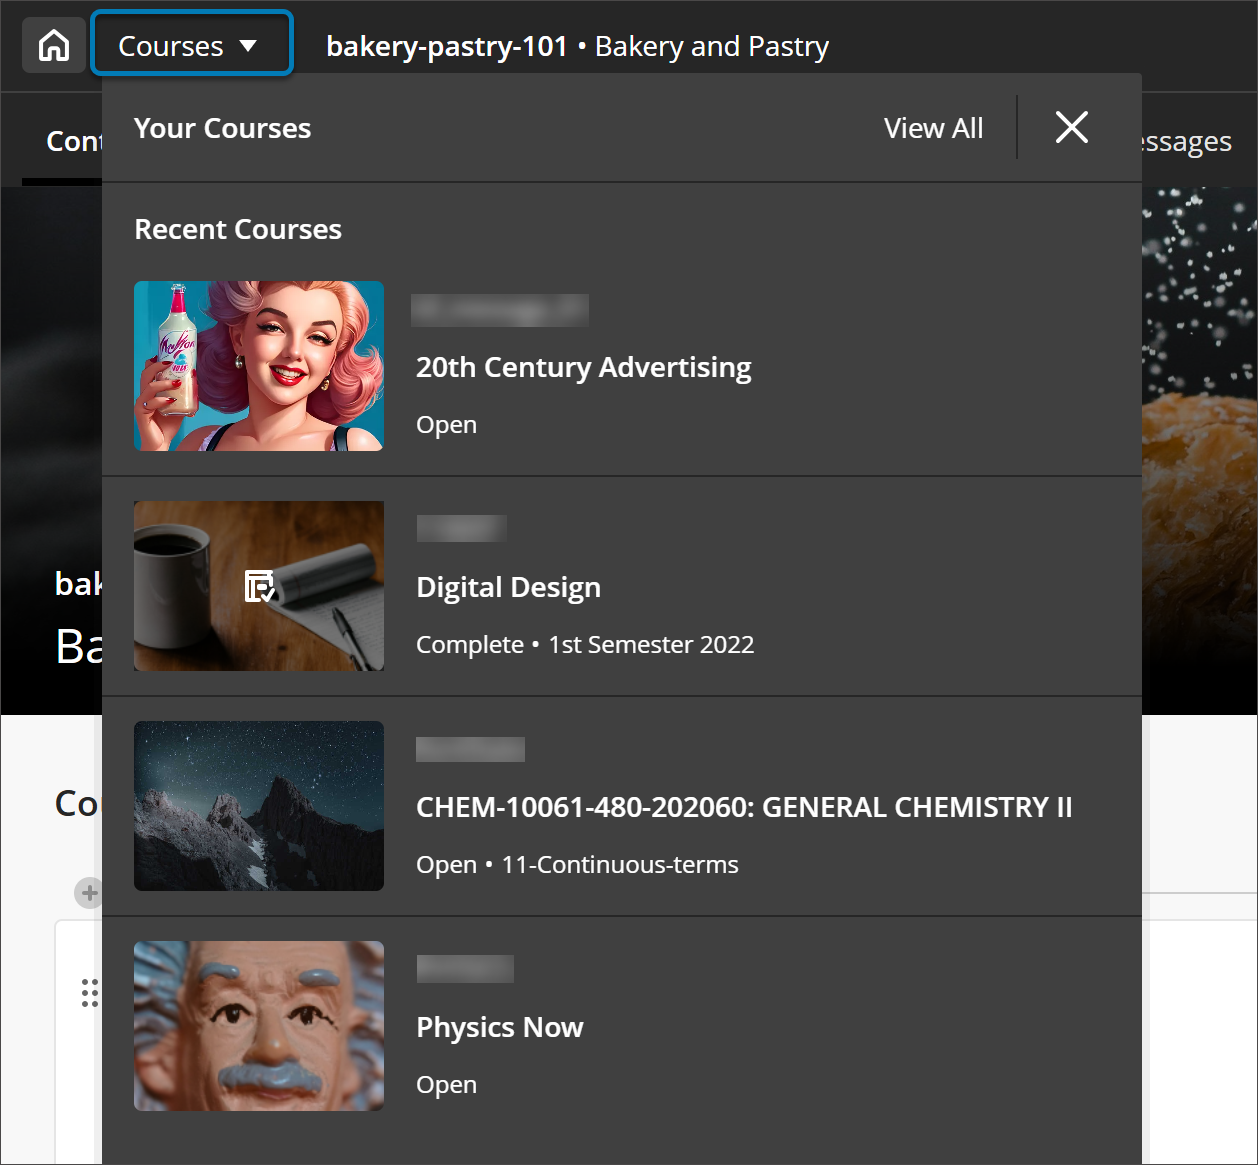
Course Switcher
Users can quickly jump between their four most recent courses or go to the full Courses page. More enhancements are planned based on ongoing feedback.
Image 4: The new course switcher lets users move between the four most recent courses.
The following narrated video provides a visual and auditory representation of some of the information included on this page. For a detailed description of what is portrayed in the video, open the video on Vimeo.
Administrators
Availability: Available for all Ultra courses.
Activation: None needed.
Configuration: None needed.
Integrations
Granular Control of Achievements for Ultra via Institutional Hierarchy
Administrators can now manage the Achievements feature in Ultra Courses at specific levels of the Institutional Hierarchy. Previously, feature access was only controlled via system-level Feature Flags, which applied globally and offered limited flexibility for institutions with complex governance needs. This update provides more control and flexibility to manage Achievements within your institution. Read about creating and managing nodes in Institutional Hierarchy on the Blackboard Help Center.
Achievements for Ultra is now treated as a configurable tool that administrators can manage at the Institutional Hierarchy node level using the familiar Manage Tools interface. The existing Feature Flag remains temporarily, creating a shared control model:
When the Feature Flag is ON, the feature is visible in the Admin Tool and Institutional Hierarchy, with ON/OFF toggle and lock options. Administrators can adjust availability for specific IH nodes.
When the Feature Flag is OFF, the feature does not appear in the Admin Tool and Institutional Hierarchy.
If the Feature Flag is later removed, the feature remains fully manageable via Institutional Hierarchy, ensuring long-term governance without global flags.
This shared control model supports safe testing and gradual rollout while transitioning from Feature Flags to Institutional Hierarchy-based governance.
Administrators
Availability: Available to all Ultra courses.
Activation: None needed.
Configuration: None needed.
Grades Journey: Validate grades before submission, approval, or extract
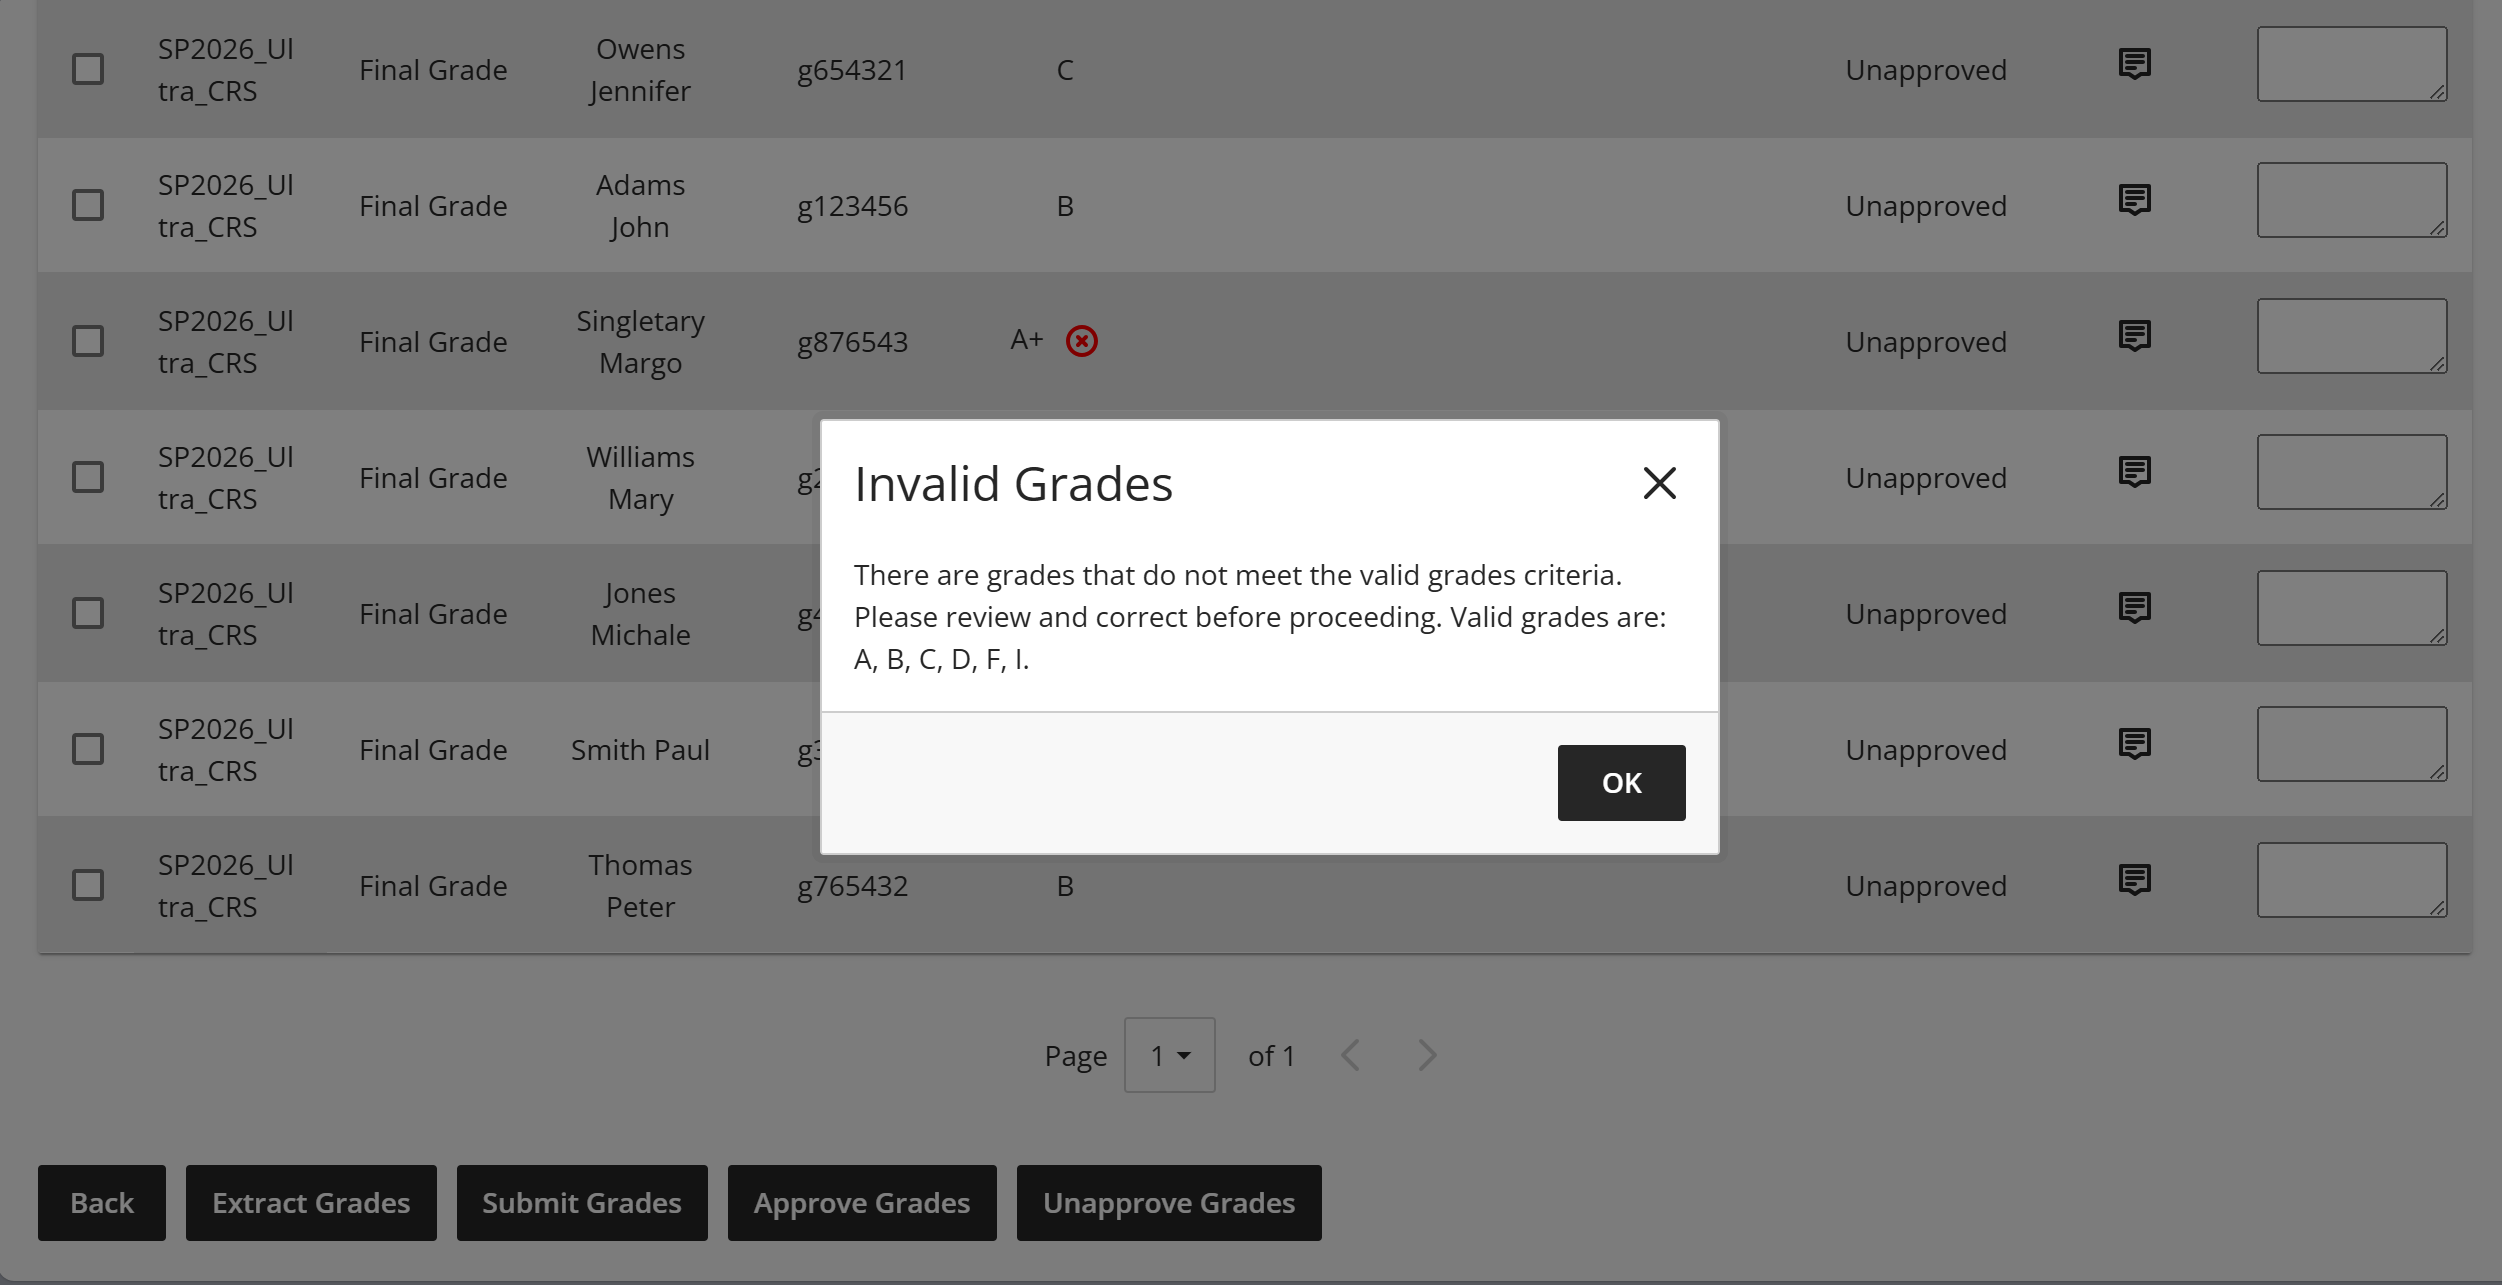
Graders now see a red X in the Current Grade column when a grade is invalid. If they try to submit, approve, or extract invalid grades, a message appears explaining that some grades are invalid and lists the valid options. This update makes it clear to graders when invalid grades are entered for students and prevents invalid grades from being submitted, approved, or extracted.
Instructors
Image 1: A red X now appears when the current grade is an invalid grade.
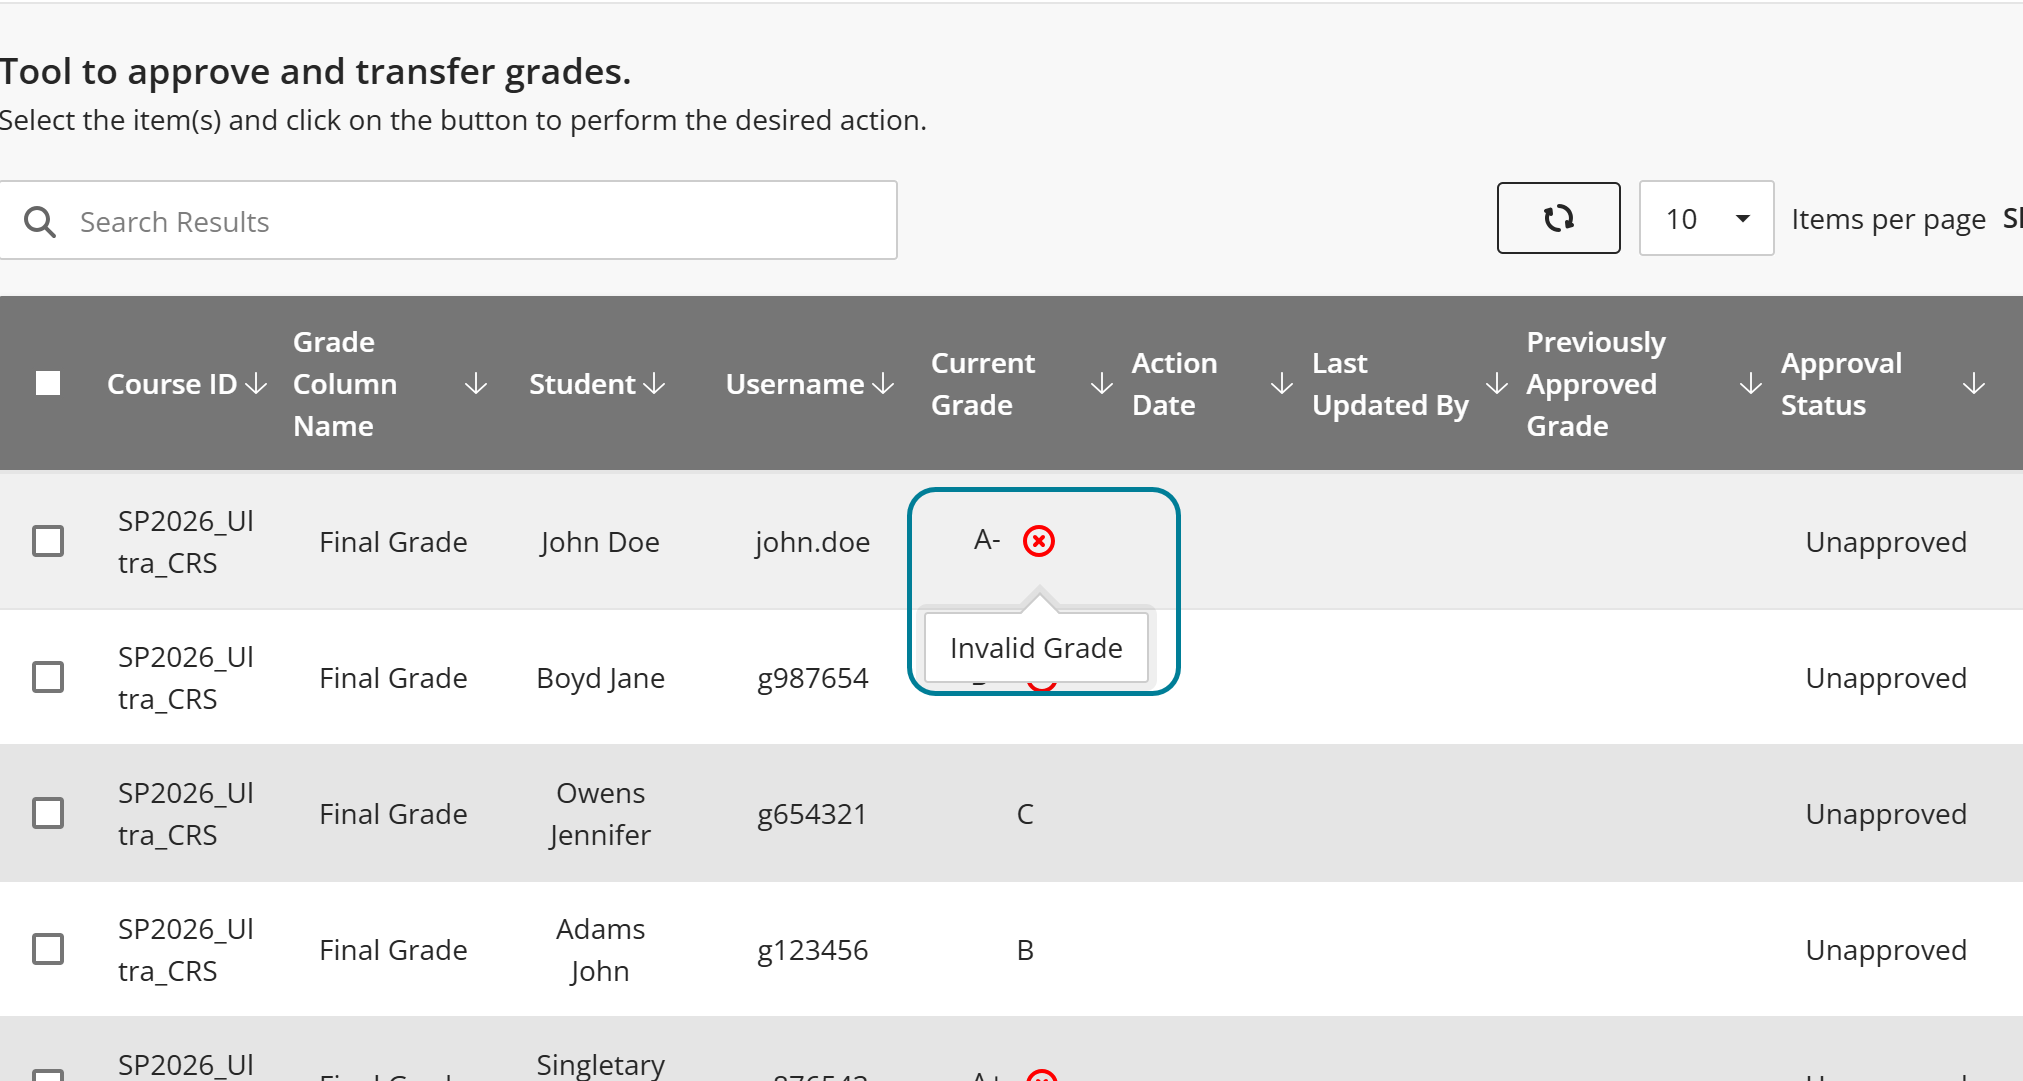
Image 2: A window appears if the grader tries to submit, approve, or extract invalid grades that lists the valid grade values.
Administrators
Availability: Available to all Original and Ultra courses.
Activation: This feature requires a Grades Journey license.
Configuration: This feature is off by default. From the Admin Panel, choose Platform Extensions and edit the Grade Export v2 settings. Select Configure for the Approval Workflow. Select Validate Grades in the Grade Approval and Transfer Settings section.
Grades Journey: Prevent manual extraction of unapproved grades
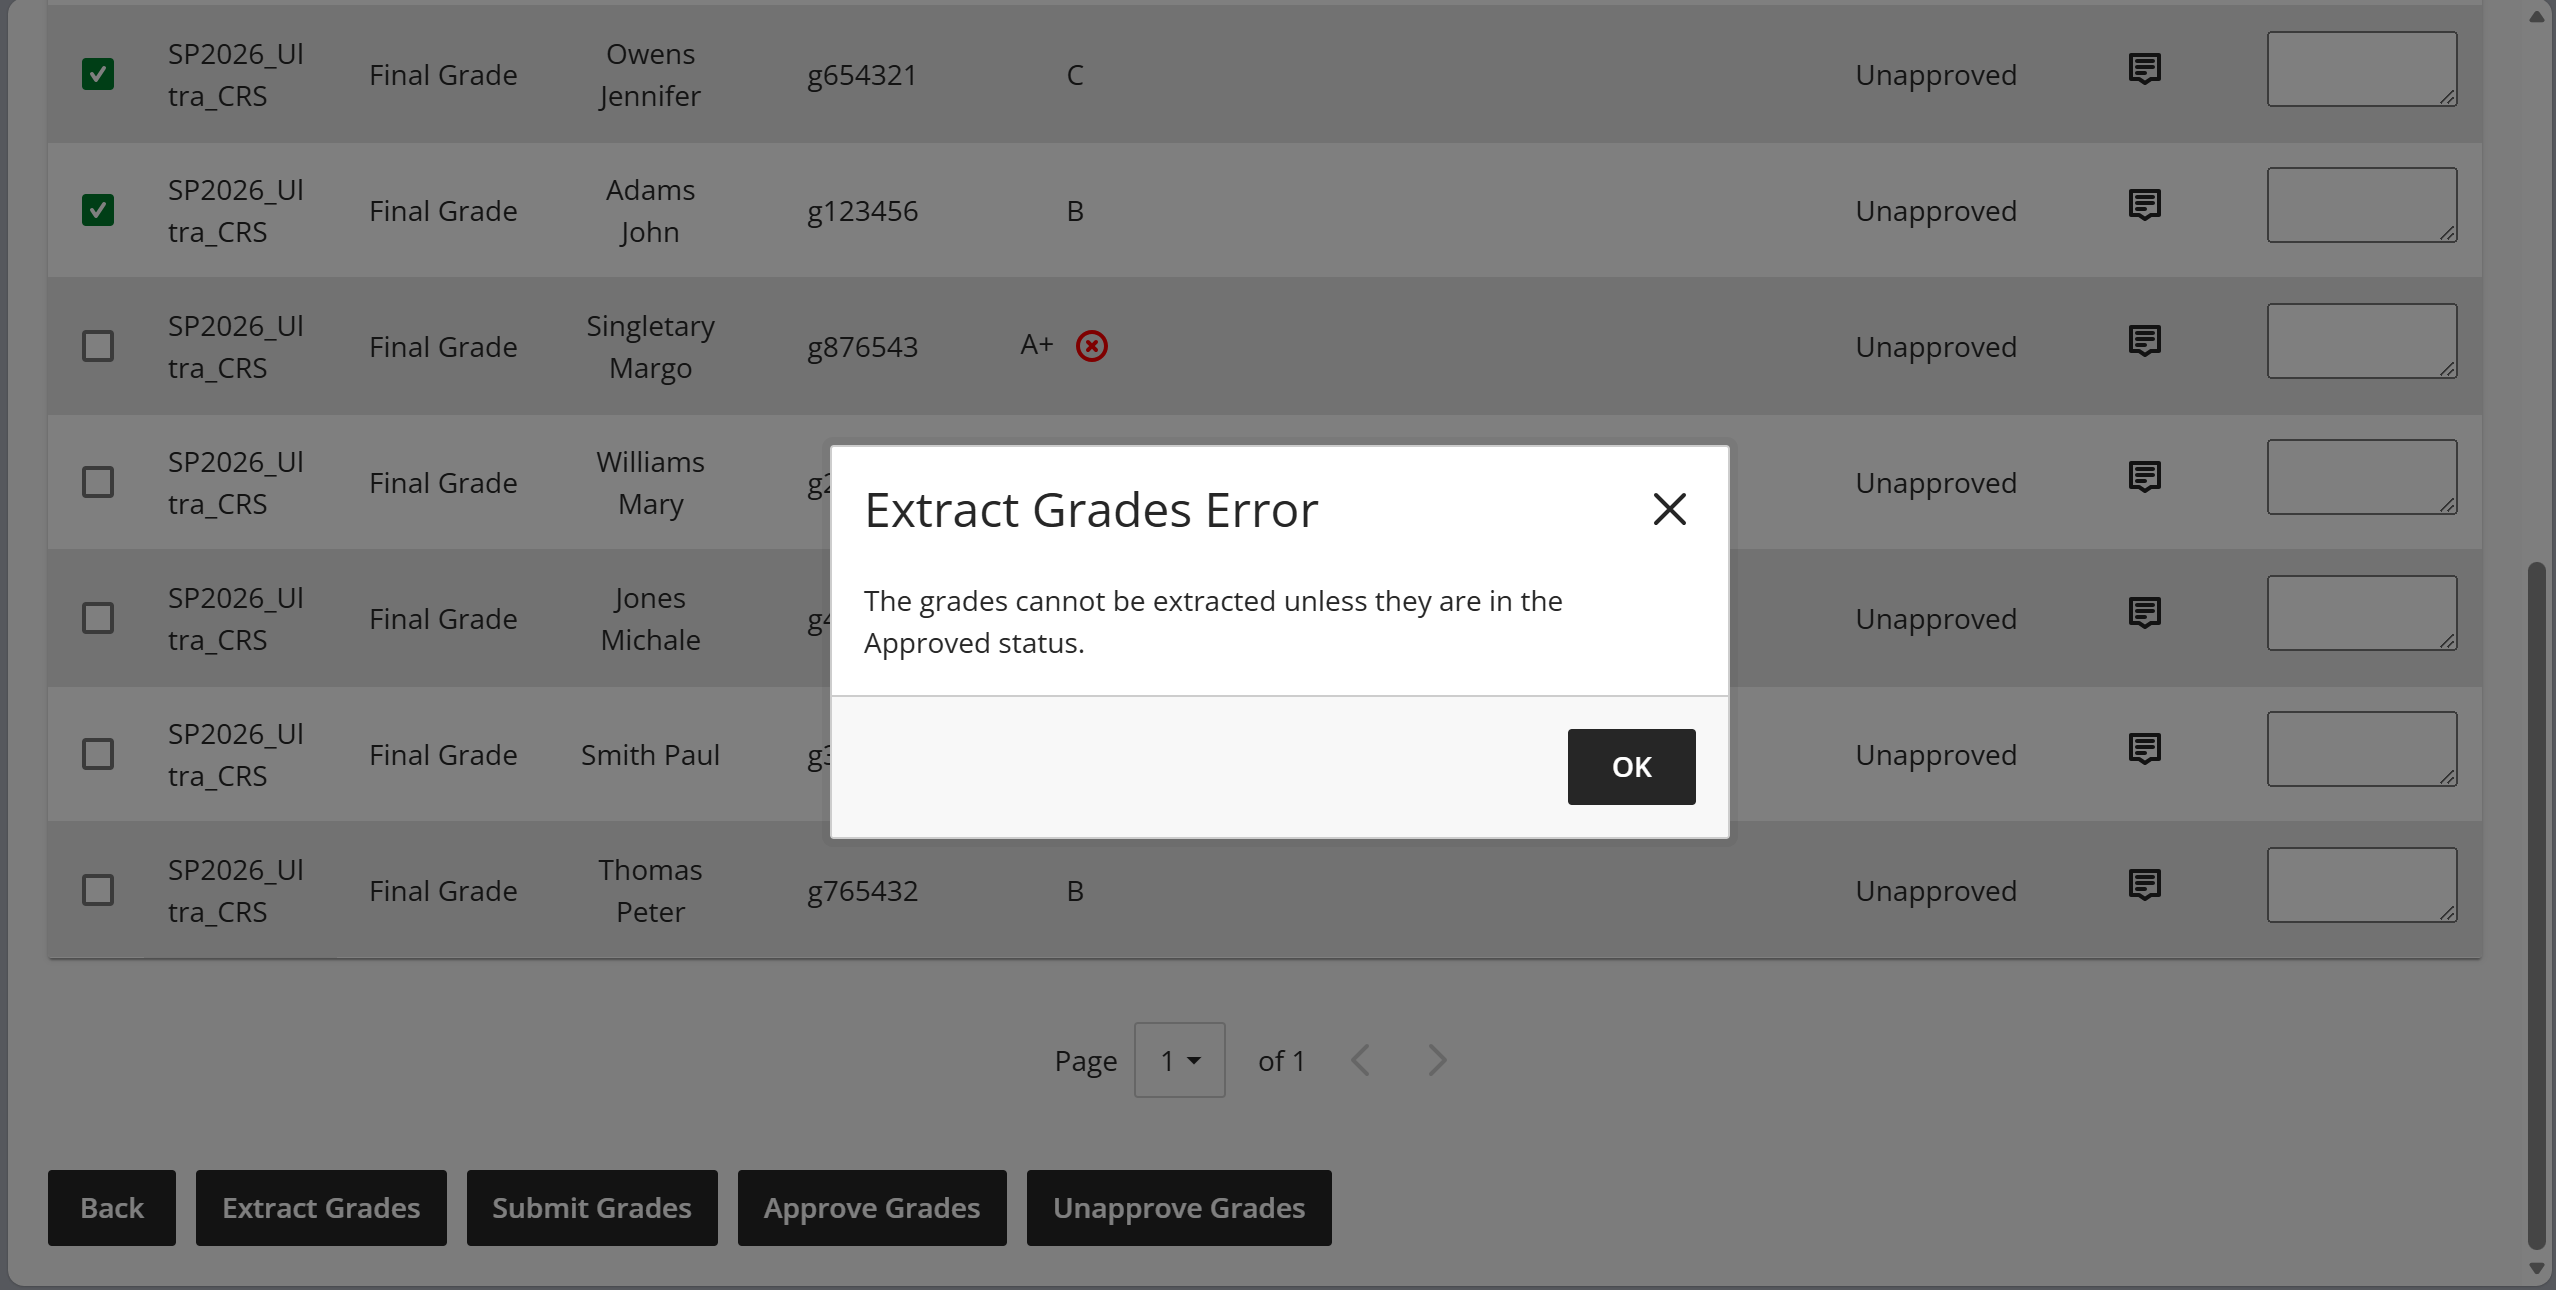
Graders now get an error message when they try to manually extract grades that are not in the Approved status. This feature prevents graders from sending unapproved grades to the student information system.
Instructors
Image 1: An error message appears when a grader tries to extract grades that have not been approved.
Administrators
Availability: Available to all Original and Ultra courses.
Activation: This feature requires a Grades Journey license.
Configuration: This feature is off by default. From the Admin Panel, choose Platform Extensions and edit the Grade Export v2 settings. Select Configure for the Approval Workflow. Select Only allow extract for approved grades? in the Grade Approval and Transfer Settings section.
Grade Export: Email a grade extract summary list
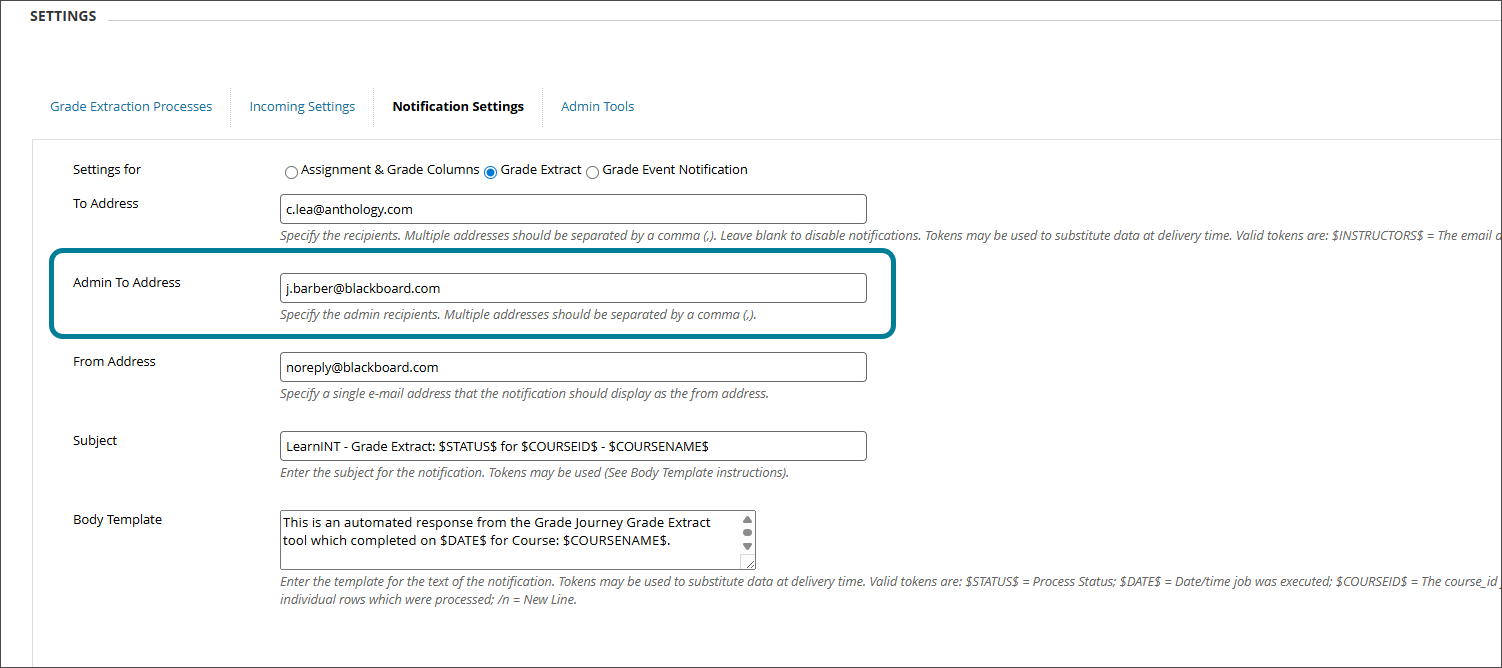
Administrators can now send a single email with a text file listing all courses included in a grade extract to chosen administrative recipients. The file contains the course IDs and is sent after any extract that transfers grades, including scheduled and manual extracts. This feature provides administrative recipients with the option to receive a single email per extract rather than an email for each individual course, which can be more efficient.
Image 1: Administrators input the recipient email on the Notifications Settings screen in the Grade Export v2 Settings.
Administrators
Availability: Available to all Original and Ultra courses.
Activation: None needed.
Configuration: None needed.
Premium
Video Studio: Use Knowledge Checks for Videos
Instructors can now embed ungraded knowledge check questions directly into videos in Video Studio. The video pauses at designated points and prompts students to answer a question related to the content they just watched. After answering correctly, the video resumes.
This feature helps instructors confirm that students understand key concepts and keeps students engaged throughout the video.
Instructors
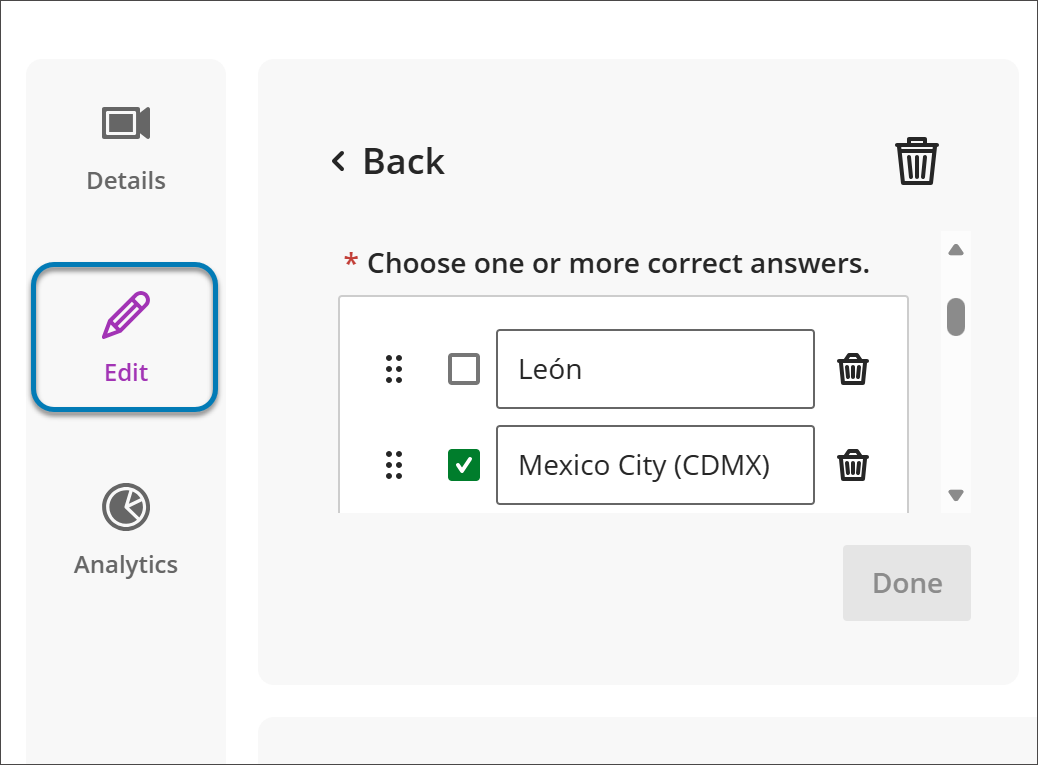
Instructors can add knowledge checks from the Edit screen for a recording. The page shows the number of knowledge checks in use. Instructors can add or edit questions, set multiple-choice options with one or more correct answers, and choose the timestamp where the question appears. Questions are ungraded and designed to validate comprehension, not assess performance. Instructors also have access to general analytics about student responses.
Image 1: Instructors can now embed knowledge checks within a Video Studio recording.
Students
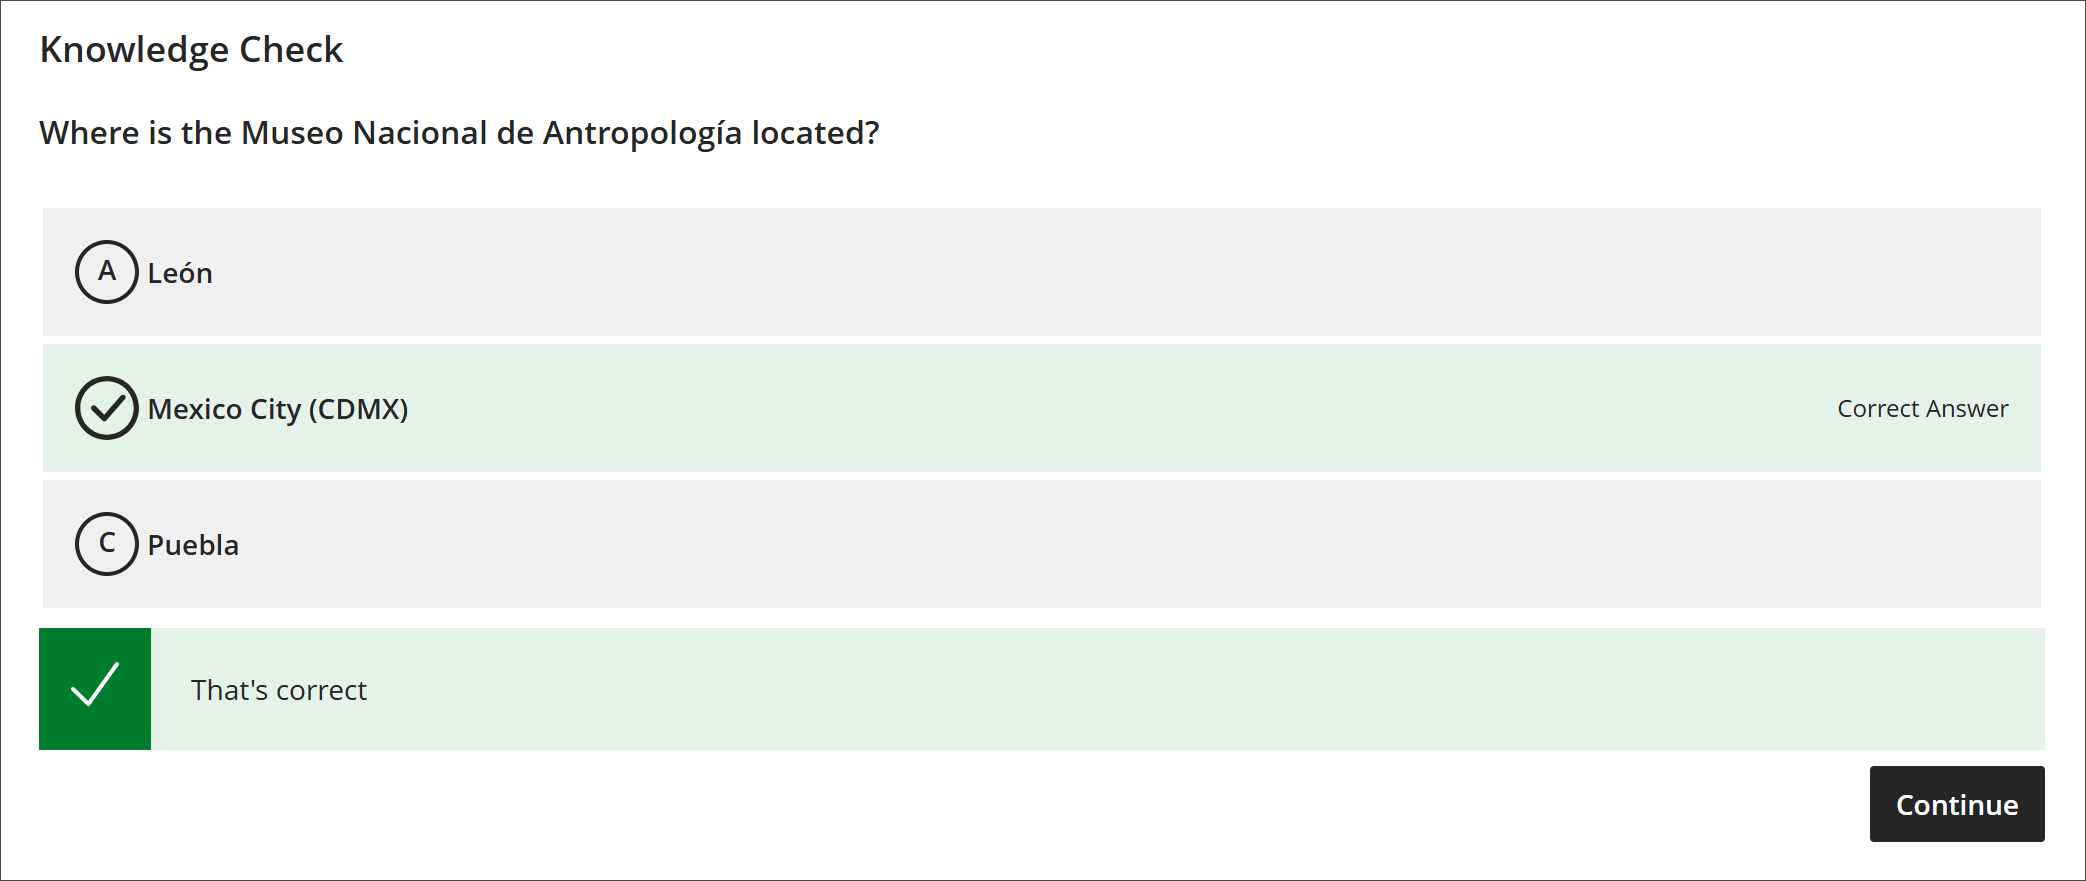
When students watch a video with knowledge checks, the video stops at the specified timestamp and displays a question. Students must answer correctly to continue and can try as many times as needed. Knowledge checks create an interactive experience that encourages active participation and deeper understanding.
Image 2: Students receive a knowledge check question that is embedded in the Video Studio recording where an instructor has chosen to point it.
Administrators
Availability: Available to all Ultra courses.
Activation: None needed.
Configuration: None needed.
Video Studio: Download Video for Offline Use
Note
This feature is available in test/stage environments on Tuesday 16 December 2025.
Users can now download Video Studio recordings directly to their local devices for offline access. This update gives instructors and students more flexibility to access course content without an internet connection.
Instructors
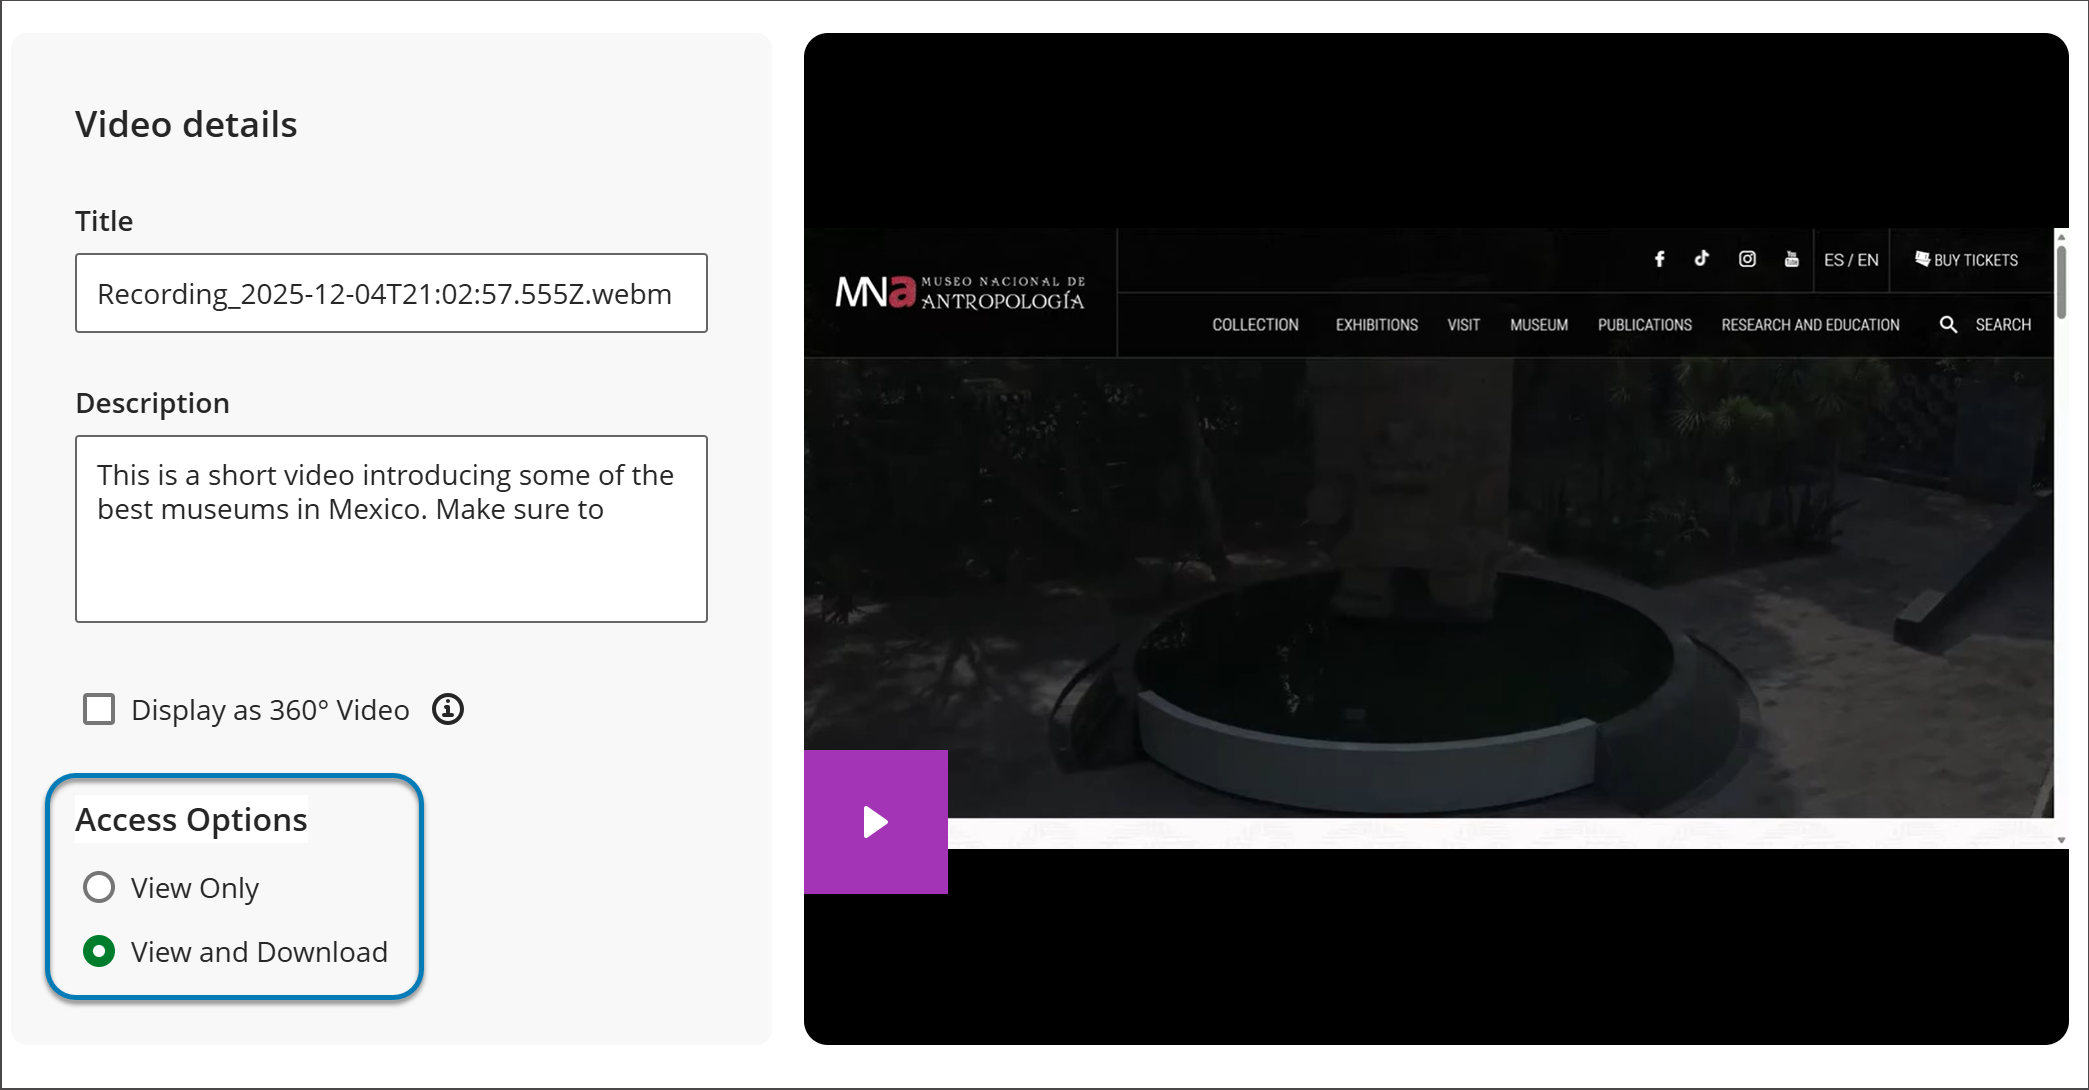
Instructors can choose which recordings students can download by turning the download option on or off for each recording. This provides control over how course material is shared.
Image 1: Instructors can now choose whether or not to allow students to download a Video Studio recording for offline use.
Students
When students open a recording with download enabled, they can select the download option to save the file to their device. This makes it easier to learn on the go, such as during commutes or in areas with limited connectivity.
There is no direct option to download to cloud storage, but users can move files to cloud services manually.
Our February 2026 release (version 4000.8) will allow students to download recordings that they themselves create.
Administrators
Availability: Available to all Ultra courses.
Activation: None needed.
Configuration: None needed.
Video Studio: Edit Description
Instructors and students can add or edit descriptions for Video Studio recordings. Use the description field to provide context, summarize content, highlight key topics, or include guidance for viewers before they watch.
Instructors and Students
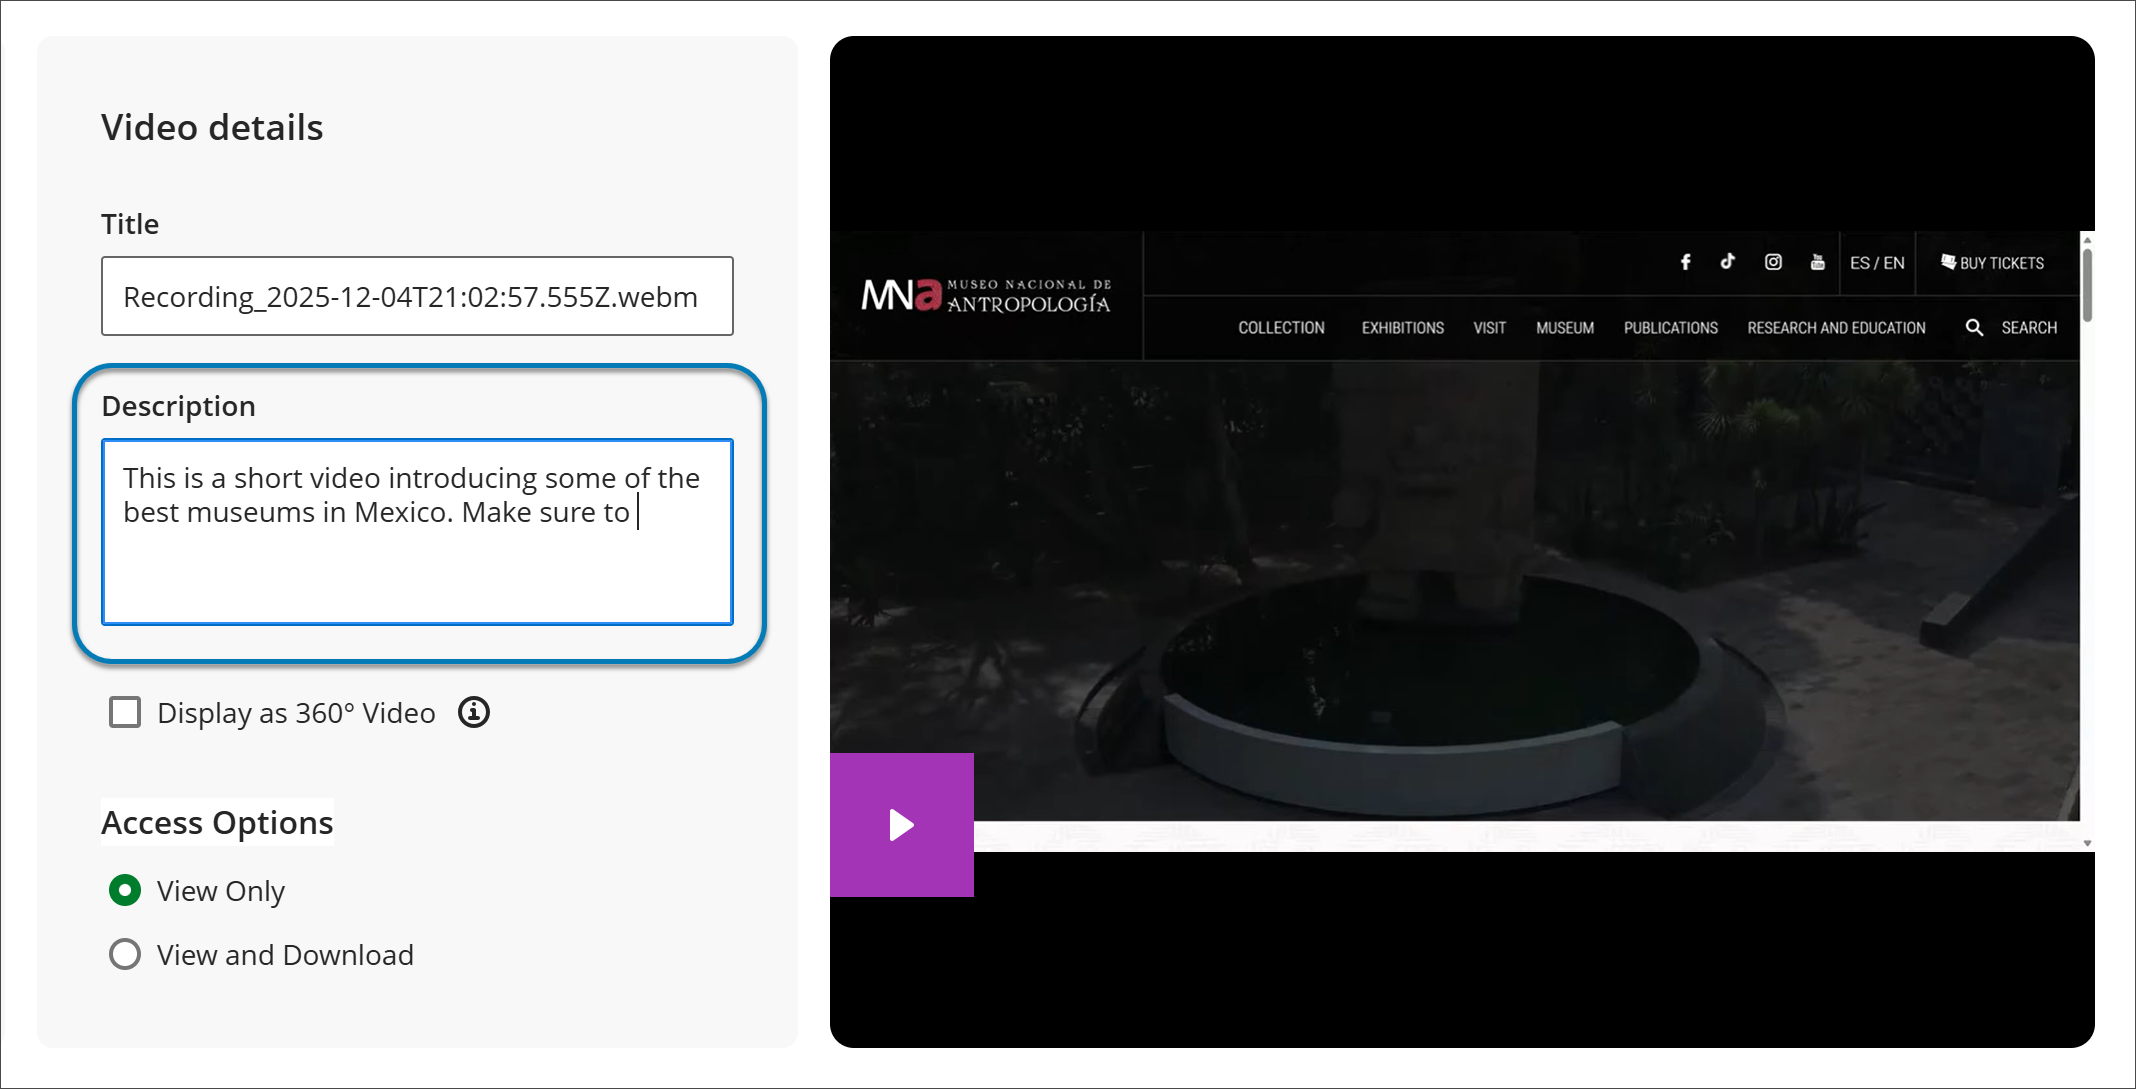
Instructors and students can add or update the title and description of any Video Studio recording. Use the description field to summarize the video, highlight key topics, or provide instructions for students.
Image 1: Video Studio users can now edit their recording description after they create their recording.
Administrators
Availability: Available to all Ultra courses.
Activation: None needed.
Configuration: None needed.
Video Studio: Bulk edit speaker names in video transcripts
Note
This feature is available in test/stage environments on Tuesday 16 December 2025.
Instructors and Students can now update all instances of a speaker’s name in a video transcript in one step. This update makes editing faster and keeps names consistent throughout the transcript.
Instructors and Students
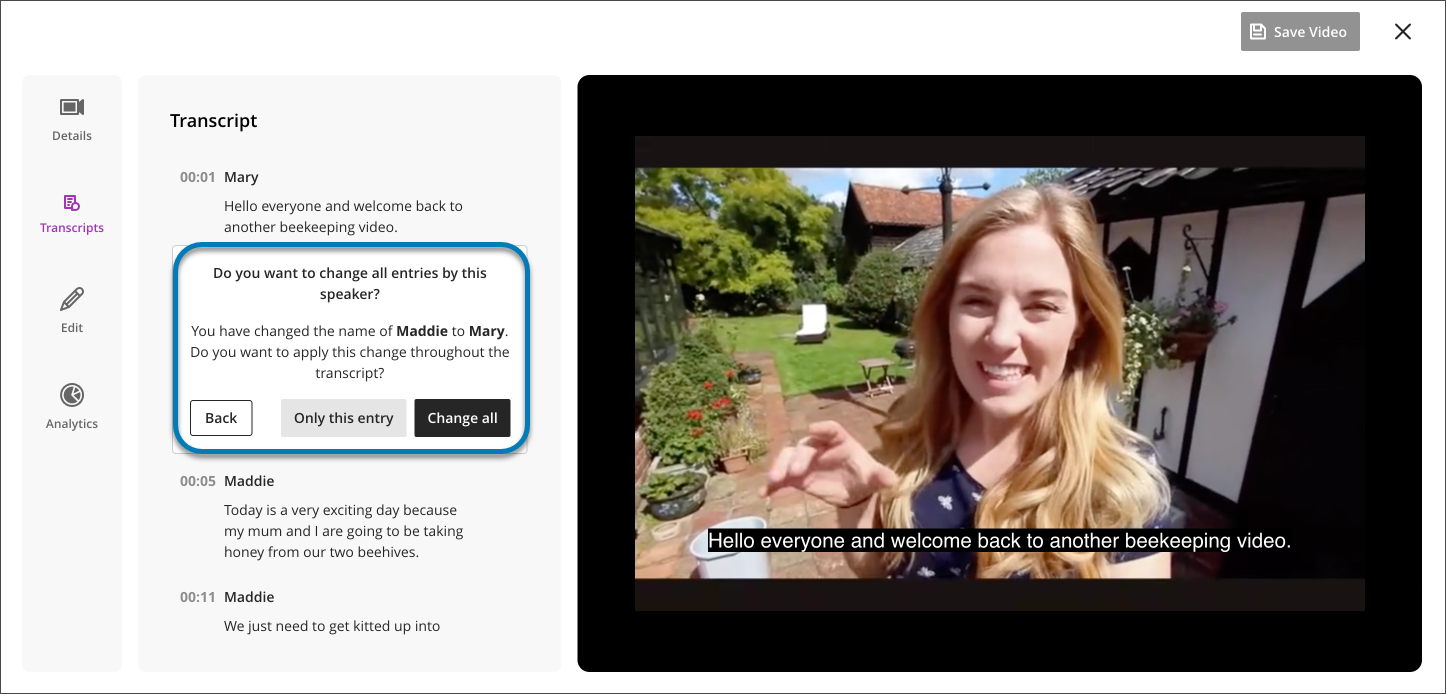
To edit a speaker’s name, open the Transcript Editor for your video. Select the name you want to change and apply the update. All occurrences of that name update automatically.
Image 1: Users can now bulk edit the name of a speaker within a recording transcript.
Administrators
Availability: Available to all Ultra courses.
Activation: None needed.
Configuration: None needed.