Batch Edit
About Batch Edit
Content management is a time-consuming part of course setup and maintenance. Instructors spend valuable time in carefully organizing content and assessments, with specific due dates and release conditions.
You can use Batch Edit to update common settings across all content, such as visibility and due dates. You can also use the tool to delete a group of selected course content. With Batch Edit, you can control content settings in one place and all at once.
Supported item types
Items that appear on the Course Content page that are supported by Batch Edit:
Assignments
Discussions
Documents
Embedded Cloud Documents
Files
Folders
Journals
Learning Modules
SCORM packages
Teaching tools with LTI connections
Tests
Web Links
Note
Course links don’t display in Batch Edit.
Access Batch Edit
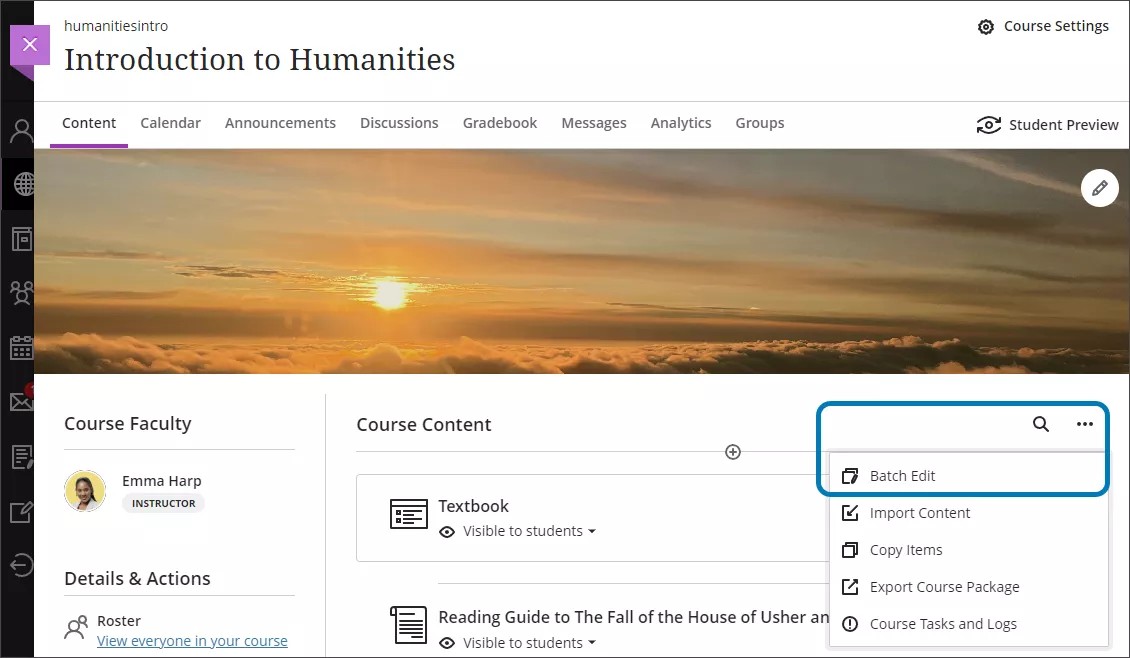
On the Course Content page, open the three dot menu on the right side above the content list. Select Batch Edit.
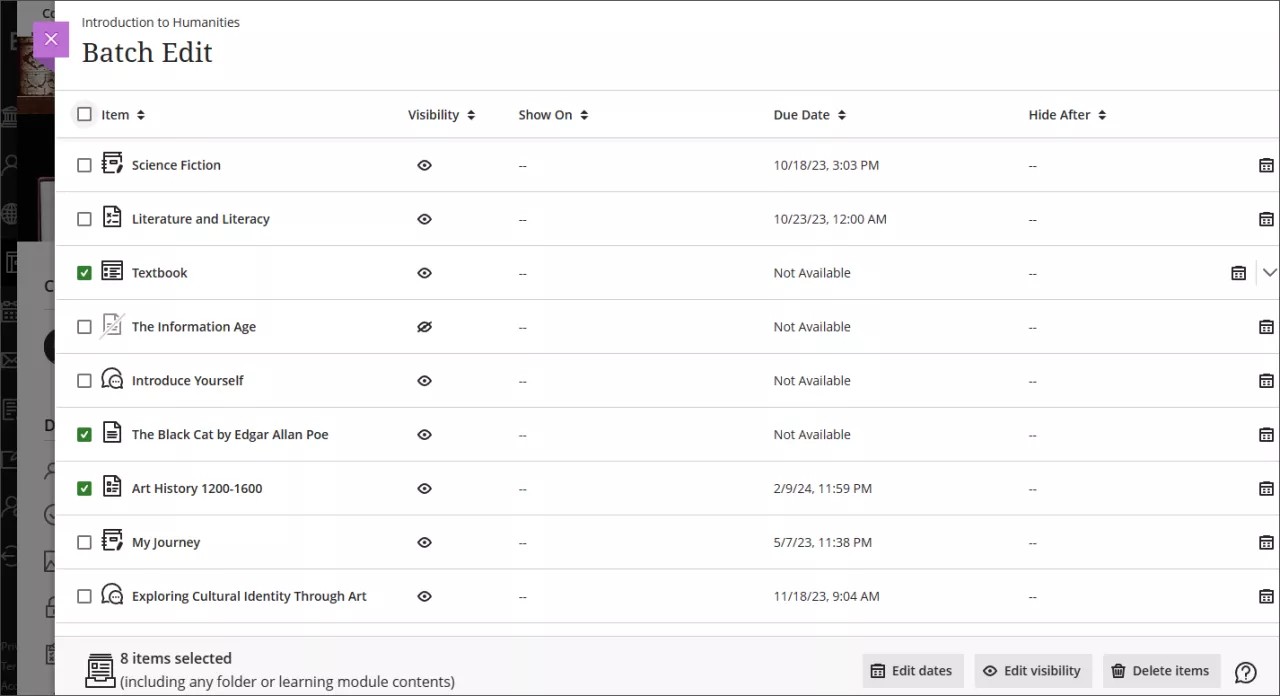
On the Batch Edit page, all content appears just as it does on the Course Content page. You can sort the list by item title, due date, show on, hide after, or visibility.
Important
When organizing items by date, the order of items in a learning module may change and differ from the actual order on the course content page. Remember this when making date adjustments for Learning Modules with forced sequencing selected.
Navigate Batch Edit
On the Batch Edit page, select the check box next to the items you want to update. You can choose individual content items, folders, and learning modules. To select all items at once, select the check box in the header at the top. You can select a maximum of 100 items at once. Items with long names are truncated.
Note
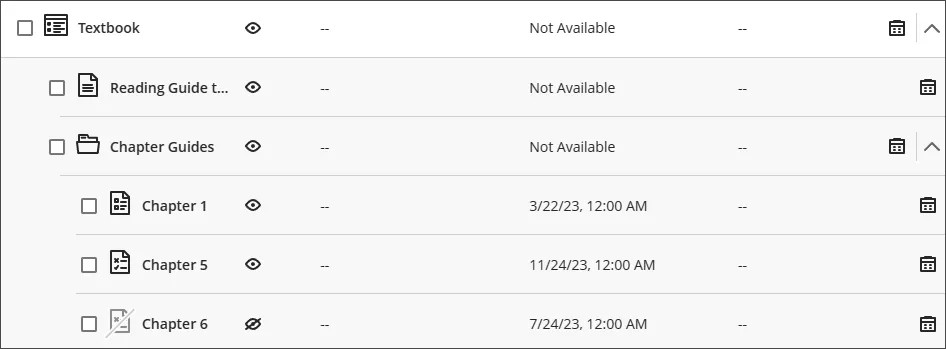
Selecting a folder or learning module also selects all items within them. To adjust what items are selected, select the arrow to the right of the folder or learning module’s name to expand their content.
Edit dates
You can use Batch Edit to adjust due dates on items. Only items with dates will be adjusted. Select Edit dates at the bottom of the page.
You have four options for editing dates:
Change dates by number of days
Change dates based on course start
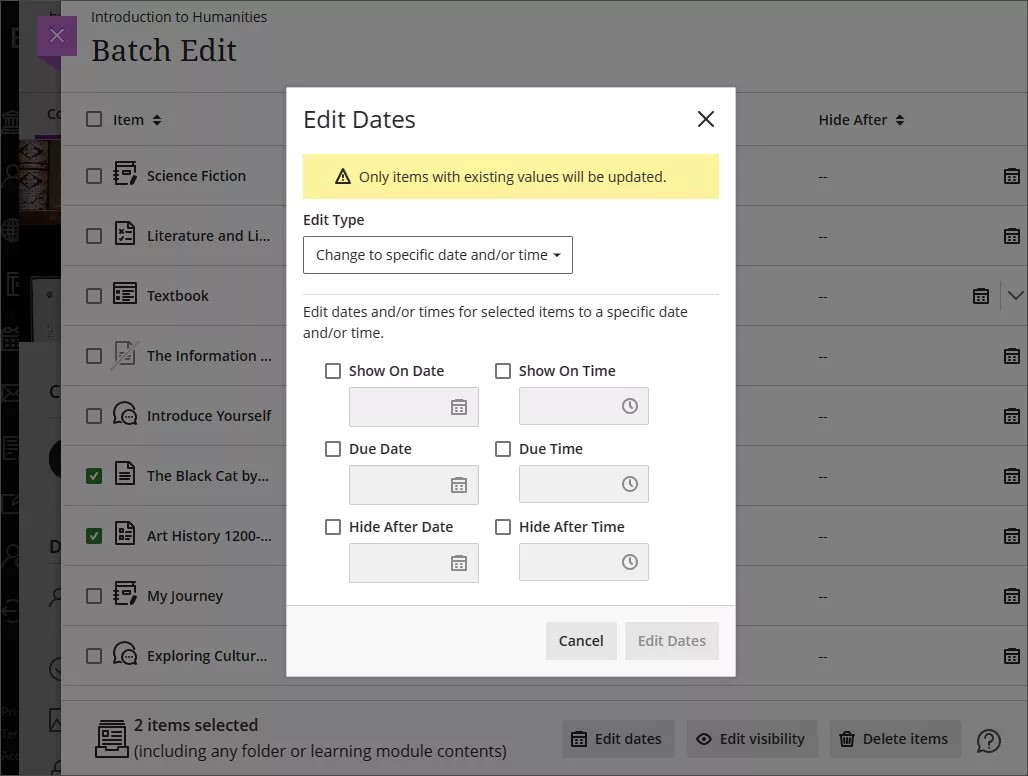
Change to specific date and/or time
Change individual item date
Select Edit Dates to confirm that you want to edit the dates for the items, or Cancel to return to the page.
Change dates by number of days
Enter a number in the Shift dates forward or Shift dates backward fields. All dates for the items selected will be adjusted forward or backward based on the field and number you choose.
For example: A snowstorm at the start of the semester pushes the academic calendar by a few days. You can use Batch Edit to add 4 days to all due dates.
Change dates based on course start
This option adjusts all the assignment dates based upon when the course started. All dates are moved forward by the number of days between the original start date and the new start date you selected. If you upload a previously created course into a new one, you can adjust all the dates in the new course to match the same cadence that the previously created course had.
For example: You reuse content from the previous semester when your course's start date was August 19, 2019. Your course's new start date is January 6, 2020. All dates for the selected items are adjusted forward 140 days.
Change to specific date and/or time
You can choose to change the specific time of day for a submission.
For example: You've set the due date time to 8:00 PM and you've decided that you want to give students more time. You can use Batch Edit to change all the due date times to 11:59 PM.
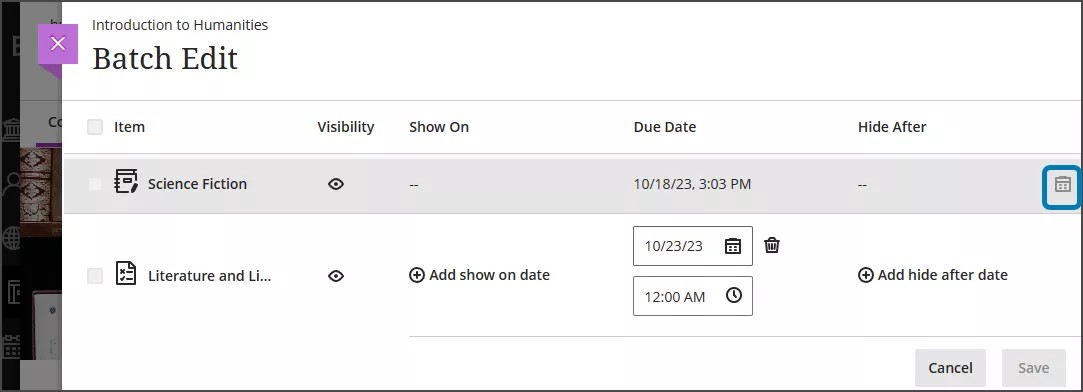
Change individual item date
If you want to change only one item's date in Batch Edit, select the calendar icon beside the item. You can now adjust the due date. You can also delete the item's due date by selecting the trash icon beside the due date.
Edit visibility
You can use Batch Edit to make items hidden or visible to students. Select Edit visibility. Choose to make items hidden or visible to students. Previous visibility settings for the items are overwritten. Date and time release conditions are removed for all selected items.
Select Save Visibility to confirm that you want to change the visibility settings for the selected items, or Cancel to return to the page.
Delete items
You can use Batch Edit to delete items from the Course Content page. Select Delete items.
Select Delete to confirm that you want to delete the items, or Cancel to return to the page.
Deleted items can't be restored unless you have an archive file or export of the course with the items you deleted.
Watch a video about batch editing
The following narrated video provides a visual and auditory representation of some of the information included on this page. For a detailed description of what is portrayed in the video, open the video on Vimeo.