ORIGINAL Original Grade Center
Access the Grade Center
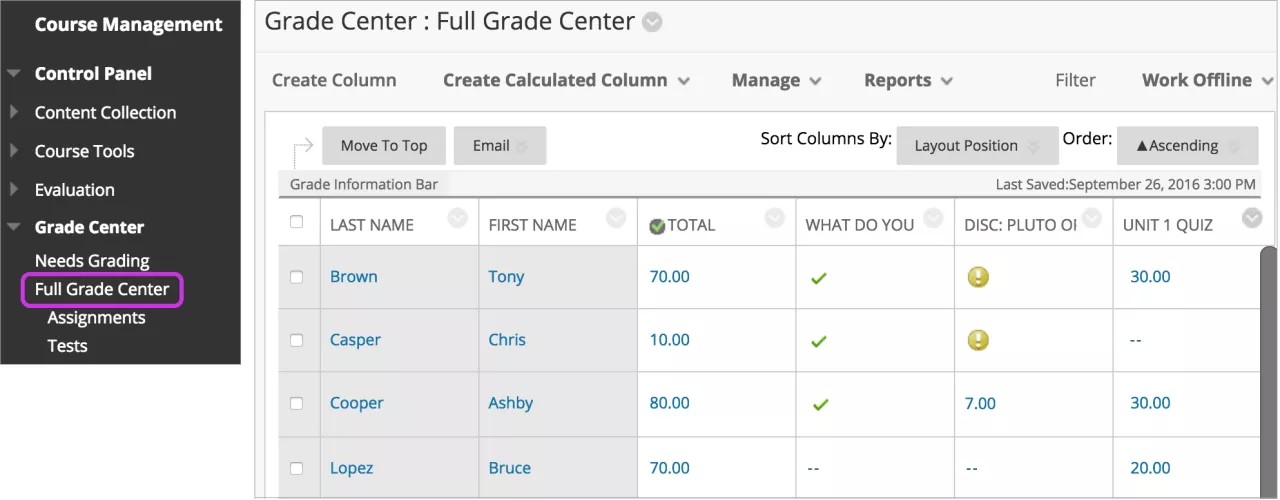
You access the Grade Center from the Control Panel. Expand the Grade Center section to display the links to the Needs Grading page, the Full Grade Center, and the smart views.
On the Needs Grading page, you can begin grading assignments, group assignments, tests, blog and journal entries, wiki page saves, and discussion posts.
The Full Grade Center link displays all columns and rows in the Grade Center and is the default view of the Grade Center.
The smart view links appear as an indented list in the Full Grade Center section. A smart view is a focused look at the Grade Center and shows only the data that matches a set of criteria. You can use smart views to quickly find data when the Grade Center includes a great number of students and columns. For example, the default Tests smart view displays only test columns.
You can customize your view of the Grade Center and create grading schemas, grading periods, categories, and columns to present and gather the information you need.
Grade Center functions
You can perform many actions in the Grade Center with the functions appearing in two rows at the top of page.
These functions appear in the first row:
Create Column: Create a grade column.
Create Calculated Column: Open a menu with options to create calculated columns.
Manage: Options include grading periods, schemas, categories, color coding, row visibility, email, and column organization.
Reports: Create reports from Grade Center data and access the grade history for all students.
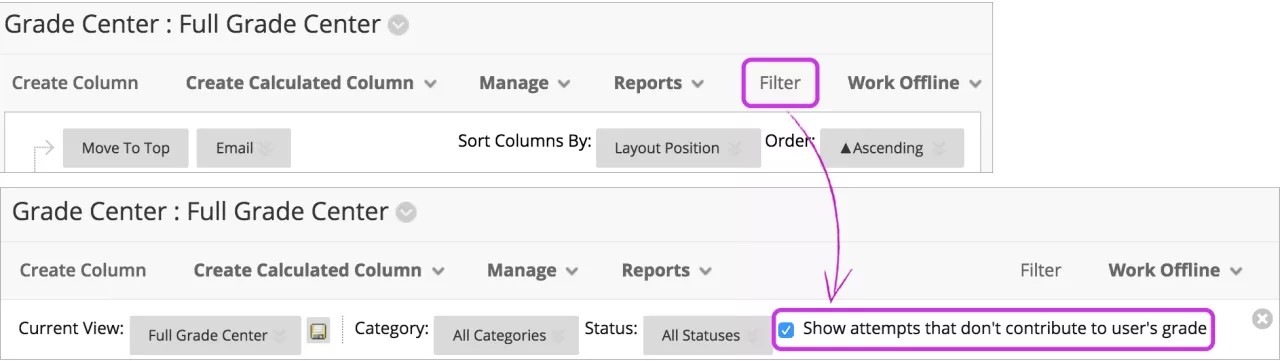
Filter: Narrow your view of the Grade Center data. Select Filter to expand the field and select an option from these menus:
Current View: Includes the Full Grade Center view, smart views, and grading periods. You can select one of the views to use as the default view with the Set Current View as Default icon.
Category: Includes all default categories and those you've created.
Status
Show attempts that don't contribute to user's grade: The default view in a grade cell's menu shows each attempt made. You can clear the check box and see only the attempt you need to grade in each grade cell's menu.
Work Offline: Work with Grade Center data outside of Blackboard.
These functions appear in the second row:
Move to Top: Select one or more check boxes for users and select Move to Top to move the rows to the first positions in the grid.
Email: Select one or more check boxes for users, select Email, and make a selection.
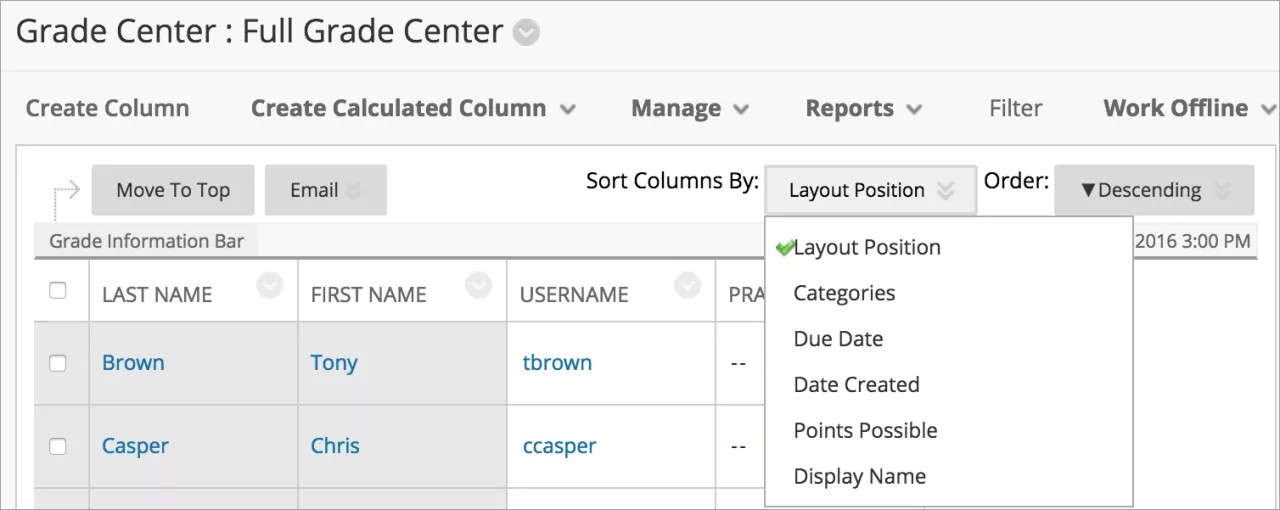
Sort Columns By: Open a menu with options to sort the Grade Center items.
Order: Sort the data in ascending or descending order. The view remains until you sort columns again or log out.
Access Grade Center menus
Throughout Blackboard, items may have menus with options that are specific for each item.
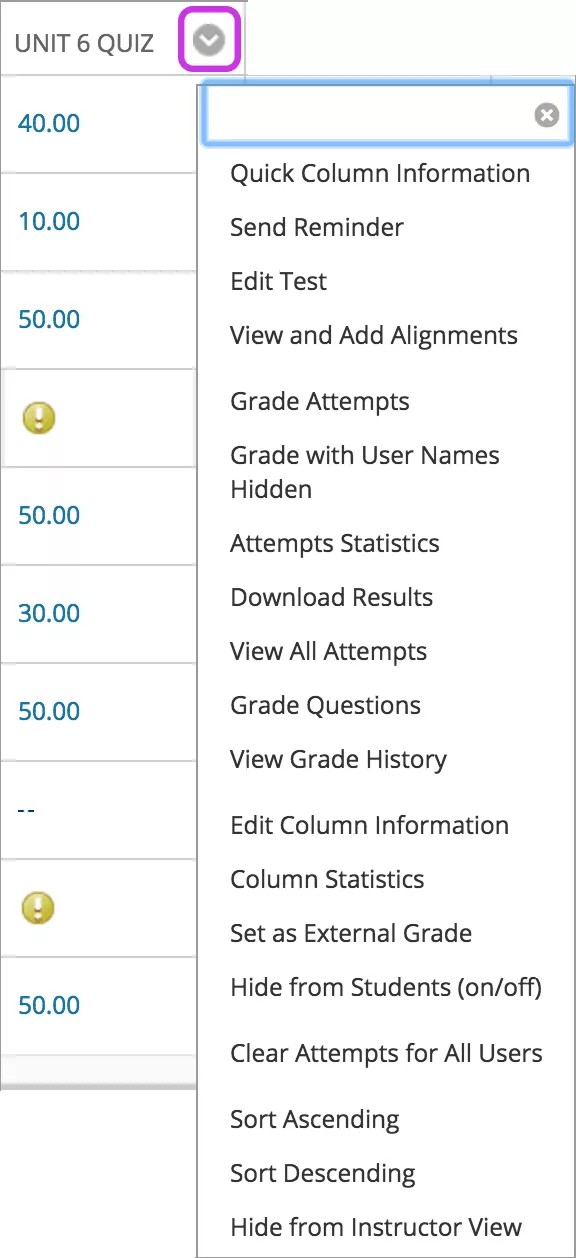
In the Grade Center, all cells and column headers have a menu. For example, a test column's menu includes options for Column Statistics and Grade Questions. For a non-grade column, such as First Name, you only have the options to hide the column and sort the cells. If an option doesn't appear in the menu, you can't perform the action on that column, row, or cell.
Point to a cell or column header to see the Click for more options icon. Select the icon to open the menu.
Note
You won't see some menu options if your institution uses an older version of Blackboard or disables some functions.
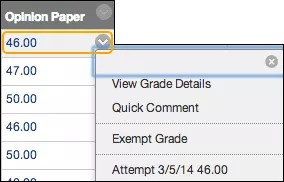
Menu options for cells
To see the Click for more options icon, point to the cell in the Grade Center grid. Select the icon to open the menu.
Example:
When you open the menu for a user's name cell, you have options to hide a user's row, hide other rows to focus your attention on one row, or email a user. You can view which items are visible to a user based on availability and adaptive release rules or which items a user marked reviewed.
You can also view the User Statistics page which provides statistical information related to a user's performance.
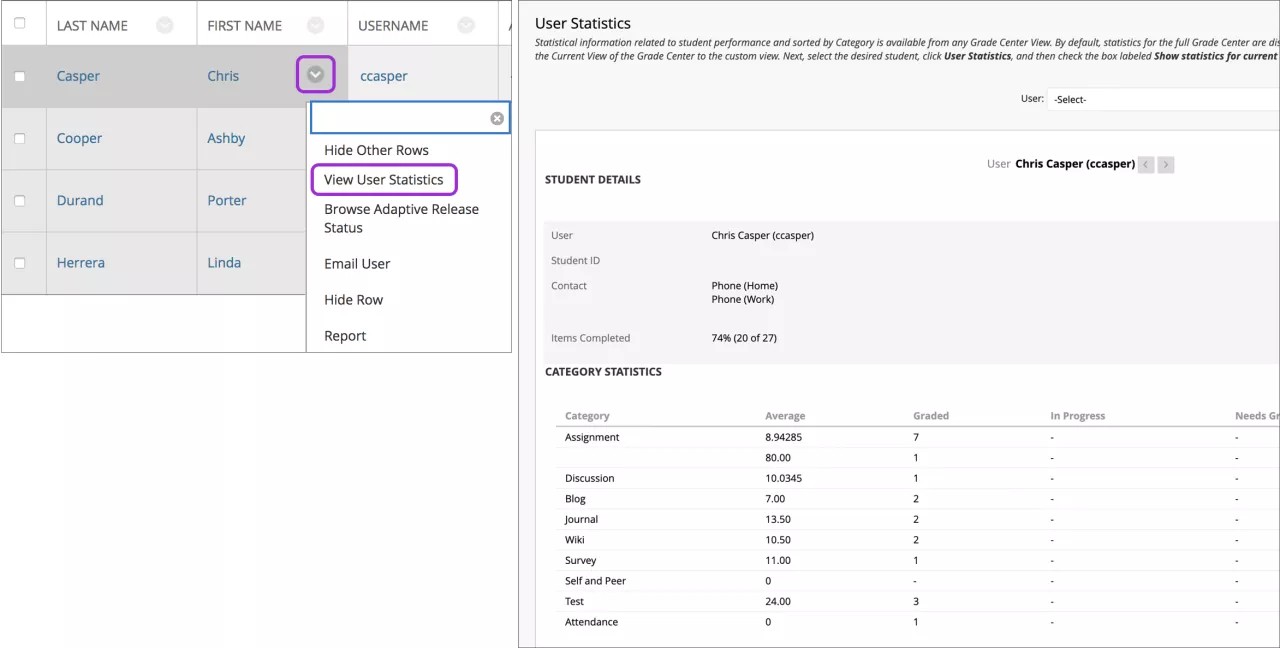
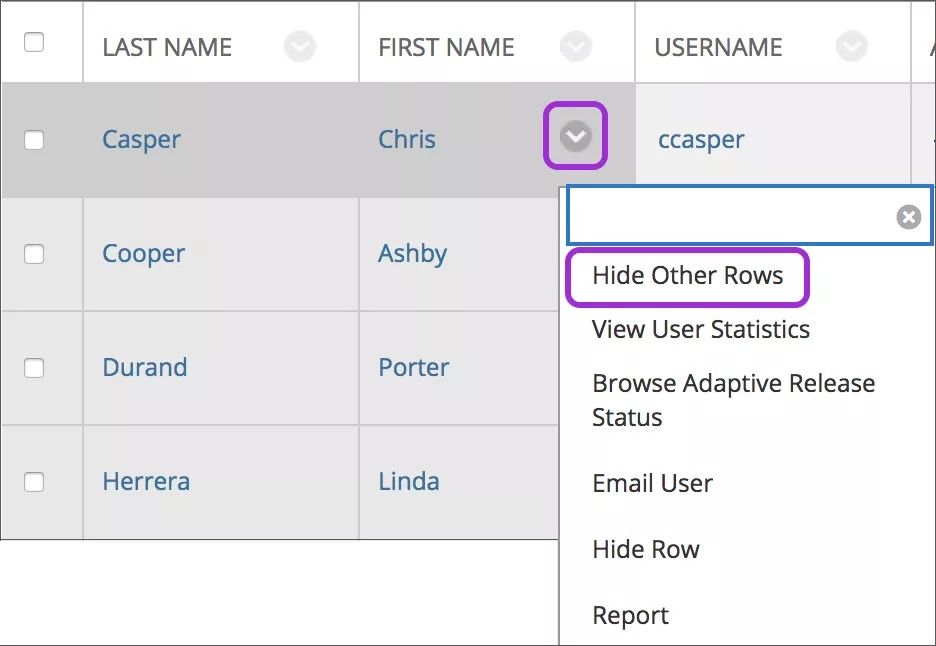
Can I show just one student's row?
You can narrow your view to show only one student's row and focus on that student's attempts and grades. You can also share grades with the student in a live office session. The grades for other students are protected and privacy is maintained. When you hide user rows, the data is retained and you can show them at any time.
Open the menu for a student's name cell and select Hide Other Rows.
From the Row Visibility page, you can hide and show user rows. Only your view of the Grade Center grid is affected. Student availability isn't affected. Open the page from the Manage menu.
Note
If you've made a user unavailable on the Users page in the Control Panel, the User Unavailable icon appears in the user's first cell in the Grade Center. But, the row isn't hidden in the grid. Unavailable users can't access your course.
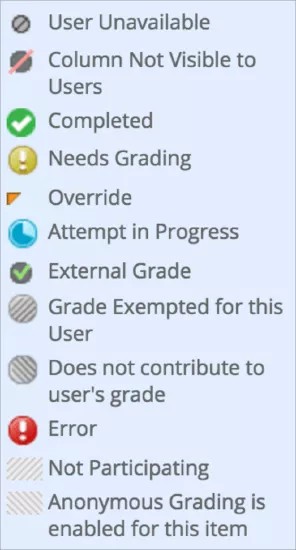
Grade Center icon legend
In the lower-right corner of the Grade Center, select Icon Legend to view the icon descriptions. Icons can appear in the Grade Center cells, attempt menus, column headers, on the Grade Details page, and on the Needs Grading page.
Note
You won't see the "Does not contribute to user's grade" icon if your institution uses an older version of Blackboard.