Create Learning Modules
You can use learning modules in your course as containers for organized collections of content. Modules let students navigate from one content item to the next without distractions or extra clicks. A learning module helps immerse students in the lesson or concept you're teaching. If you use a textbook or other materials as the basis for your course curriculum, modules are an effective and logical way to group content to match the pace of these materials.
Use a learning module to support a course objective, concept, or theme. For example, use a learning module to present the concept of magnets' fields before you describe how speakers and microphones work. Understanding the first concept is dependent on understanding the second concept.
Tip
You can also force a content sequence to make sure students know which content to access and in what order.
Alternatively, you can allow students to explore the content in a learning module in any order and at their own pace. For example, use a learning module to present a series of images and descriptions of various animals in a genus. Students can view the images and read descriptions in any order as no order is required for understanding the whole.
Create a learning module and add content
Add learning modules directly on the Course Content page. Drag existing content into modules or use the plus icon to add new content directly.
You can add these items to a learning module:
Documents
Files
Tests and assignments
Folders
Multimedia
Links to websites, discussions, and journals
Select the plus button wherever you want to add a learning module. In the menu, select Create to open the Create Item panel. Select Learning module.
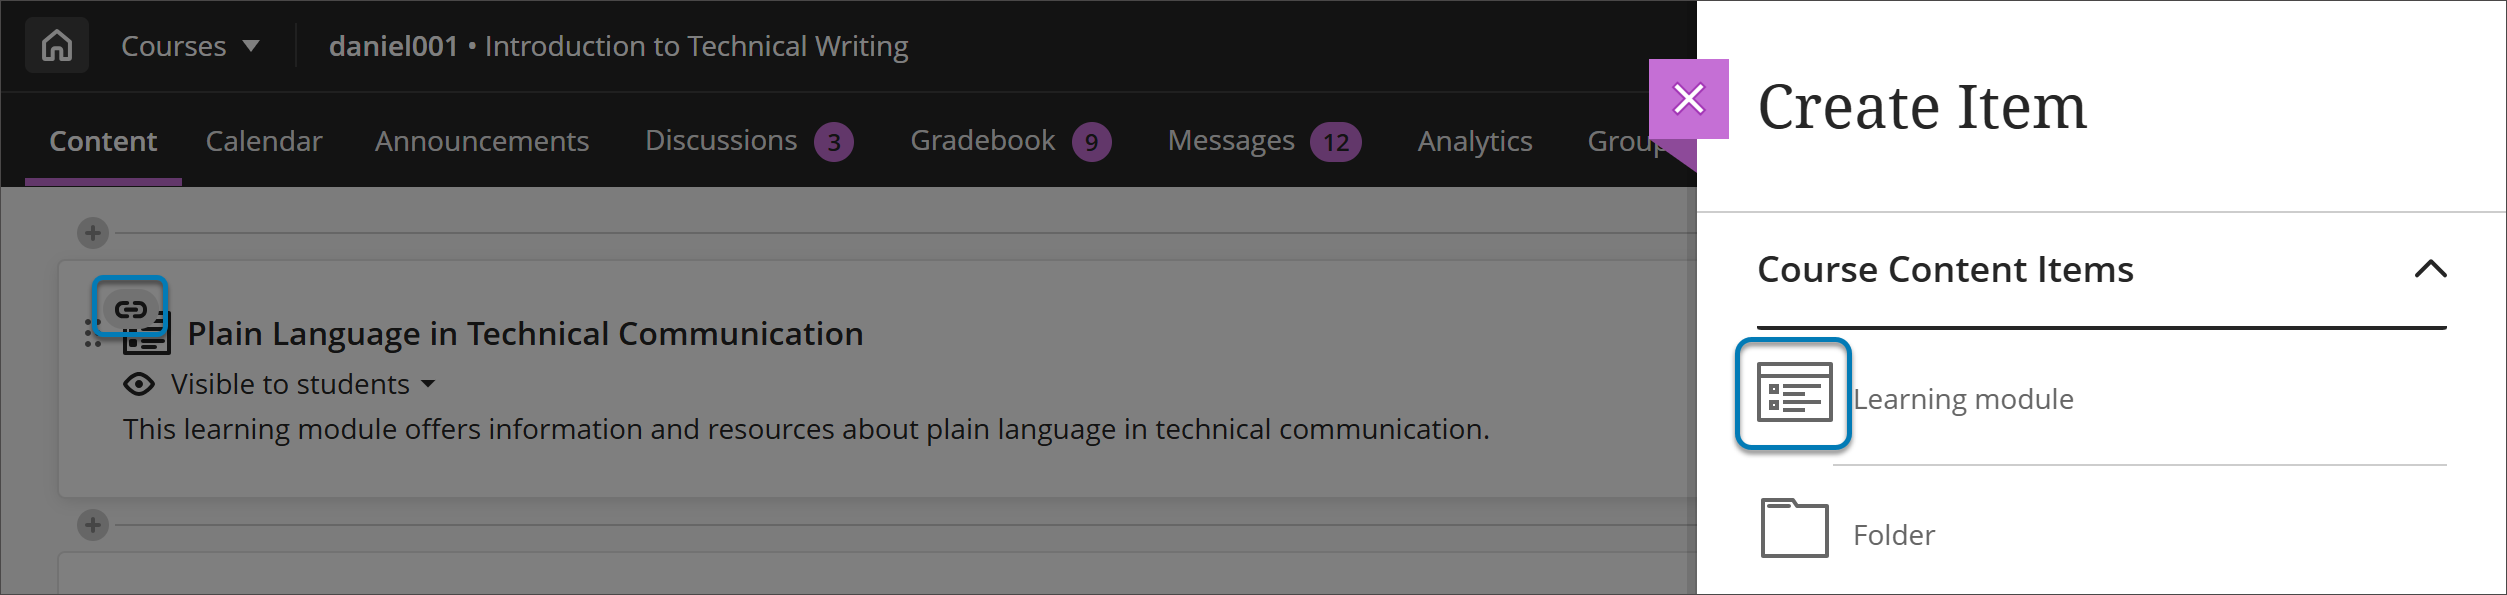
Type a name, optional description, and select the module's visibility.
To select whether students will view the learning module's content in sequence, select Conditional availability in the module's visibility menu.
In addition to content items, files, and assessments, you can add activities and tools that promote interactive learning and collaboration.
For example, you can add assignments or group projects to give students an opportunity to apply what they've studied in a learning module. You can also add collaboration tools such as discussions where students can brainstorm and share their ideas about the topics presented.
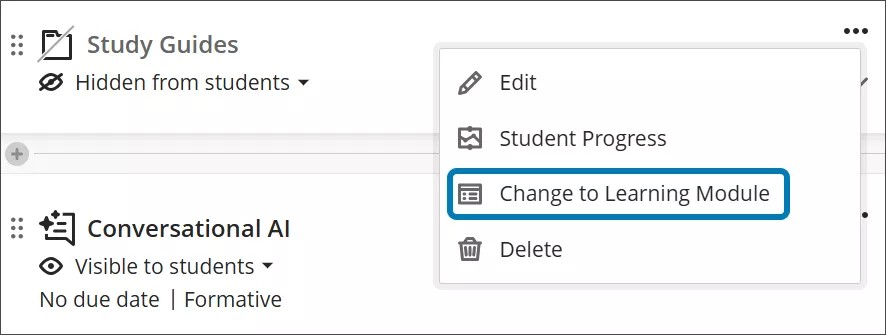
You can also create a learning module by changing a folder to a learning module. Select the More options menu for the folder, and then select Change to Learning Module.
You can also change learning modules to folders through the More options menu, but this will remove all the additional features of learning modules.
Auto-generate learning modules
If you need help designing your course and don’t know where to start, the AI Design Assistant can guide you through building the course’s structure. The AI Design Assistant draws insights from your course's title and description to generate learning modules. Refer to AI Design Assistant for more information about this feature.
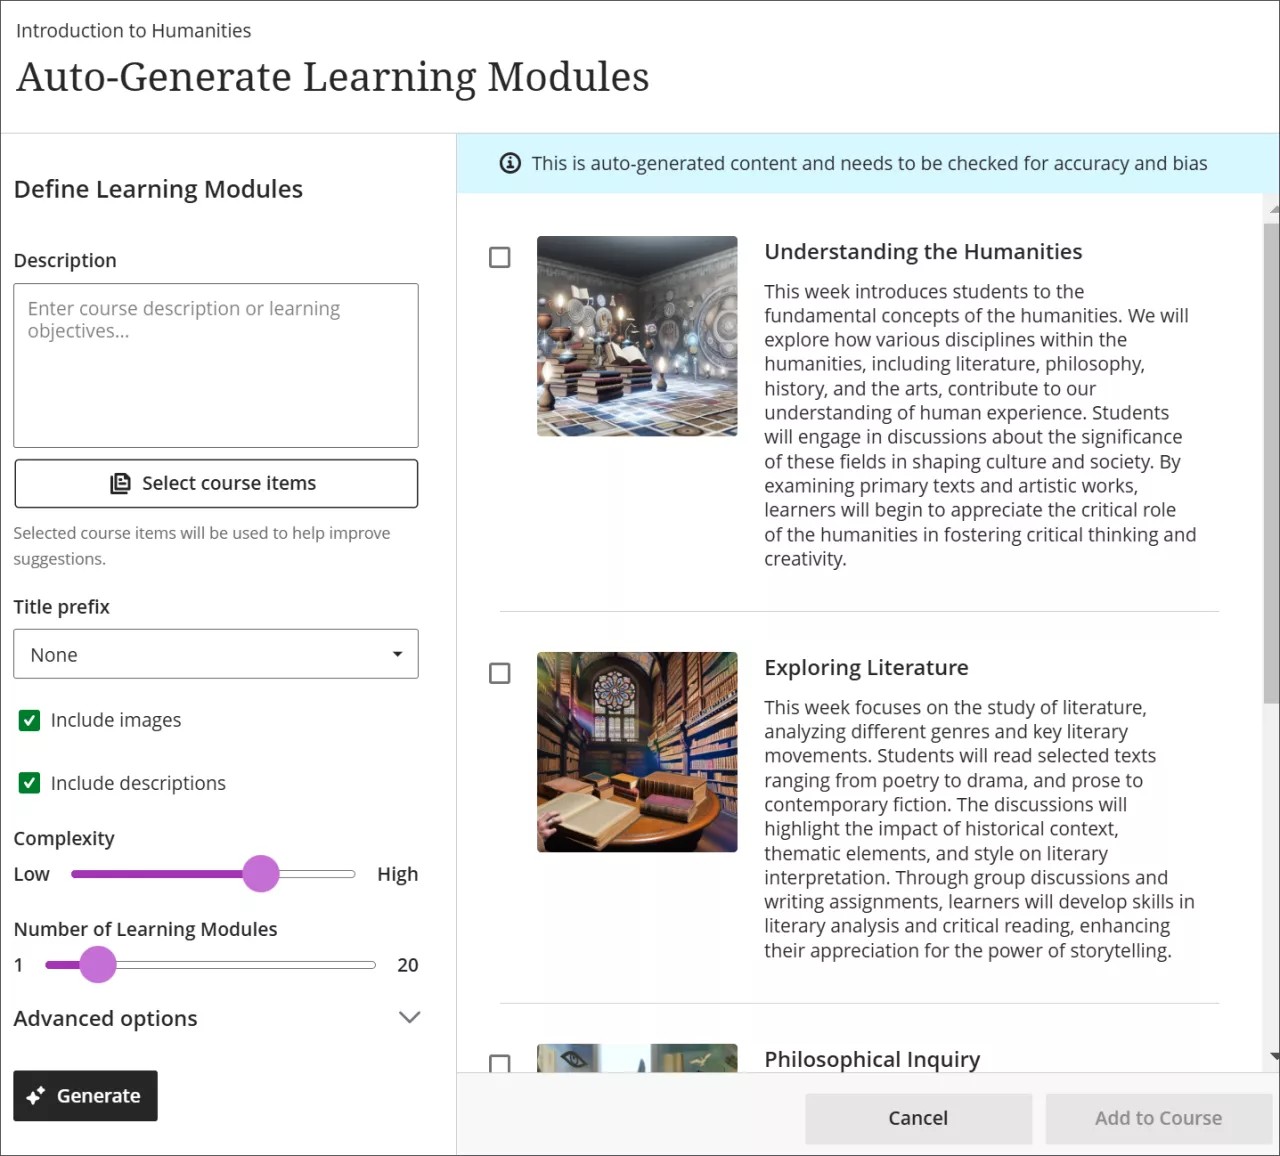
When you select Auto-Generate Modules, each generated module comes with a name, image, and description. You can turn off the generation of images or descriptions if you choose.
To auto-generate learning modules:
In an empty course, select Auto-Generate Modules. If you already have content in your course, select the plus sign on the Course Content page, then select Auto-Generate Modules.
Optionally, enter a description (up to 2000 characters) to narrow the focus of the modules.
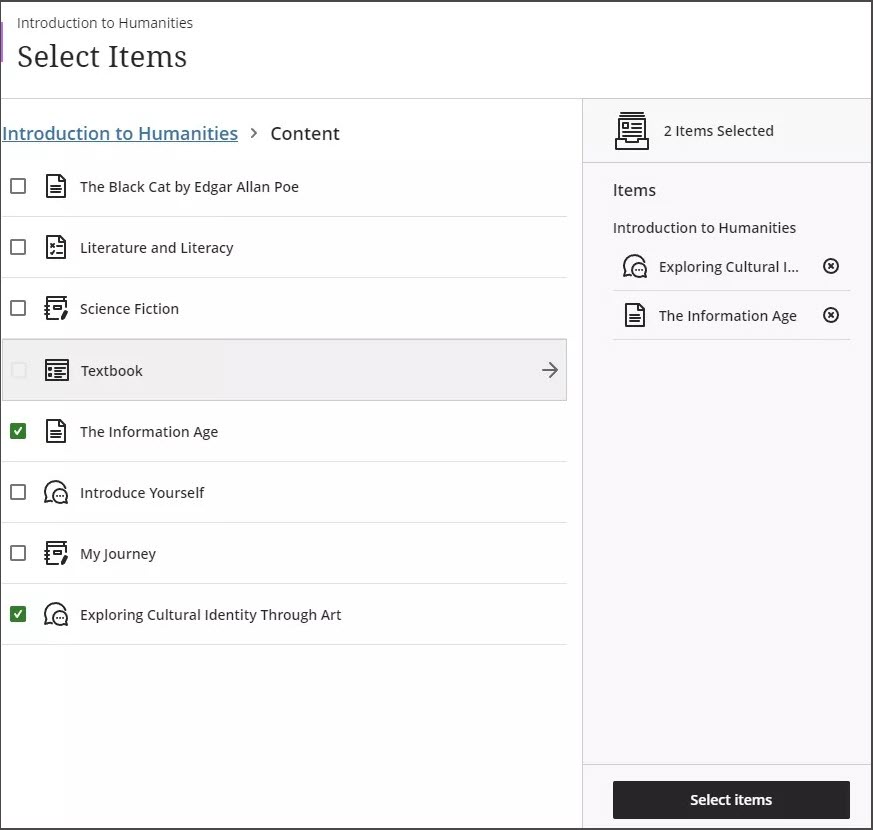
Optionally, select Select course items to provide context for the generated discussions. Select any course content item, then select Select items to return to discussion generation.
Note
File types supported by the context picker include PDF, Word, PowerPoint, text, RTF, and HTML.
From the Title prefix menu, select a prefix for the module titles.
Select or clear the Include images checkbox based on whether you want to include AI-generated images for the modules.
Select or clear the Include descriptions checkbox based on whether you want to include AI-generated descriptions for the modules.
Adjust the Complexity slider to set the complexity of the modules’ focus.
Adjust the Number of Learning Modules slider to select the number of modules to generate.
Select Advanced options to change the output language.
Select Generate.
Select the modules you want to add to your course, then select Add to Course.
Review each learning module’s title and description for accuracy and bias. You can also edit learning modules to better fit your teaching style and goals.
Tip
The AI Design Assistant can generate images for pre-existing learning modules. You can also upload your own images or select the built-in feature to include a stock photo from Unsplash.
Video: Create Learning Modules
The following narrated video provides a visual and auditory representation of some of the information included on this page. For a detailed description of what is portrayed in the video, open the video on Vimeo.
Customize your learning module's appearance
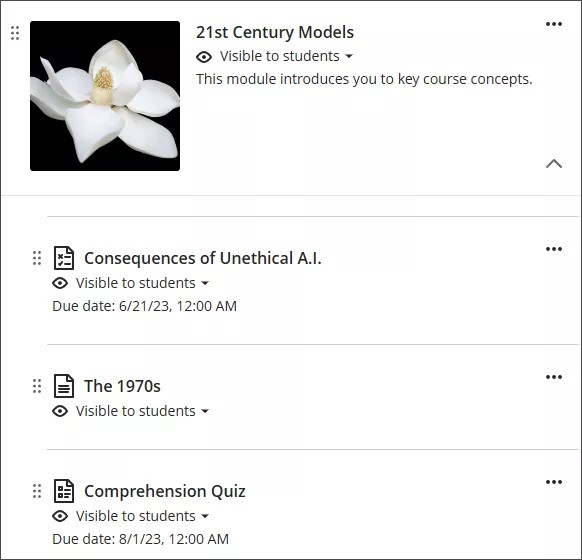
You can choose to add an image to your learning module.
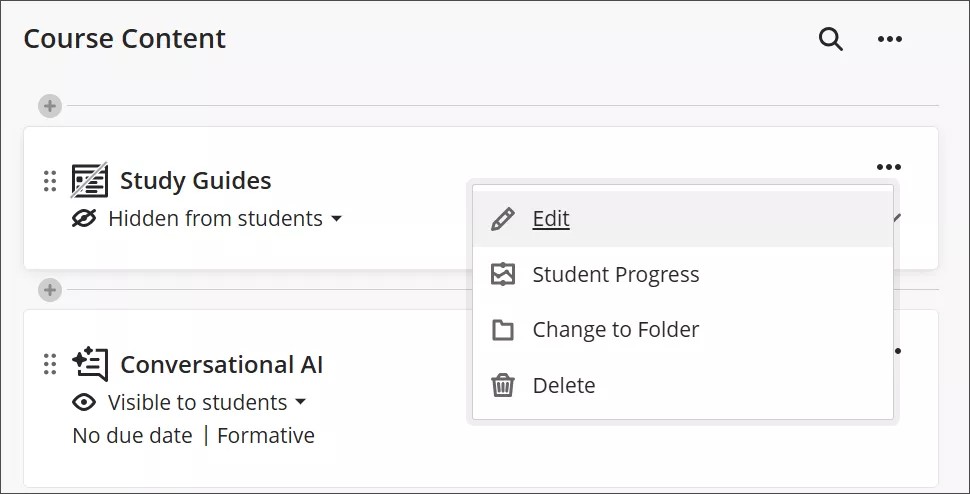
Select the ellipsis (...) button to the right of the learning module on you course content page.
Select Edit to bring up the learning module editing panel.
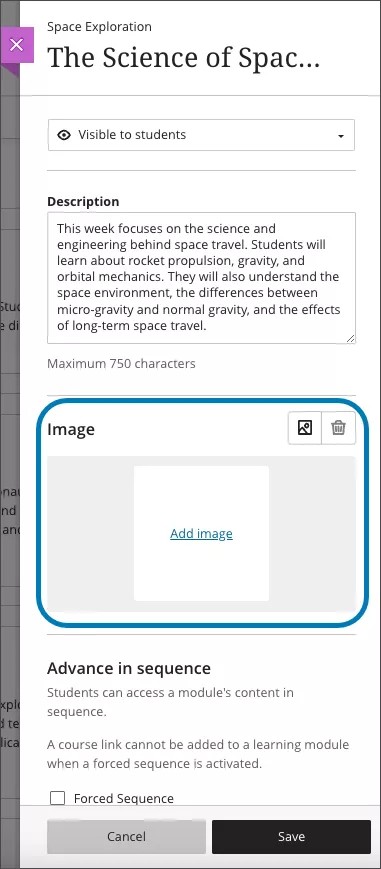
Choose an appealing and meaningful image for your learning module. Adding an image to your learning module provides a visual identity for your course and helps your students locate the learning module.
Select the image icon in the edit panel. You can now upload an image. JPEG and PNG formats are supported.
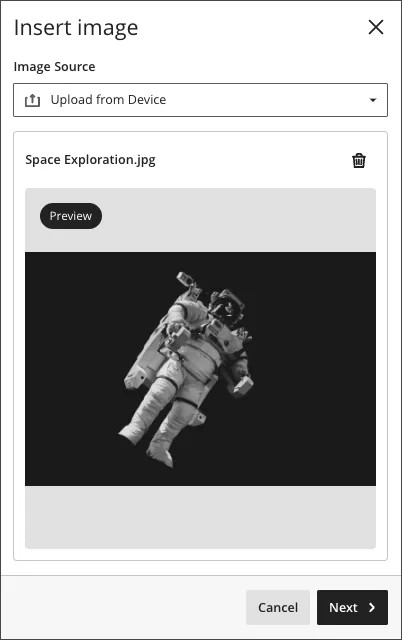
A preview of the image appears. Select Next to continue. You can select the trash icon if you want to cancel the upload instead.
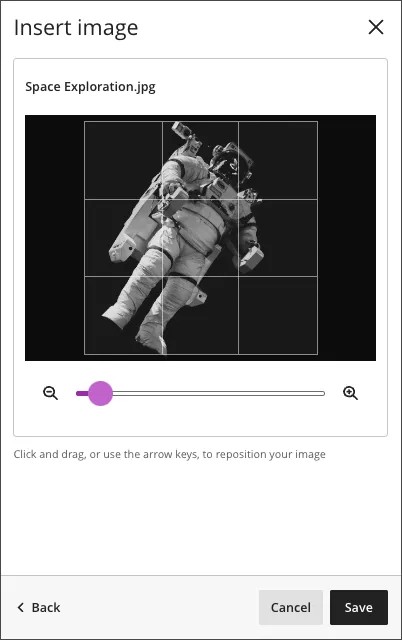
Position the image. You can adjust the zoom of the image using a slider and select and drag what parts of the image become the learning module image. Select Save to continue.
The image is uploaded to your learning module. The image might take a few seconds to load, depending on your internet connection.
Learning module images are automatically marked as decorative, which hides the banner for students using assistive technologies. If you want all students to know the content of the image, uncheck Mark the image as decorative. Enter a description of the image in the Alternative text field.
Select Save to turn on the image for your learning module.
Navigate learning modules
Edit the module title and description. Hover over the title or description and select to edit. Add an engaging description so students know what they'll learn in this module.
Change module visibility. You can show or hide the module for students. You can also select conditional availability. You can set the module availability on a certain date, as students achieve a chosen grade, or in a content sequence.
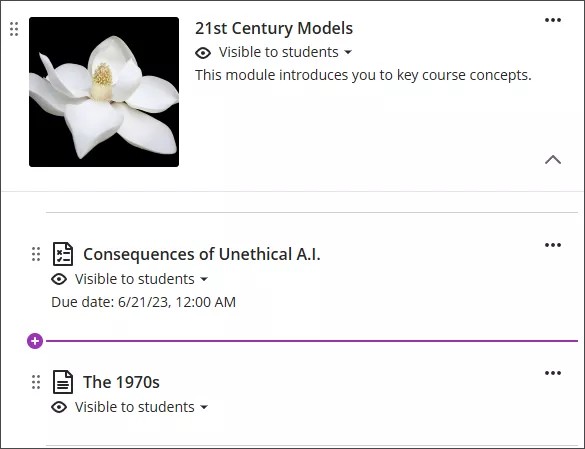
Add and create module content. Drag content from the Course Content page into the module or create content directly within it.
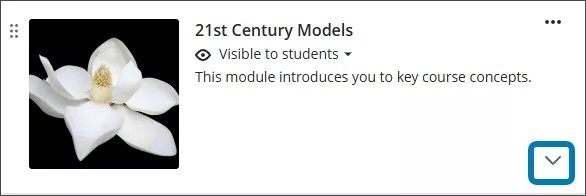
View and organize content. Select the arrow to expand the module and view all content. Reorder content in the order you want students to access it. Want to enforce the order? You can force a content sequence. If you delete a learning module with content, the content is also removed from the Course Content page.
Change content visibility or add conditions. You can select visibility for individual items within the learning module. You can also add conditions for when content becomes available.
You can navigate within the learning module just like you can in the main part of the Course Content page. Select the arrow to the right of the learning module on your Course Content page to expand or collapse the module’s content. If you select a course link within a learning module, you'll navigate out of the module.
You can create new items within the learning module by selecting the plus button that appears over blank areas in the module. Items created will appear in the location that you created them in.
You can drag and drop items that you have already created outside of the learning module. Select the item that you want to move, then drag the item to the learning module.

You can also add release conditions to content items within your learning module.
If you delete a learning module with content, all of the content is also removed from the Course Content page.
When you open a Learning Module, a collapsible table of contents is displayed on the side panel of your screen. This panel shows all the content items in the Learning Module and is similar to what students see.
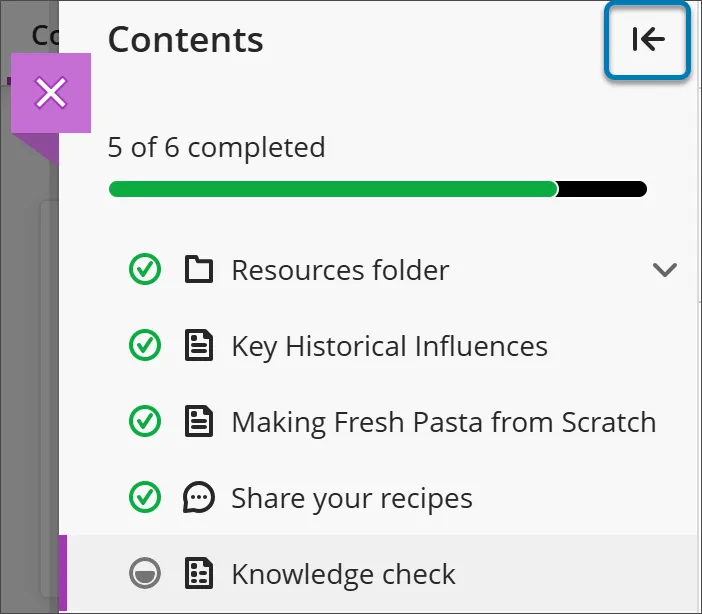
Select any item in the table of contents panel to open it directly. Keep in mind that in the student view, students can't see items that are behind a forced sequence or have not been made available to them.
If you want to hide the table of contents, select the arrow button at the top corner of the table of contents.
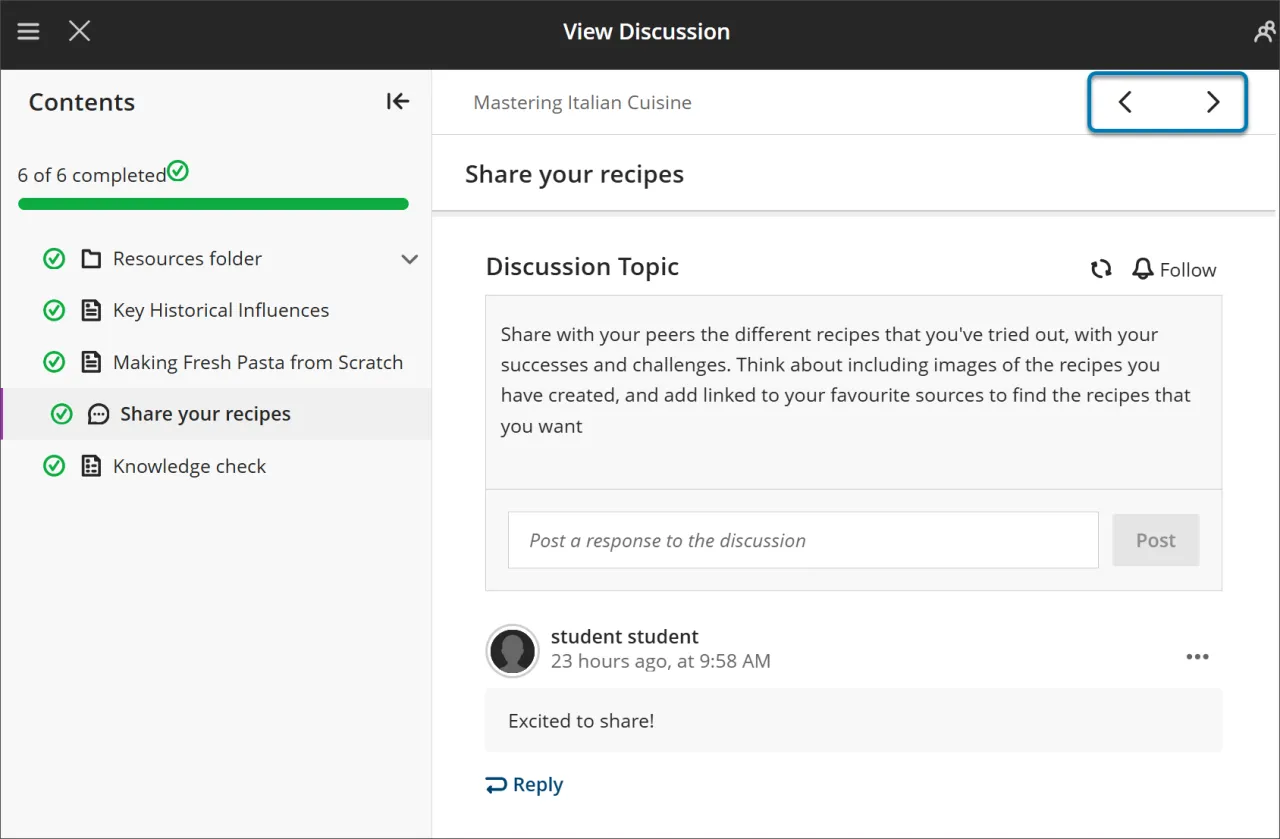
Use the Next and Previous buttons at the top right to move through content in order.
If you have initiated forced sequence, students may notice the next item is locked. They’ll need to meet certain conditions before Next and the next item in the Table of Content menu become available. They can still revisit any previously unlocked items.
Add folders to learning modules
You can add folders to a learning module to organize content. Folders in learning modules can only contain content items, not other folders.
Students navigate through content in folders the same as any other content in the module. However, you can force a content sequence. Students need to access and complete content within the folder before they move on to the next content item within the module.
Student views of learning modules
When a module is visible, students can also view all visible content within the module, including due dates. Students can open and access the content in any order.
If you force a content sequence, a message appears. Students are told that they need to open and complete the content in order, along with other conditions you set.
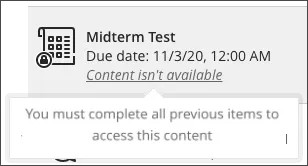
After students open a content item, they can navigate through the module with the arrows at the top of the browser window. When students are required to access the content in order, a lock appears next to the arrow.
Students can exit the module before completion. When students return, icons appear next to the module content if the sequence is enforced. The icons show which content is complete, in process, and not started, so students can pick up where they left off.
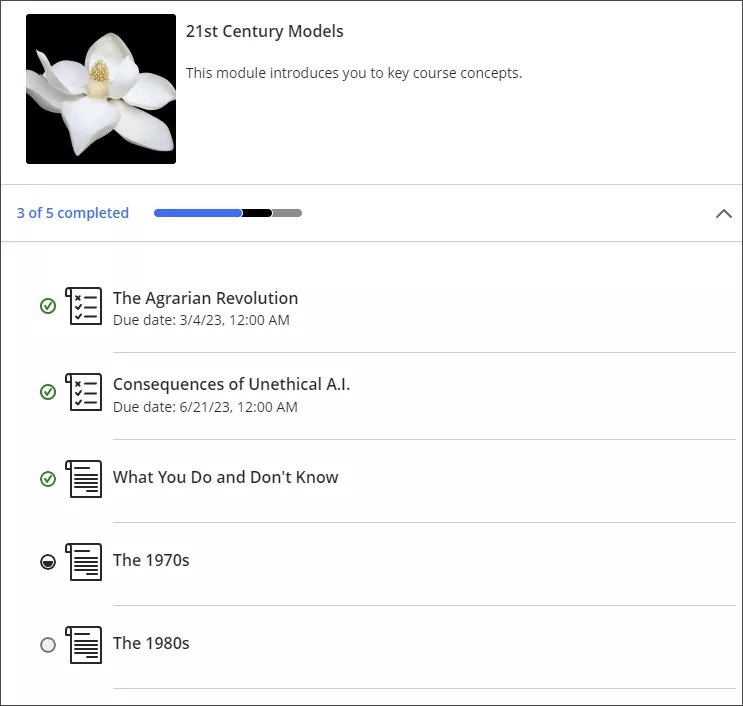
A green circle with a check mark means that content is complete. A partially filled black circle means the content is in process. An empty circle means that the content hasn't been started. Visit the Progress Tracking topic for more information about tracking your students' progress.