Article Contents
Accessing Distributed Permissions
Manage User Permissions Navigating User Permissions
Distributed Permissions allow greater control over assigning granular permissions to create custom user access that better aligns with your institution's needs. This system will allow you to responsibly delegate Course Evaluation tasks and assign custom report access to any user or group across your institution.
Accessing Distributed Permissions
Manage User Permissions Navigating User Permissions
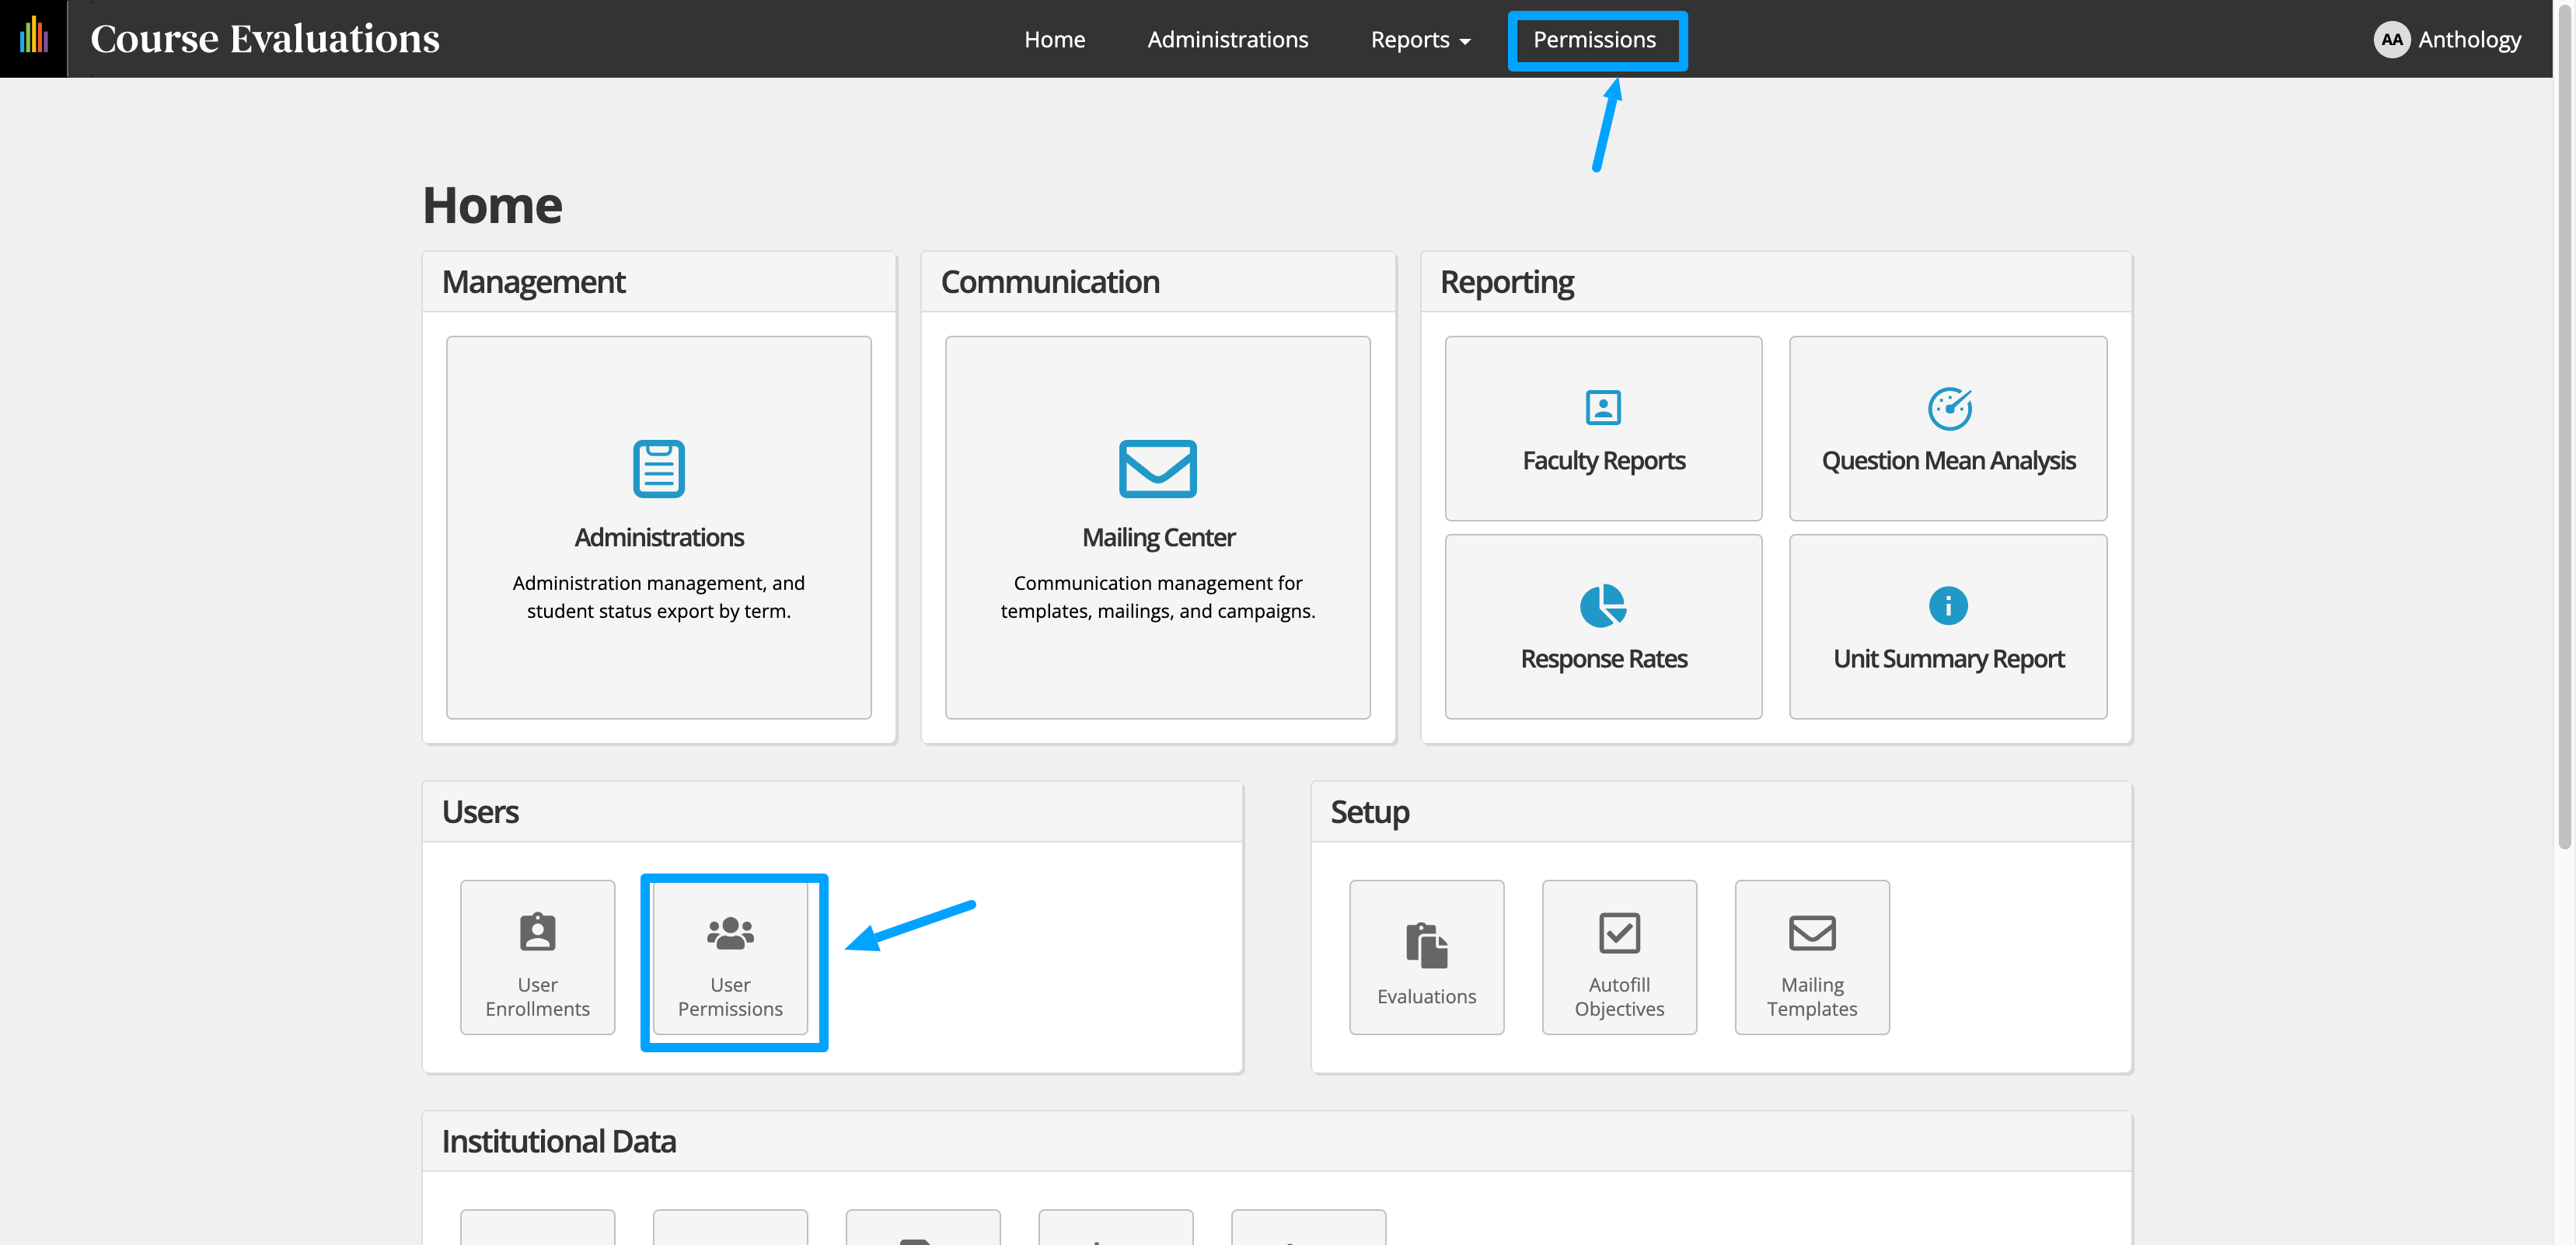
The Permissions link will appear in the top bar navigation and User Permissions tile on the home page, if enabled on your site.
Any users with access to manage permissions will be able to access this link.
To enable distributed permissions please contact Anthology Support.
 |
The User Permissions page will display all user accounts. There are various ways to filter and organize this list as permissions become assigned. Flexible column customization, giving administrative users the ability to structure the page in the way that best fits their needs.
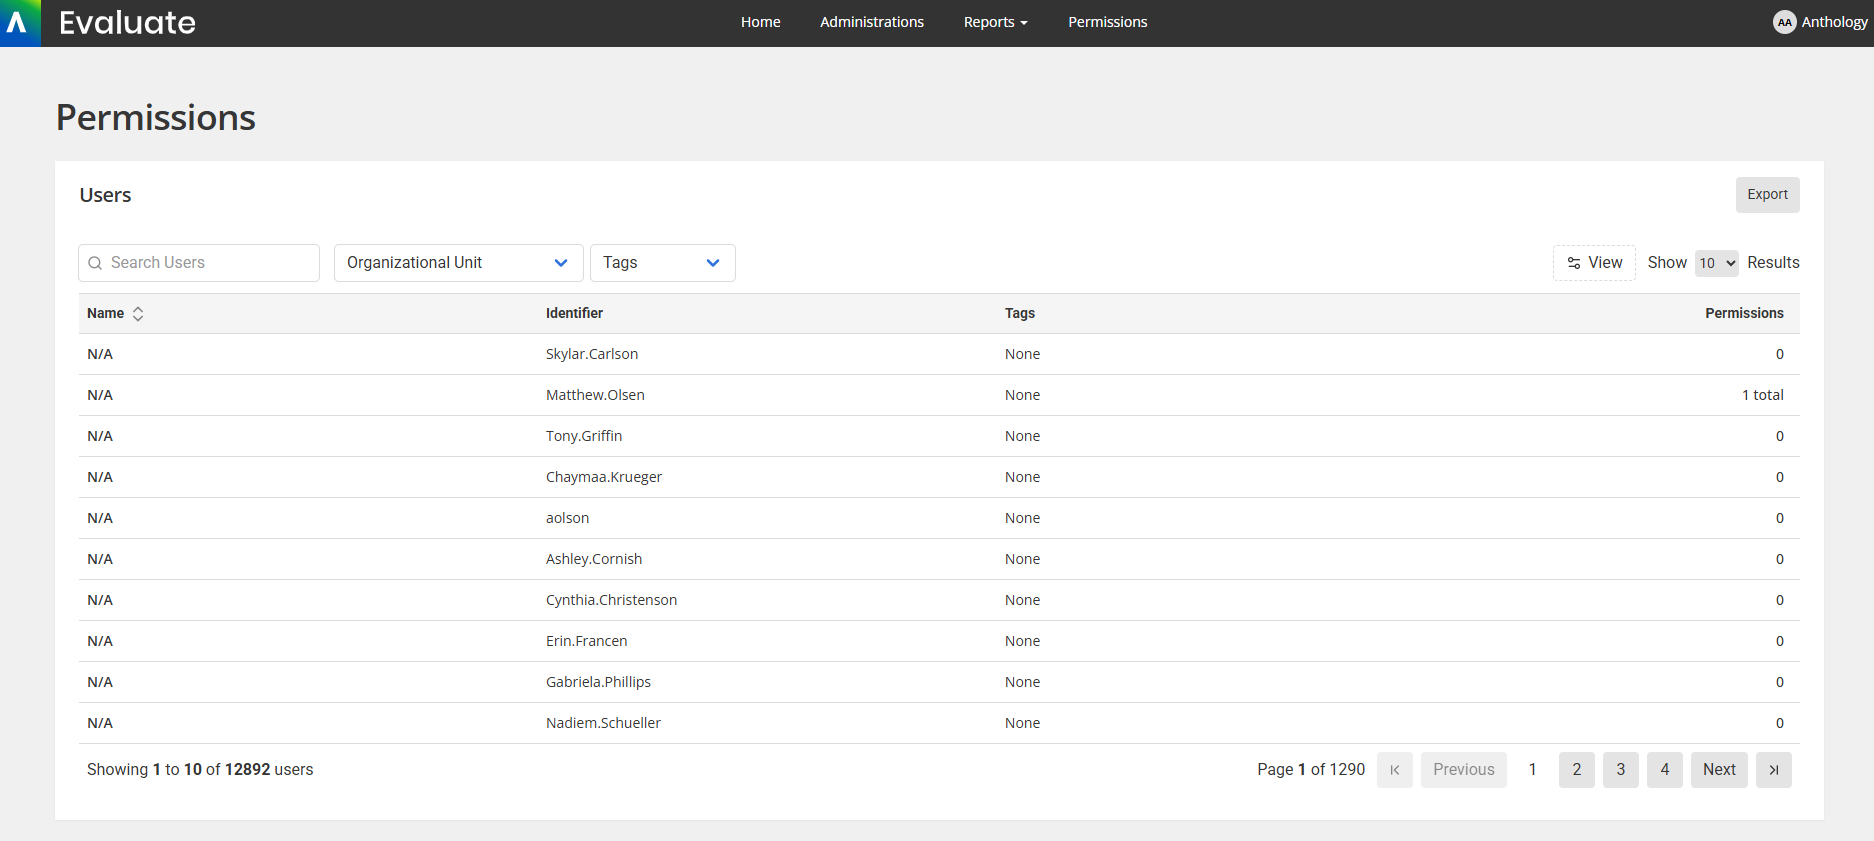
To set permissions, select a specific user account from the list to begin managing permissions and tags.
Tags are markers that can be applied to individual (user accounts) within your Evaluate permissions. You can utilize these markers in any way you choose, however, they are typically useful for organization and in labeling users with similar permission assignments or campus roles.
You will see the “Tags” area on the left hand of the page of the user you wish to assign a Tag. When you click into the "Add tags" a box will open and a list of any existing Tags will be shown. Start typing the name of the Tag you wish to find in the existing list or type out the full name of the Tag you wish to create. If needing to add a new Tag, enter the text in the “Create New Tag” and click "Add new Tag" and select “Save Tags” to assign the new tag to the user.
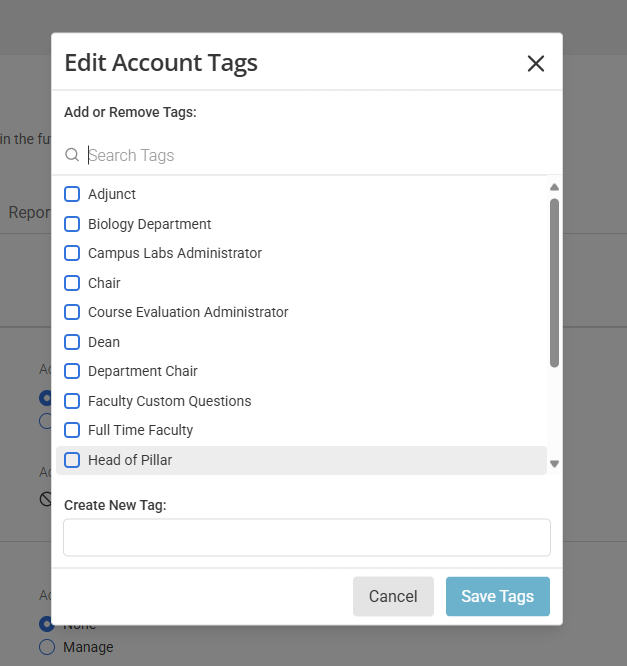
Tags allow you to filter users on the permission landing page
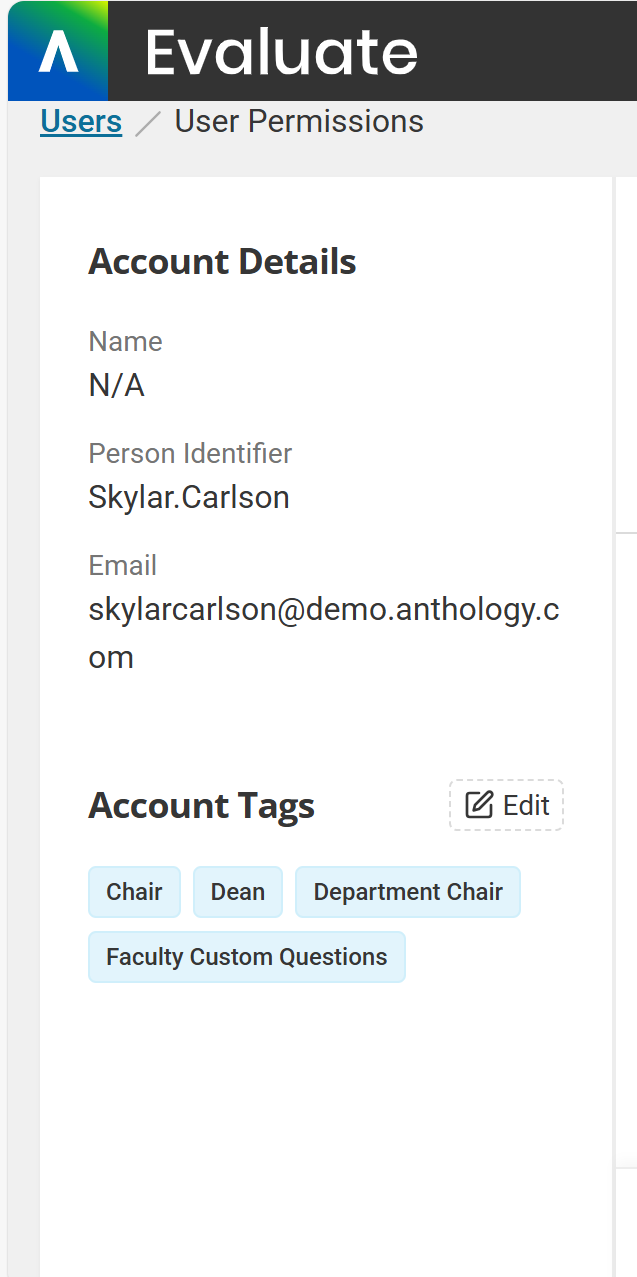
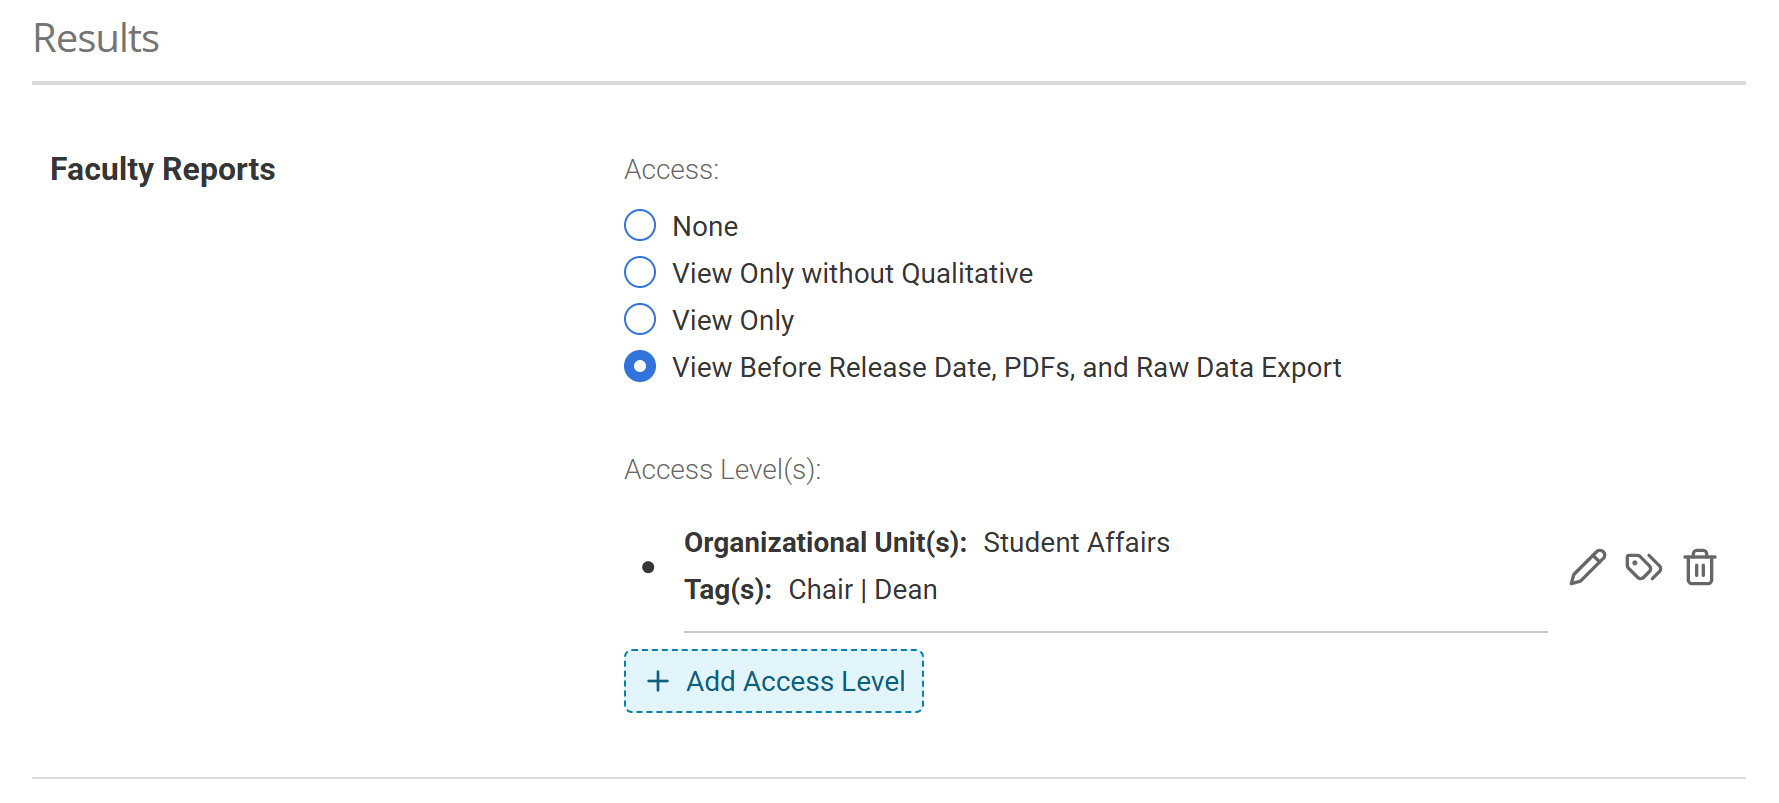
Tags give you additional control over whose faculty reports a user can view. Learn how to restrict access by tags.
Access level tags to specific permissions. Administrators will now be able to assign these tags within both the Faculty Reports permissions.
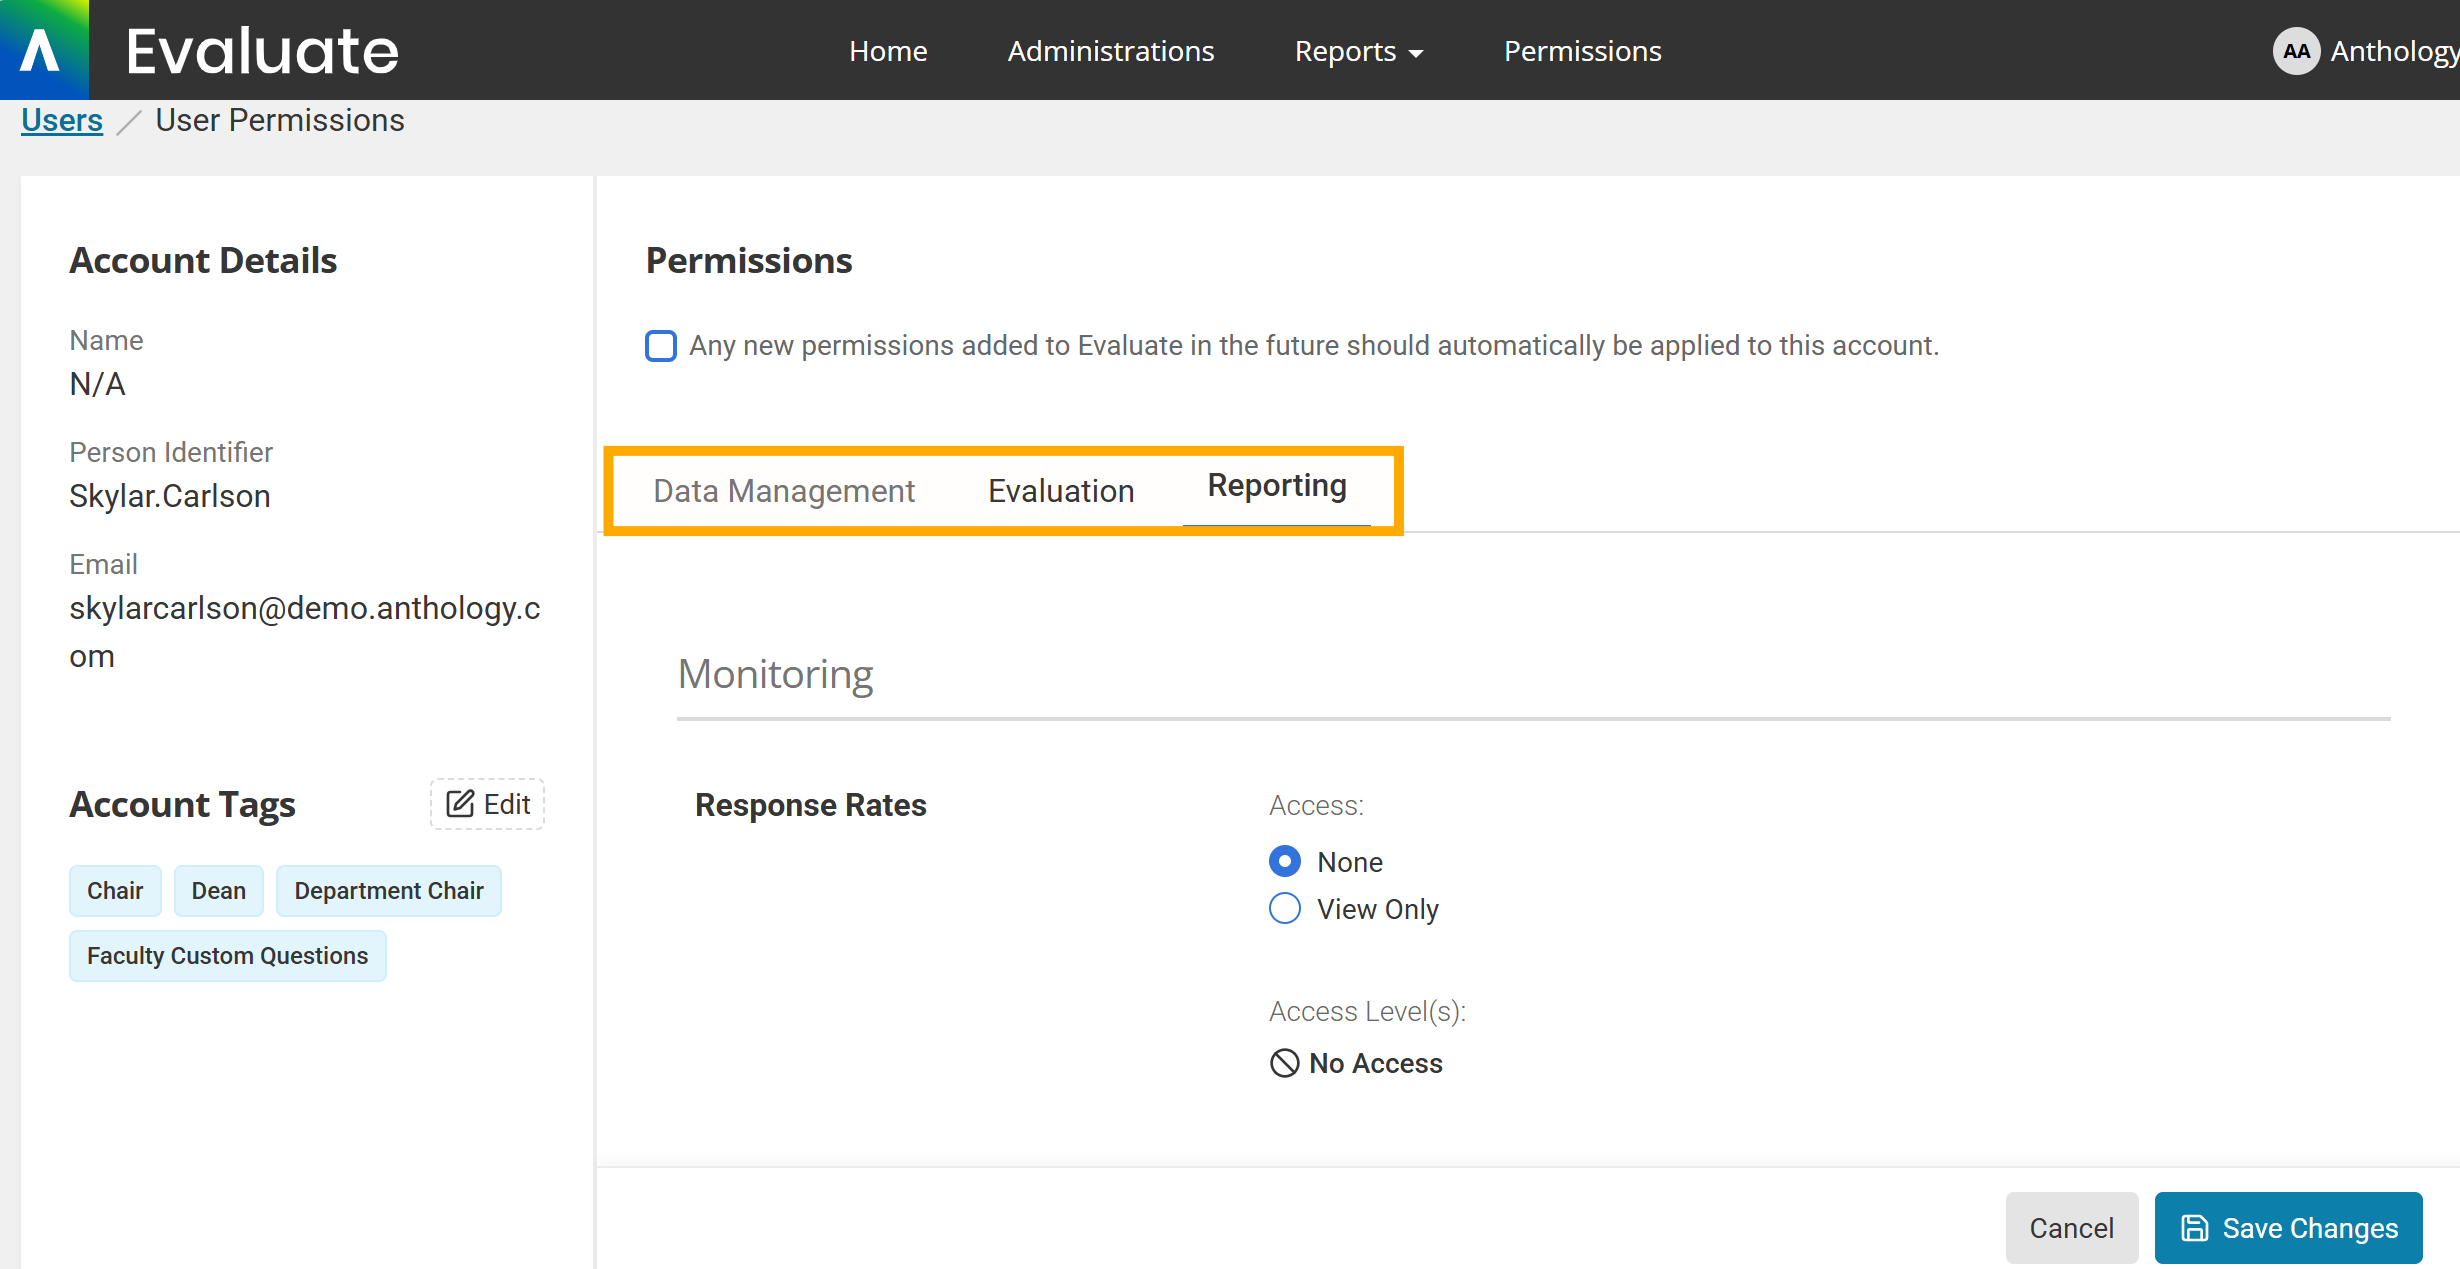
After selecting a user account, you will be brought to their permission details page.
Permissions are organized into three (3) categories displayed as panels. Each panel houses multiple sub-categories and individual permission items that refer to specific areas of the site and the associated tasks. You may manage the level and scope of access for each permission through the Actions and Data Access columns.
Before granting permissions you can learn more about the details about each permission item.
Select the appropriate tier of access the user should be granted on a permission item.
After selecting an option other than “ None” from the actions menu the data access column will indicate whether further action is needed.
Permissions that display “Unrestricted” access to the data set do not require any further action.
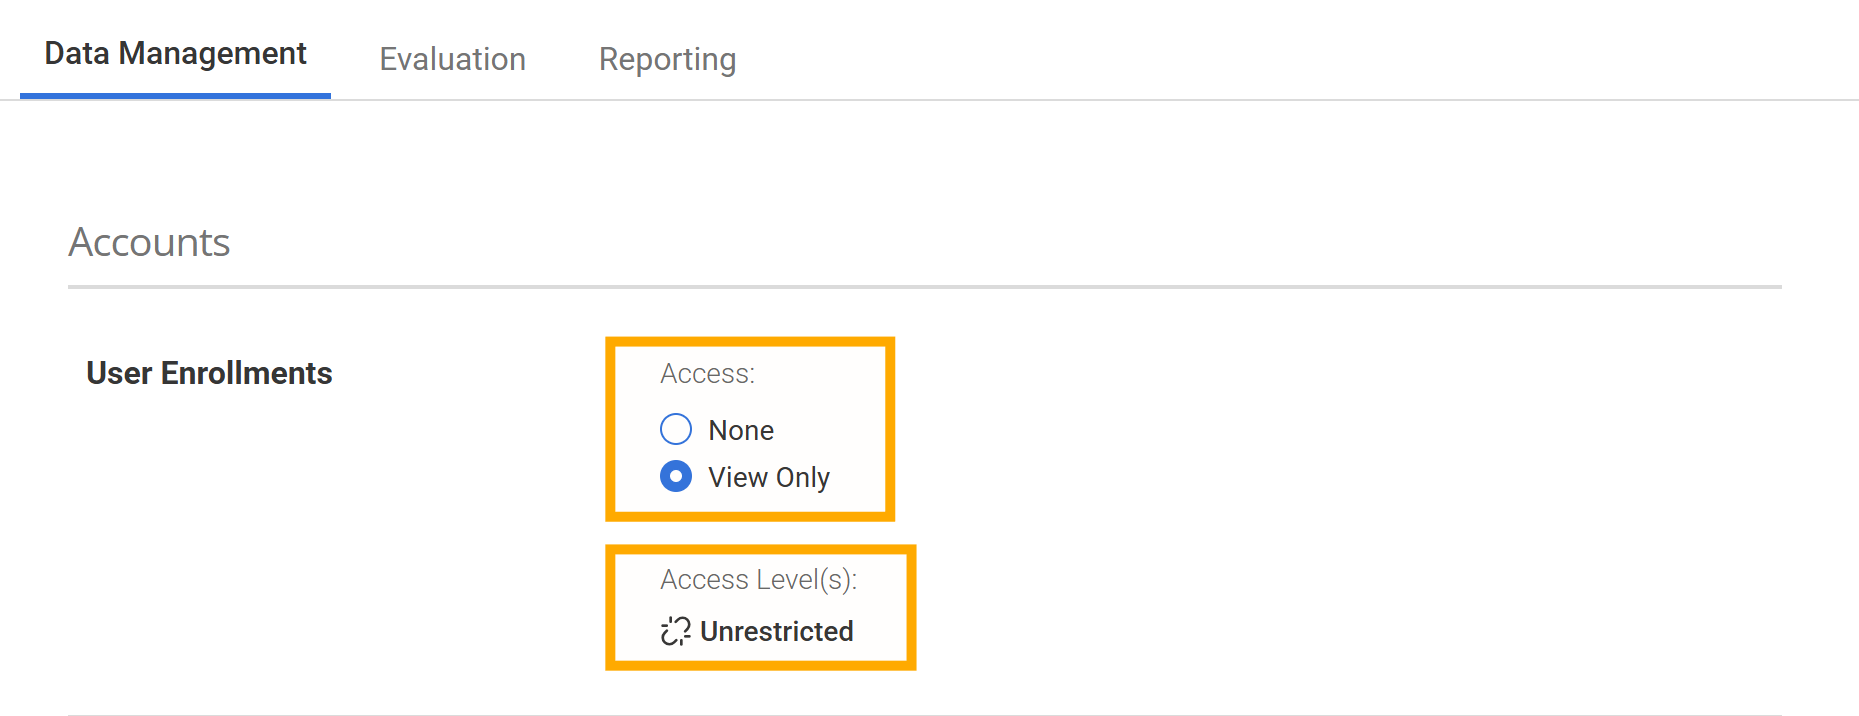
Permissions that display a “Select ” link in the data access column require an Organizational Unit assignment before the permission can be applied.
Click the “Add Access Level” link.
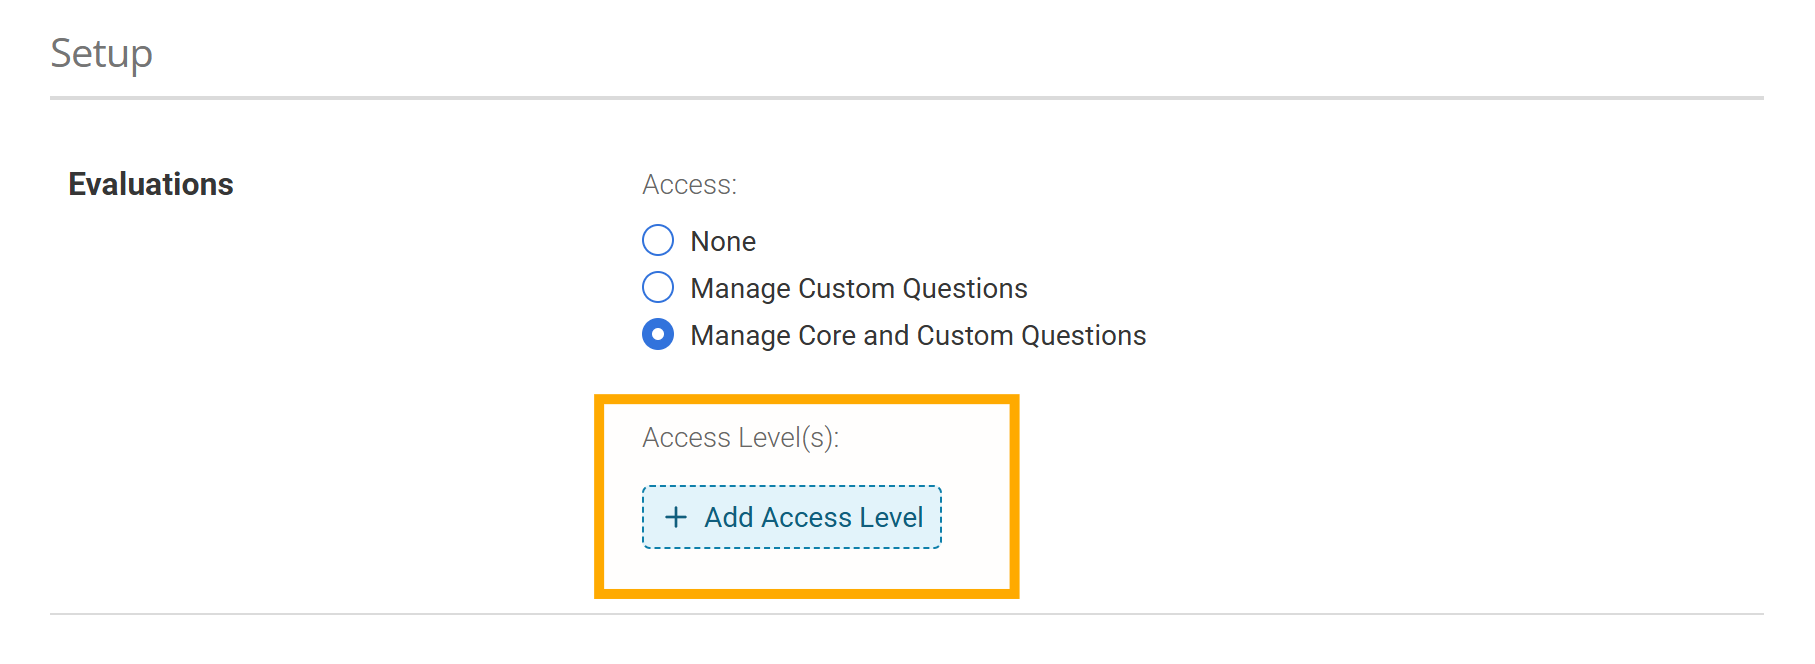
A side panel will appear for you to make your selections . Selecting the highest-level organizational unit will enable the user full access to all underlying units , whereas selecting a lower-level organizational unit will limit access to that subset of the data.
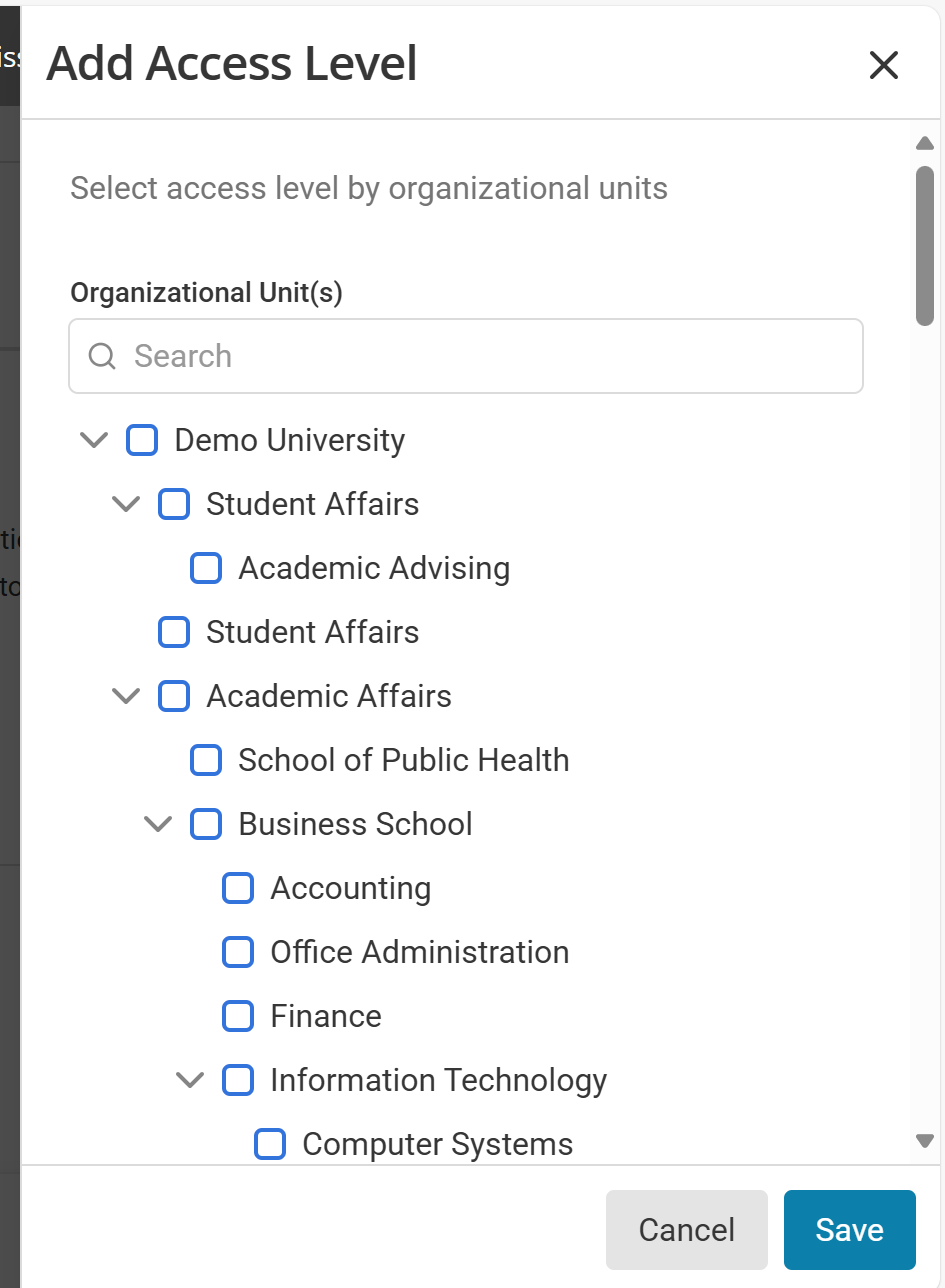
Click “ Save . ”

The enabled Actions will now be limited to the Organizational Unit displayed .
Before granting permissions you can learn more about the details about each permission item.
The Faculty Reports permission, found under the Reporting panel, will allow you to add additional restrictions to report access with the use of Tags.
If desired, Tags may be used to control reporting views. The use of Tags in Set Data Access will restrict which reports are visible to the user to the reports associated with other users that have the same Tag applied to their User Account .
Follow the steps above to assign report access to an Organizational Unit. By default, users have access to all reports assigned within the selected org unit.
Add Tags associated with users that report access is being given
Click “ Save” when you have finished limiting access to Tags.
Learn more about Report related permission details by visiting Distributed Permission Item Details.