ロールを使用してレポートへのアクセスを制限する
Note
このドキュメントは、AIを活用した機械翻訳によって翻訳されました。 翻訳は現状のまま提供されており、その正確性については一切保証いたしません。このコンテンツの英語版が、公式かつ信頼できる情報源となります。
Blackboard Illuminate Reporting のロールベースのアクセスにより、各ユーザーは自分のロールで許可されたレポートにのみアクセスできます。
Illuminate Reportingには、学長、遠隔/オンライン学習責任者、学部長、学生サクセスリーダーなど、教育機関のハイレベルな指導者を対象としたさまざまなレポートがあります。しかし、データに基づいた意思決定の文化を完全にサポートし促進するために、教育機関では、他のユーザーに特定のタイプのレポートへの制限付きアクセスを許可したい場合があります。
ロールを使用して、Illuminate ユーザーがアクセスできるレポートの種類を制限できます。ロールベースのアクセスを有効にする手順は、認証タイプによって異なります:
機関認証:Blackboard Illuminateでロールベースのアクセスを設定する
SAMLをIDプロバイダとして使用する機関認証を使用している管理者は、レポーティングにログインし、関連するノードからのみデータにアクセスするユーザ権限を付与できる。
ヒント
役割ベースのアクセスを設定する前に、必ず機関階層(IH)とコースを設定してください。
役割によるIlluminateレポートへのアクセスの制限
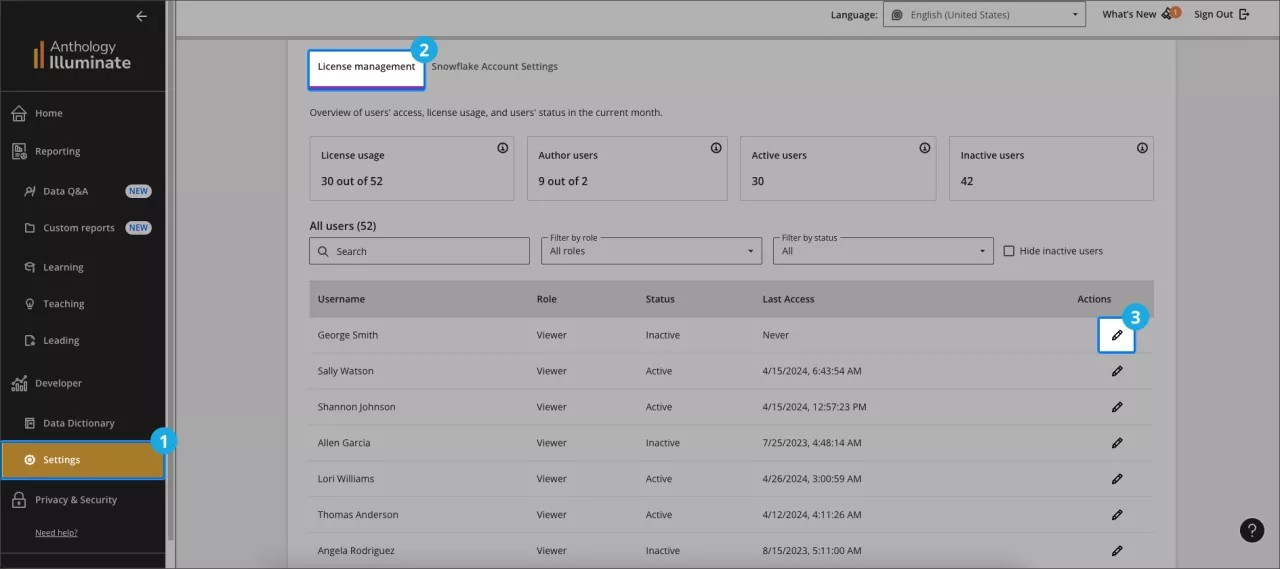
開発者で、設定からライセンス管理を選択します。
アクションで、更新するユーザーの編集を選択します。ユーザの編集ページで、ユーザの役割の下に、割り当てる役割を選択します。
管理者:管理者。設定、Snowflake へのアクセス、すべての事前構築済みレポートおよびデータへの読み取りアクセスを含む、プラットフォームへのフル アクセスが可能です。
作成者(Illuminate Premium専用):。カスタムレポートの作成、Snowflakeへのアクセス、デフォルトですべての構築済みレポートとデータの表示が可能です。
ビューア:データのセキュリティを確保するため、デフォルトで構築済みレポートへの読み取り専用アクセス権を持ちます。アクセスを制限する
注記
ロールが割り当てられていないユーザーは、Illuminate にログインすることはできますが、プラットフォーム内で権限を持つことはできません。これらのユーザーは、ライセンスされたユーザーシートを占有しないため、管理者はライセンス容量を効率的に管理することができます。
組織階層の下で、ユーザーがアクセスできる組織レベルに対応するノードを選択します。各ノードを展開して子ノードを見ることができます。
ヒント
レポートエリアのアクセスの種類と、データ制限付きアクセスまたはデータ制限なしアクセスを組み合わせて、よりパーソナライズされたエクスペリエンスを作成できます。
変更を保存 を選択します。
Select Save Changes.
重要
権限が適用されるまで一晩待ちます。
注記
ロールベースのアクセス権がユーザーに割り当てられると、そのユーザーのアクセス権が制限されるため、最初はフィルタリングされていない、データがない状態でレポートが表示されます。ユーザーは、自分のアクセス権に基づいた情報をレポートに入力するために、階層レベルを選択する必要があります。
認定用の事前構築されたレポート権限
各権限は、レポートへの特定のアクセスレベルを提供する:
権限 | 内容 |
|---|---|
主要レポート - データ制限 | すべてのリーディングレポートおよびデータへのアクセスは、組織階層によってユーザーに付与された権限によって制限されている。 |
学習レポート - データの制限 | すべての学習レポートおよびデータへのアクセスは、組織階層によってユーザーに付与された権限によって制限される。 |
ティーチング・レポート - データの制限 | すべてのティーチングレポートおよびデータへのアクセスは、組織階層によってユーザーに付与された権限によって制限されます。 |
すべてのレポート - データは無制限 | すべてのレポートとデータへのアクセス |
すべてのレポート - データ制限 | すべてのレポートおよびデータへのアクセスは、教育機関の階層によってユーザーに付与された権限によって制限される。 |
ネイティブ認証:Blackboard LMSでロールベースのアクセスを設定する
教育機関が教育機関認証を有効にしておらず、代わりにIlluminateのIDプロバイダとしてBlackboardを使用している場合、ユーザーがレポートにログインし、関連付けられたノードからのみデータにアクセスできるように許可できます。
この方法には2つのプロセスがある:
レポートがすでに制限されたユーザーをサポートするように設定されていることを確認してください。(上記の支持報告表を参照してください)。
既存ユーザーにデータ - 制限された役割を追加。
ヒント
レポートへのロールベースのアクセスを設定する前に、必ず教育機関階層(IH)とコースを設定してください。
Illuminateのユーザーにデータ制限ロールを追加する
Blackboard Illuminateから環境設定を選択します。
ライセンス管理タブを選択し、ユーザーリストを見つけてください。
ユーザーが編集できるアクション欄の編集を選択してください。
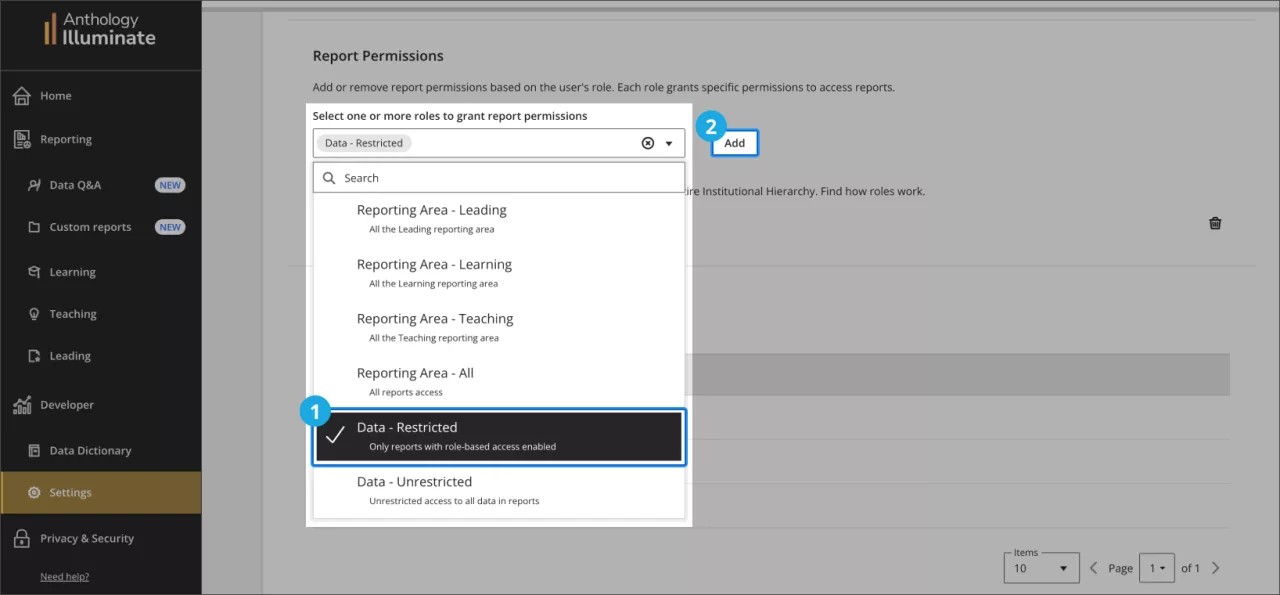
ユーザー編集ページで、 レポート権限セクションに移動し、ドロップダウンメニューから「データ – 制限の」オプションを選択します。次に、 追加を選択します。
Blackboard LMS の教育機関階層レベル別のアクセス設定
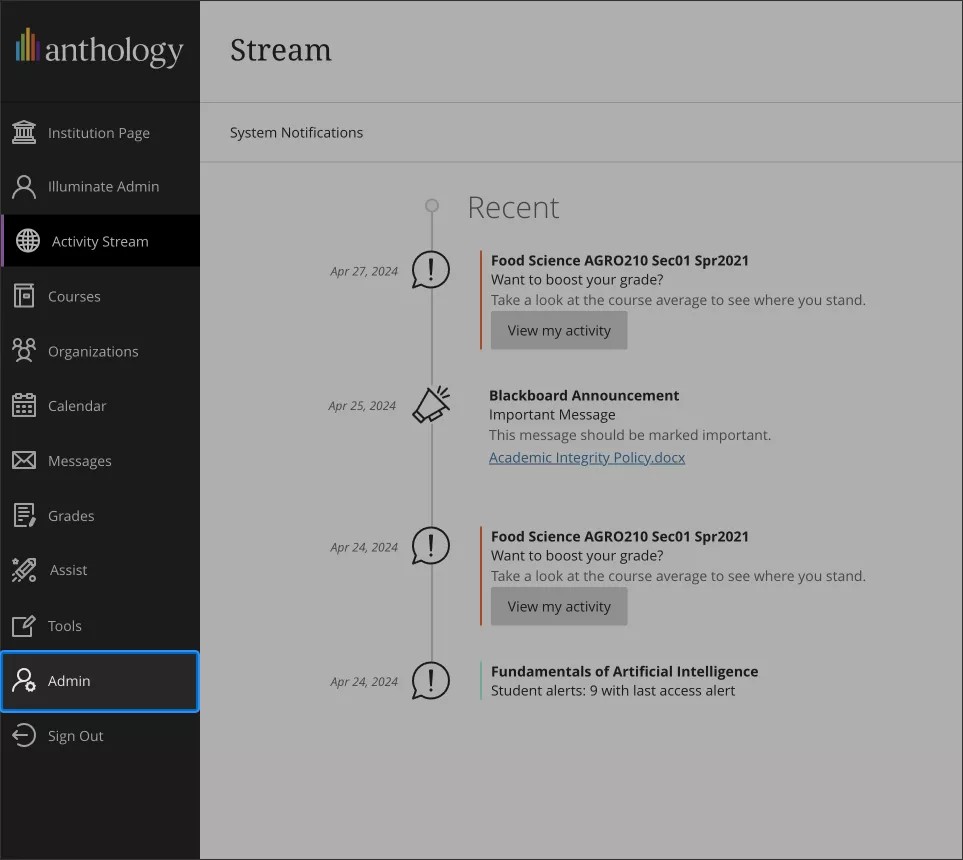
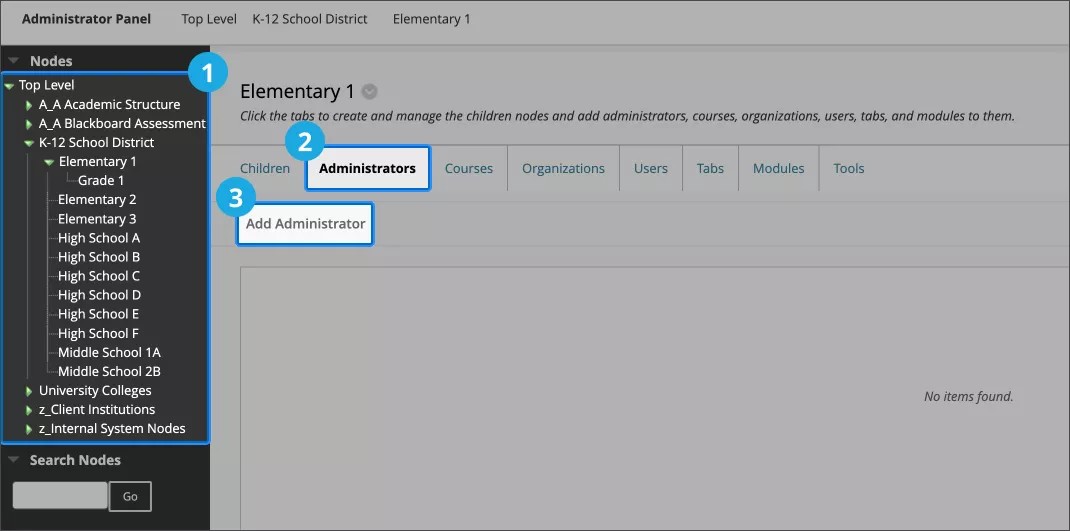
Blackboard LMSの管理者パネルに移動します。
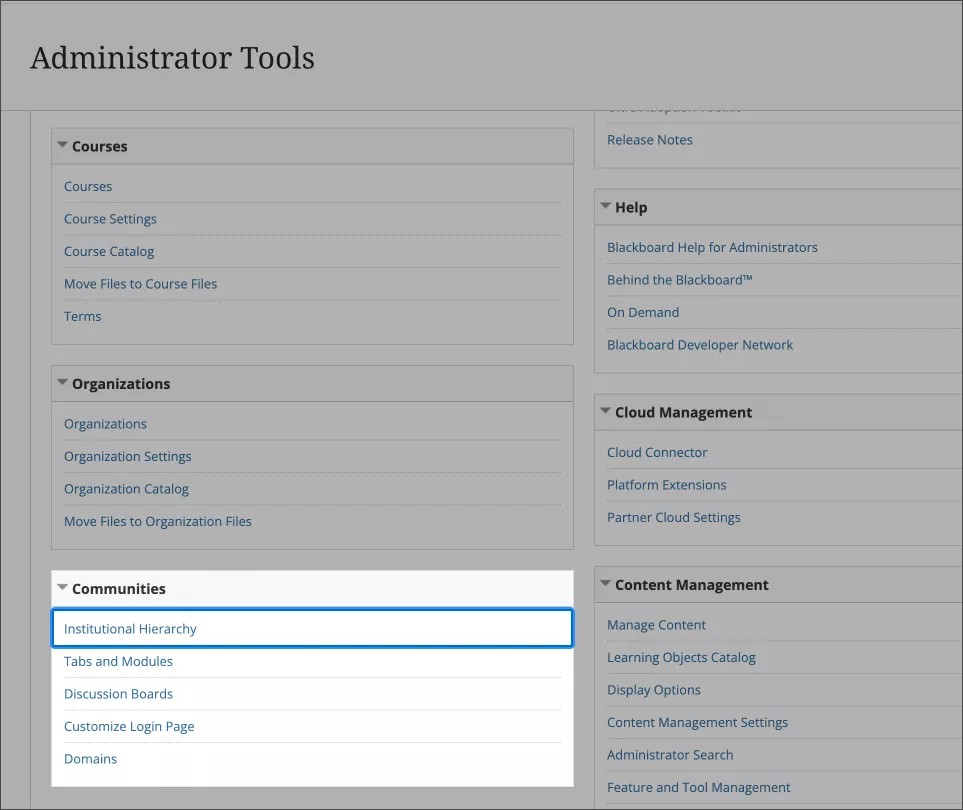
「コミュニティ」の下で、「組織階層」を選択します。
教育機関の階層内を移動し、ユーザにアクセス権を付与するノードおよび子ノードを選択します。
アクセス権を設定するときは、各ユーザに割り当てるレベルを慎重に選択することが重要です。ユーザーは割り当てられたレベルやそれ以下のレベルの情報にアクセスできますが、同じティア以上のレベルからはアクセスできません。
次の例を考えてみましょう。
教育機関レベル1 - A
教育機関レベル2 - B
教育機関レベル3 - C
教育機関レベル4 - D
教育機関レベル4 - E
この構造では、ユーザ1に教育機関レベル3 - Cへのアクセス権を付与すると、ユーザは教育機関レベル4 - Dと教育機関レベル4 - Eの両方のデータにもアクセスできるようになります。これは、レベル4 - Dと4 - Eがレベル3 - Cの下にネストされ、アクセス権限が下位レベルにまで及ぶためです。
ただし、ユーザ2に教育機関レベル4 - Dへのアクセス権のみを付与した場合、ユーザは教育機関レベル4 - Eのデータにアクセスできません。レベル4 - Dでのアクセスはそのレベルのみに制限され、同じレベル以上の他のノードは含まれません。
目的のノードを選択したら、 管理者 に移動し、 管理者の追加 を選択します。
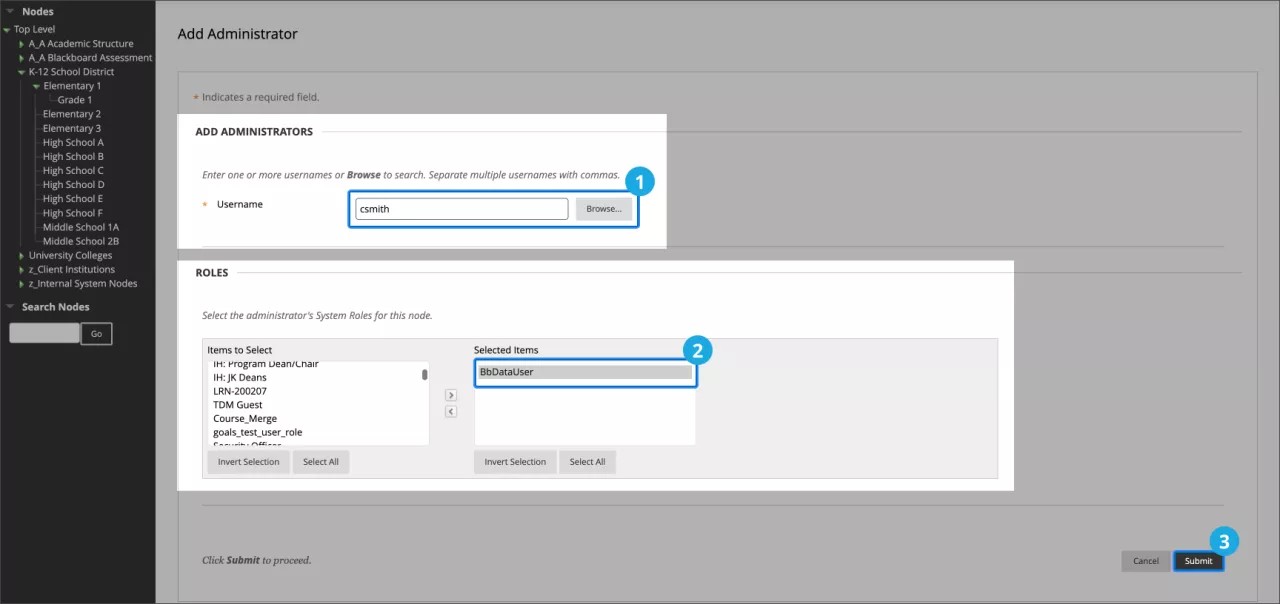
管理者の追加画面から
管理者として追加したいユーザー名がわかっている場合は、ユーザー名フィールドに入力します。
それ以外の場合は、[参照]ボタンを選択し、[名前]、[Eメールアドレス]、[システムロール]などのフィールドで検索します。関連する結果をすべて選択し 、[送信]をクリックします。
役割セクションで、ノードで使用する管理者のシステムロールを選択します。
重要
特定のロールは、Illuminateのコンパートメント化されたレポートには影響しませんが、Blackboard LMSのノード内のユーザーの権限に影響します。
関連付けはノード管理者の関連付けを変更することでいつでも変更できます。または、ユーザの教育機関での認証のロール/グループを削除するか、シングルサインオンアカウントを無効にすることで、アクセスを完全に取り消すこともできます。
提出を選択します。
警告
ルールが適用されるまで一晩待つ。
ネイティブ認証のレポート権限
ヒント
よりパーソナライズされたエクスペリエンスを作成するために、ユーザーに対して複数のレポート権限を選択できます。
各ロールは、レポートに対する特定のアクセスレベルを提供する:
ユーザーの役割 | 権限 |
|---|---|
レポートエリア - 読書 | すべての読書レポートにアクセスする |
レポートフィールド - 学習 | すべての学習レポートへのアクセス |
レポート領域 - 教員向け | すべての教員レポートへのアクセス |
報告領域 - すべて | すべてのレポートへのアクセス |
データ - 制限あり | 組織階層によってユーザーに付与された権限によって制限されるデータへのアクセス |
データ - 無制限 | すべてのレポートのすべてのデータにアクセスできます。 |
Illuminateユーザーからレポートの権限を削除する
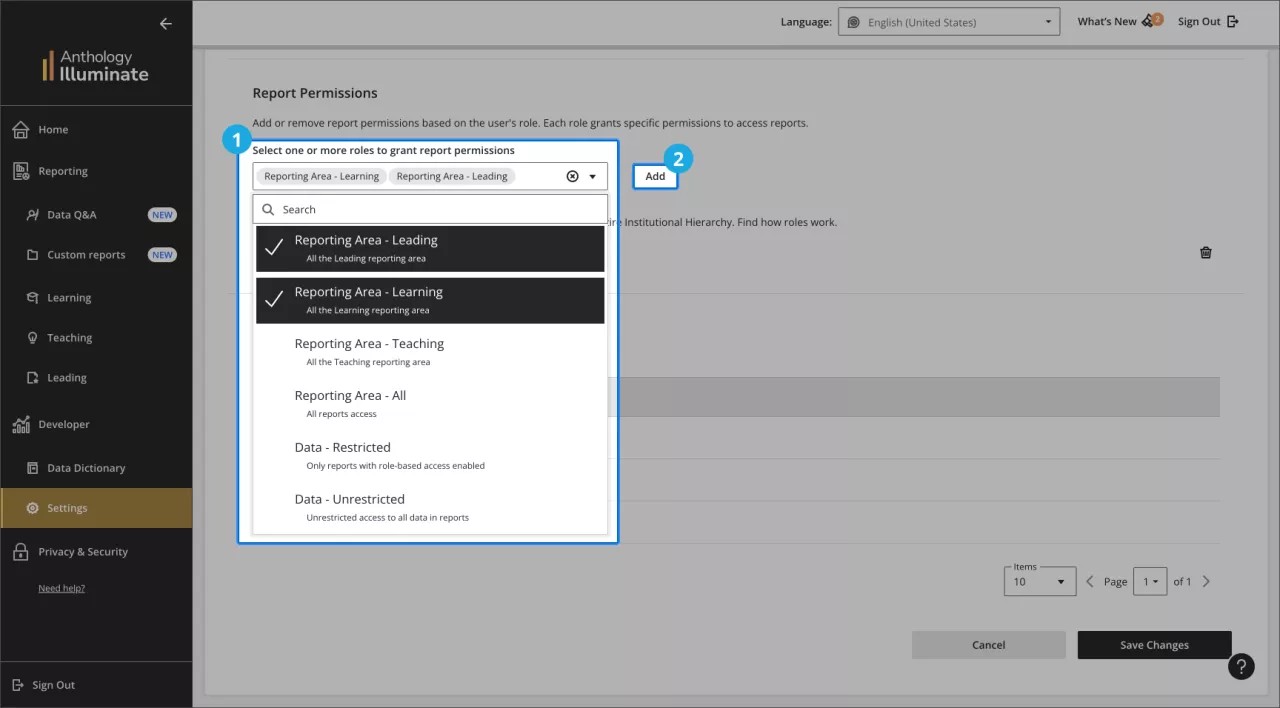
設定から。
[ライセンス管理]タブを選択し、ユーザリストを見つけます。
変更したいユーザーの横にある編集を選択します。
レポートの権限を割り当てるには、レポートの権限セクションに移動し、1つ以上のロールを選択してから、追加を選択します。
役割ベースのアクセスをサポートするレポート
ロールベースのアクセスを設定する前に、この表を確認して、レポートがサポートされていることを確認してください。
領域 | レポート | 状態 |
|---|---|---|
学習 | 学生の積極的な取り組み | サポート |
学習 | 学生のパフォーマンスと成績 | サポート |
学習 | ソーシャルとコラボレーションの取り組み | サポート |
学習 | 学生の概要 | サポート |
教育 | 指導方法 | サポート |
教育 | アセスメントと採点 | サポート |
教育 | コースの概要 | サポート |
指導 | 学習ツールの導入 | サポート |
指導 | コラボレーションセッションのアクティビティ | サポート |
指導 | 学習プラットフォームの導入 | 進行中 |
指導 | コース管理 | サポート |