Notas de la versión 2026
October 2026
Data Dictionary
The Data Dictionary has a redesigned layout that makes the Illuminate data models easier to browse. The new experience also adds sample data from your institution and the ability to search across all schemas with filters.
Browse by schema, table, or column
From the navigation bar, you can quickly access the Schemas and Entity Relationships.
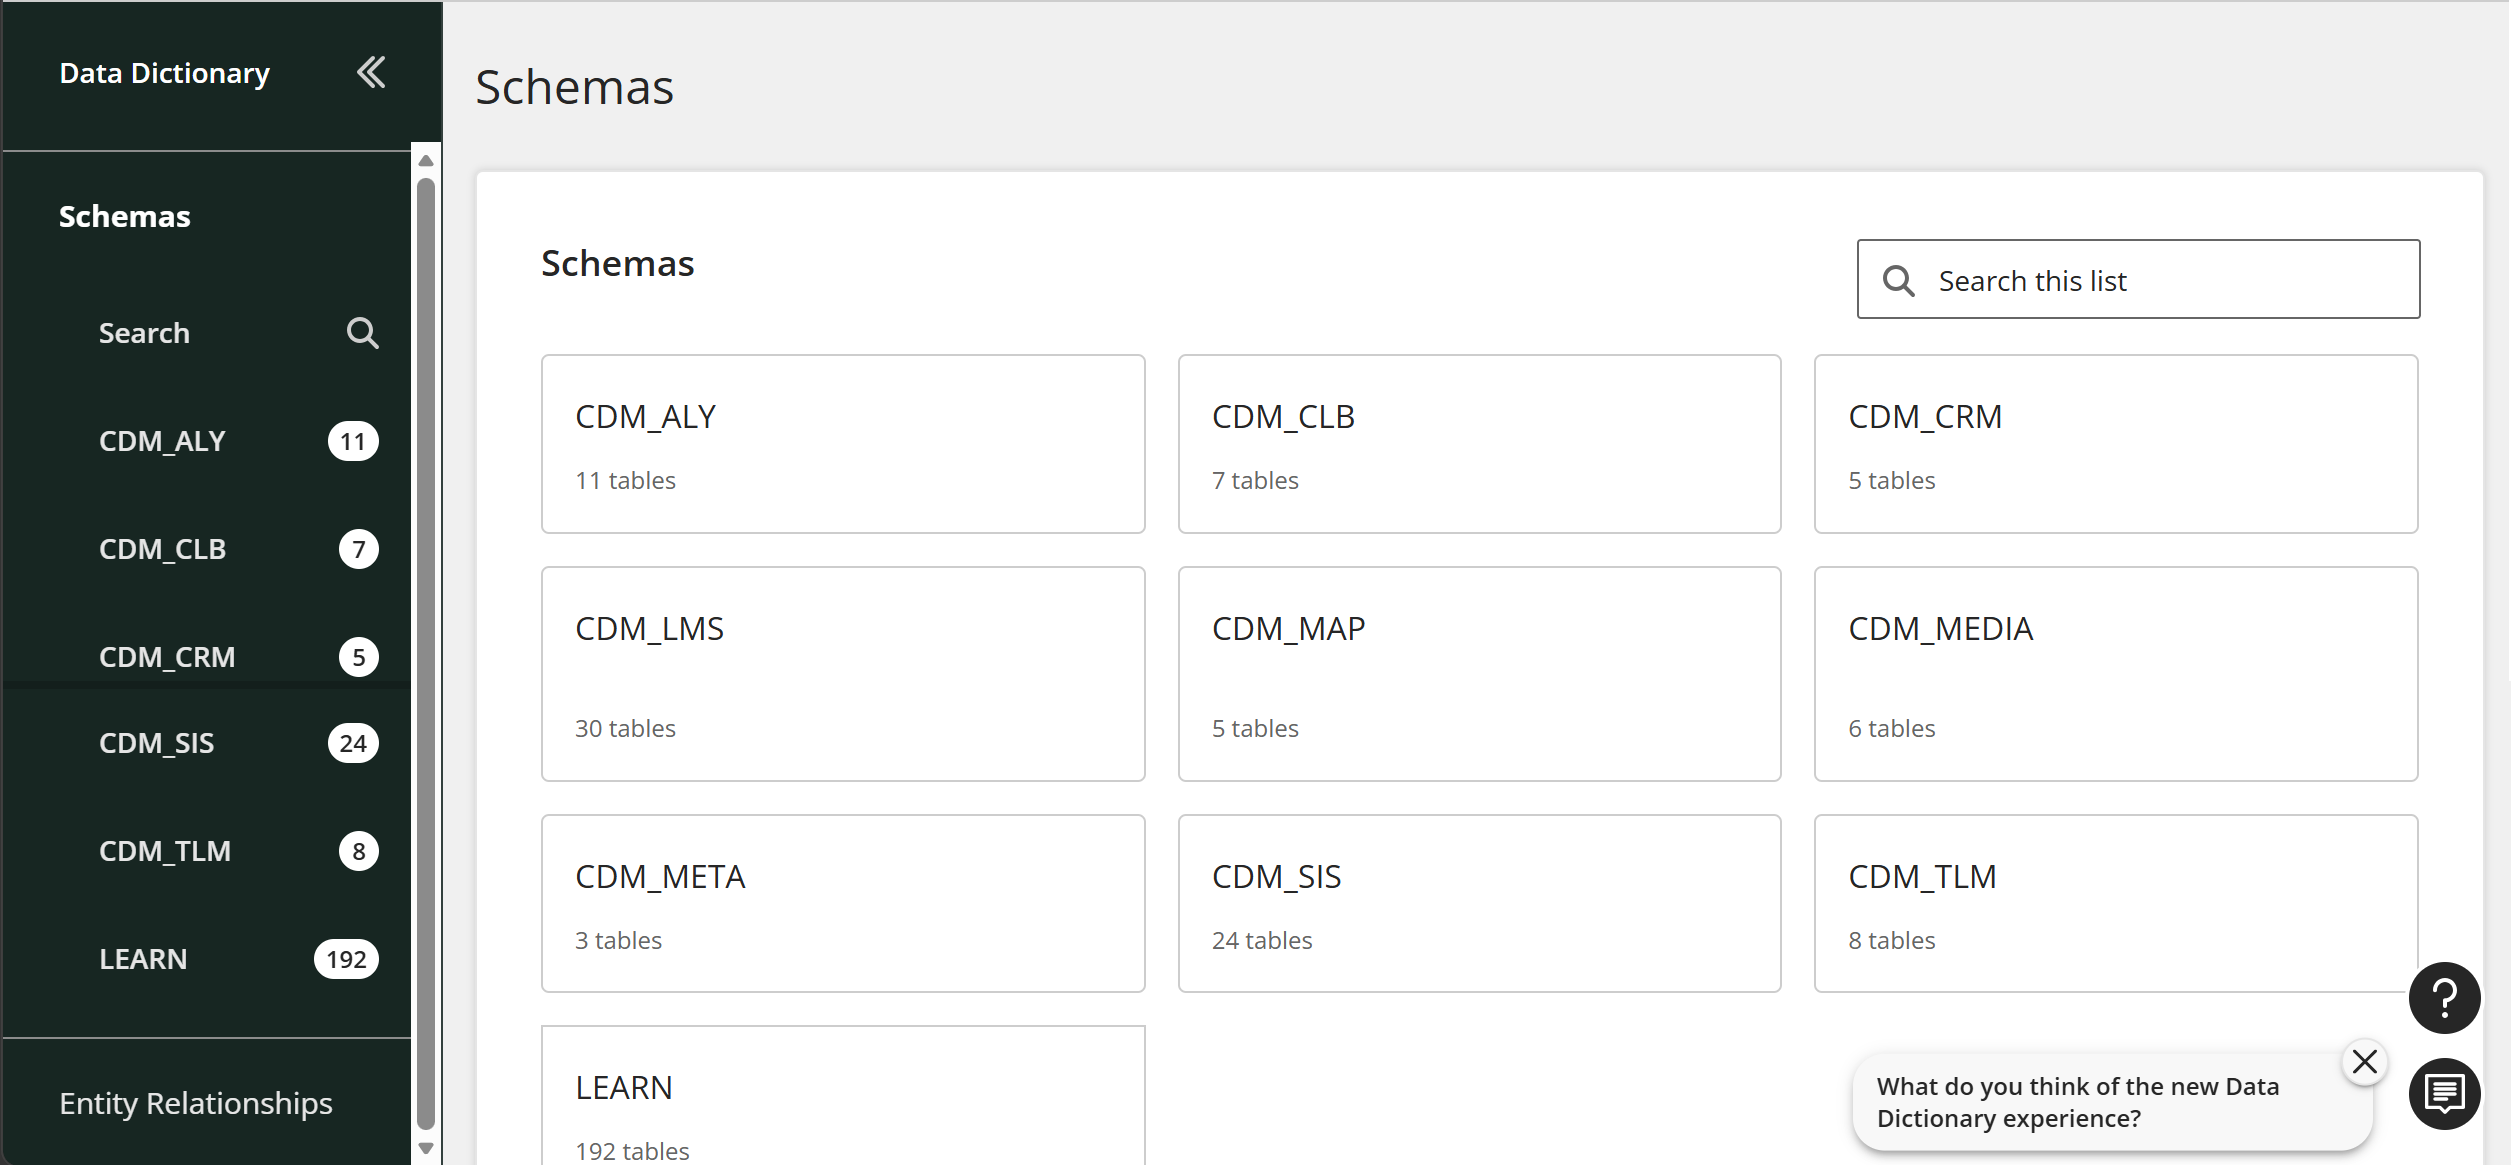
Schemas
Browse the list of schemas to view all available canonical data models.
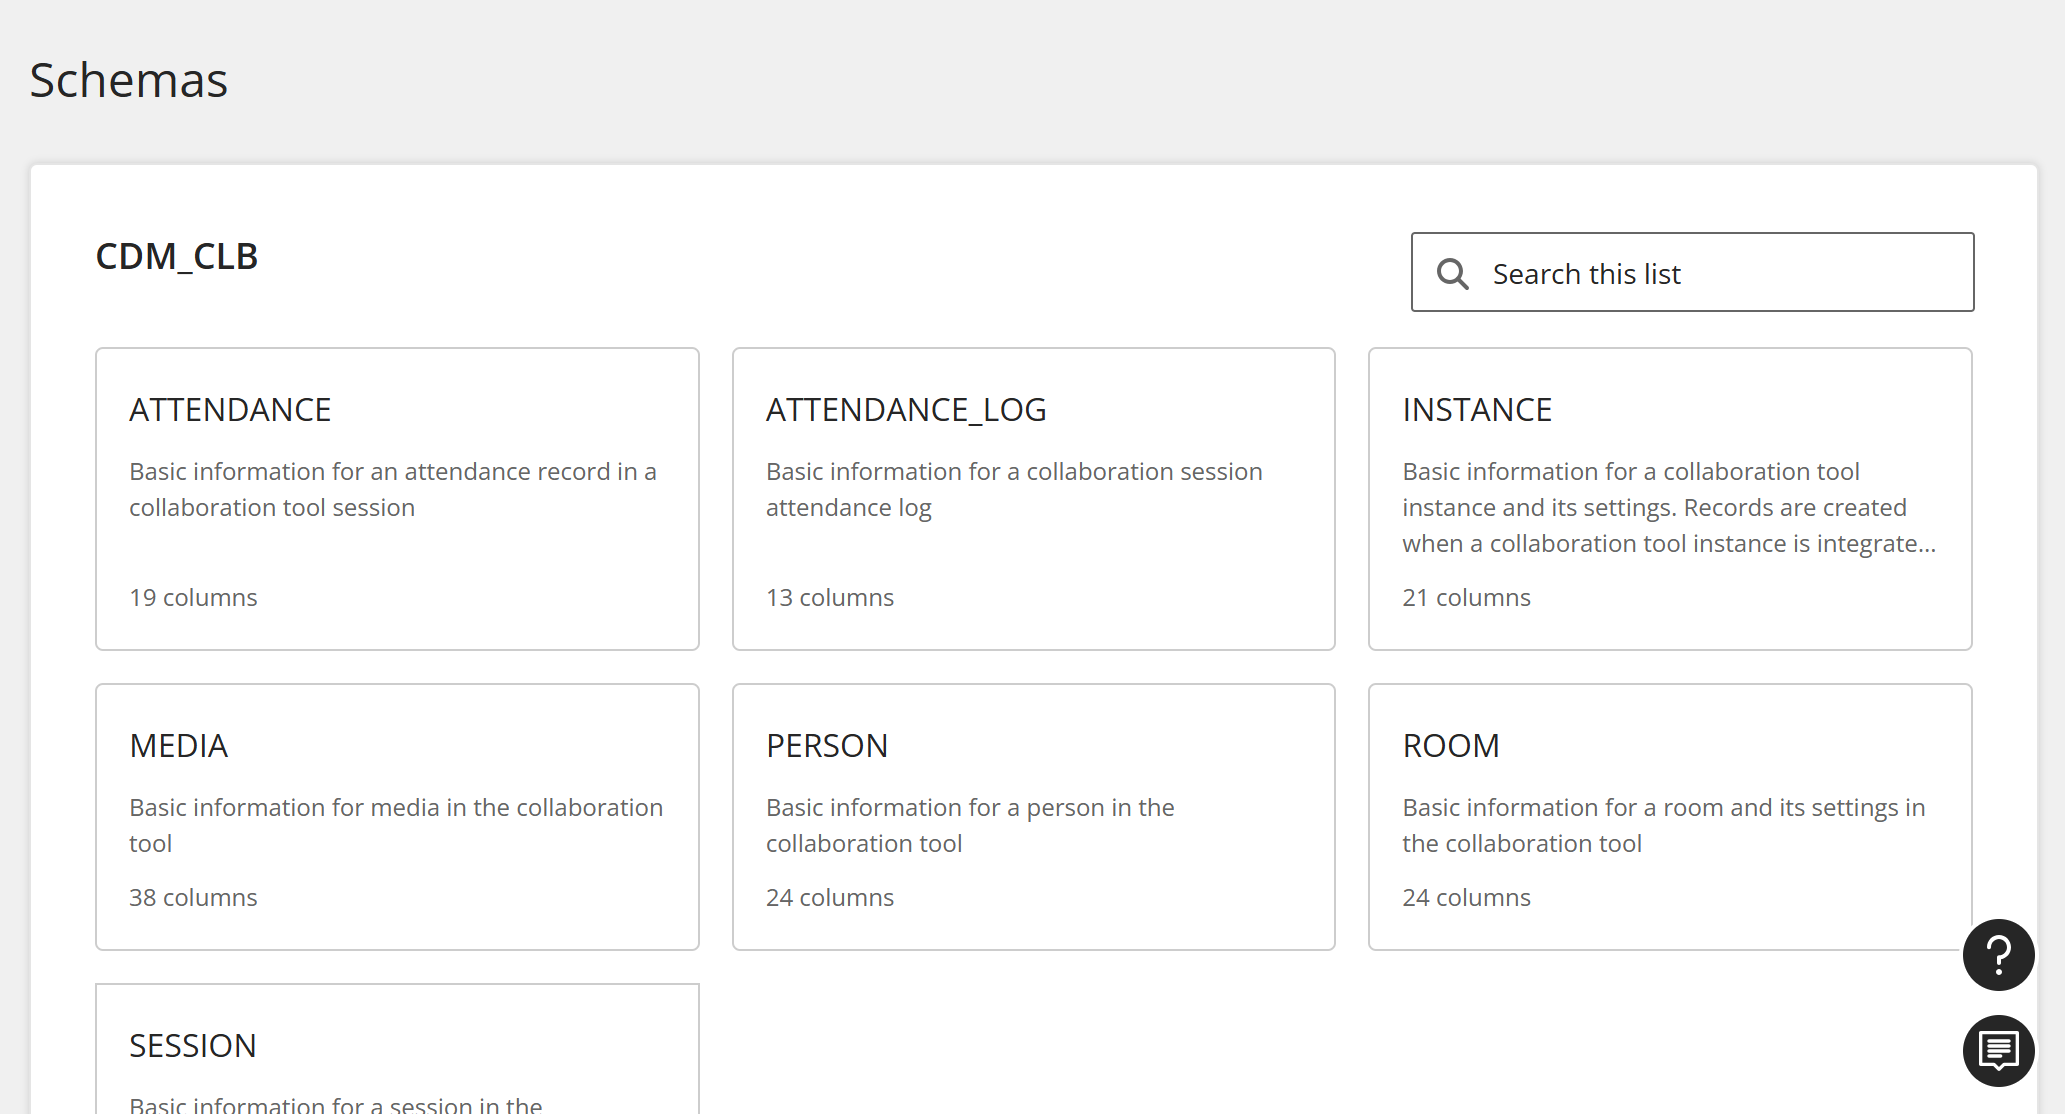
Tables
When you select a CDM, you can view all of its tables. Select a table.
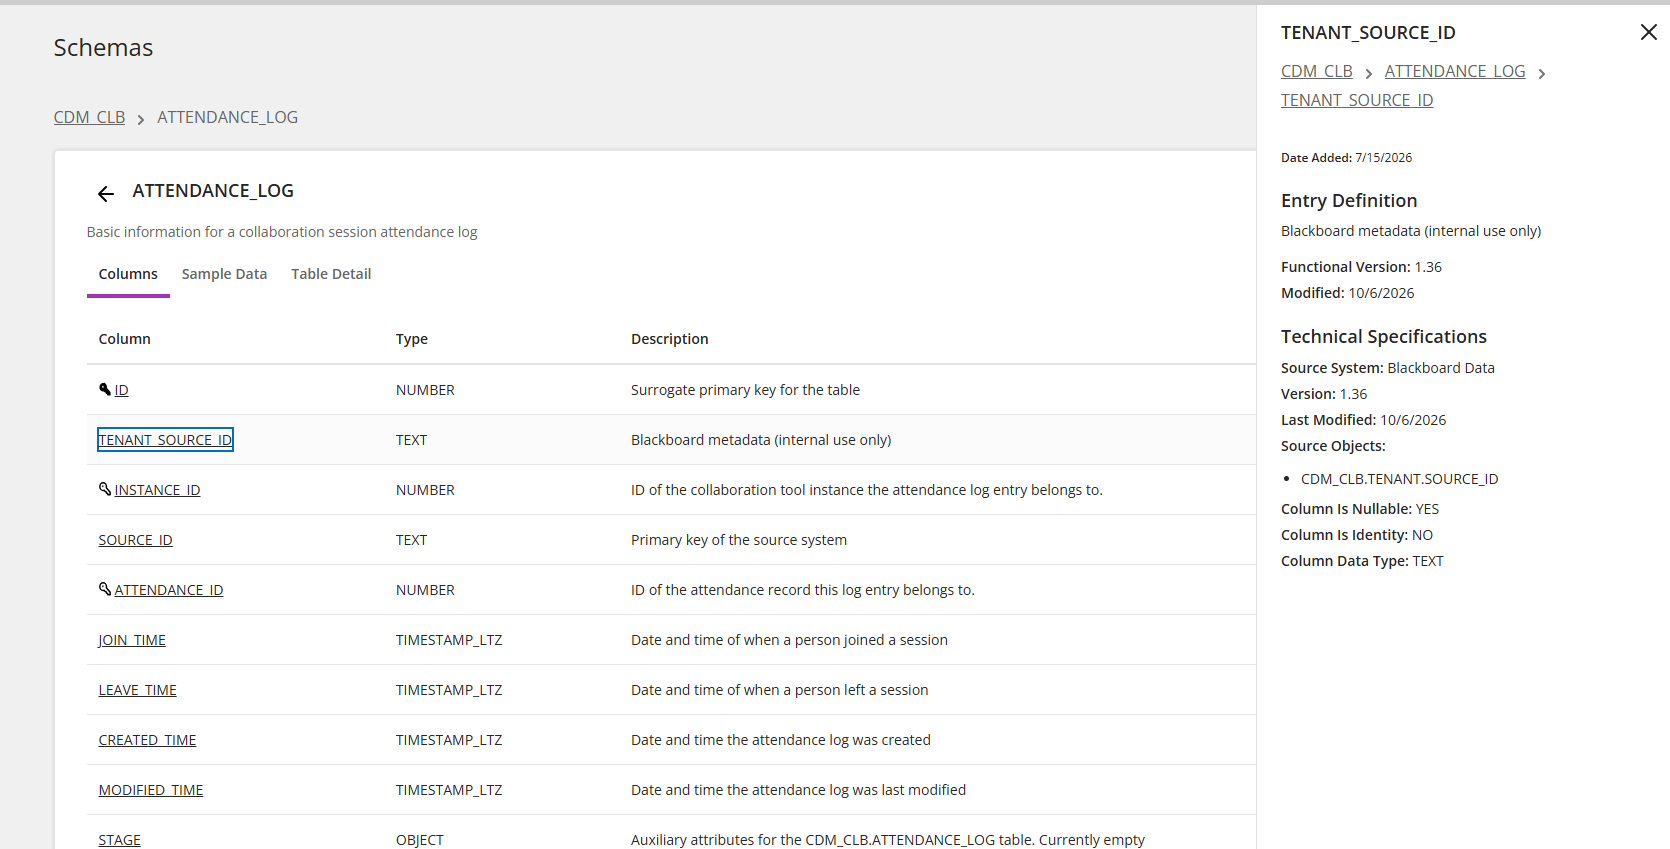
Each table has Columns, Sample Data, and Table Detail tabs.
Columns
From a table, select Columns. Then select a column to see its entry definition and technical specifications.
Sample data
From a table, signed-in Administrators, Authors, or Developers can select Sample Data to view up to 100 example rows of their institution's own data. You can copy samples directly from the table. For longer description values, select the expand button and then copy the description from the window.
Nota
Loading sample data for the first time can take a few seconds.
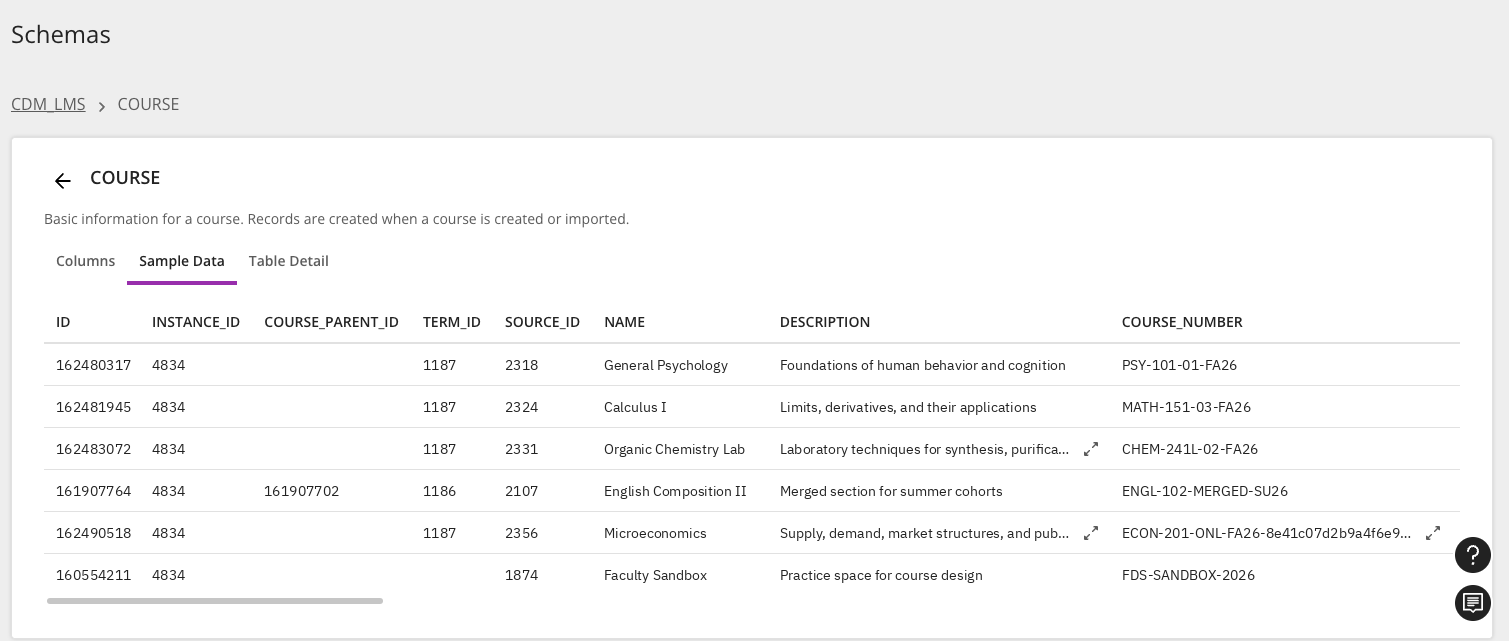
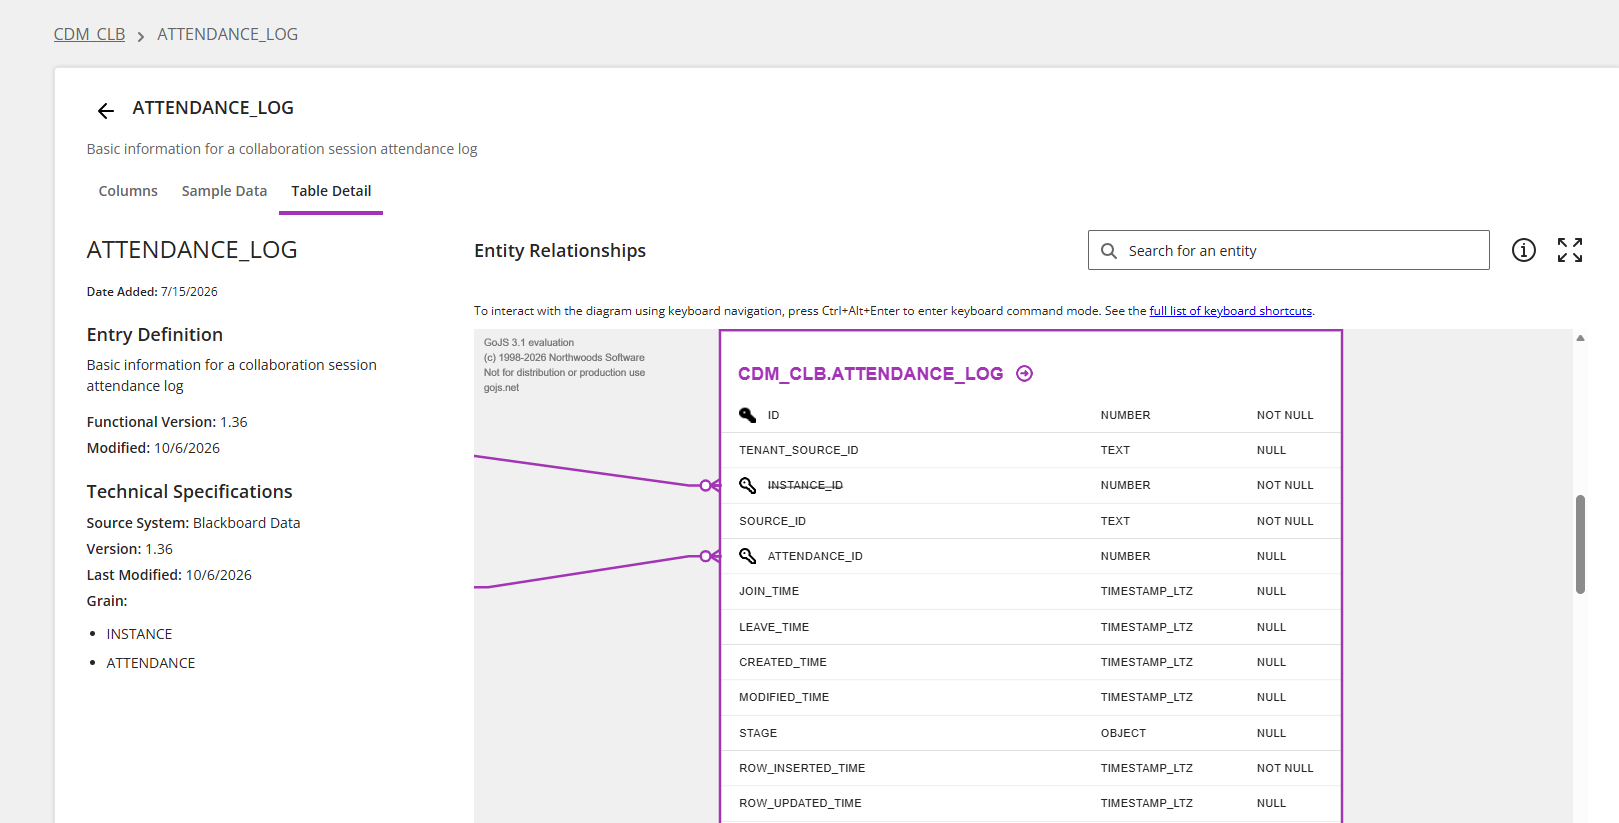
Table details
From a table, select Table Detail to view the definition, technical specifications, and entity relationships for the table.
Enhanced search
Using the new Search field in the navigation bar, you can search across all tables and columns at one time. Use the toggles to filter which types of items to include in the search.
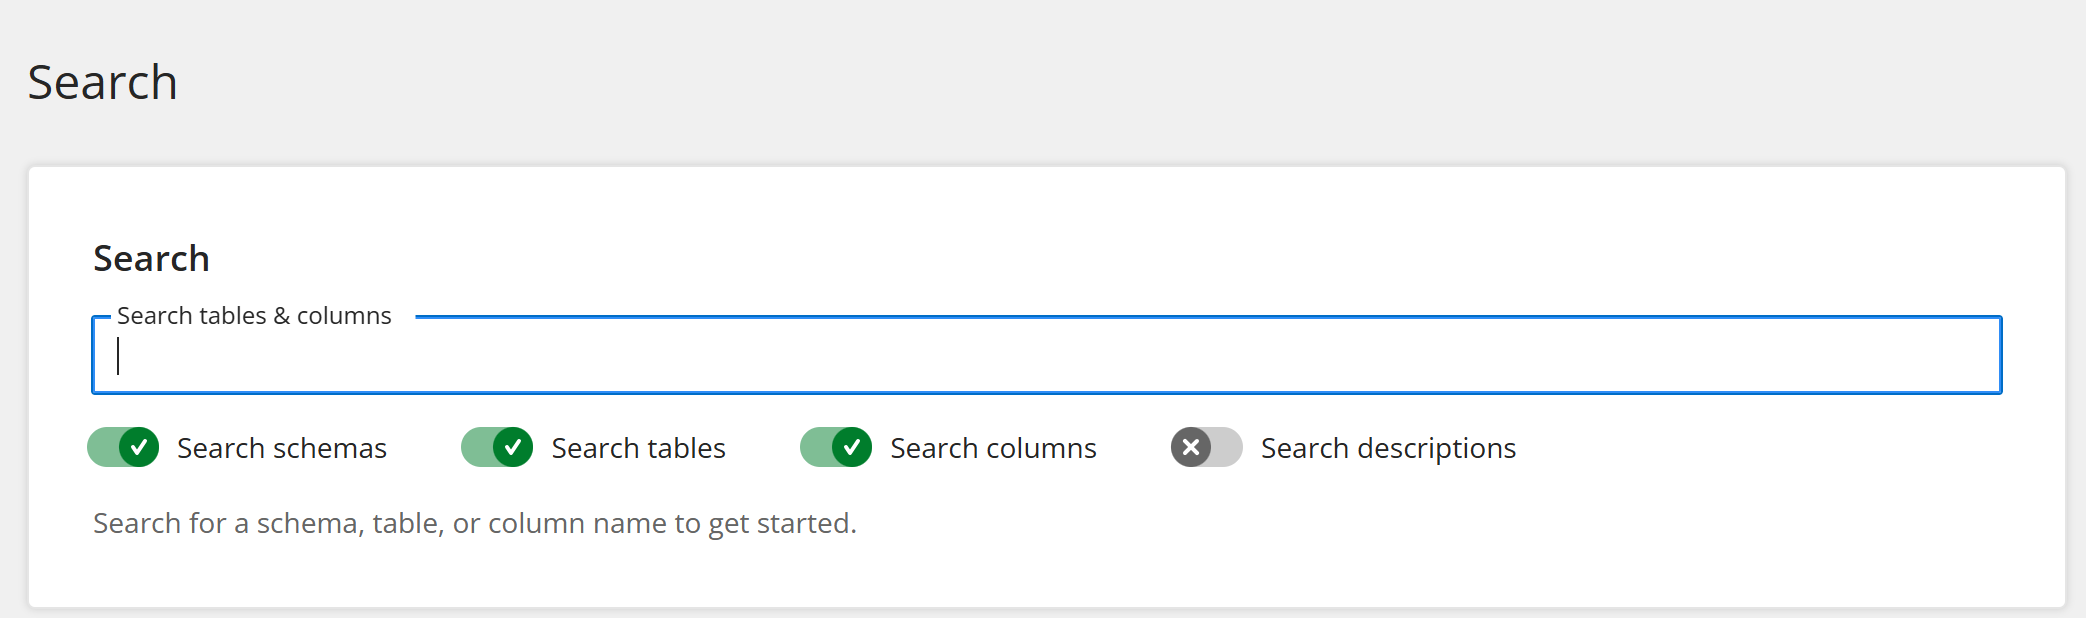
For a more granular search, you can use the search field found on each schema, table, or column page.
Sugerencia
If you receive no results when searching by name, select Search descriptions too to search descriptions as well.
Tell us what you think
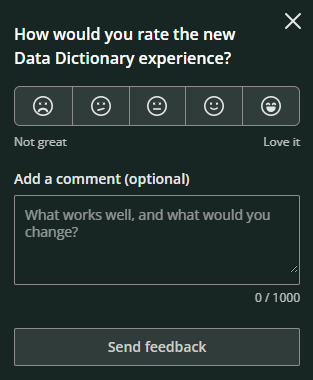
We'd love to hear what you think about the new Data Dictionary! Signed-in users can select the feedback button to rate the new experience and provide additional comments.
Illuminate febrero de 2026
Administrar las funciones de los usuarios en Illuminate
Ahora, los administradores pueden asignar funciones a los usuarios en Illuminate Configuración, lo que elimina la necesidad de gestionar funciones a través de grupos SAML o del Panel del administrador de Blackboard. Esto agiliza la gestión de usuarios al reducir la dependencia de plataformas externas y evita cuellos de botella operativos.
With this release:
A new Developer role can be assigned to any current or new user. It's intended for data analysts, SQL developers, and integration partners.
The Developer area is now fully dedicated to developer features, including Launch Snowflake to query institutional data and the Data Dictionary to explore the data models.
On the navigation bar, the Settings link was moved outside of the Developer area and it's only available to Administrators now. This keeps administration clearly separated from the Developer experience.
The Developer role does not consume an Author or Viewer license.
Roles are stackable. For example, a user who needs both data and administrative access can hold the Developer and Administrator roles at the same time. A Developer who also needs reports can be given the Viewer role.
To assign a developer role to a user, go to Settings and then select License management. Select Edit for a user, and then select Developer under User Roles. For more information, visit Utilice funciones para restringir el acceso a los informes.
February 2026
Manage user roles in Illuminate
Administrators can now assign roles to users in Illuminate Settings, eliminating the need to manage roles through SAML groups or the Blackboard Administrator Panel. This streamlines user management by reducing dependencies on external platforms and prevents operational bottlenecks.
Institutional authentication is still managed through Blackboard or SAML. After the initial connection to the identity provider, administrators can manage all users, roles, and permissions directly from Illuminate Settings.
Assign roles to an Illuminate user
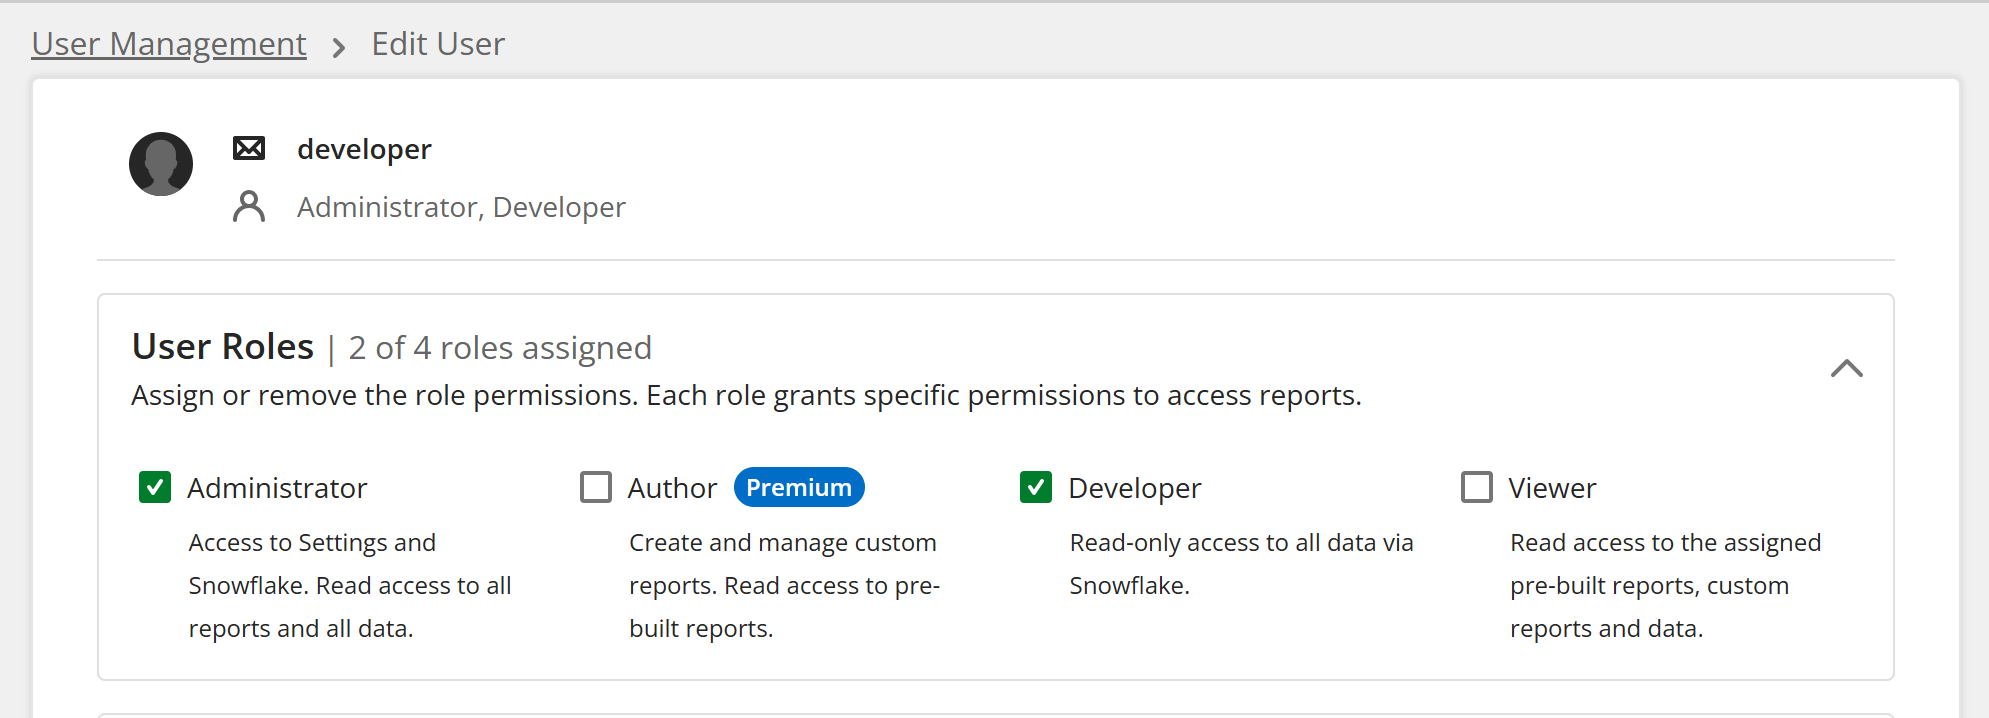
To assign role permissions for a user, from Settings in Illuminate, select License management. Then, under Actions, select Edit for the user to update. On the Edit User page, select which roles to assign.
Image 1. Edit user page in Illuminate where you can assign roles and permissions
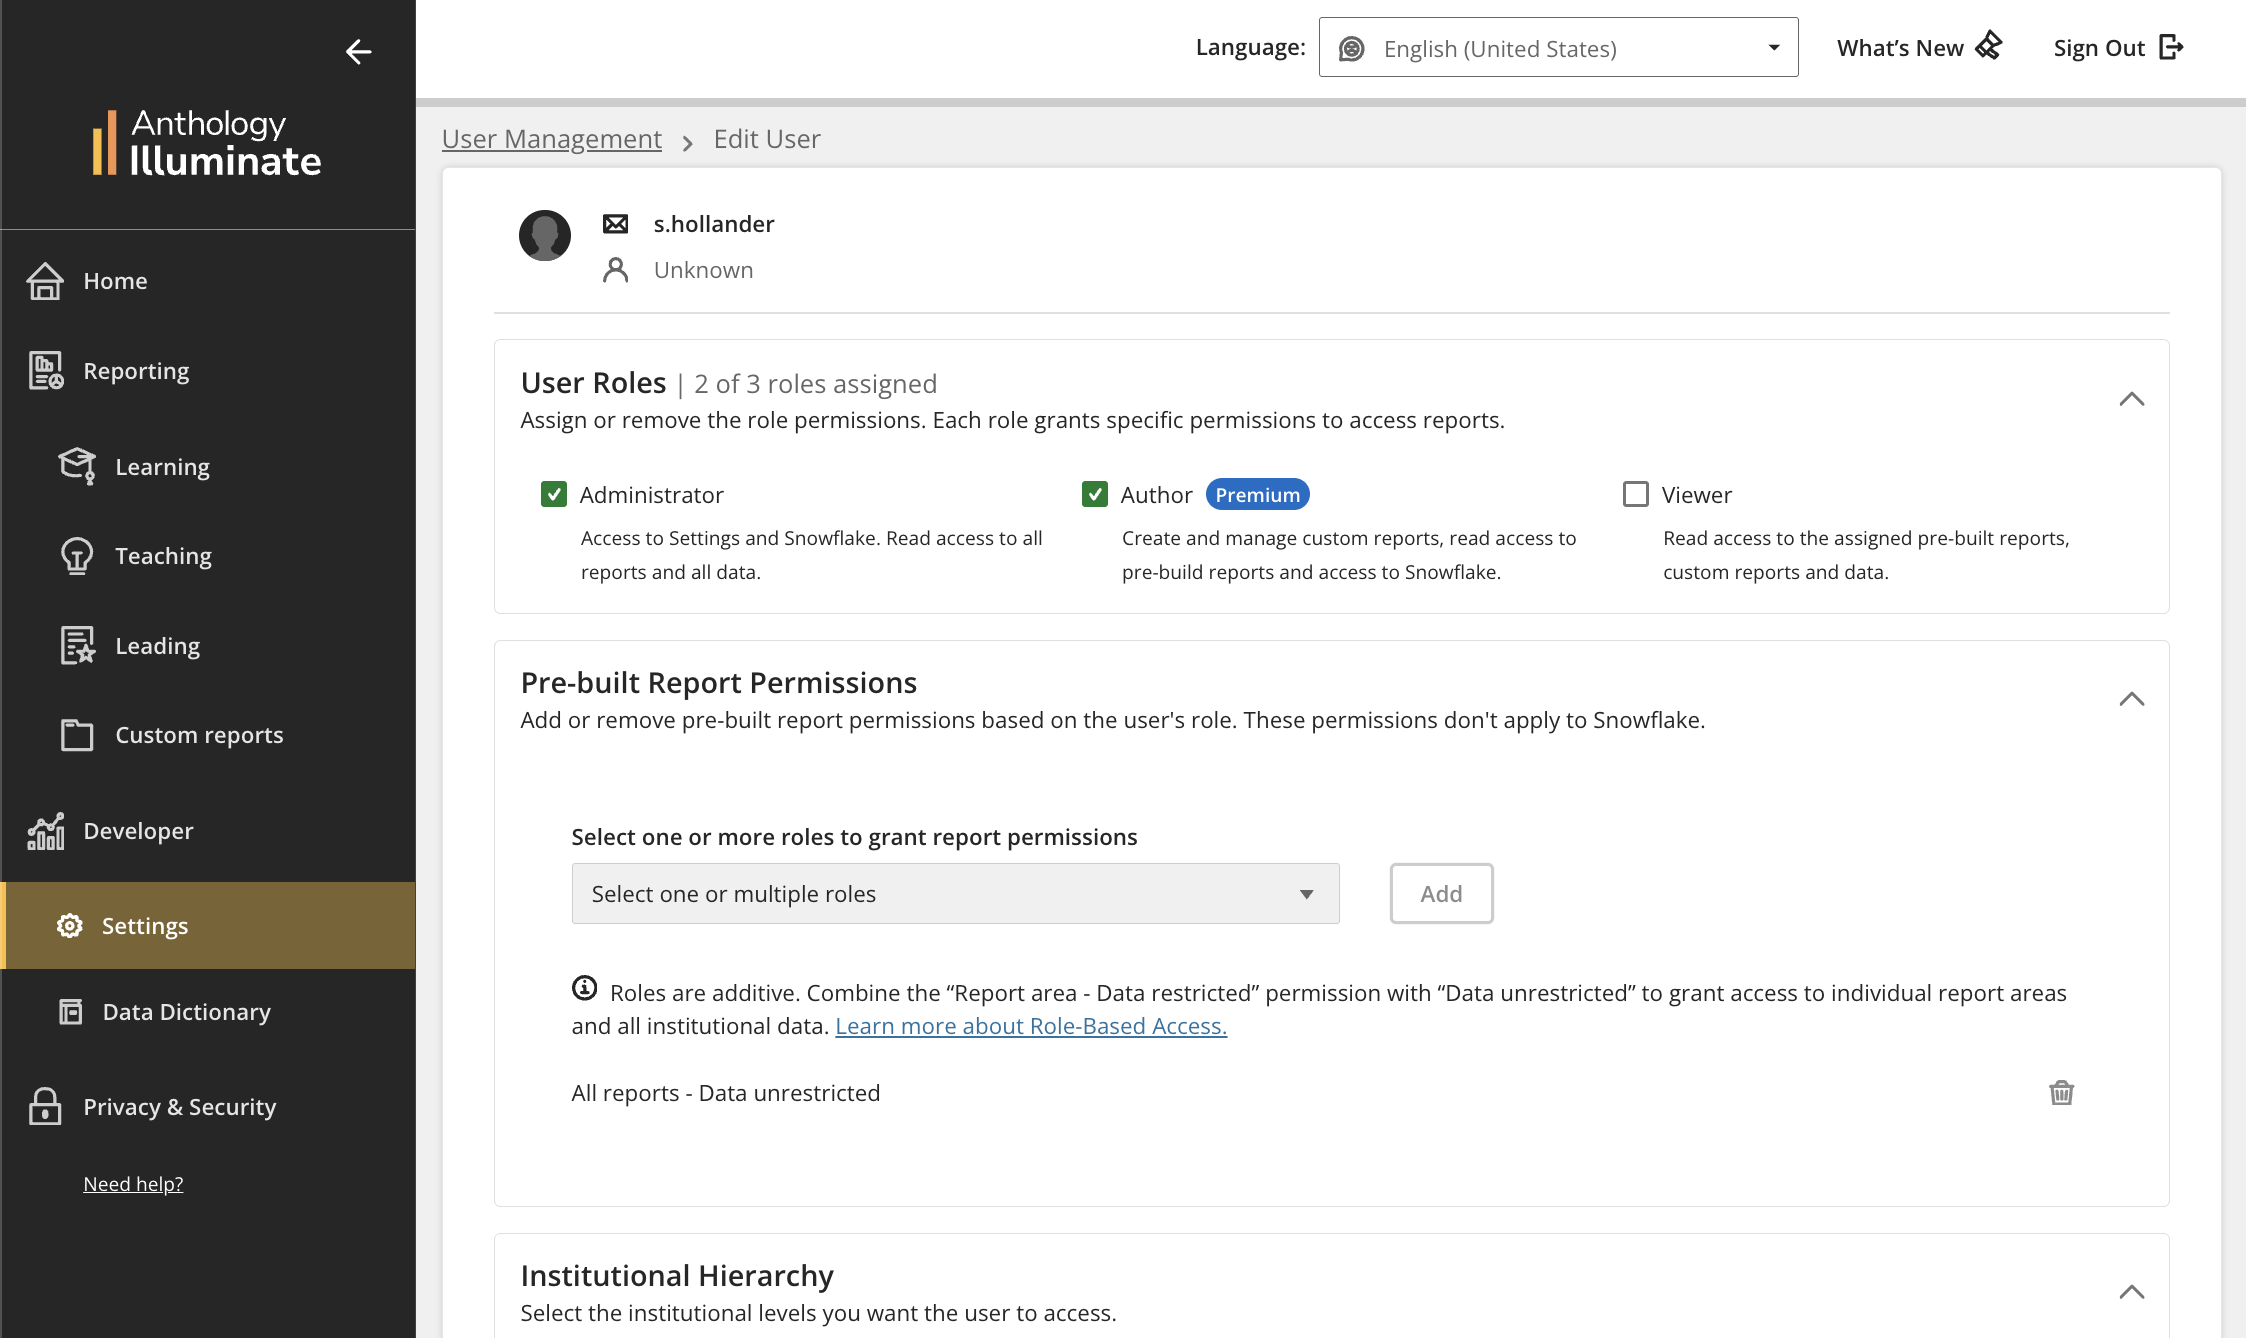
These are the roles available in Illuminate:
Administrators: Have full platform access, including settings, Snowflake access, and read access to all pre-built reports and data.
Authors (exclusive for Illuminate Premium): Can create custom reports, have Snowflake access, and by default can view all pre-built reports and data, with permissions configurable.
Viewers: Have read-only access to pre-built reports, with no data permissions assigned by default, ensuring data security.
Notes
If institutional authentication is already configured, no additional steps are required.
Existing users currently listed in the user list will remain in place, and their roles will be reflected in Illuminate without requiring any additional configuration.
Users who previously had roles configured in Blackboard or SAML but have never logged into Illuminate will not appear in the user list and will need to be created again.
Users without any assigned roles can still log into Illuminate, but they will not have any permissions within the platform. These users do not occupy a licensed user seat, allowing administrators to manage license capacity efficiently.
Delete Illuminate users or remove their roles
In a recent release, we introduced the ability to delete Viewer users. Administrators can now delete other Administrators or Authors. Administrators can also remove roles from users to reassign them to other users.
Delete a user
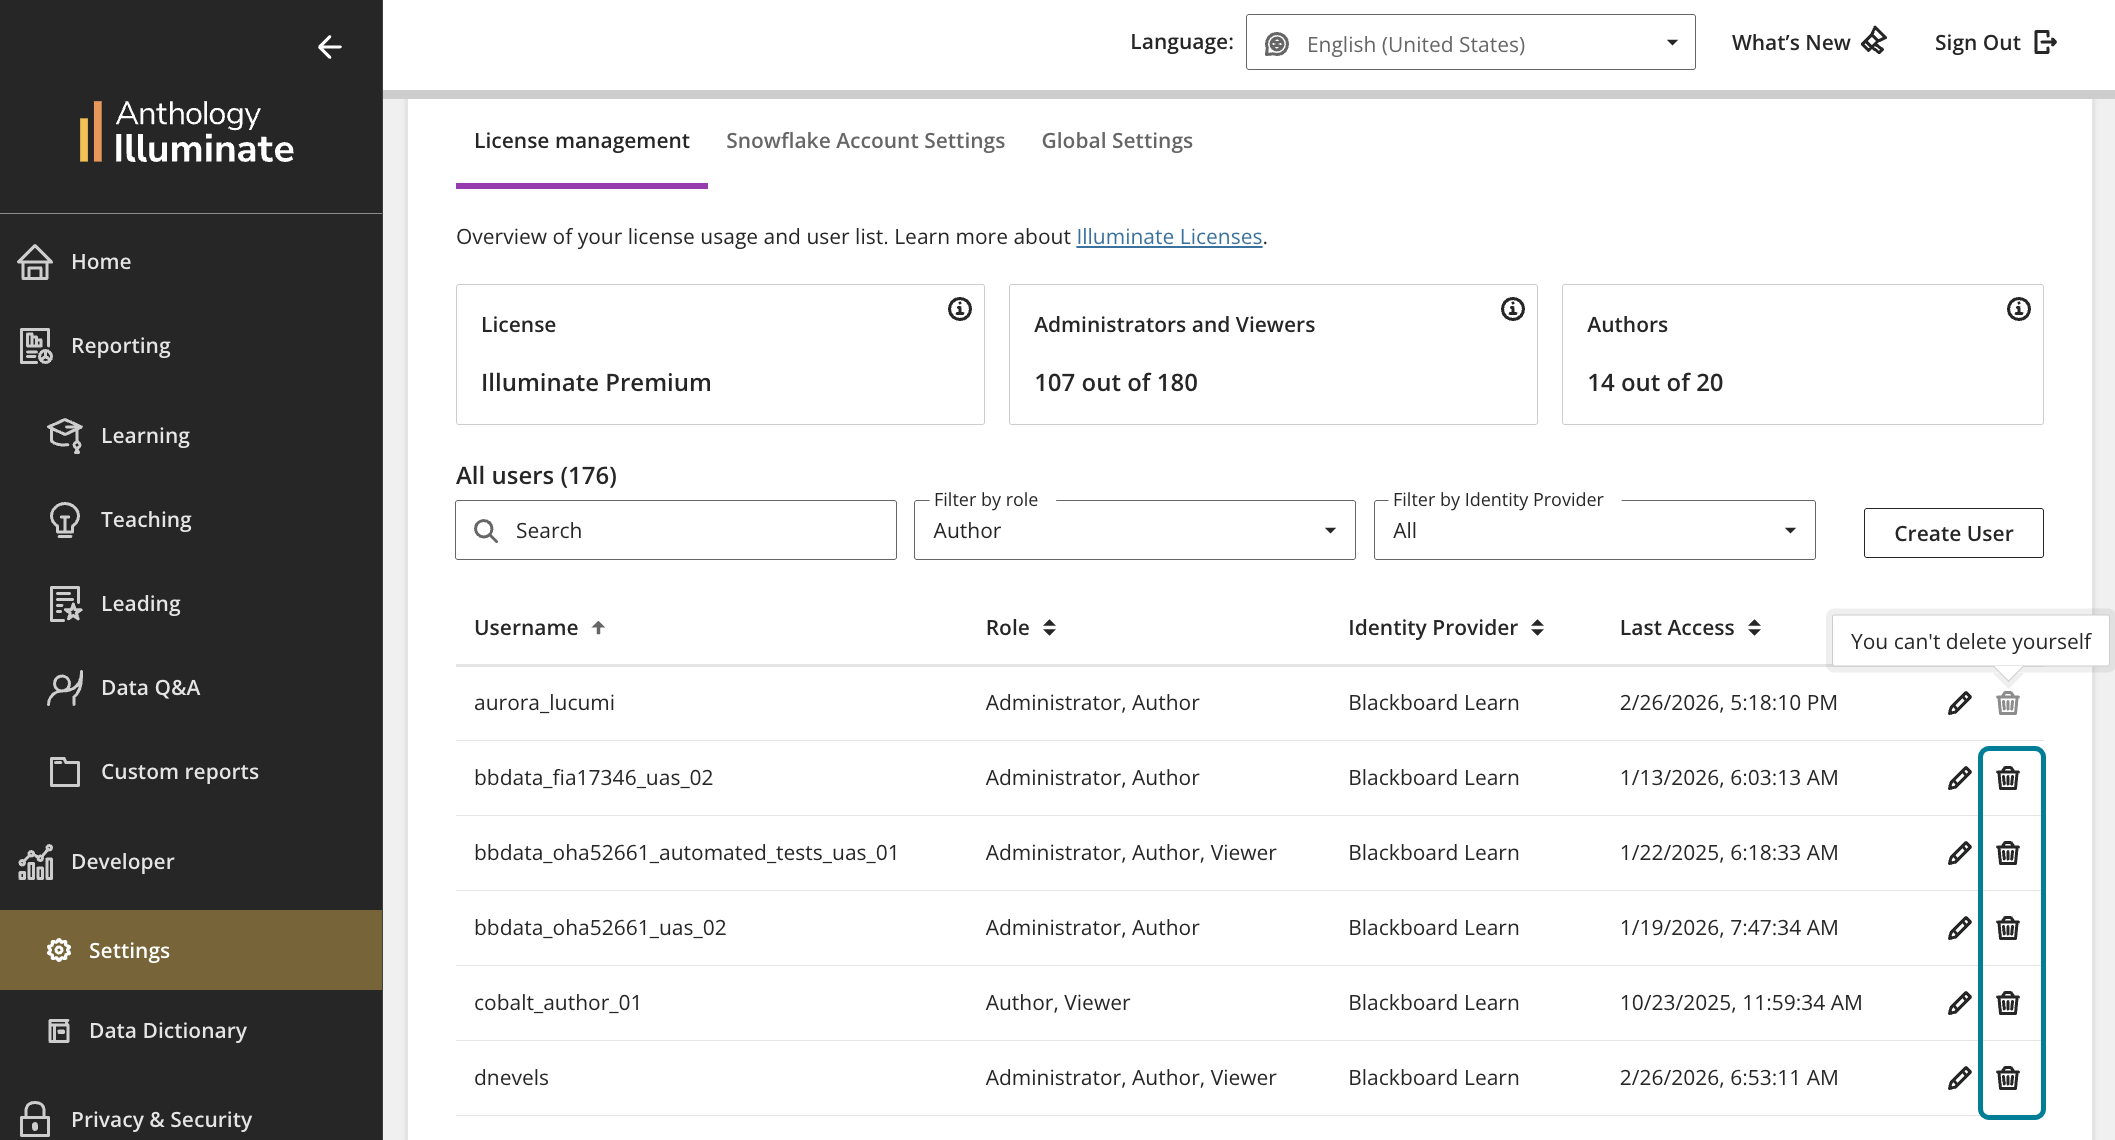
From Settings in Illuminate, select License management. Then, under Actions, select Delete for the user to remove.
Image 1. The Delete option for removing users
Nota
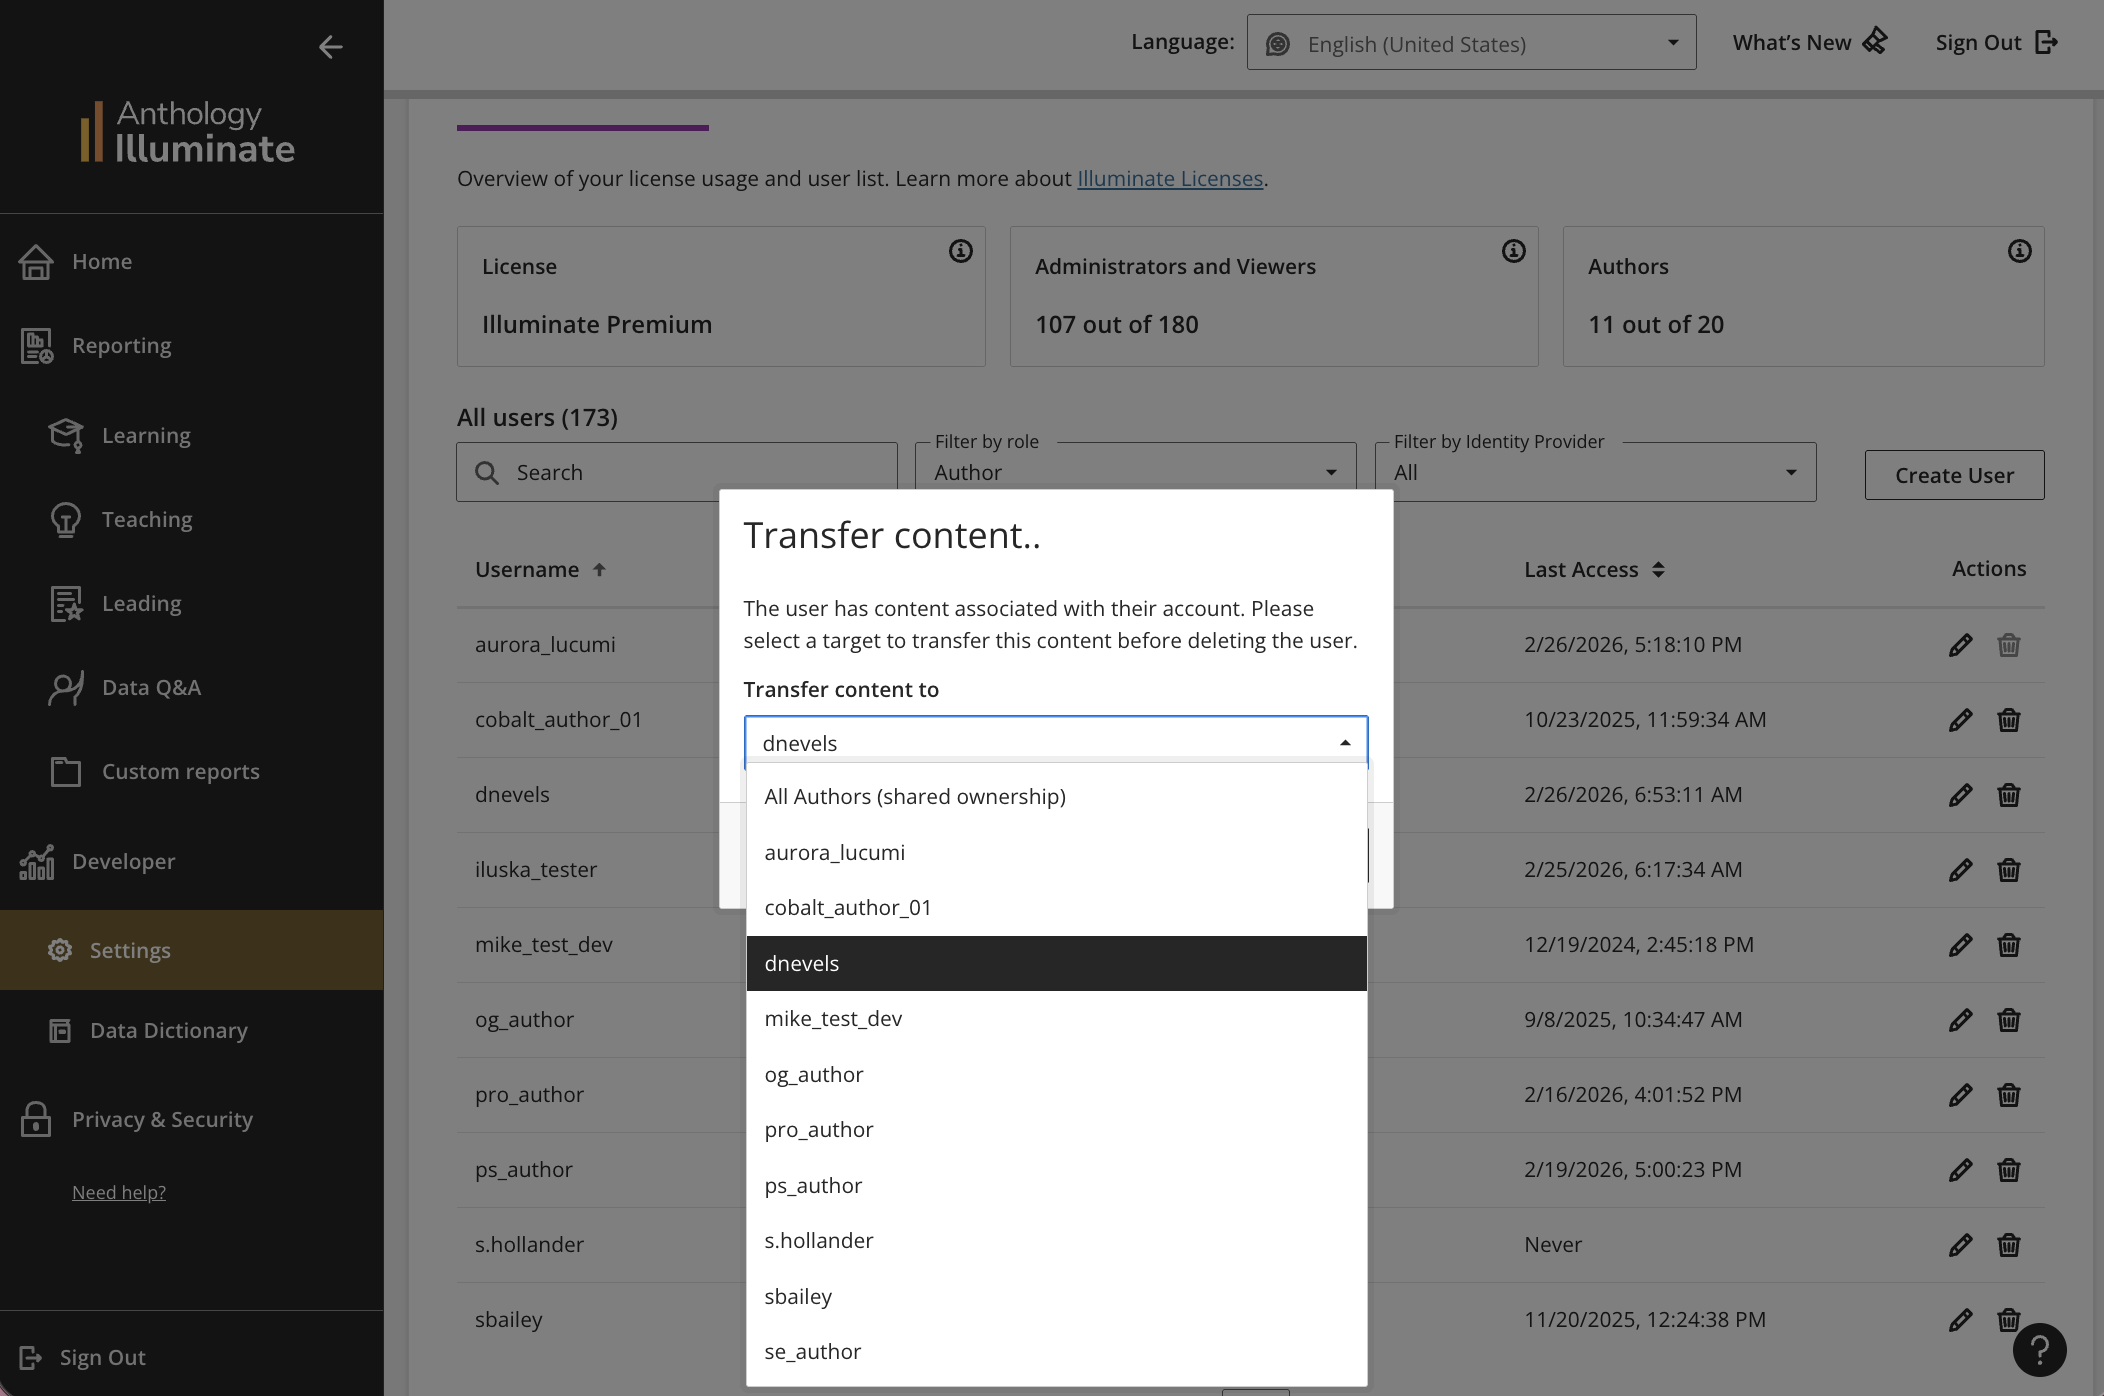
Because Authors can create and own custom report content, additional safeguards are in place to ensure data security. When you delete an Author with saved content, you can choose to transfer their content to another Author or to all Authors. If the content transfer fails, the deletion process stops automatically to prevent any data loss.
Image 2. Content transfer prompt for choosing where to transfer the deleted author's content.
Notes
Once a user is deleted, they immediately lose access to the platform. This action cannot be undone.
Administrators cannot delete themselves or remove their own Administrator role.
Remove roles from an Administrator or Author
From Settings in Illuminate, select License management. Under Actions, select Edit for the user to update. On the Edit User page, clear the checkboxes for the roles to remove.
AI conversations data included in Blackboard Source Tables for Illuminate Premium
For customers with Illuminate Premium, data for AI Conversations is now included in the Blackboard source tables in Illuminate. The new data is available in the LEARN schema in Snowflake. This update is retroactive and includes historical AI Conversations data.
With this data, you can identify these items:
AI conversation’s name and type (Socratic or role play)
Number of conversations per course
Whether the AI conversation was created with AI Identify if the AI conversation is a test or formative
Number of student messages in an AI conversation
Texts of questions and answers
A new AI Conversations folder has been added to the GitHub query repository with sample Snowflake queries, including:
Image 1. Query to analyze AI Conversations in Snowflake
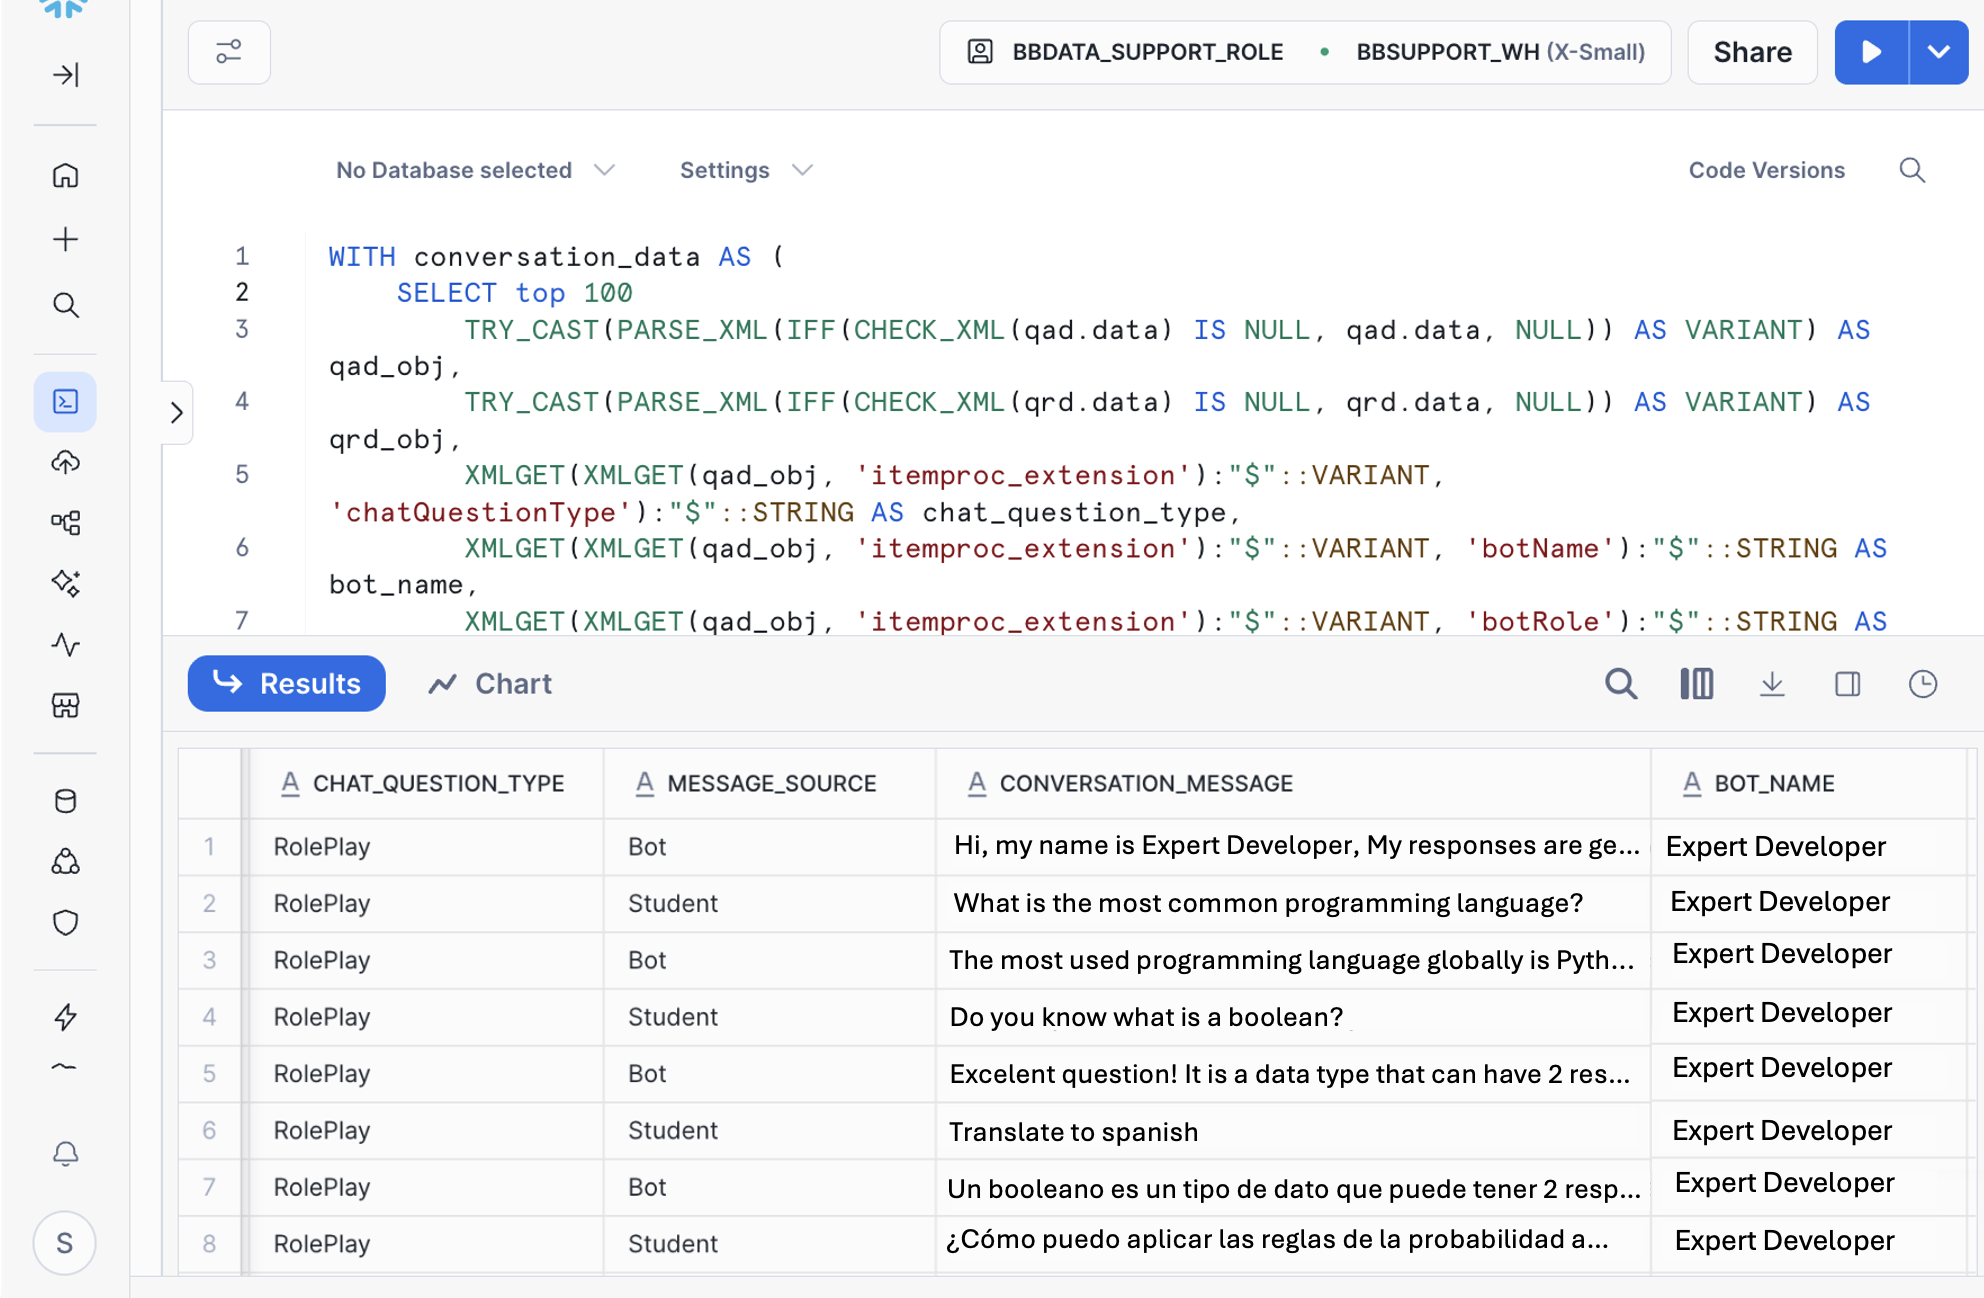
New columns included in LEARN schema are:
Date (YYY-MM-DD) | Status | Entry | Source | Description |
|---|---|---|---|---|
2026-2-15 | Added | LEARN.QTI_ASI_DATA.DATA | Blackboard | Contains raw XML markup for assessment, section, item data |
2026-2-15 | Added | LEARN.QTI_RESULT_DATA.DATA | Blackboard | Contains raw XML markup for questions in assessments such as tests |
Publicación de Illuminate de enero de 2026
Tablas de origen de Blackboard disponibles en Snowflake para clientes de Illuminate Premium en la región de América
Las tablas de origen de Blackboard ya están disponibles para los clientes de Illuminate Premium alojados en la región de AWS de EE. UU., que abarca América del Norte, América Central y América del Sur. Esto significa que las tablas de origen de Blackboard ya están implementadas en todas las regiones compatibles con Illuminate.
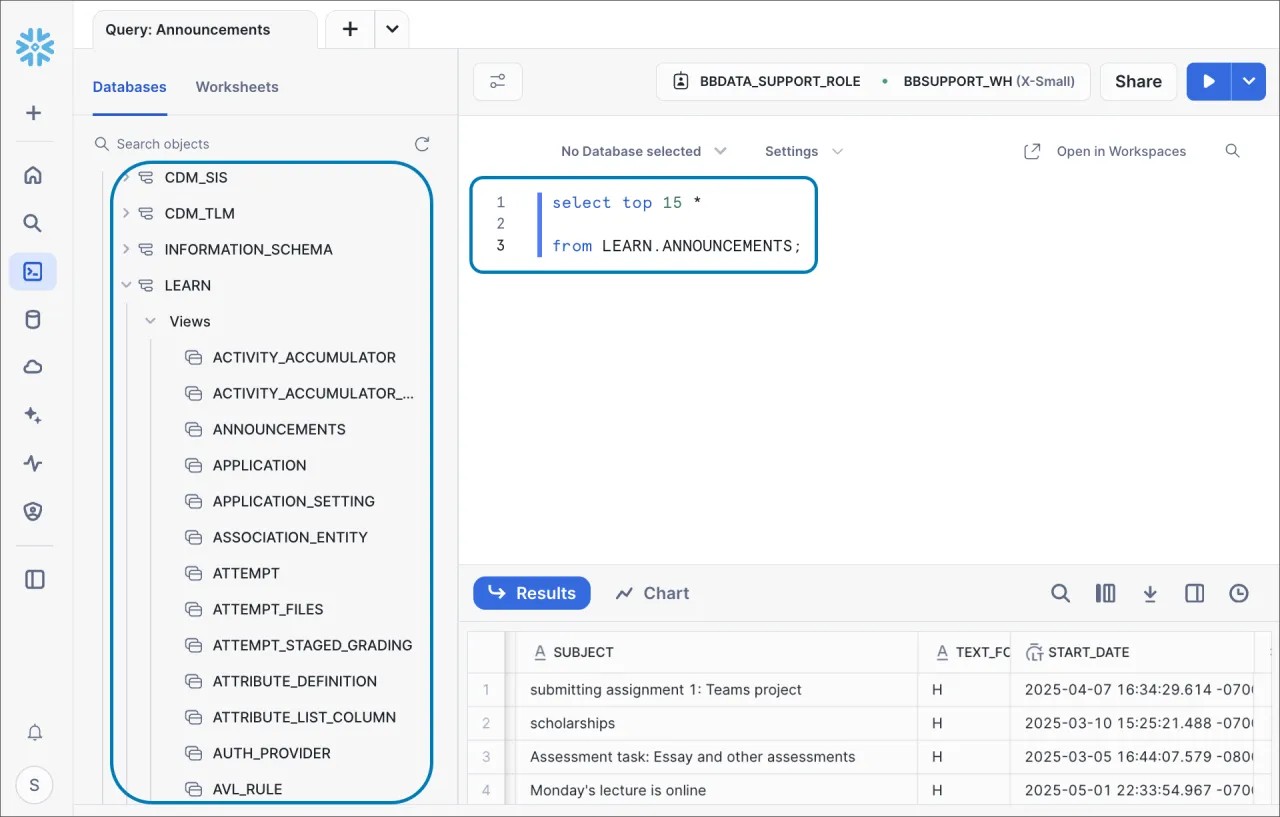
Illuminate Premium incluye 183 tablas del esquema de base de datos abierto de Blackboard. Estas tablas de origen están disponibles en Snowflake como vistas en el esquema LEARN y se actualizan cada 4 horas. Nota: estas tablas no están documentadas en el diccionario de datos. Más información sobre Illuminate Premium y las tablas de origen de Blackboard incluidas en Illuminate.
Imagen 1. Una consulta con tablas de origen del esquema LEARN en Snowflake.
Importante
Si tiene Illuminate Premium, estas tablas de origen están incluidas en su licencia actual sin necesidad de configuración adicional.
Nota
En algunas cuentas, las tablas de origen aparecerán en el esquema LEARN la primera semana de febrero de 2026 debido a los procesos de entrega incremental.
Migración de la región de América a una arquitectura multicliente
Completamos la migración del modelo de datos canónico de Blackboard (CDM_LMS) a una implementación multiinquilino para instituciones alojadas en la región de AWS de EE. UU. Esta actualización proporciona un método de conexión de datos más fiable.
La región de Estados Unidos incluye instituciones de América del Norte, Central y del Sur. Con este hito, la migración de varios clientes se ha completado en todas las regiones que admiten Illuminate.
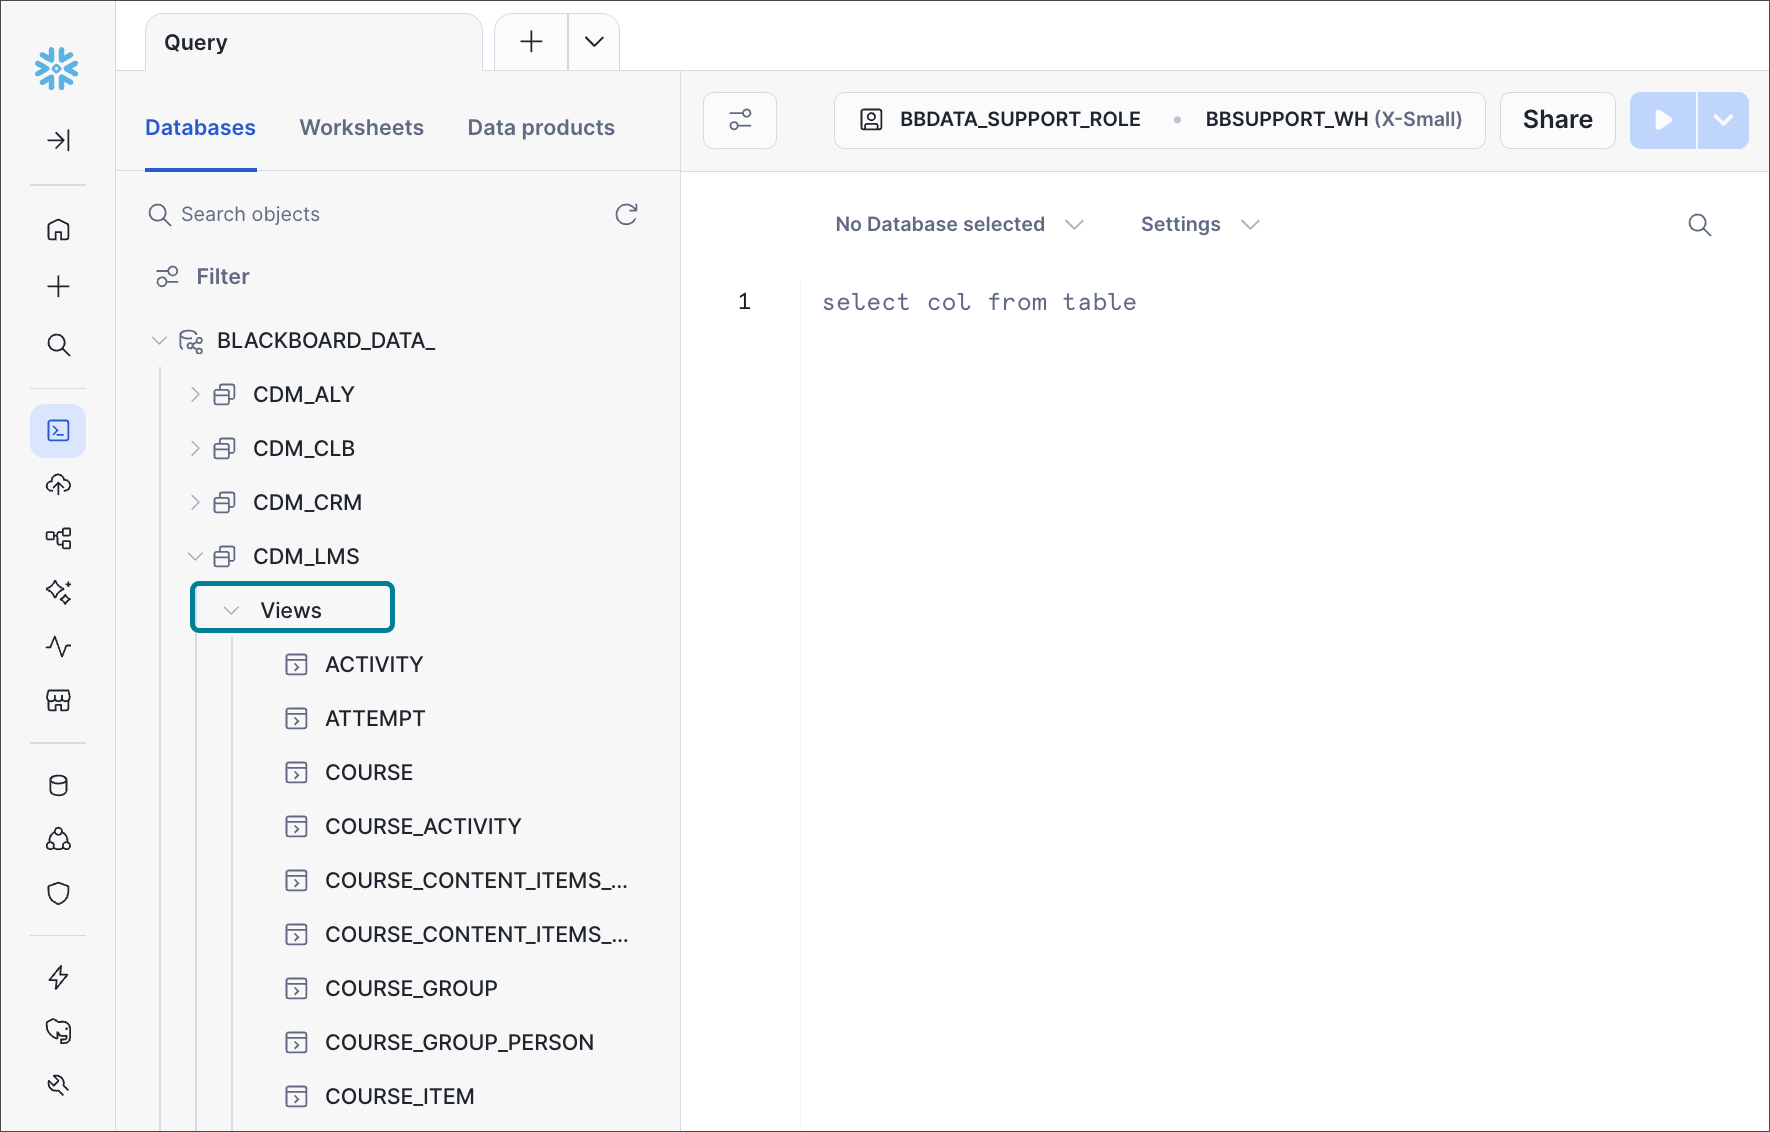
Puede comprobar si su instancia es de varios clientes viendo CDM_LMS en Snowflake. Las instancias de varios inquilinos tienen los datos organizados en vistas, mientras que las instancias de un solo inquilino tienen los datos organizados en tablas.
Consideraciones clave:
Tus consultas a Snowflake pueden tardar más en cargarse.
Si está extrayendo datos de Illuminate en Power BI, actualice a la última versión de la aplicación Power BI que admita las vistas de Snowflake.
Si utiliza Looker Studio o Qlik, utilice consultas SQL en lugar del método de conexión basado en el asistente.
Imagen 1: Consulta en Snowflake que muestra las vistas CDM_LMS.
Múltiples cuentas de servicio Snowflake para Premium
Las cuentas de servicio de Snowflake en Illuminate permiten conexiones seguras de máquina a máquina para extraer datos de Illuminate a herramientas externas, como plataformas de BI para informes o almacenes de datos.
Illuminate Core incluye una cuenta de servicio de Snowflake. Ahora, los clientes de Illuminate Premium pueden solicitar cuentas de servicio de Snowflake adicionales enviando un ticket de soporte. Los administradores pueden ver todas las cuentas de servicio en Configuración de Illuminate en el menú Configuración de Snowflake.
Las cuentas de servicio múltiples proporcionan un mayor control, permitiendo a los administradores asignar cuentas dedicadas a equipos o fines específicos y gestionar las contraseñas y las restricciones de IP de forma independiente.
Imagen 1. Dos cuentas de servicio de Snowflake en la configuración de Illuminate.