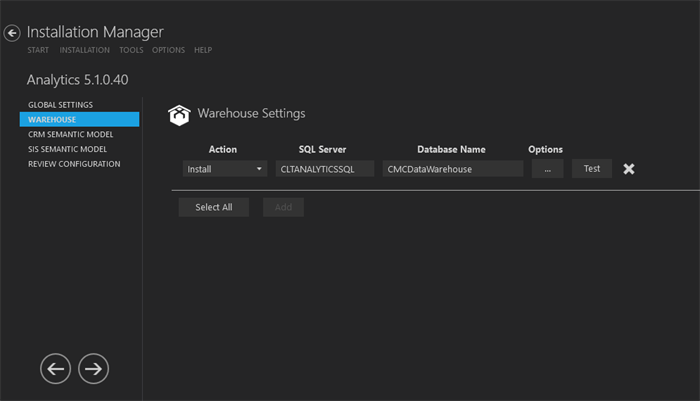
This screen enables you to select the actions to be taken by Installation Manager (e.g., install, uninstall) and to specify the database and configuration options for the Student Analytics Warehouse. The Warehouse assembles data dispersed in various data sources by combining all relevant data. SQL Server Analysis Services (SSAS) connects to the Warehouse database containing the denormalized data from the source database and allows Student Analytics users to query and view the data from many different angles.
The SQL Server Integration Services (SSIS) Catalog is installed with the Warehouse. The SSIS Catalog is the place where you manage SSIS projects and packages, including the configuration and monitoring of Integration Services server operations. SSIS Catalog objects (projects, packages, parameters, environments, and operational history) are stored in the SSISDB.
Note: The initial SSISDB catalog must be created before installing the Warehouse. See Prerequisites and Requirements.
Set Up the Warehouse
-
In the Installation menu, click Warehouse. The Warehouse Settings screen is displayed.

-
Click Add to add a line to the Settings screen.
-
Select an appropriate Action. The following Action values are available:
-
None – Performs no action.
-
Install – Performs a fresh installation or upgrade of a component. You can install or upgrade multiple components at same time.
-
Uninstall – Removes all subcomponents on that machine and uninstalls the component from Programs and Features.
Optional: Click Select All to set the Action field to Install for all components listed on this screen. Click Unselect All to set the Action field to None.
-
-
In the Database Server field, enter the SQL server name. If the database server contains multiple SQL server instances, also specify the instance name, e.g., <server name\instance>.
-
Specify the Database Name of the Warehouse database to be created or upgraded.
-
Click
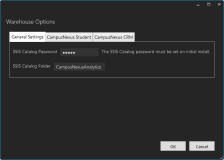
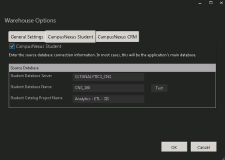
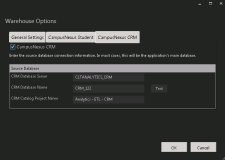
 to view and edit the Options form.
 Warehouse Options - General Settings Tab Field Description SSIS Catalog Password Password of the SQL Server Integration Services (SSIS) Catalog. SSIS Catalog Folder Name of the folder to be created that will hold the SSIS packages and projects. Specify unique names if multiple projects are deployed on the same SQL Server instance. Warehouse Options - CampusNexus Student Tab Field Description CampusNexus Student Select this check box if the source database is a CampusNexus Student database. The associated fields are enabled. Student Database Server Name of the CampusNexus Student database server used by Student Analytics. Student Database Name Name of the CampusNexus Student database used by Student Analytics. Click Test to verify access to the database. Student Catalog Project Name Name of the CampusNexus Student Catalog Project which holds the SSIS packages, for example, Analytics - ETL - SIS. Warehouse Options - CampusNexus CRM Tab Field Description CampusNexus CRM Select this check box if the source database is a CampusNexus CRM database. The associated fields are enabled. CRM Database Server Name of the CampusNexus CRM database server used by Analytics. CRM Database Name Name of the CampusNexus CRM database used by Analytics. In most cases this will be the application's main database. Click Test to verify access to the database. CRM Catalog Project Name Name of the CampusNexus CRM Catalog Project which holds the SSIS packages, for example, Analytics - ETL - CRM. -
Click OK to save changes on the Options form. The form is closed.
-
Click
 to delete a selected line.
 -
Click Test to ensure the setup for the corresponding line is correct. If a test on a particular line fails, check all associated fields and click Test again.
-
If all tests pass, click
 .
.


