The topic "Live Assist Enabler Configuration" is not available in Version 1.0.0
Live Assist Enabler Configuration
The Live Assist Enabler feature provides the "Chat with an Agent" functionality to Anthology Reach clients who want to use the web chat variant of Digital Assistant rather than the Live Assist variant. See Conversation Flow - Web Chat with Live Assist Enabler.
This topic details the process to configure the Live Assist Enabler for a tenant.
Configure the Internal Administration Portal
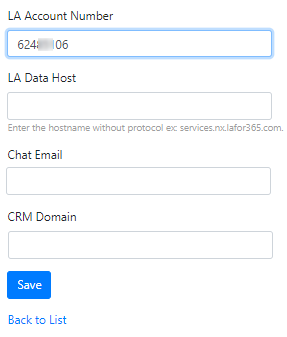
Live Assist Enabler requires populating the LA Account Number and LA Data Host fields in the Internal Administration Portal.
-
Open the Internal Administration Portal, select the Tenants tab, and create or edit a tenant configuration. See Add Tenant in Internal Administration Portal.
-
In the LA Account Number field, specify the tenant's Live Assist Dynamics 365 account number.
To locate the Live Assist account number:
-
Log in to the Live Assist Administration Portal at https://admin.na1.liveassistfor365.com/portal/.
— OR —
With full administrator permissions in Anthology Reach, navigate to Dynamics 365 - Custom, select Live Assist, and click Supervisor Console.
For more information, see https://support.liveassistfor365.com/hc/en-us/articles/360006116154-Finding-your-Account-Number.
-
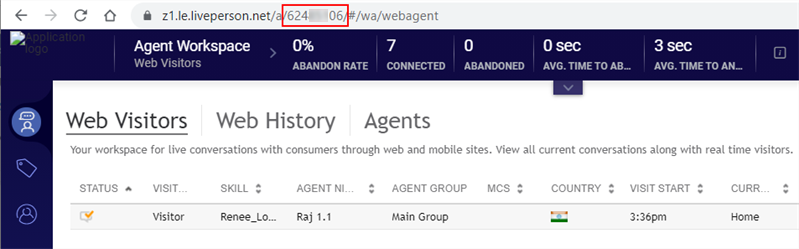
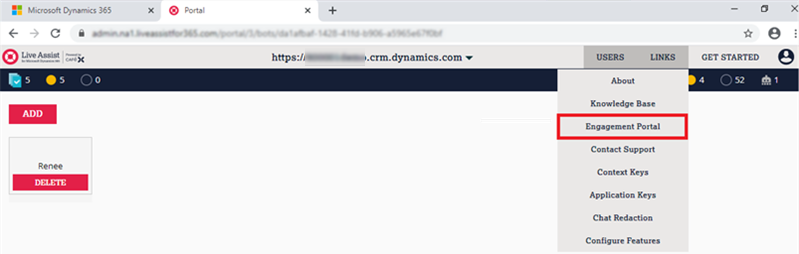
In the Administration Portal, navigate to LINKS > Engagement Portal.

-
Note the account number in the URL of the Engagement Portal.
-
Copy the account number from the Engagement Portal and paste it into the LA Account Number field in the Internal Administration Portal.
-
-
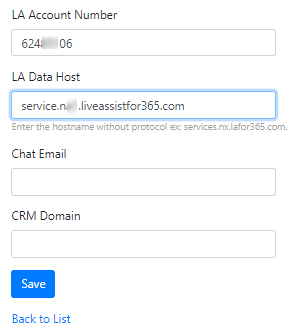
In the LA Data Host field, specify the hostname of the tenant's Live Assist data services.
To locate the hostname of the Live Assist data services:
-
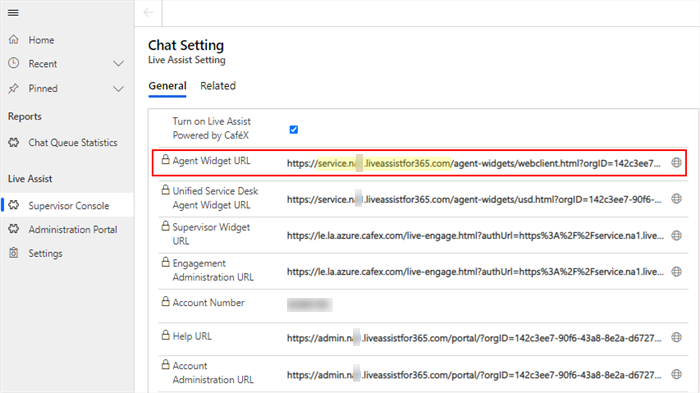
In Anthology Reach, navigate to Dynamics 365 - Custom > Live Assist > Settings.
— OR —
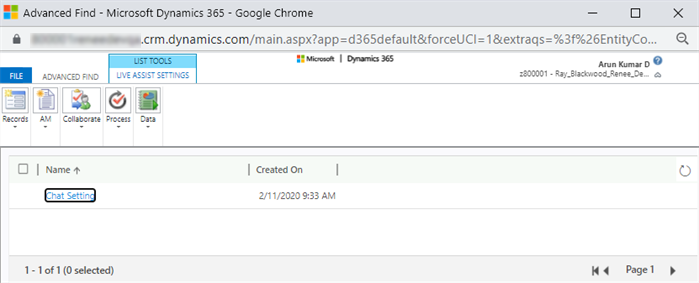
In Anthology Reach, select Advanced Find, select Live Assist Settings in the Entity field, click Results, and open the Chat Settings record.
-
Locate the Agent Widget URL record and select the hostname (without the https protocol and without slashes).
-
Copy the hostname, for example: "service.nxx.liveassistfor365.com", and paste it into the LA Data Host field in the Internal Administration Portal.
-
Verify RENEEESCALATE Skill for Agents
Live Assist Enabler requires:
-
One or more Live Assist agents to be created. See Security Roles for Live Assist
-
The RENEEESCALATE skill to be associated with one or more Live Assist agents. See Create the RENEEESCALATE Skill.
Verify Certificate in Azure
Live Assist Enabler requires a signed private certificate for the AppService in Azure. A single certificate is required for all tenants that use the Live Assist Enabler.
This step will be completed by Anthology staff (DevOps Cloud Team).
To check for a signed certificate:
-
Locate the Digital Assistant resource in Azure.
-
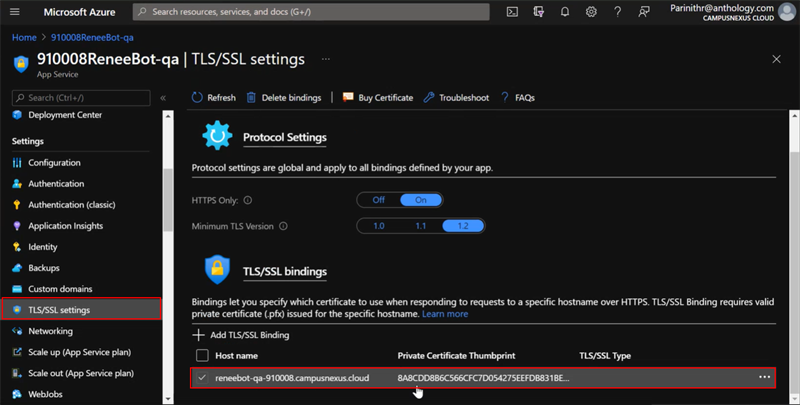
In the navigation menu at the left, locate Settings, and select TSL/SSL settings.
-
On the Bindings tab, verify that a private certificate is assigned.
-
If there is no certificate, generate and upload a key for Live Assist as detailed in Step 3 and Step 4 at https://support.liveassistfor365.com/hc/en-us/articles/360006116494-C-Azure-Web-App-Bot-v4-as-an-Enabler-adding-Context-Service-and-Chat-Activity-Quick-start-#loadKeyLA365.
Note: The certificate for Live Assist Enabler must be signed certificate, not, as shown at the link above, an open SSL certificate which is not signed and only used for development purposes. The signer for a signed certificate will be a third party, e.g., GoDaddy.
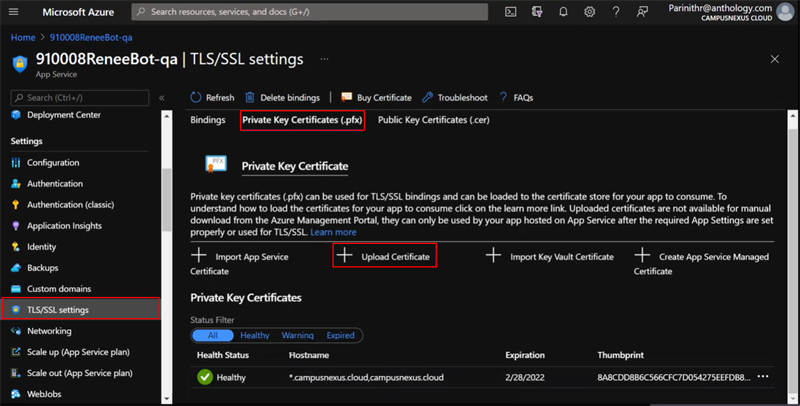
In Azure, select the Private Key Certificates (.pfx) tab, click Upload Certificate, and enter the private key data obtained from Live Assist.
-
Add the public key in the Live Assist
-
Log in to the Live Assist Administration Portal at https://admin.na1.liveassistfor365.com/portal/.
-
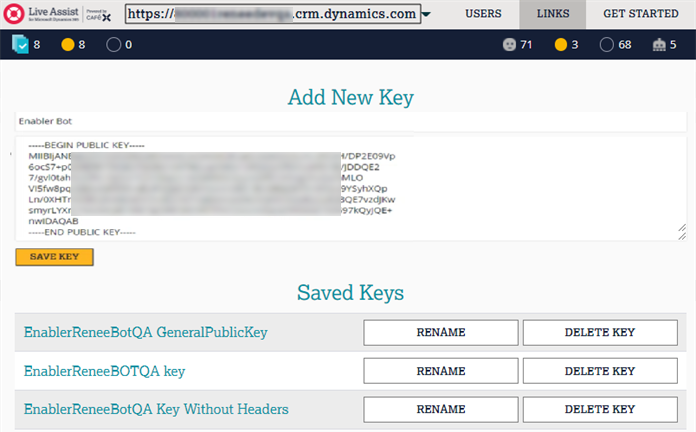
In the Administration Portal, navigate to LINKS > Context Keys.
-
On the Add New Key page, specify a key name, paste the key with the header and footer lines into the provided field, and click Save Key.
-