Dashboard Overview
Dashboards are available for the verification process as well as the optional workflows for Comment Codes and Professional Judgments.
The Dashboards in the Associate Portal provide a way to review students in specific statuses within the respective process or students that require special handling. Each tile represents a status or a state for an active student ISIR. As a staff user, you can filter the information displayed in these tiles to provide easy access to the items that apply to your area of responsibility.
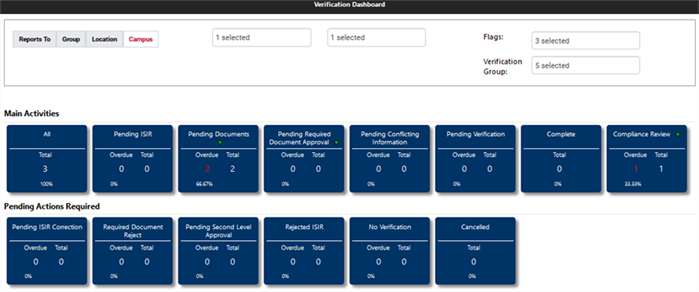
Tile Information
Each tile displays the following information:
-
Tile name - The name is displayed at the top of the tile; Pending Documents in this example. The tile name indicates the state of the student's verification process. For example, all students in the Pending Documents tile have documents that are in the Pending Document status, awaiting student submission.
-
Sub-status Indicator - When the green triangle (
 ) icon is displayed on the tile, you can select this to expose sub-status information at the bottom of the tile.
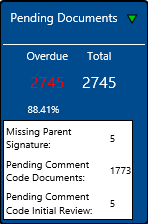
-
Overdue -The number of student records that have not been addressed within a prescribed time frame are displayed as overdue in red. The number of overdue items is less than or equal to the total number of items.
Note: An administrator configures the time frame (number of days) within which an item should be addressed according to the policies of your institution (see Overdue Days Configuration). The timer starts on the hour that the student status changes to fall within the tile.
-
Total -The total number of student records in the state for the tile.
-
Percent -The percentage of the records in that tile category relative to the number of records in the All tile.
Tile-Generated List
To view students in a tile, select the overdue number or the total number. This will provide a list of students reflected in the tile.
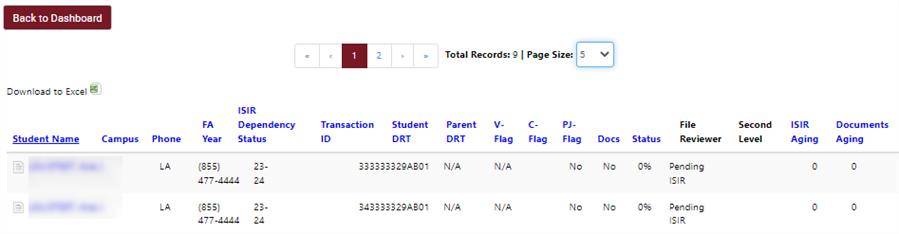
These list pages provide additional functionality to navigate to more detailed information and tools:
-
The Student Name is displayed in blue to indicate a link to the Student Details page. Select the student name to open this page and access all information and functions for managing the student record.
-
Each list page includes a Download to Excel link. Select this link to download an Excel-compatible CSV (comma-separated value) file that includes the list information that can be used for additional reporting and student record management.
-
Each column header displayed in blue supports sorting. Select the column header to change the sort order of the list by the value in that column. For more information, see Student List Columns.
-
You can hover over the notes icon (
 ) to the left of a student name to check for notes from the Activity History (see Add an Activity Note to the Activity History). Select the icon, to view the note details in a popup. When you download the list, the note details are saved to the Excel file (Latest Note column).
Filters
Filter by Staff Assignment
Select the Reports To option to display students based on staff user assignments.
-
The Reports To filter option will only display students assigned to the selected staff user. The Dashboard has additional filter options, some may be permission based.
-
If the selected staff user is designated as a manager, this displays students assigned to the manager and all students assigned to associates who report to that manager. By default, this is the selected filter type and the logged in user is the selected user assignment. Use the first selector to change the user selection.
-
You can filter the list further by choosing Award Year, Flags, or Verification Group in the respective selectors.

Filter by Staff Assignment Group
-
Select the Group option to display all students assigned to staff users that belong to a selected group.
-
When you select this filter type, there is no default group selected. Use the first selector to select a group.
-
You can filter the list further by choosing Award Year, Flags, or Verification Group in the respective selectors.

Filter by Staff Assignment Location
-
Select the Location option to display students based on the location of the assigned staff user.
-
Use the first selector to select a location.
-
You can filter the list further by choosing Award Year, Flags, or Verification Group in the respective selectors.

Filter by Campus
-
Select the Campus option to display all students for a selected campus.
-
Use the first selector to select the campus. You can select All Campuses to display all students on the page.
-
You can filter the list further by choosing Award Year, Flags, or Verification Group in the respective selectors.

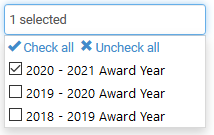
Filter by Award Year
-
Select the second box on the right to display Award Years available.

-
Select Check all for all award years or choose individual award years.
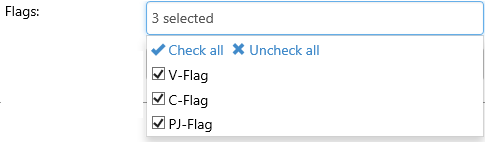
Filter by Flags
-
Select the Flags option to display students based on a review Flag such as Verification (V-Flag), Professional Judgment (PJ-Flag), or Comment Code (C-Flag).
-
You can filter the list by choosing one or multiple Flags. To filter out a flag, clear the check box.
Filter by Verification Group
-
Select the Verification Group option to display all students selected for verification in a specific V-Group.
-
You can filter the list by choosing one or multiple Verification Groups.
