Configure the TPC Portal
In this procedure you will configure the TPC Portal, i.e., the portal that is integrated with Anthology Reach for the Live Assist bot. You will retrieve the code snippet needed by the bot, supply the private RSA key, add the bot widget to the web pages, and, if authenticated chat is used, verify the configuration for authenticated chat.
Live Assist provides support for authenticated chats and unauthenticated chats.
-
Authenticated chats require users to log in so authentication can occur and the information stored for the user at the institution can be retrieved and updated.
-
Unauthenticated chats do not require users to log in but when a chat is initiated, the user is prompted for first name, last name, and email address to determine if a record exists for the user at the institution. If a record exists, that record can be retrieved and updated. If no record exists, a new record can be created and updated.
Prerequisites:
You must have completed the procedures:
- Create a Bot User Skill
- Set Up Authenticated Chats (if applicable)
- Add Campaign and Engagement Details
Get the JavaScript Code for Live Assist
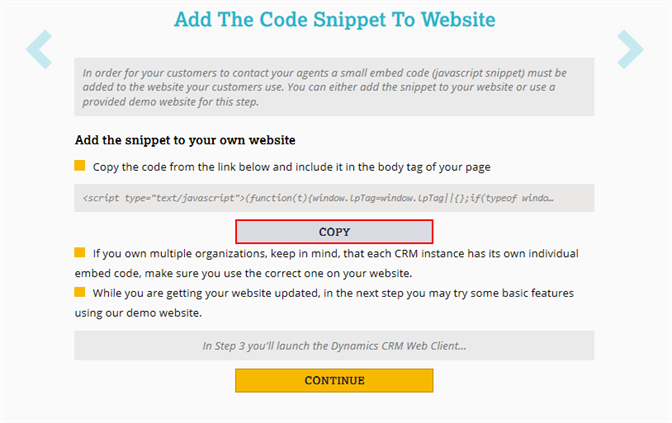
Enabling chat on your website involves inserting a small amount of JavaScript code into your web pages. This code runs on your website and interacts with the Live Assist servers. You retrieve the code from the Live Assist Admin Center.
-
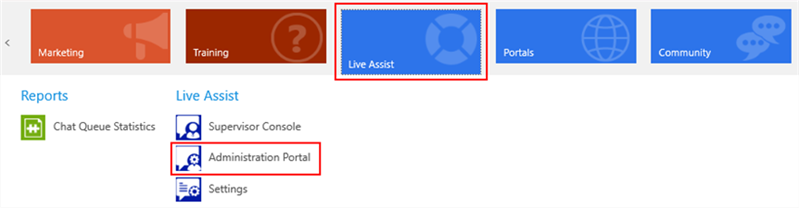
In the Anthology Reach drop-down ribbon, select Live Assist > Administration Portal and log in to Live Assist Admin Center.

-
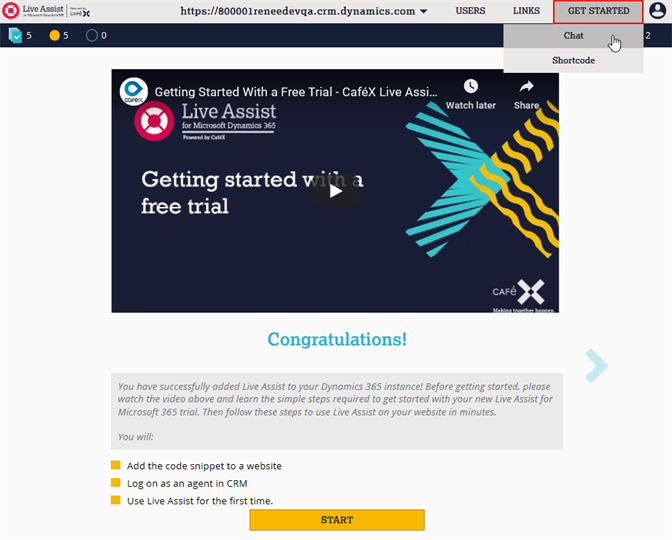
In Live Assist, select Get Started > Chat and click Start.
Configure Live Assist in the TPC Portal Settings
Prerequisite: The Campus Management modules must be installed from Modules and Services.
-
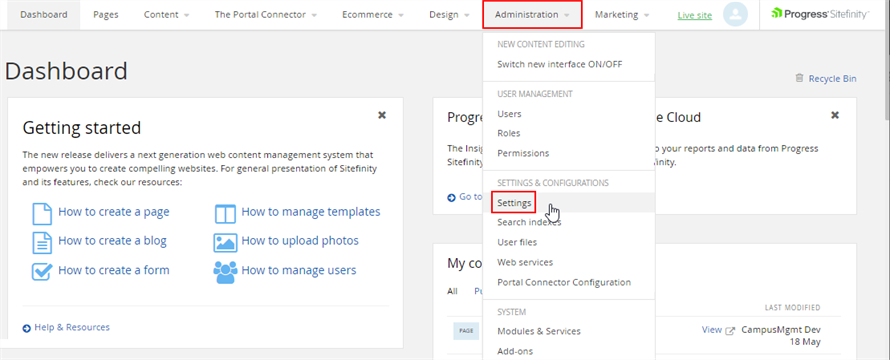
Log in to the ProgressSitefinity site and select Administration > Settings.
-
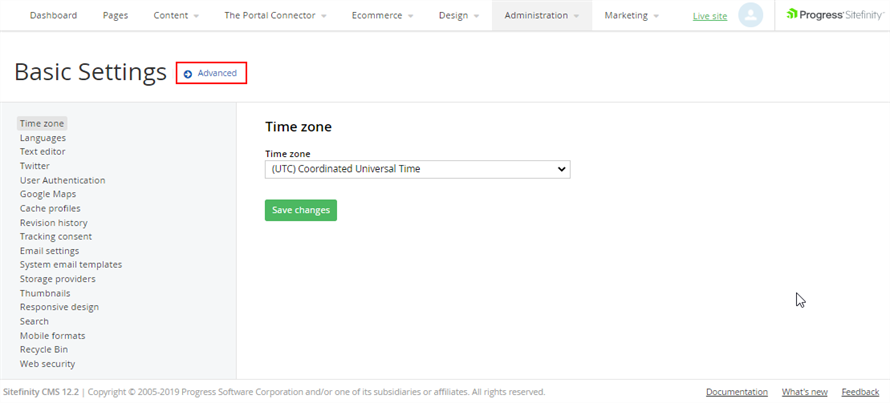
On the Basic Settings page, select Advanced.
-
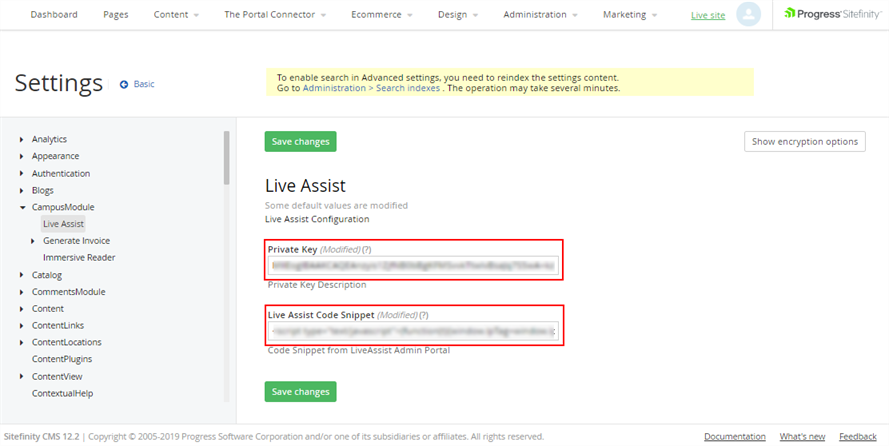
Expand Campus Module and select Live Assist.
-
In the Private key field, paste the generated Private RSA key. See Generate RSA Keys.
-
In the Live Assist Code Snippet field, paste the Live Assist Code Snippet copied in the last step of the procedure above.
-
Click Save changes.
Add the Live Assist Widget to Pages and/or Templates
You can add the Live Assist chat widget to individual web pages in the TPC Portal. However, we recommend adding the widget to templates that have been created for various page types. For example, you might have a template for a login page and a different template for general information pages, another template for forms, and so on.
|
|
For unauthenticated chats: Place the Live Assist widget on the login page and disable authentication in the Campaign and Engagement configuration. For more details, see steps 5 and 15 under Add Campaign and Engagement Details. For authenticated chats: Do not to place the Live Assist widget on the login page since the Digital Assistant cannot look up the Anthology Reach Contact record until the student logs in. You can also configure the Entry Points for the Campaign and Engagement to exclude login pages. See step 15 under Add Campaign and Engagement Details. |
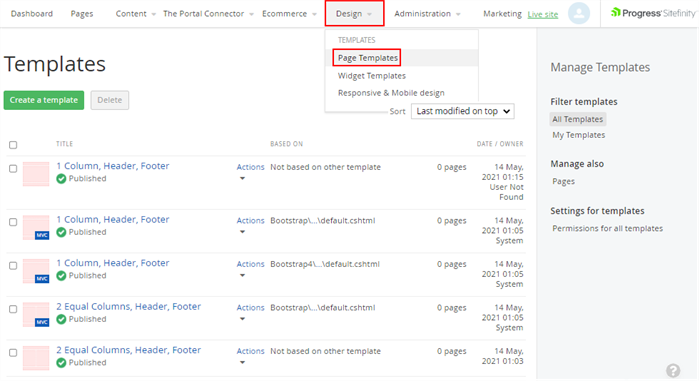
-
To configure templates, select Design > Page Templates in the navigation bar.
-
Select the template for the pages where you want the Live Assist chat widget to appear.
-
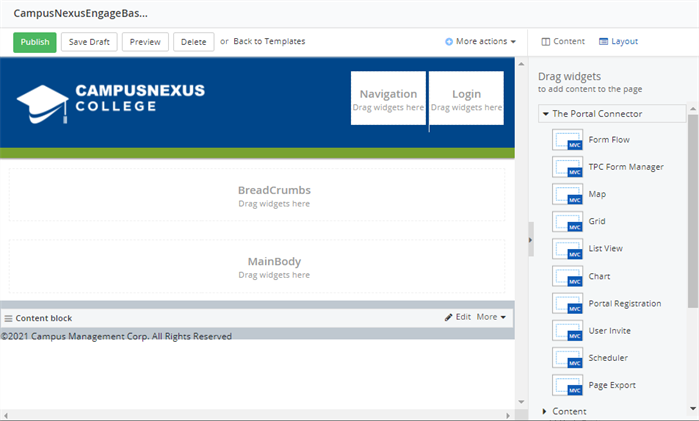
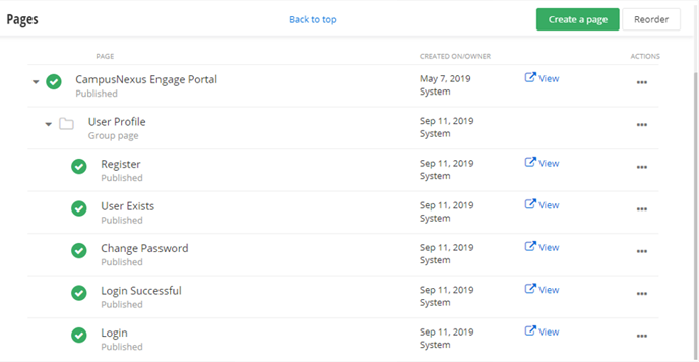
To configure pages, select Pages in the navigation bar.
-
Select the page you want to add the Live Assist widget to.
-
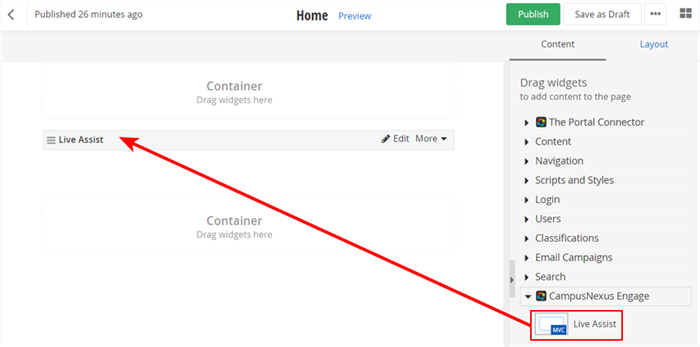
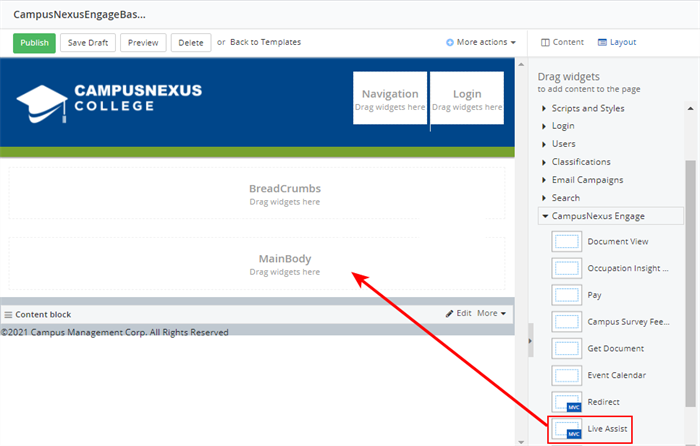
In the toolbar at the right, locate the Live Assist widget and drag it to the selected page or template.
-
Preview and then publish the pages and/or templates.


Verify the Configuration for Authenticated Chat
Authenticated chat requires authentication to be turned on for the Campaign. See Add Campaign and Engagement Details.
-
After all configuration is complete, log in to the TPC Portal and initiate the chat.
-
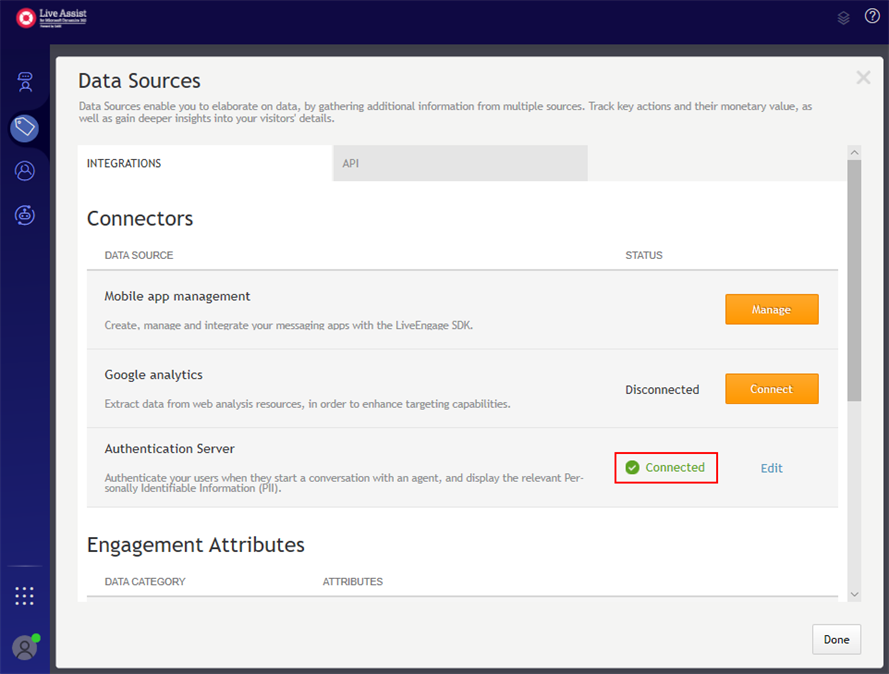
If the Digital Assistant comes up and chat is successful, navigate back to the Data Sources Page to confirm that the Authentication Server is Connected.
-
In this procedure you will add the JavaScript code for the bot widget to the TPC Portal, i.e., the portal that is integrated with Anthology Reach.
Prerequisites:
You must have completed the procedures:
Get the JavaScript Code for Live Assist
Enabling chat on your website involves inserting a small amount of JavaScript code into your web pages. This code runs on your website and interacts with the Live Assist servers. You retrieve the code from the Live Assist Admin Center.
-
In the Anthology Reach drop-down ribbon, select Live Assist > Administration Portal and log in to Live Assist Admin Center.
-
In Live Assist, select Get Started > Chat and click Start.
Live Assist Configuration in the TPC Portal
Prerequisite: The Campus Management modules must be installed from Modules and Services.
-
Log in to the ProgressSitefinity site and select Administration > Settings.
-
On the Basic Settings page, click Advanced and expand CampusModule and click LiveAssist.
-
Add a Private RSA key in the Private key field. See Generate RSA Keys.
-
Paste the Live Assist Code Snippet copied in the last step of the procedure above into the Live Assist Code Snippet field.
-
Click Save changes.
Configure Pages with the Live Assist Widget
-
Select Pages to configure pages in the TPC Portal.
-
Select the page(s) you want to add the Live Assist widget to.

For authenticated chats, do not to place the Live Assist widget on the Login page since Anthology Digital Assistant cannot look up the Anthology Reach Contact record until the student logs in. -
Drag and drop the Live Assist widget to the appropriate pages in your Portal where you want to enable a user to request a chat.