Add Campaign and Engagement Details
In this part of the procedure you will:
-
Add a campaign and engagement for authenticated and/or unauthenticated chats
Live Assist provides support for authenticated chats and unauthenticated chats.
-
Authenticated chats require users to log in so authentication can occur and the information stored for the user at the institution can be retrieved and updated.
-
Unauthenticated chats do not require users to log in but when a chat is initiated, the user is prompted for first name, last name, and email address to determine if a record exists for the user at the institution. If a record exists, that record can be retrieved and updated. If no record exists, a new record can be created and updated.
-
-
Configure the theme and layout for the chat widget(s)
-
Publish the campaign
| Authenticated chats | Unauthenticated chats |
|---|---|
| Create a Bot User Skill
Set Up Authenticated Chats |
Create a Bot User Skill |
To add Campaign and Engagement Details for authenticated or unauthenticated chats:
-
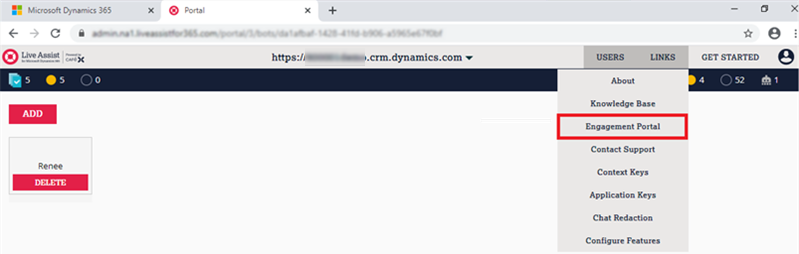
In the Live Assist Administration Portal, navigate to LINKS > Engagement Portal.

-
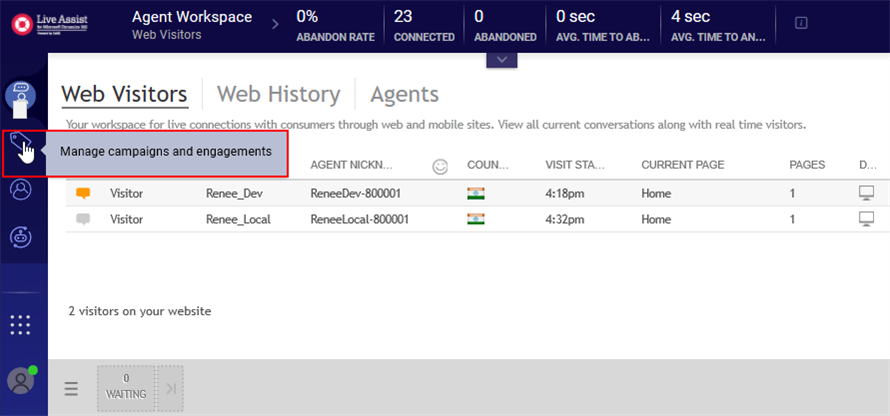
Select Manage campaigns and engagements in the left menu.
-
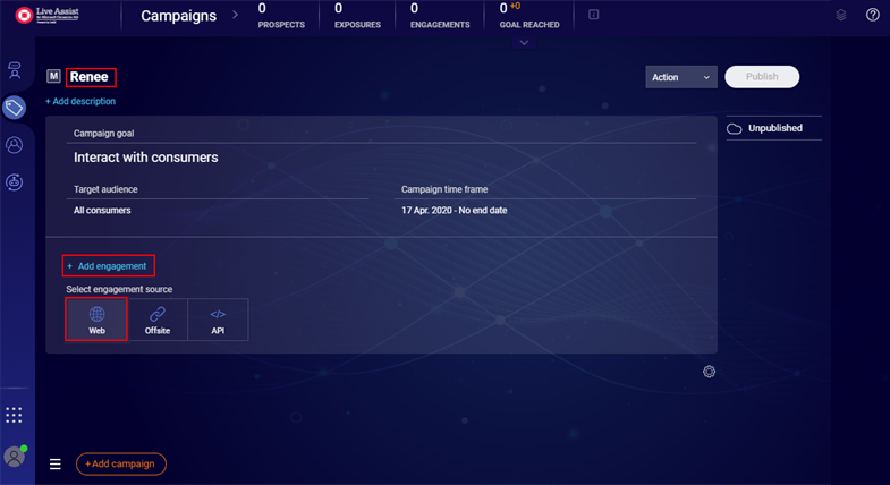
Click on Add campaign.
-
Specify the Campaign name (e.g., Renee).
-
Click Add description.
-
Select the goal Interact with consumers.
- Select the target audience All consumers.
-
Click Add engagement.
You need to create a new engagement for authenticated chat. Designing engagements for a campaign includes defining the type of interaction, the banners, and the engagement window.
-
Select the Web option under engagement source.
-
-
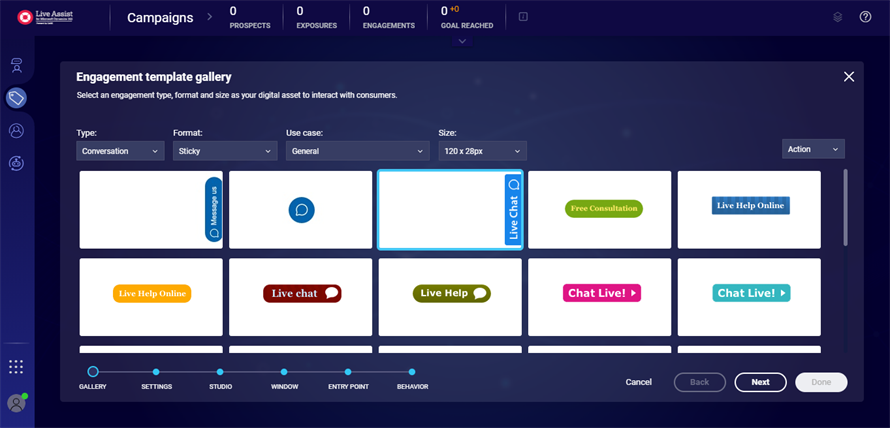
The Engagement template gallery is displayed. Select a bot widget from the Engagement template gallery and click Next.
-
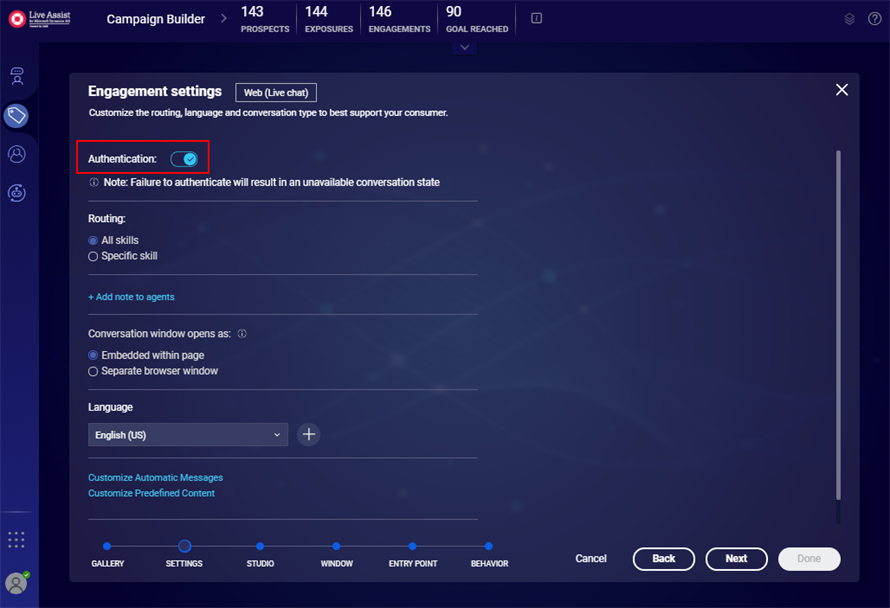
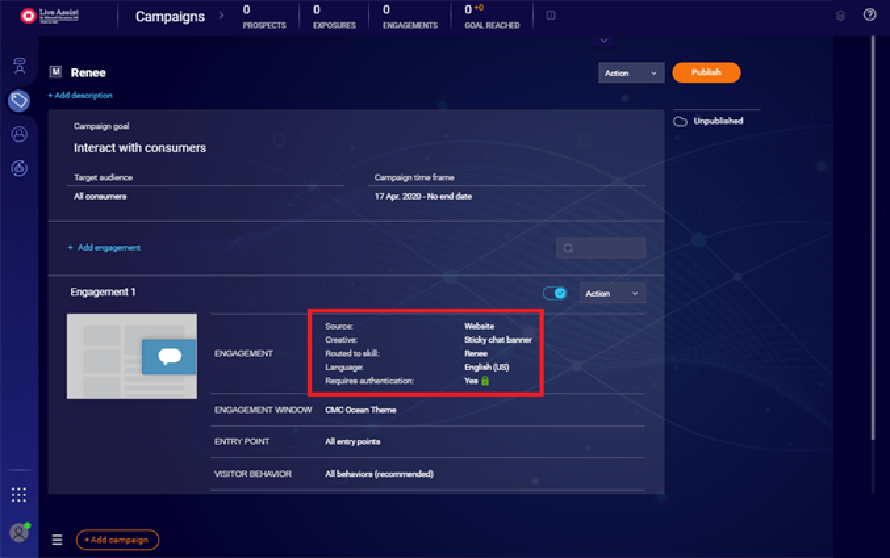
Configure the Engagement settings. Chose the appropriate settings for authenticated chats or unauthenticated chats.
For authenticated chats:
-
Enable Authentication. This setting enables the Contact name details to be passed from the bot to Anthology Reach.
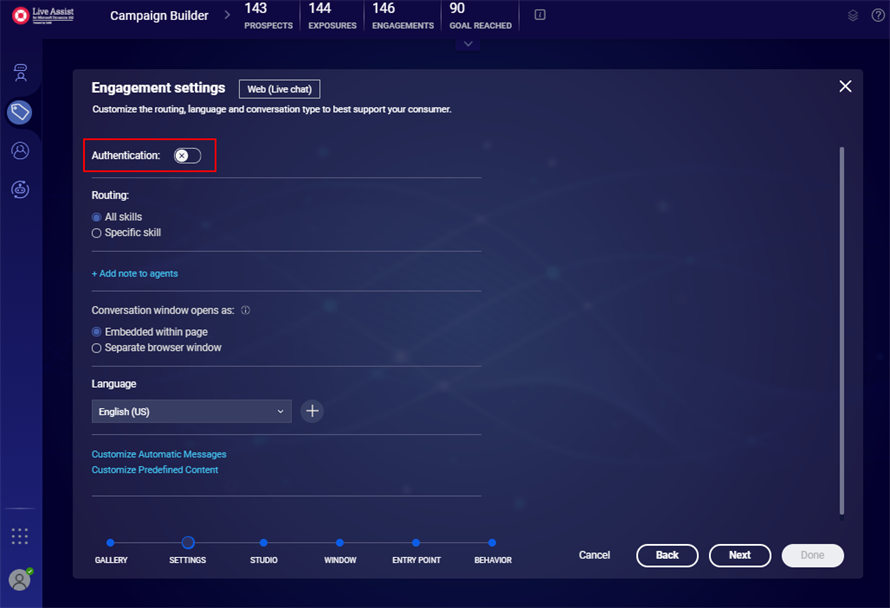
For unauthenticated chats:
-
Disable Authentication.
-
-
Under Routing, choose Specific skill and select the skill 'Renee' from the drop-down. This is the skill name you defined above.
-
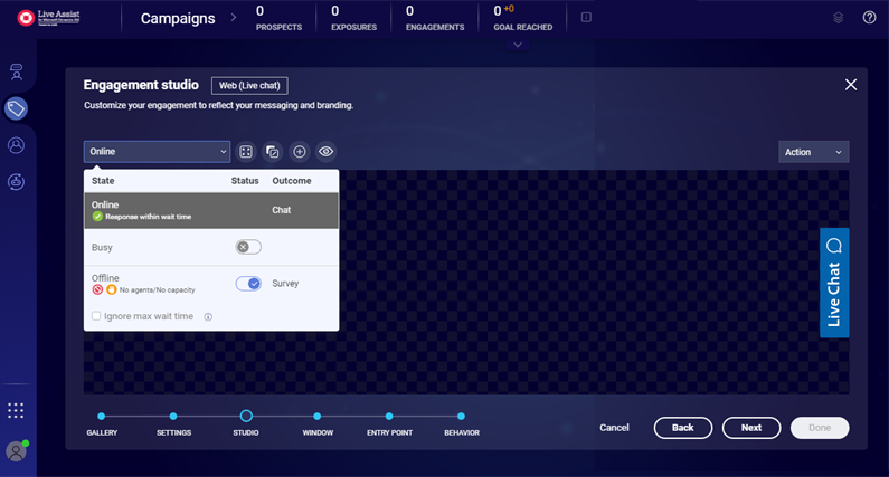
Click Next and select the Online state.
-
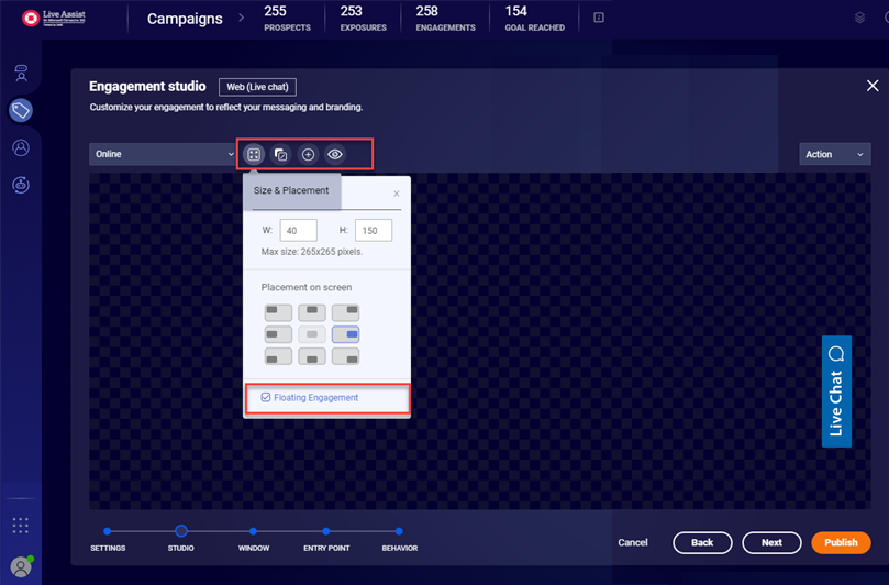
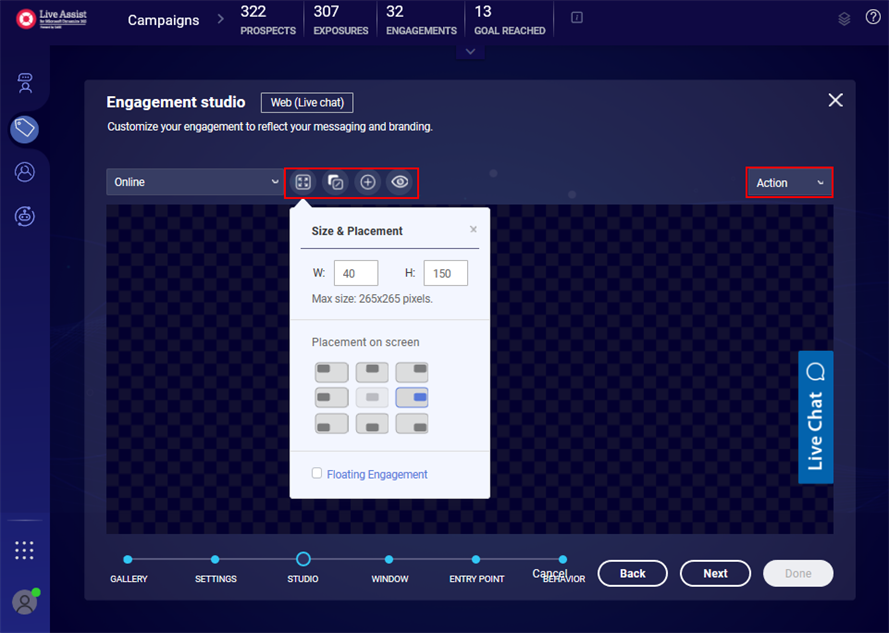
On the Engagement studio page, adjust the size and placement, background, and additional elements (text, images, buttons) as needed by the institution's branding.
Note: The Floating Engagement check box allows the chat window to be moved across the page and to be minimized.
-
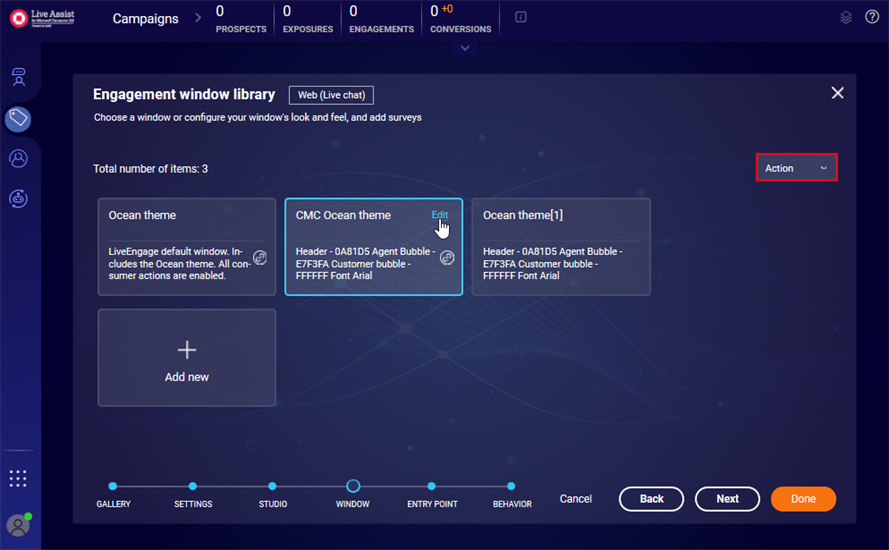
Click Next and select a Theme.
By default, Ocean theme will be loaded on Engagement window library page. Select the Ocean theme and create a duplicate from the Actions menu.
In our example the 'CMC Ocean Theme' is a copy of the Ocean Theme where the name has been modified. You can hover over the selected theme and click Edit to modify its layout.
-
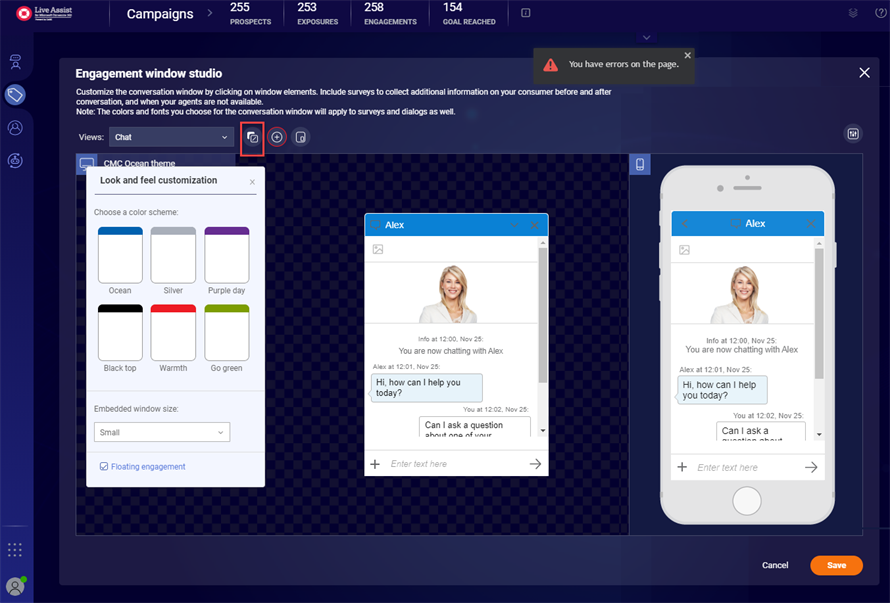
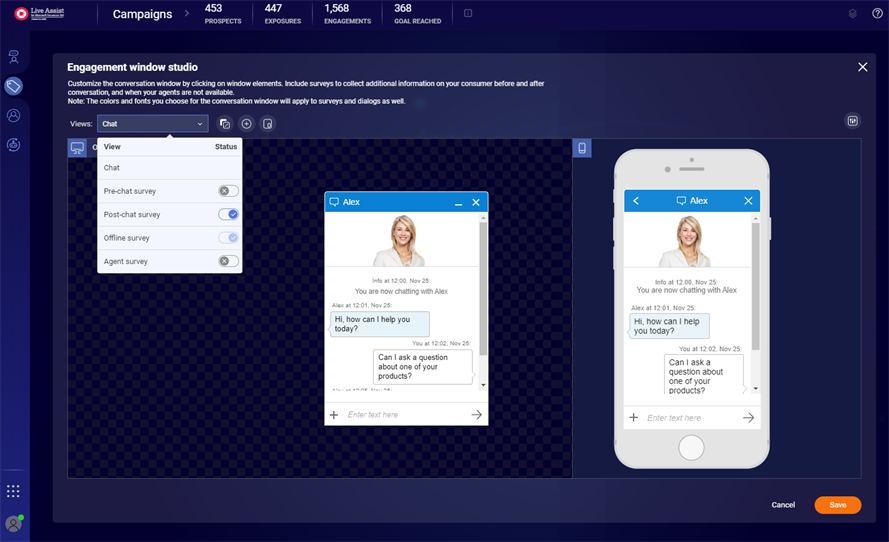
On the Engagement window studio page, you can customize the conversation window by clicking on window elements. Include surveys to collect additional information on your consumer before and after conversation, and when your agents are not available.
Note: The colors and fonts you choose for the conversation window will apply to surveys and dialogs as well.
-
You can change color scheme, embedded window size, and make the window a floating window.
Note: The Floating Engagement check box allows the chat window to be moved across the page and to be minimized.
-
You can add and modify elements for the Chat Window, such as changing the Image, Header, and selecting different images for the elements.
-
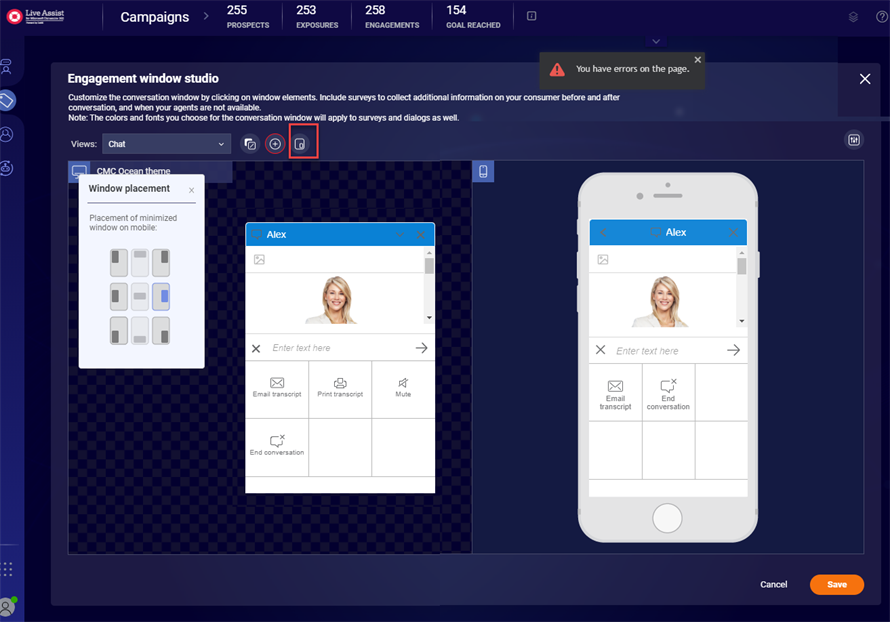
You can modify Window placement.
-
-
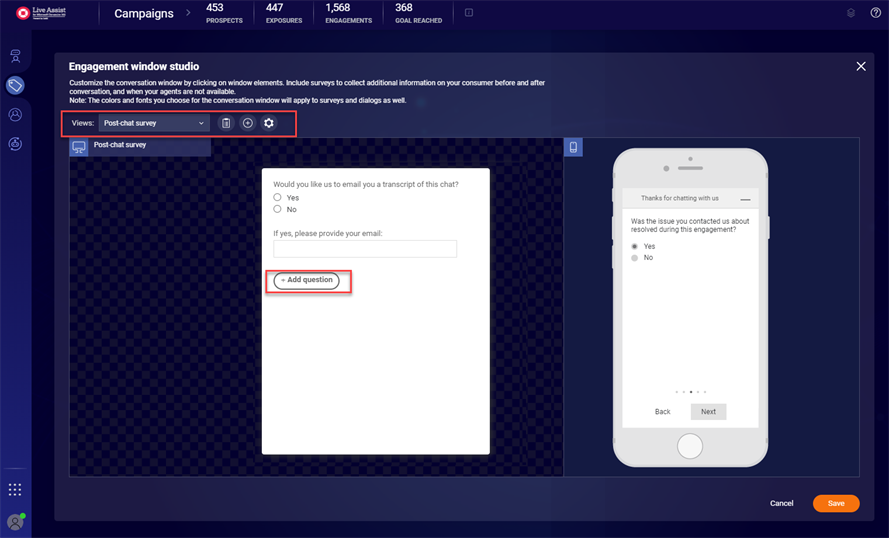
On the Engagement window studio page, you can activate a survey in the Views drop-down list.
-
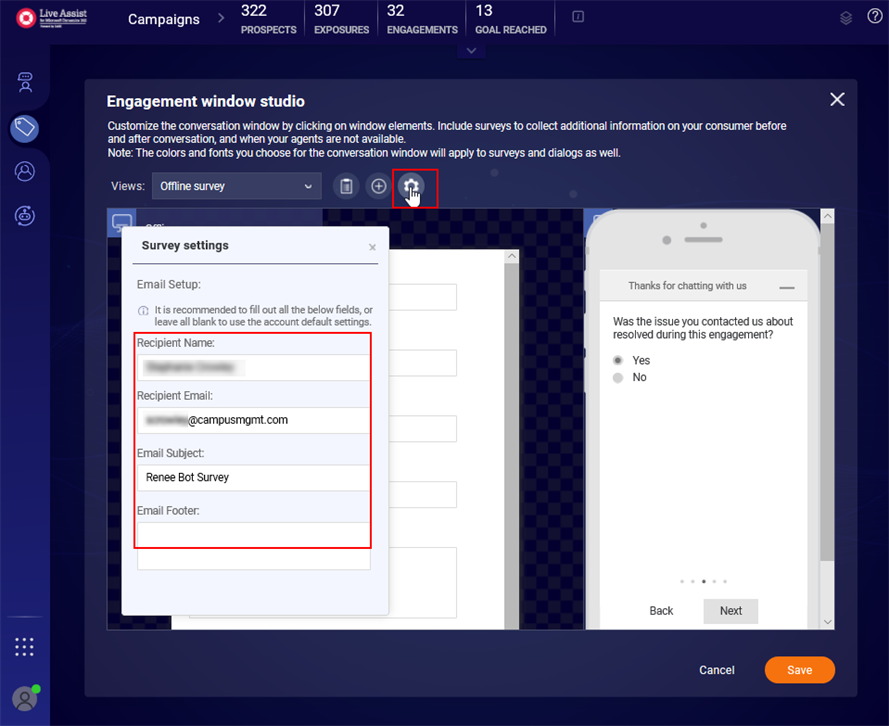
For a selected survey, you can customize the survey by adding questions, adding a survey heading, or updating additional survey settings.
-
After you have completed your changes to the surveys on the Engagement window studio page, click Save. Click Next to continue.
-
After you have completed the View settings on the Engagement window studio page, click Save. Click Next to continue.
-
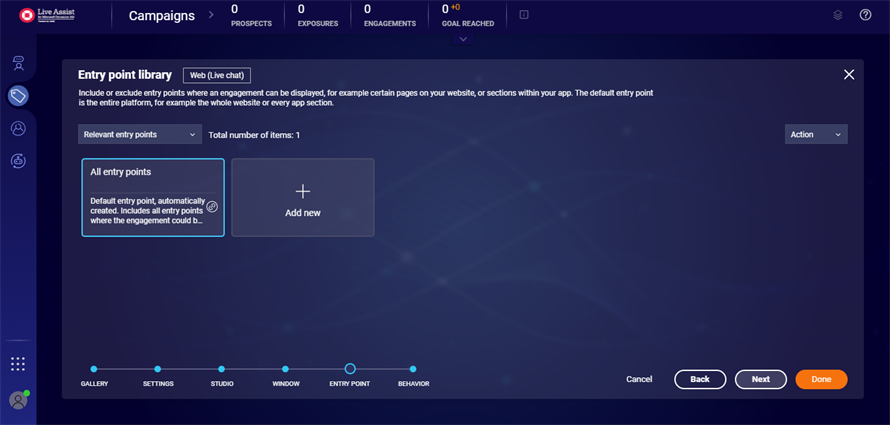
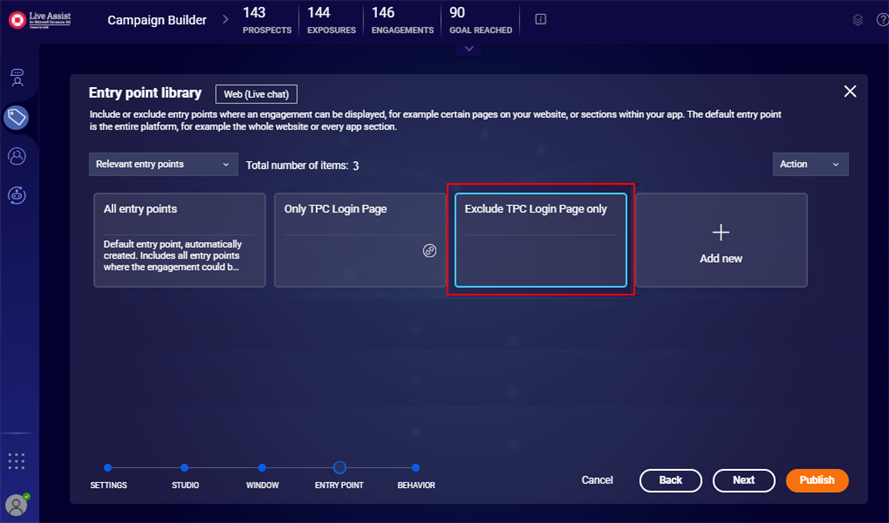
Configure the Entry point library options. Chose the appropriate settings for authenticated chats or unauthenticated chats.
-
If you are implementing authenticated chats only, select All entry points and click Next. This is the default entry point. It includes all entry points where the engagement could be displayed, for example, all website pages or all sections of the app.
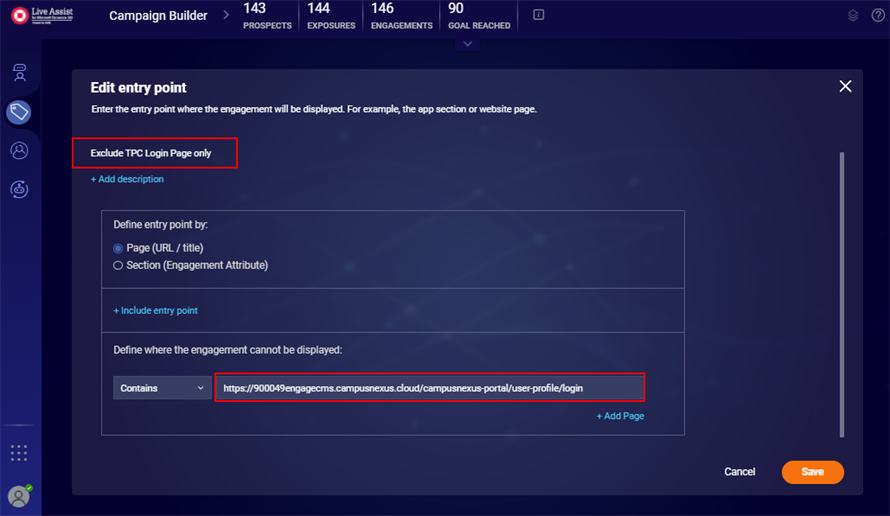
If desired, you can exclude entry points on this page. For example, you can exclude any login pages. Another option is to exclude login pages when you configure the entry points in the TPC Portal.
-
If you are implementing both authenticated and unauthenticated chats, you need to configure specific entry points. The entry points for authenticated engagements should exclude entry points used for unauthenticated chats. For example, if unauthenticated chat is available on the TPC Portal login page, the authenticated chat entry points should exclude the TPC login page.
For unauthenticated chats:
-
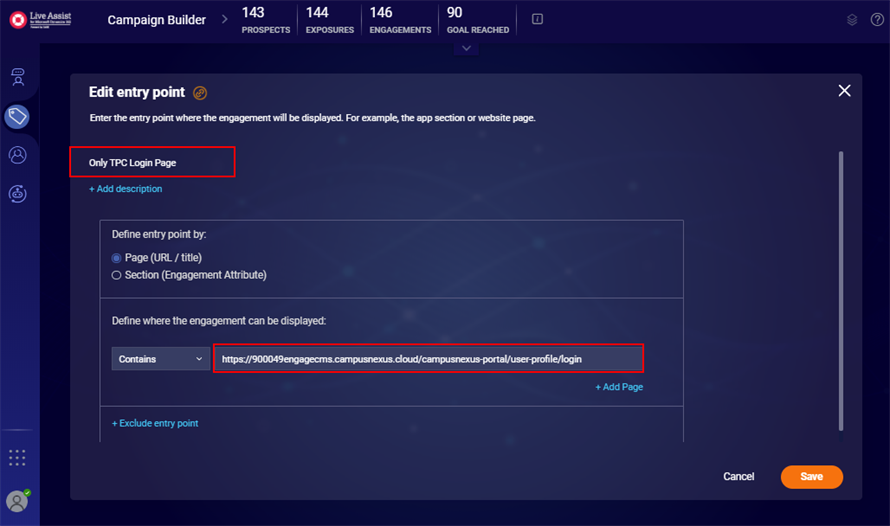
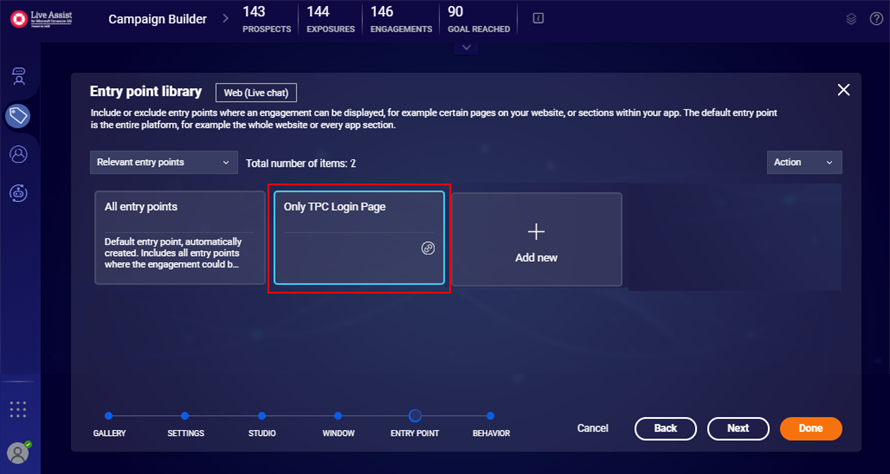
Create an entry point for the web site where the chat widget will appear. In our example we created the entry point for the TPC Portal login page and named the entry point as "Only TPC Login Page". Select Only TPC Login Page and click Next.
-
-
On the Visitor behavior library page, select All behaviors (recommended) and click Done.
-
The Engagement for the campaign will be created.
-
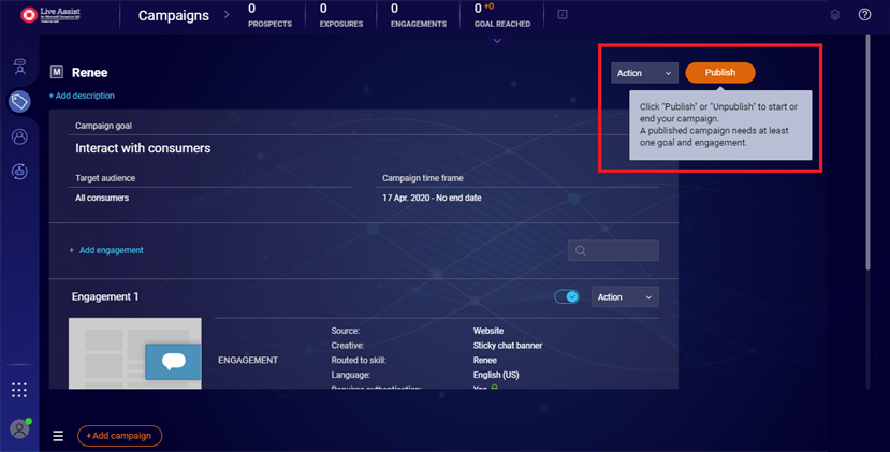
Click Publish to publish the created campaign.
-
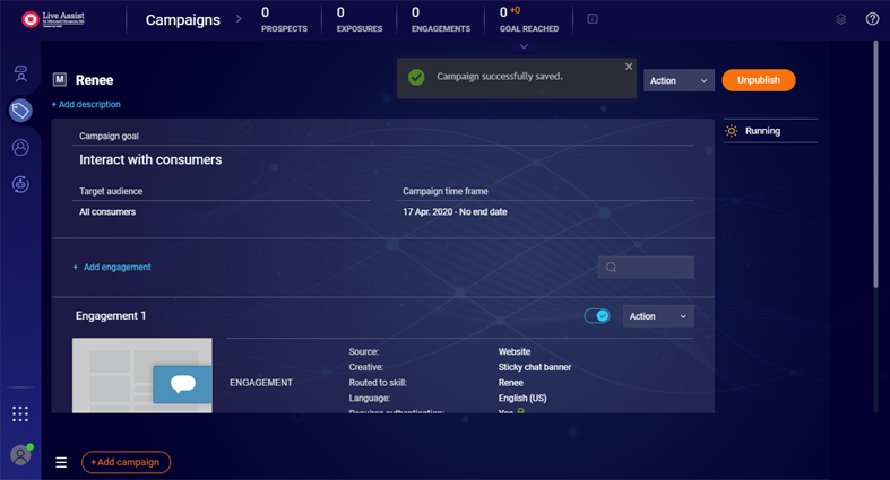
The campaign will be saved and published.
-
The published campaign will be added on the Campaigns page.


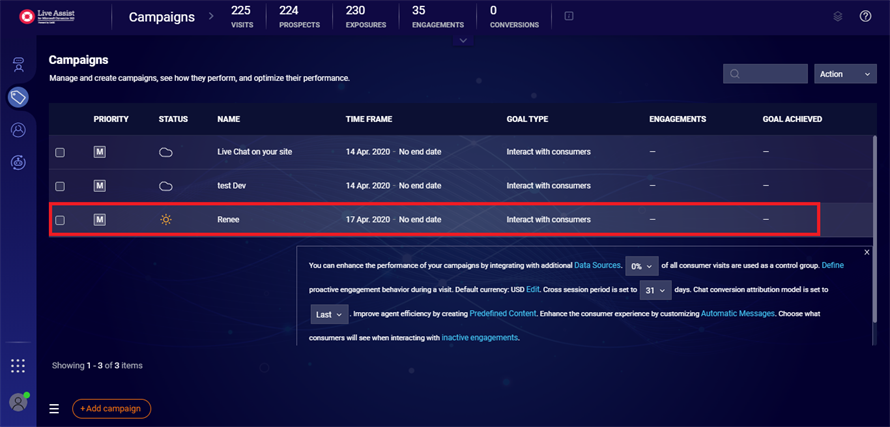
Note: If you want to change the name of the bot, see Change the Bot Name.
Continue with Create the RENEEESCALATE Skill.
In this part of the procedure you will:
- Add a campaign and engagement for authenticated chats
- Configure the theme and layout for the chat widget
- Publish the campaign
Prerequisite:
You must have completed the procedure Set Up Authenticated Chats.
-
In the Live Assist Administration Portal, navigate to LINKS > Engagement Portal.
-
Select Manage campaigns and engagements in the left menu.
-
Click on Add campaign.
-
Specify the Campaign name (e.g., Renee).
-
Click Add description.
-
Select the goal Interact with consumers.
- Select the target audience All consumers.
-
Click Add engagement.
You need to create a new engagement for authenticated chat. Designing engagements for a campaign includes defining the type of interaction, the banners, and the engagement window.
-
Select the Web option under engagement source.
-
-
The Engagement template gallery is displayed. Select a bot widget from the Engagement template gallery and click Next.
-
Set the required Engagement settings:
-
Enable Authentication. This setting enables the Contact name details to be passed from the bot to Anthology Reach.
-
Under Routing, choose Specific skill and select the skill 'Renee' from the drop-down. This is the skill name you defined above.
-
-
Click Next and select the Online state.
-
On the Engagement studio page, adjust the size and placement, background, and additional elements (text, images, buttons) as needed by the institution's branding.
-
Click Next and select a Theme.
By default, Ocean theme will be loaded on Engagement window library page. Select the Ocean theme and create a duplicate from the Actions menu.
In our example the 'CMC Ocean Theme' is a copy of the Ocean Theme where the name has been modified. You can hover over the select theme and click Edit to modify its layout.
-
On the Engagement studio page, you can activate a survey in the Views drop-down list.
-
For a selected survey, you can customize the survey by adding questions, adding a survey heading, or update additional survey settings.
-
After you have completed your changes to the surveys on the Engagement studio page, click Save. Click Next to continue.
-
After you have completed the View settings on the Engagement studio page, click Save. Click Next to continue.
-
On the Entry point library page, select a All entry points and click Next.
If desired, you can exclude entry points on this page or you can configure the entry points in the TPC Portal.
-
On the Visitor behavior library page, select All behaviors (recommended) and click Done.
-
The Engagement for the campaign will be created.
-
Click Publish to publish the created campaign.
-
The campaign will be saved and published.
-
The published campaign will be added on the Campaigns page.
Continue with Create the RENEEESCALATE Skill.