The topic "Bot Framework Composer" is not available in Version 1.0.0
Bot Framework Composer
Get the Know-how
You can use the Microsoft Bot Framework Composer to create a bot for the Azure Bot Service using an open-source IDE. Bot Framework Composer is visual designer for conversation flows. You select assets, events, or activities and specify the properties and values associated with each item. For an overview, please review What is the Bot Framework Composer? at https://docs.microsoft.com/en-us/composer/.
Custom skill bots and knowledge bases created using Bot Framework Composer version 2.0 and later have been tested and integrated with Anthology Digital Assistant. A sample skill bot created using the Composer is available at https://github.com/anthology-inc/renee-integration-samples/tree/main/skillbot/src/botFrameworkComposer.
Install Bot Framework Composer
Read the instructions at https://docs.microsoft.com/en-us/composer/install-composer?tabs=windows. The basic installation steps are:
-
Download the Composer desktop application for Windows.
-
Install Composer.
-
When prompted, install Node.js.
-
Close and restart the Composer.
If you are using Bot Framework Composer to build a:
-
Custom skill bot for an activity, continue with Custom Skill.
-
Custom skill bot for an activity with QnA Maker as the source for a knowledge base, continue with QnA Maker.
Bot Framework Composer
Get the Know-how
You can use the Microsoft Bot Framework Composer to create a bot for the Azure Bot Service using an open-source IDE. For an overview, please review What is the Bot Framework Composer? at https://docs.microsoft.com/en-us/composer/.
Download the Bot Framework Composer desktop application from https://docs.microsoft.com/en-us/composer/install-composer?tabs=windows.
Custom skill bots created using Bot Framework Composer version 2.0 and later have been tested and integrated with Anthology Digital Assistant. A sample skill bot created using the Composer is available at https://github.com/anthology-inc/renee-integration-samples/tree/main/skillbot/src/botFrameworkComposer.
Build a Skill Bot
-
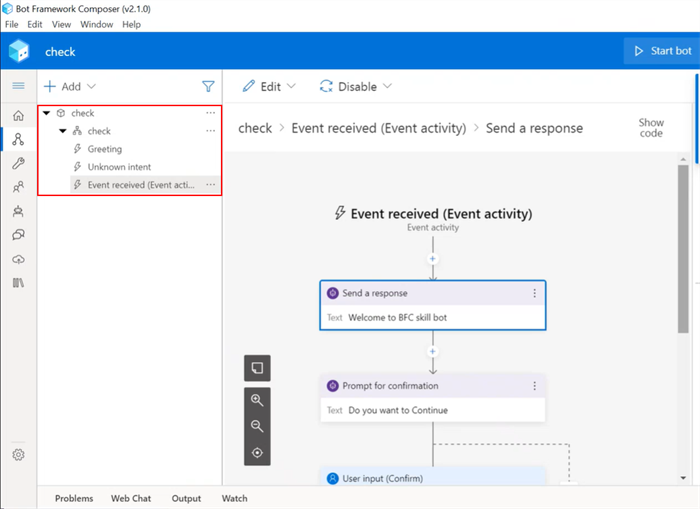
Create dialogs in the Bot Framework Composer. In our example, we created a "check" dialog.

-
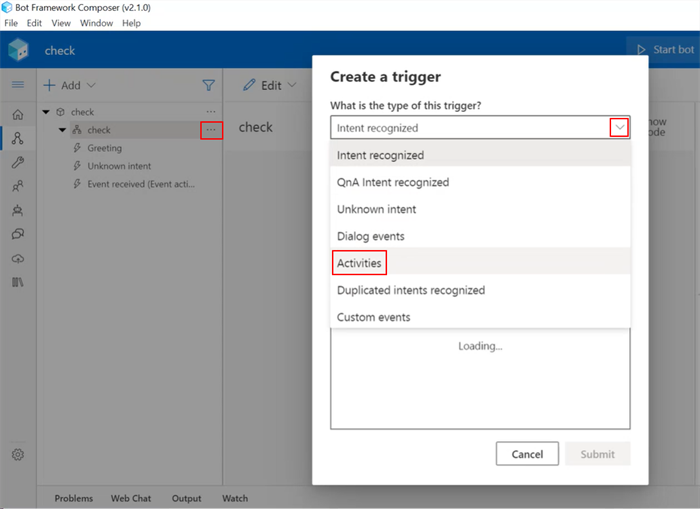
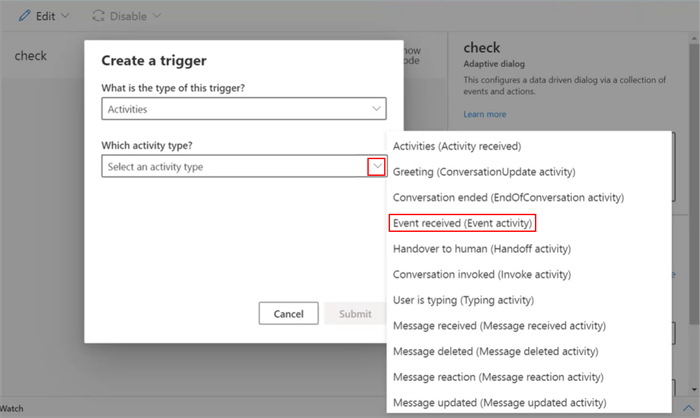
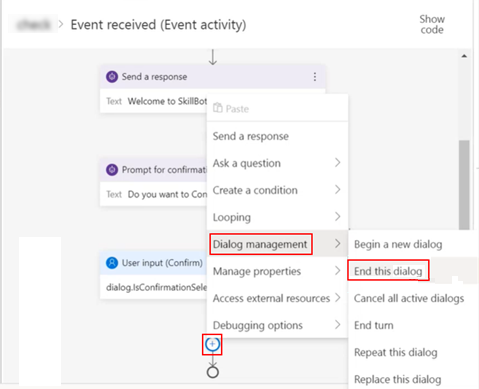
Select the ellipsis next to the "check" dialog, select Add a trigger, and select a trigger. We selected Activities.
-
We selected Event received (Event activity) in the activity type drop-down and clicked Submit.
-
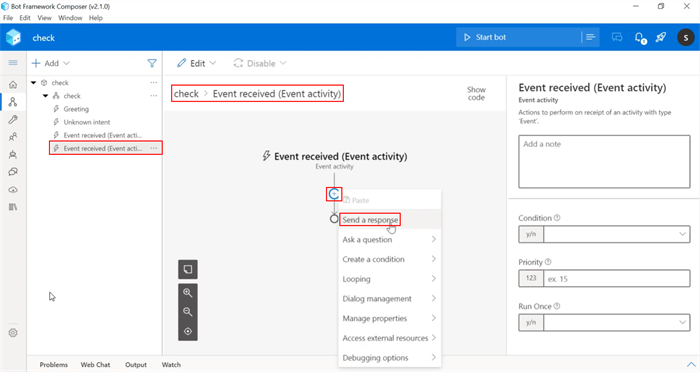
The Event received activity is added to the "check" dialog. We selected Send a response as the next step in the dialog flow.
-
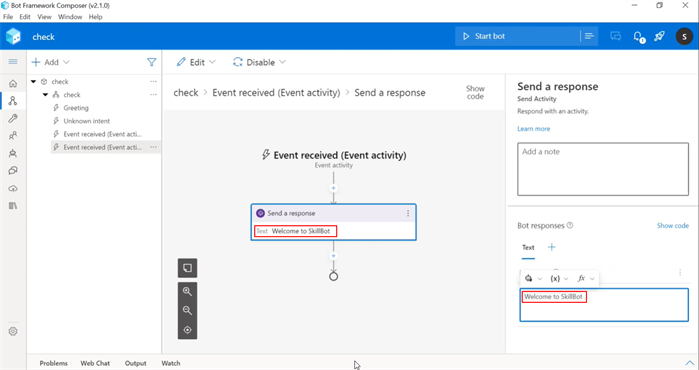
We specified the message text for the Send a response option.
-
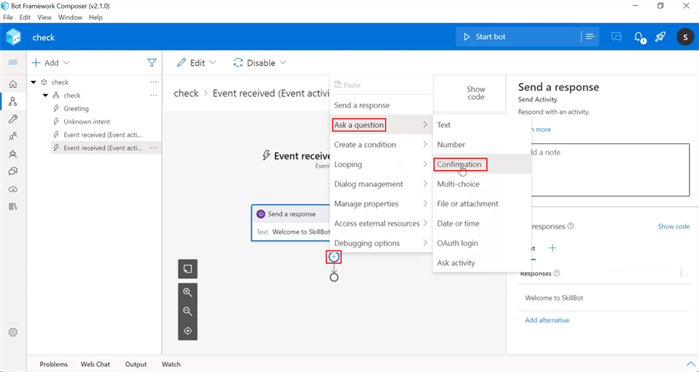
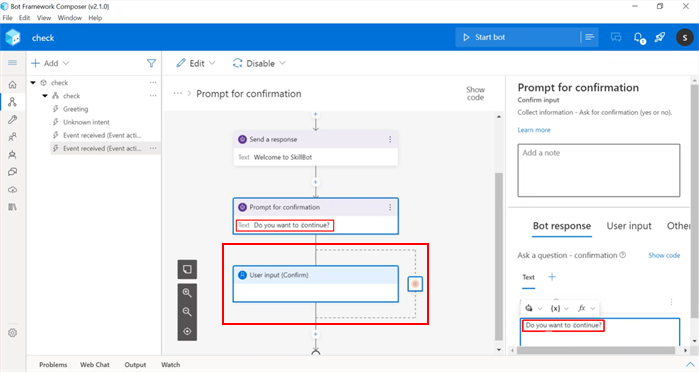
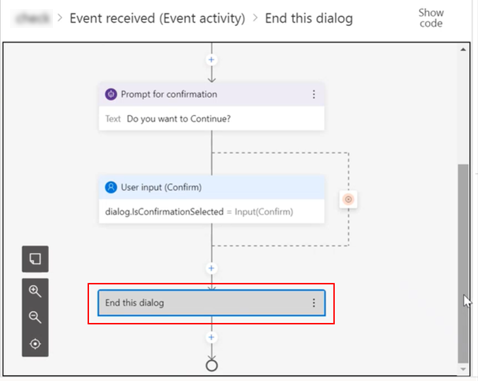
Next, we added a confirmation question.
-
We specified the text for the Confirmation question. The IDE automatically inserted a placeholder for the user's response to the confirmation question.
-
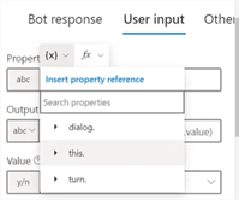
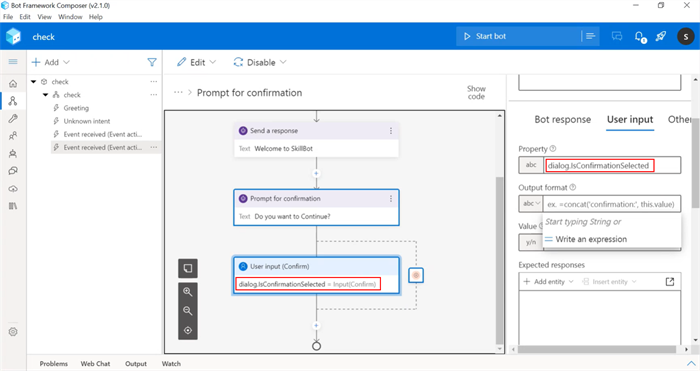
The user's response can be stored in a property. You can select whether to store the value on the
dialog.,this., orturn.scope. A drop-down provides valid property values for each scope.We stored the user's response in the dialog property as dialog.IsConfirmationSelected.
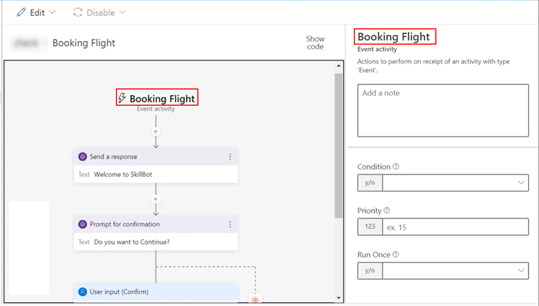
Build the event flow for your custom skill bot as needed based on your business rules.
|
Important: Integration with the Digital Assistant requires that an event flow created in Bot Framework Composer includes:
|
Publish the Skill Bot
When you have completed building the dialog, publish it to the Azure.
-
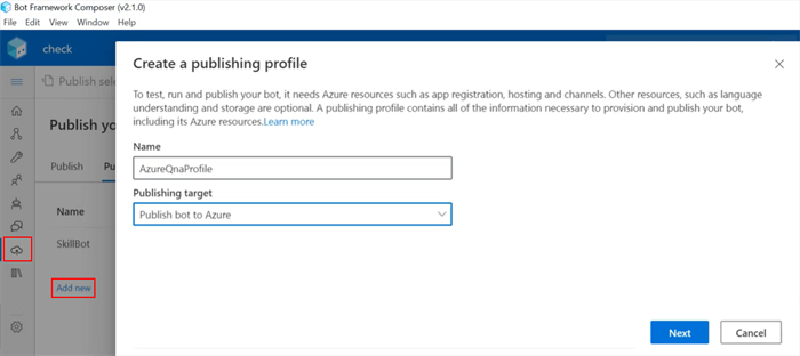
In the Bot Framework Composer menu, select Publish, click Add new profile.
Specify a Name for your profile, select a Publishing target, and click Next.
-
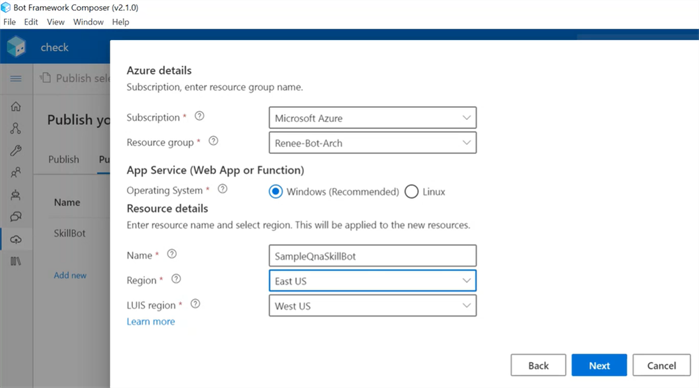
Follow the steps on the page to create new resources for your skill bot in Azure.
-
Specify your subscription, resource group, operating system, and bot resource details.
-
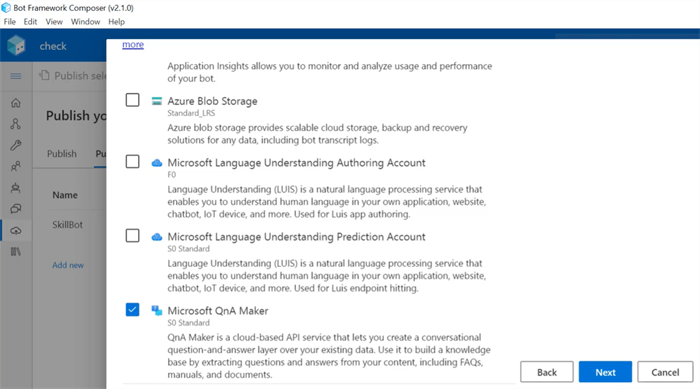
Select from the optional resources. For example, if you select Microsoft QnA Maker, the QnA Maker resources will be created for you in Azure.
-
Select Next and then click Create. The resources will be provisioned and deployed in Azure. This may take a few minutes.
-
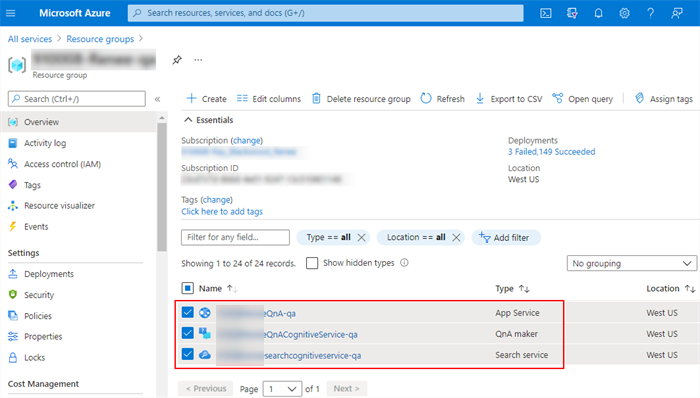
Three QnA Maker Services are created:
- Cognitive Service
- Search Service
- App Service
Once the QnA Maker Services are created, you can locate them under Resource groups.
-
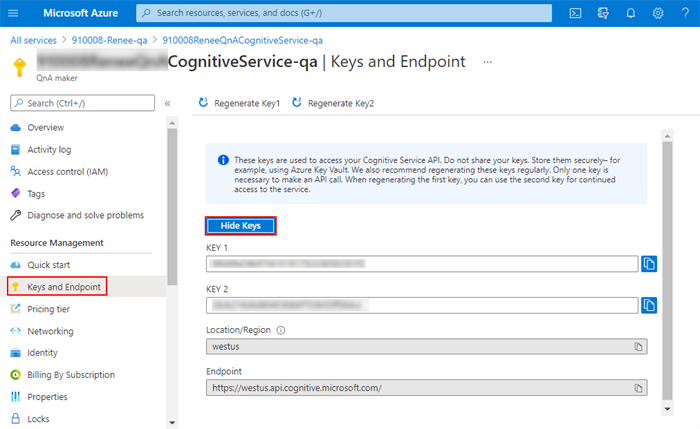
Select the Cognitive Service, select Keys and Endpoint under Resource Management in the left menu, and click Show Keys.
-
Copy a key and paste it into the AppSettings.json file.