Worklist Overview
The Worklists provide an easy way to find students in a particular status, campus, location, or group. Unlike the Dashboard tiles, the Worklist provides a view of all students, regardless of their status, with filters to drill-down and quickly find the information you need.
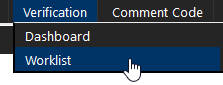
You can access the Worklist from the Site Sections menu by selecting:
-
Verification > Worklist,
-
Comment Code > Worklist, or
-
Professional Judgment > Worklist.
The Worklist displays the list of students with information about the student record. You can select the blue column headings to sort by the data in that column.
You can hover over the notes icon (![]() ) to the left of a student name to check for notes from the Activity History (see Add an Activity Note to the Activity History). Select the icon, to view the note details in a popup. When you download the list, the note details are saved to the Excel file (Latest Note column).
) to the left of a student name to check for notes from the Activity History (see Add an Activity Note to the Activity History). Select the icon, to view the note details in a popup. When you download the list, the note details are saved to the Excel file (Latest Note column).

The Filters & Flags section at the top of the list provides options for you filter the list displayed.

Download Dashboard Tile
When you select the displayed number in a Dashboard, the system displays a list page for those records. From a list page, you can download this data in Excel-compatible format (.csv). Using this downloaded file, your organization can then manipulate the data within Excel or any other program that supports this format.
To download a tile-generated list:
-
Select Verification > Dashboard to open the Verification Dashboard.
-
Select the number on a tile for which you want to retrieve the associated data.
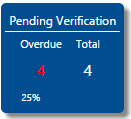
Example: Select the Overdue number on the Pending Verification tile to view a list of all students in Pending Verification status that are flagged as overdue for processing.
-
(Optional) Sort the list items by selecting one of the column headings.
-
Selecting the same column heading again reverses the order in which the list is sorted.
-
At the top of the student list, select the Download to Excel button.
This downloads a local copy of the list of students, including all the fields displayed in the list page.
If you sorted the columns using the column headings, the data in the Excel file are in the same order and using the same information you see on the page.
-
Open the downloaded file in Excel (or a program capable of opening Excel files). This serves as a report that shows information for all students in that tile/status.

You can then manipulate the data in Excel (or a similar spreadsheet program) to create your own reports in the needed format.