Associate Accounts
To access Associate Accounts, go to Administrators > User Administration > Associate Accounts.

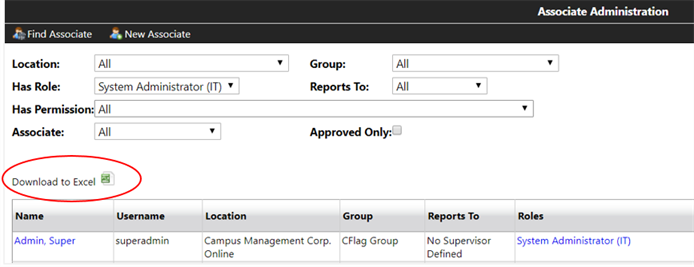
The following functions can be accessed on the Associate Administration page:
- Find Associate
- New Associate
The following filters can be accessed on the Associate Administration page:
- Location
- Has Role
- Has Permission
- Associate
- Group
- Reports To
- Approved Only
The filters can be used to view a list of users who meet the criteria in the filters selected.
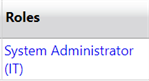
Example: Use the 'Has Role' filter to view all users with System Administrator (IT) role.
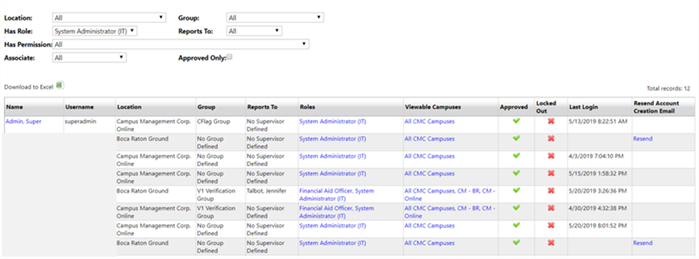
Export to Excel
-
Select applicable filters.
-
Select the Download to Excel symbol.
-
To view the “Staff” Excel Report, select Open.

-
The associate grid will be exported to Excel.

Find Associate
The Find Associate functionality allows you to view or edit (depending on permissions) associate profile information.
-
Select the Find Associate tab.
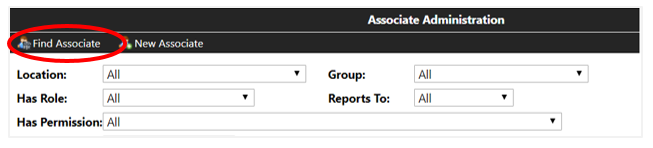
An Associate Search box allows you to search by an associate’s ID, Username, or Last Name.
-
Enter the appropriate information and select Search.

A list with associate ID, username, name, location, and campus will be displayed.
-
Choose an associate ID from the search list.
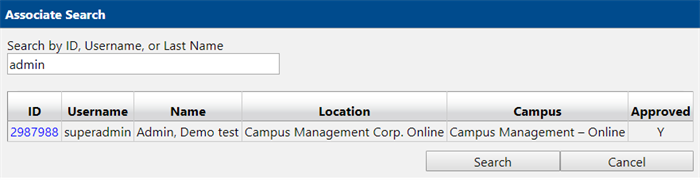
The account summary for the selected associate will be presented.

Create New Associate
The permission Staff: Create Staff User Account is required to create an associate account.
-
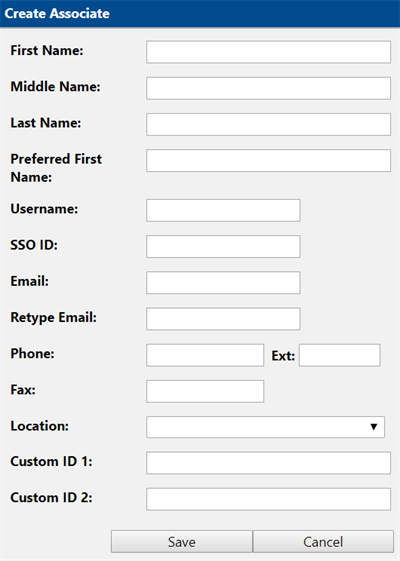
From the Associate Administration page, select the New Associate tab.

-
Enter the associate information in the Create Associate window and select Save.
-
First Name (required)
-
Middle Name (optional)
-
Last Name (required)
-
Preferred First Name (optional)
-
Username (required)
-
SSO ID (for use with Single Sign-On configuration)
-
Email (required)
-
Retype Email (required to validate entry)
-
Phone (required)
-
Ext (optional)
-
Fax (optional)
-
Location (required)
-
Custom ID 1 (optional, can be used for integration)
-
Custom ID 2 (optional, can be used for integration)
The Associate Administration grid appears.

Important: Upon initial account creation, the following areas remain undefined.
-
Group – Groups are used as a Dashboard filter option. When the group filter is selected, students assigned to associates in that group will be presented.
-
Reports To – The associate’s supervisor.
-
Roles – The permissions underlying an associate’s role determine the functionality accessible for the user.
-
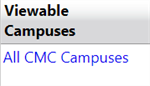
Viewable Campuses – The associate will only be able to view students in the campus(es) selected.
-
Resend Account Creation Email – An active link to resend the email will be present if the Last Login is blank.
Follow the steps in the Edit Associate Account section to define these areas or make additional updates.
-
Edit Associate Account
The permission Staff: Edit staff accounts is required to edit an associate account.
-
Follow the steps to Find Associate or Create New Associate.
-
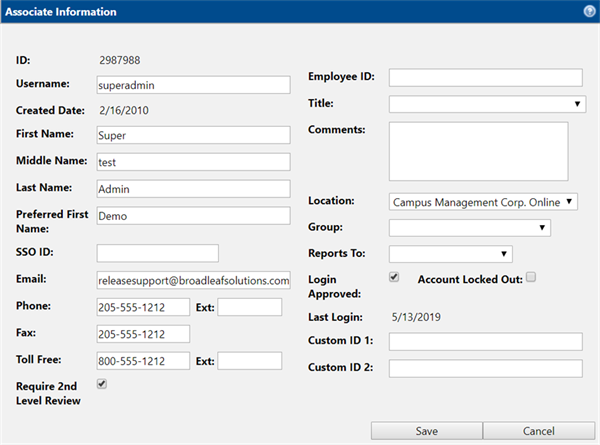
Select the associate’s name to view Associate Information window.
Please see the fields below that are not part of the initial account creation.
-
Toll Free and Ext – Optional toll-free number and extension
-
Require 2nd Level Review – Trigger 2nd level review on students assigned to this user
-
Employee ID – Optional employee ID
-
Title – Optional, select title from drop-down list. For more information, see Associate Titles.
-
Comments – Optional comments
-
Group – Optional, select group from the drop-down list. Permission, Staff: Set group in profile, is required. For more information, see Groups.
-
Reports To – Optional, select from drop-down list the person this staff member reports to. Permission, Reports: Set reports-to in profile, is required. This will drive Dashboard filter results.
-
Login Approved – Checked if account is active and approved for login. If SSO is used, this field will be ignored.
-
Account Locked Out – Checked to prevent user from logging in. If SSO is used, this field will be ignored.
-
Location – Included on account creation, but permission Staff: Set location in profile is required.
-
-
Make applicable updates and select Save.
Define Associate Roles
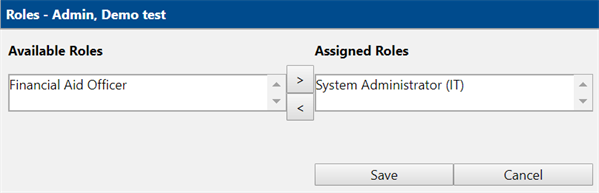
An associate’s role(s) will determine what access the user has throughout the system. An associate can be assigned multiple roles. Navigate to the Roles section of the grid on the Association Administration page. The Roles window allows you to add or delete roles for the selected associate.
Add a Role
-
Select the role you would like to assign in the Available Roles section then select
 .
.Multiple roles can be selected:
-
Select a list or section of roles, using the Shift key.
-
Select specific roles, using the Ctrl key.
-
-
The selected role(s) are displayed in the Assigned Roles section.
-
Select Save.
Delete Role
-
Select the role in the Assigned Roles section and then select
 .
.Multiple roles can be selected:
-
Select a list or section of roles, using the Shift key.
-
Select specific roles, using the Ctrl key.
-
-
The selected role will be displayed in the Available Roles section.
-
Select Save.
The assigned roles will now appear in the Associate grid.
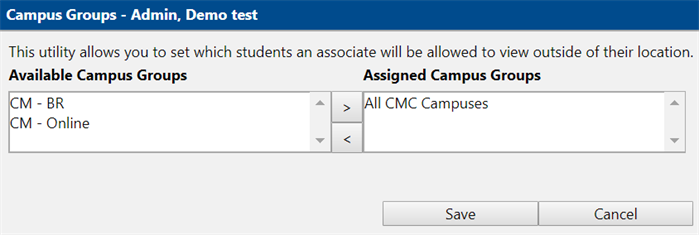
Assign Viewable Campuses
The staff user will only be able to view students at a campus that they have assigned as viewable. To define which campuses an associate can view, select Viewable Campuses in the Associate grid.
The Campus Groups pop-up window allows you to add or delete campuses for the selected associate.
Add a Campus
-
To add a campus, select the campus you would like to assign in the Available Campus Groups section, then select
.Multiple roles can be selected:
-
Select a list or section of roles, using the Shift key.
-
Select specific roles, using the Ctrl key.
-
-
The selected role will be displayed in the Assigned Campus Groups section.
-
Select Save.
Delete Campus
-
To delete a campus, select the campus in the Assigned Campus Groups section, then select
.Multiple roles can be selected:
-
Select a list or section of roles, using the Shift key.
-
Select specific roles, using the Ctrl key.
-
-
The selected campus is displayed in the Available Campus Groups section.
-
Select Save.
The assigned Campus Groups are displayed on the Associate grid under Viewable Campuses.