Microsoft Outlook Busy Sync Settings
https://docs.microsoft.com/en-us/azure/active-directory/develop/quickstart-register-app
Prerequisite: These settings can be configured only for institutions which use Outlook 365 with mailboxes on Microsoft Exchange Online.
Institutions can configure these Outlook Busy Sync settings with the Staff Calendar feature to check for conflicts in a staff member's official Outlook calendar. This verification prevents a scenario where multiple appointments will be booked at the same time. For more information, see:
-
The Determining the Display of Book Appointment Slots section in The Schedule Appointment Page in Reach topic, and
-
The description of the Check Other Calendars for Conflicts option in Default Configurations.
Configurations in the Azure Portal
Important:
- Steps 1 - 11 must be performed to create an application registration in the Azure Active Directory and must be performed by an institution's Outlook / mailbox administrator.
- Step 12 must be performed by an Anthology Reach DevOps professional or a Professional Services team member after receiving a request from the institution to implement the staff calendar feature along with a mechanism to check for conflicting appointments.
-
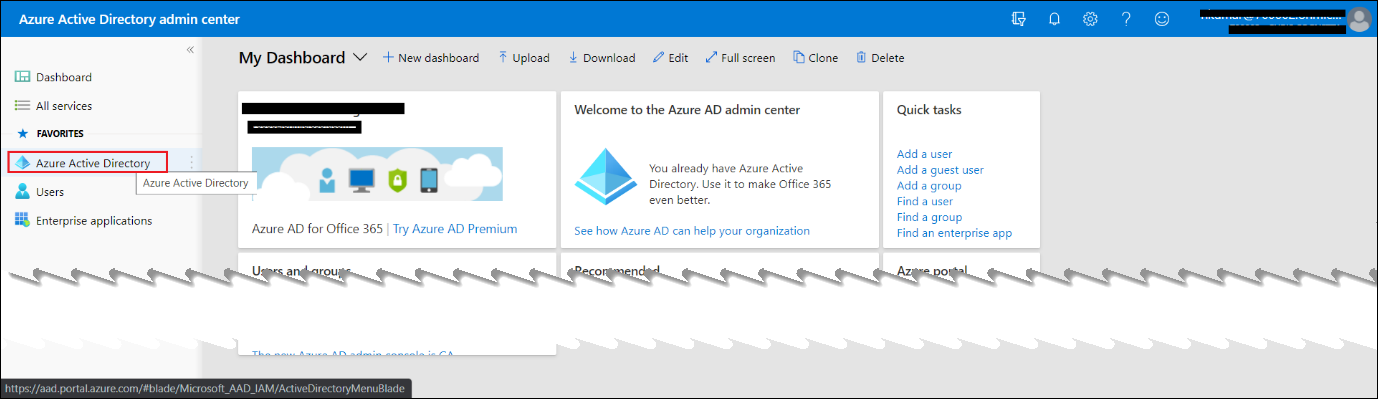
Using admin credentials, login to https://aad.portal.azure.com/.
- Navigate to Azure Active Directory.
- Navigate to App Registrations > New Registrations.
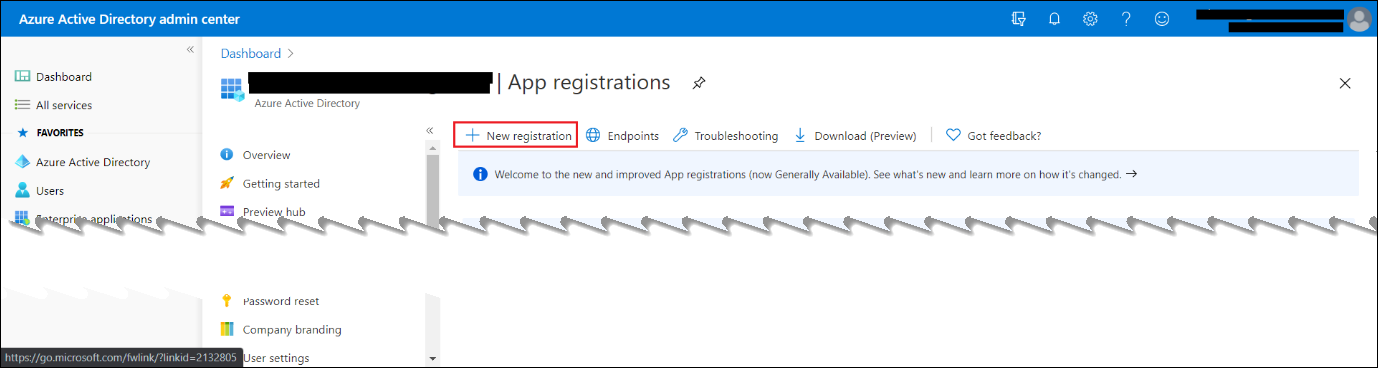
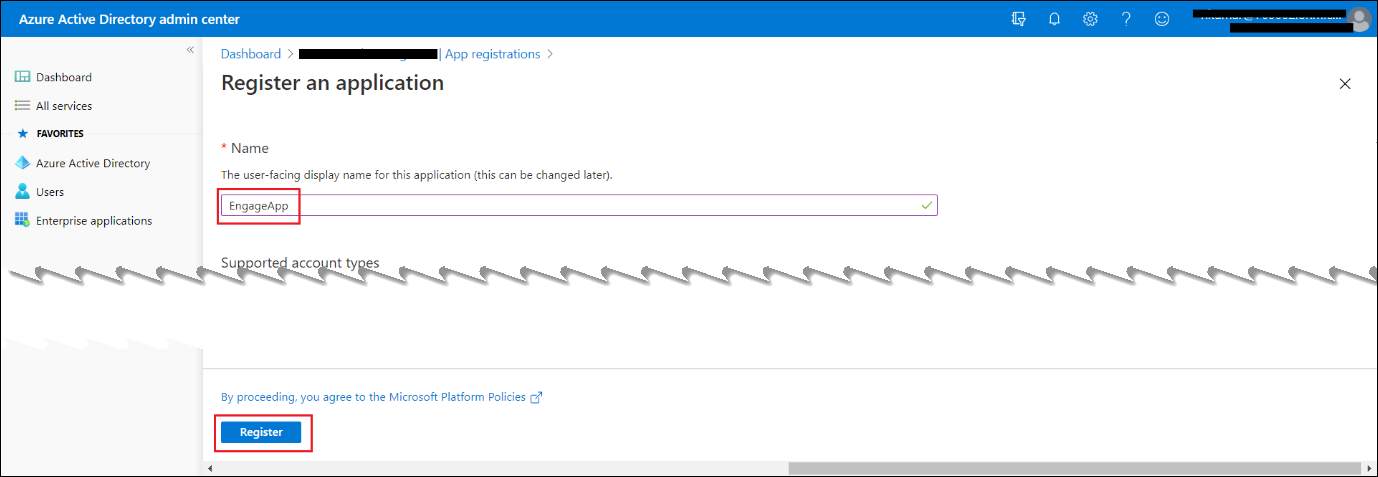
- Enter the name, for example EngageApp, and then click Register.
The EngageApp will be registered. Make a note of the Application (client)ID.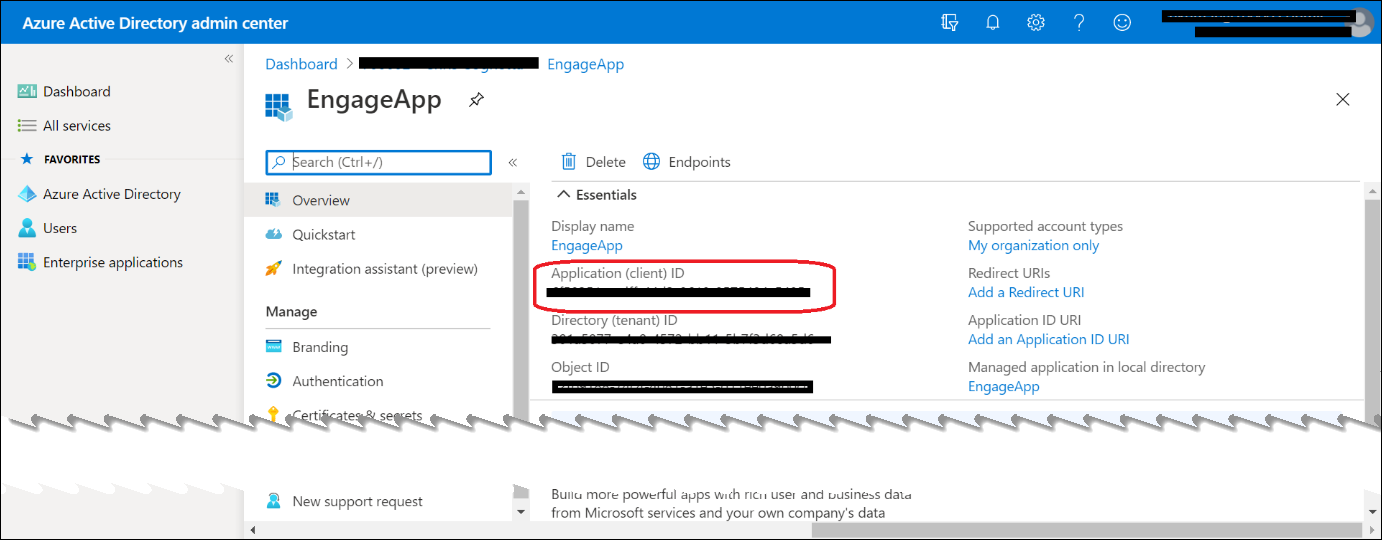
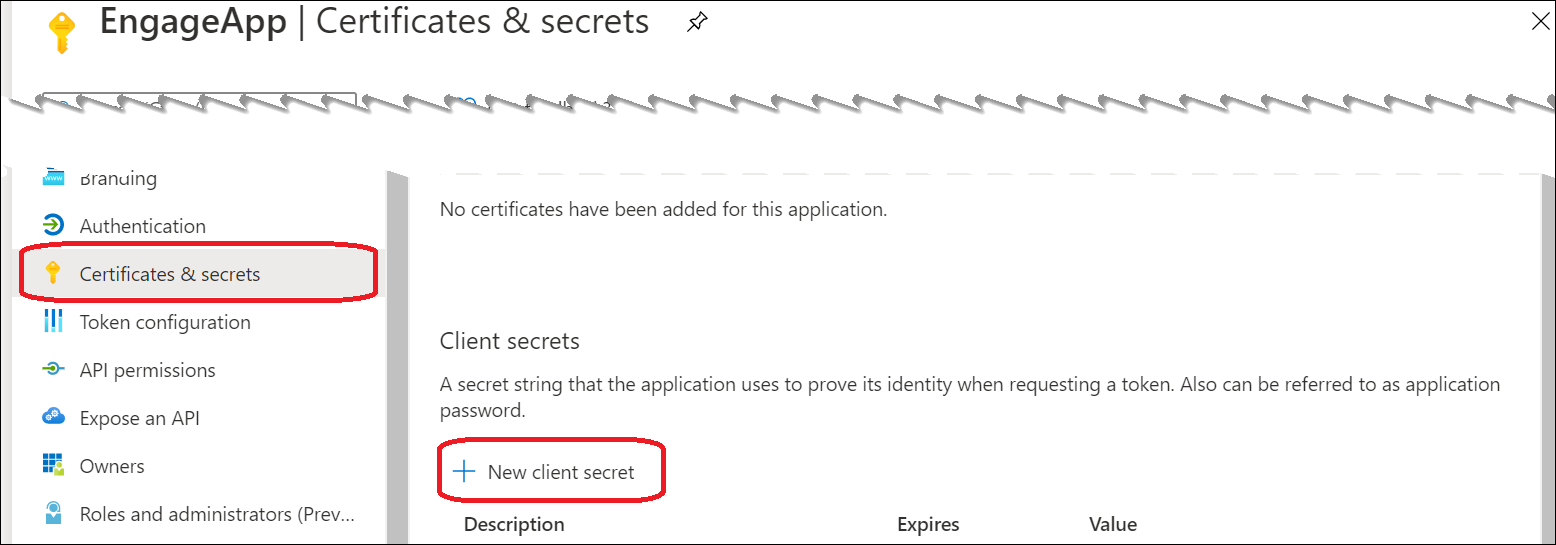
- To configure Certificates & secrets, select Certificates & secrets > New client secret.
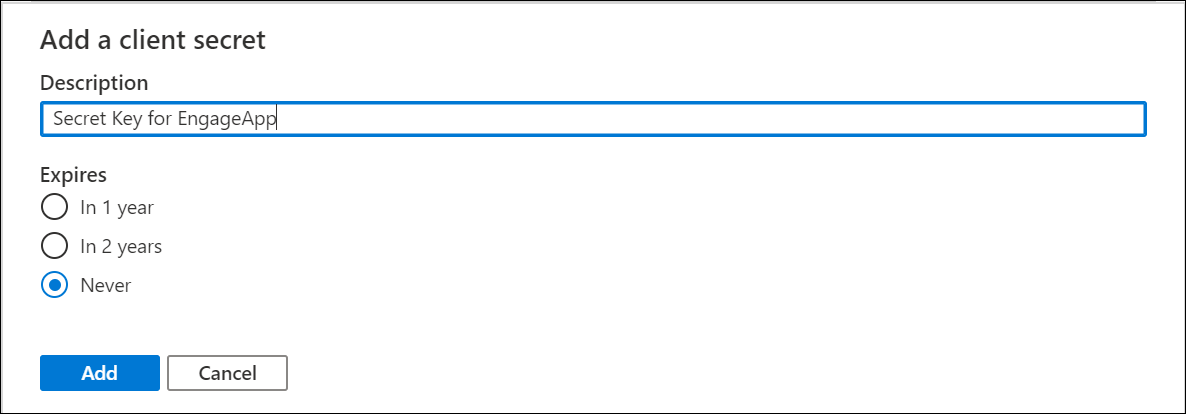
- Provide a description for the secret, and set the expiry. When done, click Add.
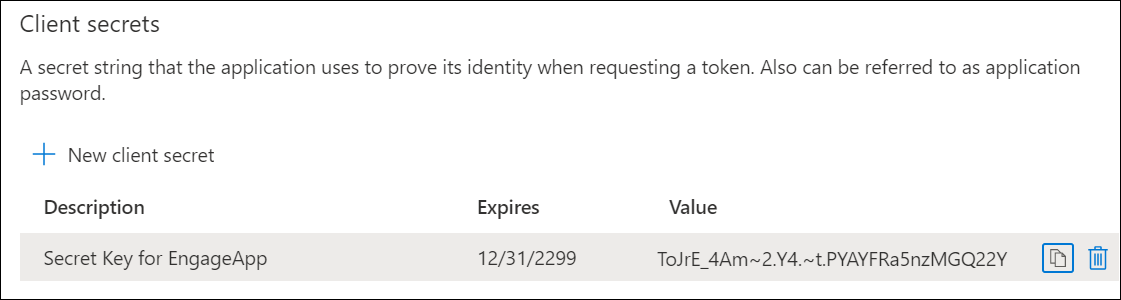
- After saving the client secret, its value will be displayed. Copy the value because you won't be able to retrieve the key later. You will need to provide the key value with the application ID to sign in to the application. Store the key value where your application can retrieve it.
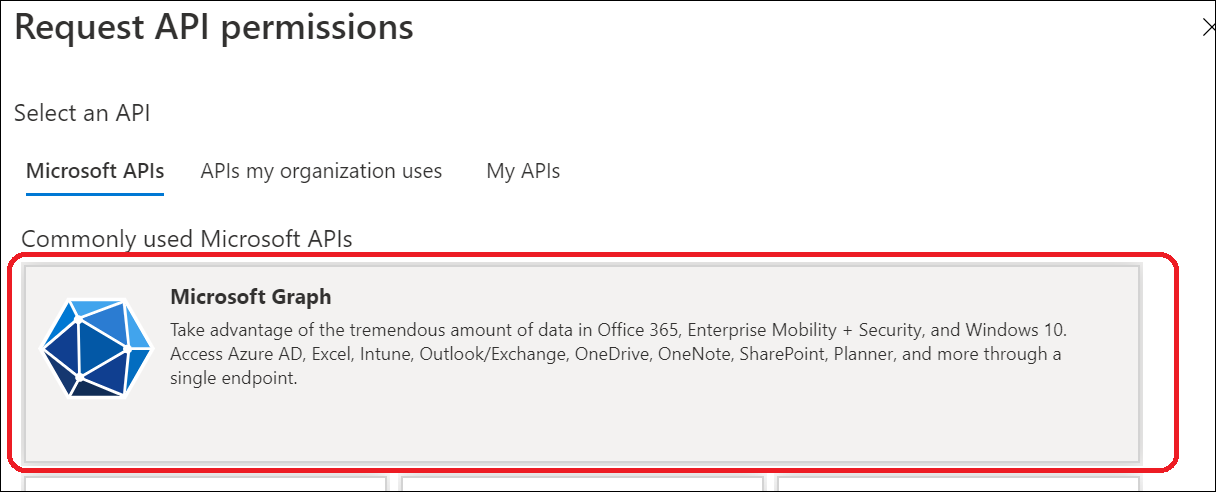
- To configure permissions, select API Permissions > Add a permission.
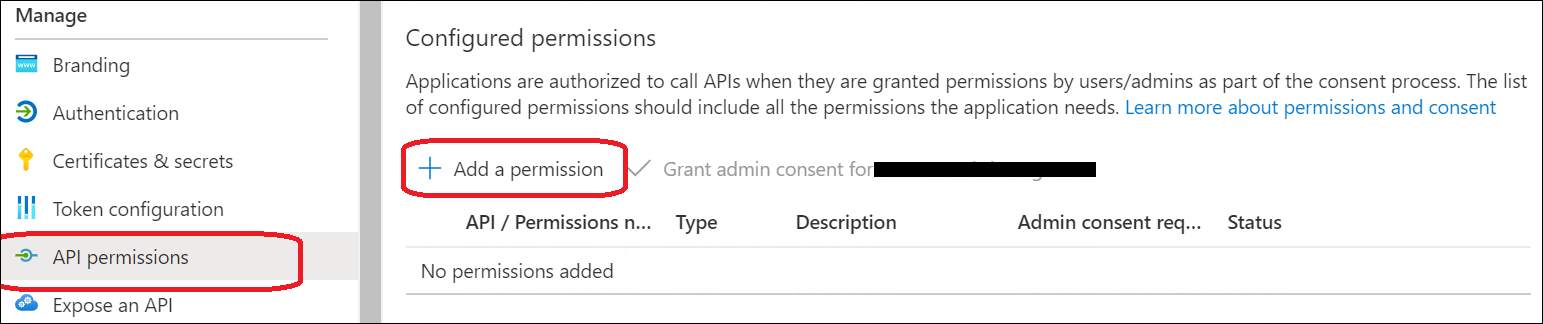
- Select Microsoft Graph under Microsoft APIs.
- Select Application permissions > Calendars.Read and then click Add permissions.
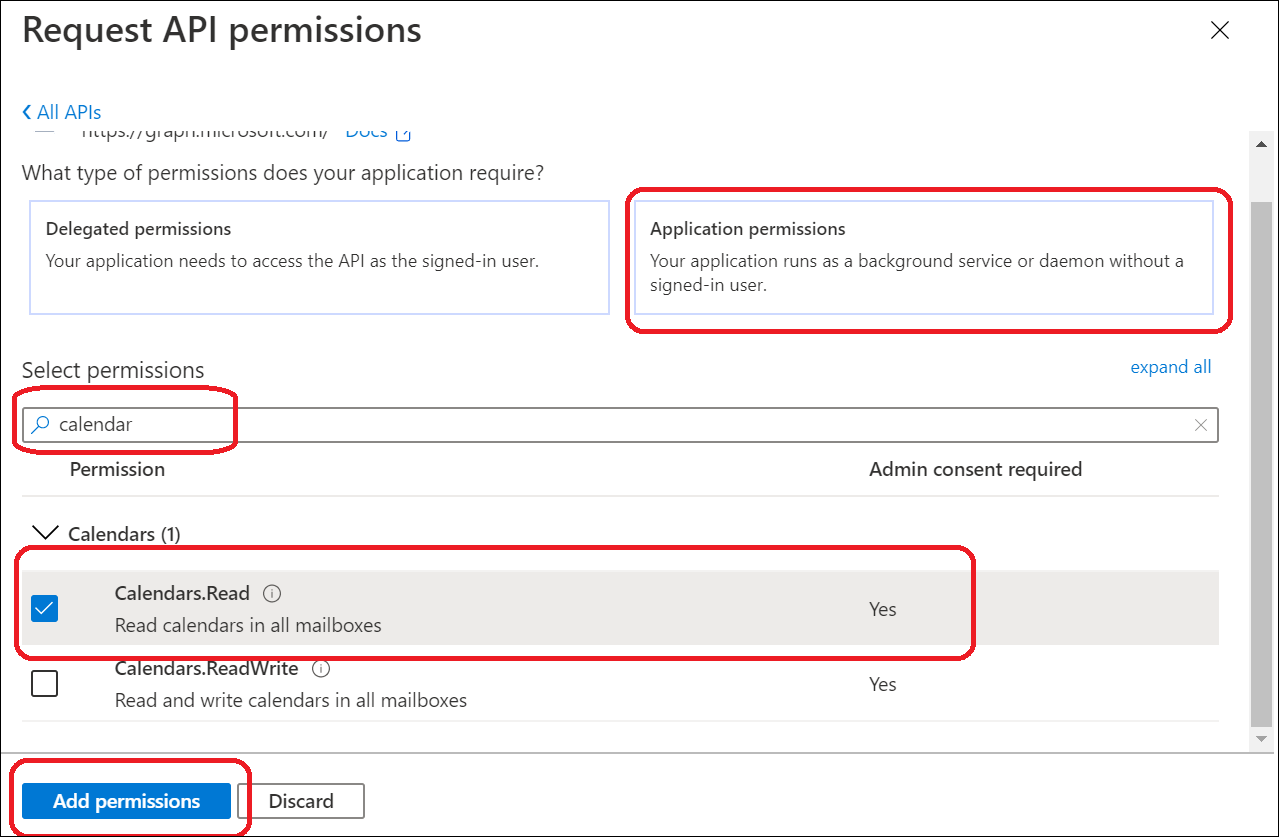
- You will be required to grant admin consent. If you have admin permissions, click Grant admin consent > Yes.
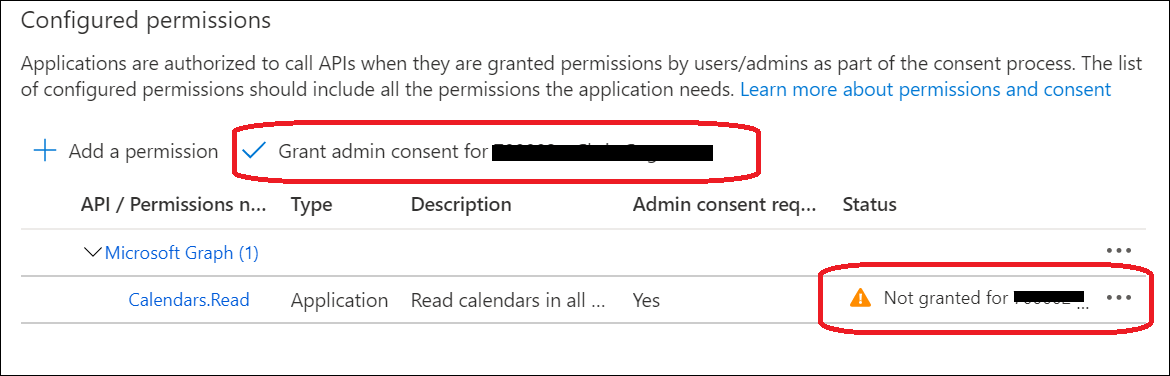
Permissions will then be granted.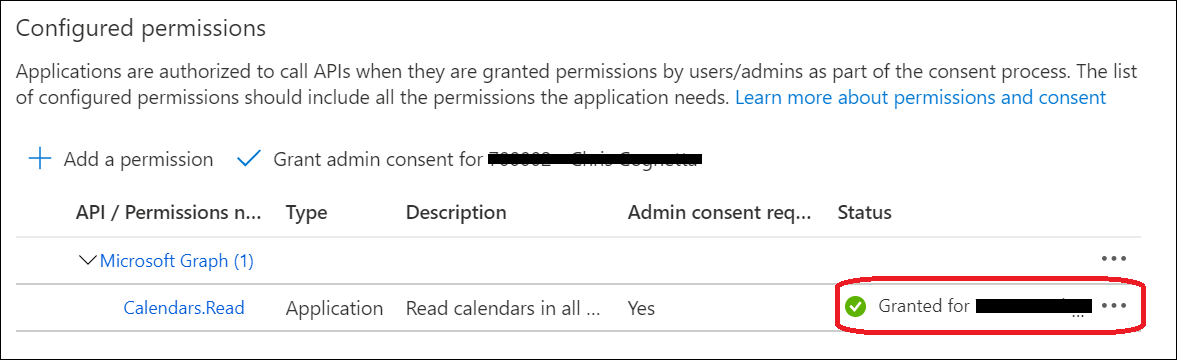
- This step must be performed by a DevOps professional. In the Azure Azure App Service:
- Configure the CMC_GraphAppClientId key value with the Application (client) ID from step 4, and
- Configure the CMC_GraphAppClientSecret key value with the client secret from step 7.
-
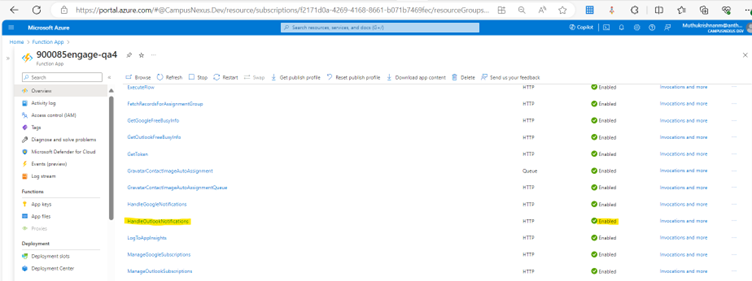
On the Azure portal, navigate to Function App > locate the required Org > Select <orgno>engage-<orgname> > go to Overview, and verify the HandleOutlookNotifications is Enabled.
Note: For more information see Microsoft documentation.
Configurations in Anthology Reach
-
Go to Anthology Reach > Settings > Configurations > Default Configuration > Staff Calendar > Set the Check Other Calendars for conflicts as Outlook Calendar.
-
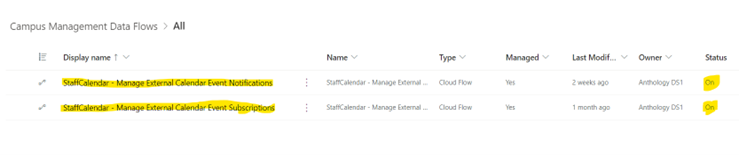
Go to PowerApps > Select the required Org > go to Solutions > Managed > double-click the Campus Management Data Flow solution. The Status of the following flows should be ON:
-
StaffCalendar - Manage External Calendar Event Notifications
-
StaffCalendar - Manage External Calendar Event Subscriptions
-