Enabling Global Option Sets on Custom Forms
The following global option sets can be displayed on custom forms in which administrators have created custom fields to store Country, State/Province, and County values:
| Display Name | Schema Name |
|---|---|
| Country | cmc_country |
| State/Province | cmc_stateprovince |
| County | cmc_county |
After enabling the above option sets, string fields in which users were required to type values will be:
- Displayed as drop-down lists in the Country, State/Province, and County fields.
- Values in the State/Province field will be dependent on the selected country.
- Values in the County field will be dependent on the selected state/province.
Prior to implementing this framework, verify that the country to state/province and state/province to county mappings are correct in the applicable web resource files.
While the default web resource files (addresscountrystateoptionsetglobal.js and addressstatecountymapping.js) can be used to display values in these fields, if custom mappings unique to your institution are required, it’s recommended to copy mappings from these default files and then update the copied mappings into new web resource files. For more information about creating new web resource files, see Changing Mappings in Global Option Sets.
This topic describes steps to implement global option sets in a new form that includes the following details:
- Form name: Custom_Entity
- Country field: Custom_Country (schema name), Country/Region (Display name)
- State field: Custom_State (schema name), State/Province (Display name)
- County field: Custom_County (schema name), County (Display name)
The above details are indicative and are used as examples in this topic. Form and field names will differ in an institution's implemented environment.
Steps in this procedure will change the display of the following text fields to drop-down lists.
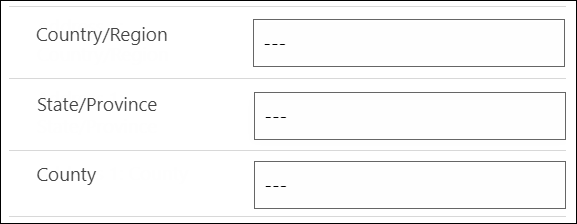
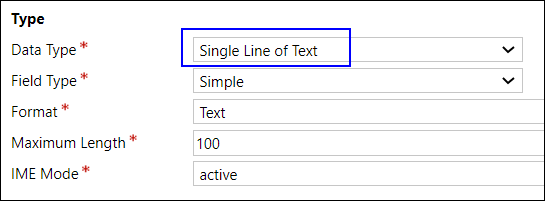
- Create 3 fields with Data Type as Single Line of Text in your entity form:
- Custom_Country
- Custom_State
- Custom_County
- In the Custom_Entity form, add the Custom_Country, Custom_State and Custom_County fields.
- In the interface to configure the form:
- Double-click the Country/Region field and then perform steps 1 to 4e, 5 and 6 in the topic Setting Drop-down Options In Dependent Fields.
In the Global optionset schema name property, type cmc_country. This will associate the Custom_Country field with the cmc_country global option set.
- Double-click the State/Province field and then perform steps 1 to 4i, 5 and 6 in the topic Setting Drop-down Options In Dependent Fields.
The following settings are important. Administrators must ensure that they are understood completely:
- In the Dependent field property, select Yes.
- In the Global optionset schema name property, type cmc_stateprovince.
This will associate the State/Province field with the cmc_stateprovince global option set.
- In the Parent field property, select the value Custom_Country.
- In the Web resource property, copy the path of the addresscountrystateoptionsetglobal.js web resource.
For the following fields, the values of the parent and child fields can be obtained from the above web resource.
- In the Parent field name property, type the value cmc_countryregion.
- In the Child field name property, type the value cmc_state.
- Double-click the County field and then perform steps 1 to 4i, 5 and 6 in the topic Setting Drop-down Options In Dependent Fields.
The following settings are important. Administrators must ensure that they are understood completely:
- In the Dependent field property, select Yes.
- In the Global optionset schema name property, type cmc_county.
This will associate the County field with the cmc_county global option set.
- In the Parent field property, select the value Custom_State.
- In the Web resource property, copy the path of the addressstatecountymapping.js web resource.
For the following fields, the values of the parent and child fields can be obtained from the above web resource.
- In the Parent field name property, type the value cmc_state.
- In the Child field name property, type the value cmc_county.
Important: In steps iv - vi of points 3b and 3c, it's assumed that the default web resources are used. If new web resources are used, then values specific to the new web resources must be specified in these fields.
- Double-click the Country/Region field and then perform steps 1 to 4e, 5 and 6 in the topic Setting Drop-down Options In Dependent Fields.
- Save and publish your changed settings. The fields will now be displayed as follows:
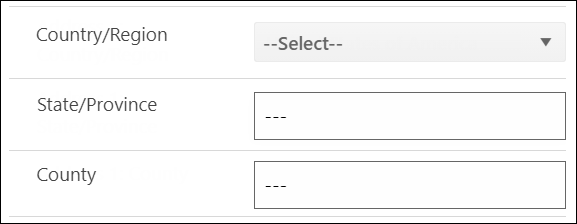
Drop-down lists will display in child fields when a value is selected in a parent field.
Notes:
- If child fields do not have values for a selected parent field, the child field will be displayed as a text field in which values can be typed. For example, the display of the field will change as follows:
- While this framework of configuring option sets in parent and child fields is demonstrated using the Country/Region, State/Province and County fields, it can be implemented in other scenarios specific to an institution. Administrators must follow the above steps to configure the fields.
| From | To |
|---|---|

|

|