Setting Drop-down Options In Dependent Fields
This topic describes how to implement a framework in which dependent values of a selected parent string field will be displayed in a child string field. In turn, the child field can also be a parent field to a dependent string field.
For example, in a new form, this topic describes how a value in a parent field Country can display dependent values in the State field, which will further prompt the display of specific values in the County field.
IMPORTANT: The described steps must be performed in the following order to first configure the parent field and then the dependent field.
- Perform step 1 - 3.
- In step 4:
- For a parent field - do not proceed after performing step 4e.
- For a dependent field, including a parent field that is also a dependent field - perform step 4 completely.
- Perform step 5 - 6.
Example
To configure the Country, State and County fields, the Country field is a parent field, and the State is a child field, while it's also a parent to the County field.
- For the Country field, perform steps 1 to 4e, 5 and 6.
- For the State and County fields, perform steps 1 to 4i, 5 and 6.
This means the above steps must be performed thrice:
- Once to configure the Country field.
- Twice to configure the State and County fields.
To Configure Display Options
- In the form designer, double-click a field that you want to configure as a parent field. The Field Properties dialog will be displayed.
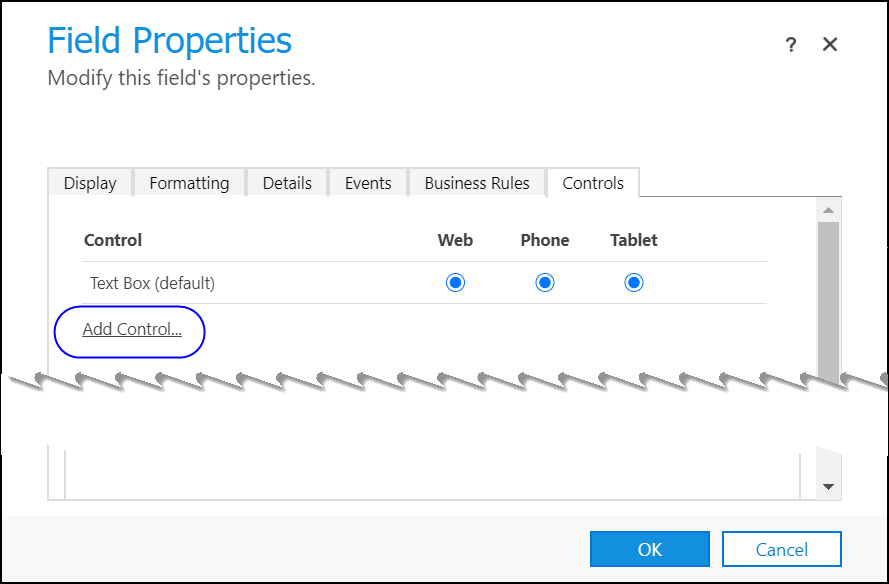
- In the Controls tab, click:
- Radio buttons of the interfaces (Web, Phone or Tablet) in which you want the control to appear.
- Add Control – The Add Control dialog will be displayed.
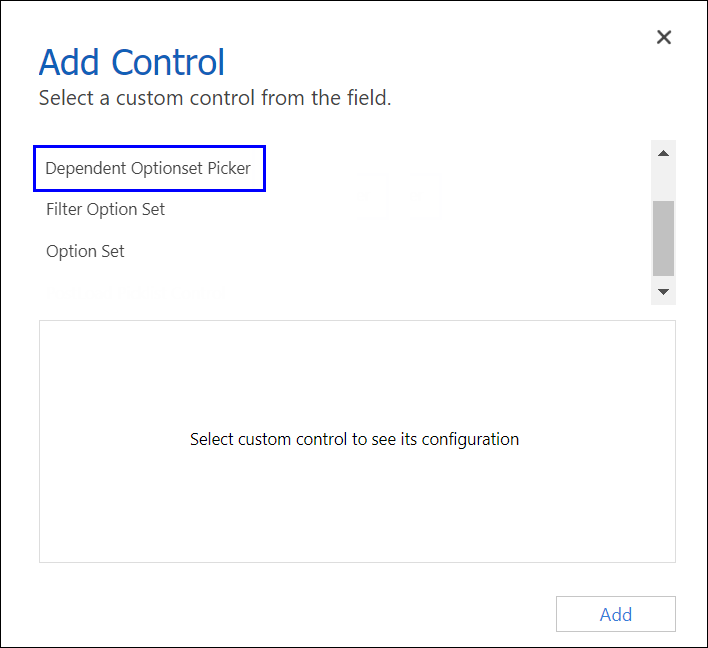
- Select Dependent Optionset Picker and then click Add. The Dependent Optionset Picker section will be displayed.
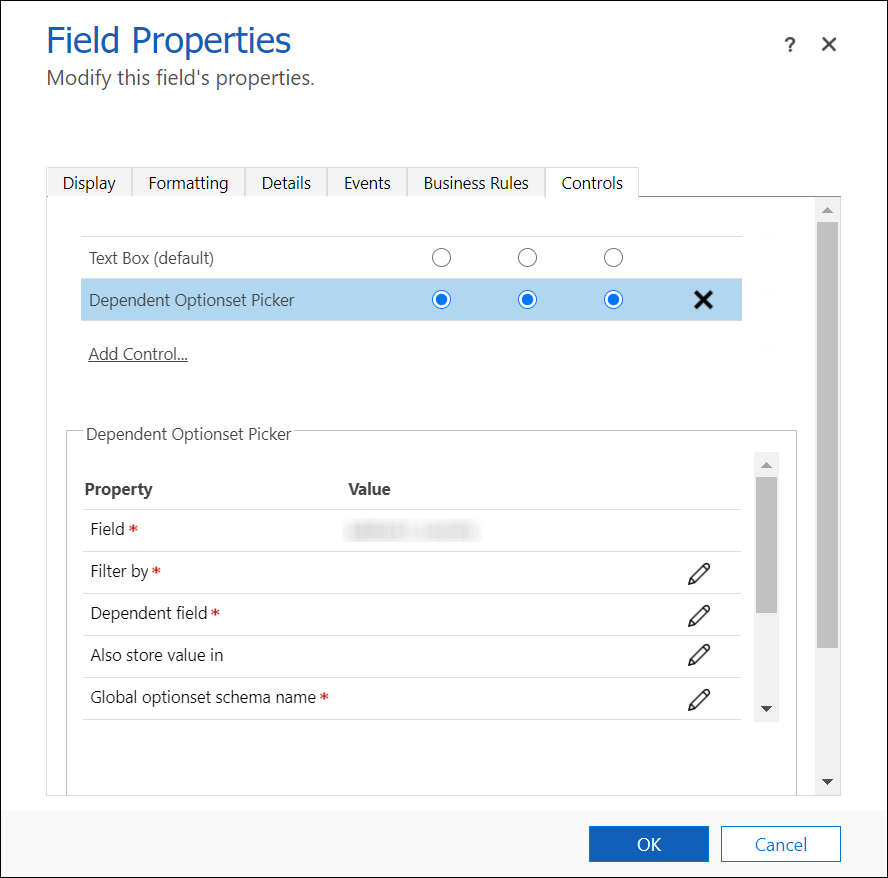
- Perform the steps for a parent field first and then for a child field that’s dependent on the parent field:
Property Configuring a Parent field (Perform steps 4a - 4e)
Configuring a Dependent Field (Perform steps 4a - 4i)
- Field *
By default, the schema name of the field selected in step 1 will be displayed in read-only format. - Filter by *
Click
 .
.
In the option Bind to static options, select Label or Description. This will determine whether the value of the option set must be displayed from the Label field or the Description field.
Note: By default, the value Label is selected for the State/Province field in forms of the following entities:- Account - In the Account(Reach - New) form
- Address - In the Information(Reach - New) form
- Contact - In the Contact(Reach - New) and Quick Create: Contact forms
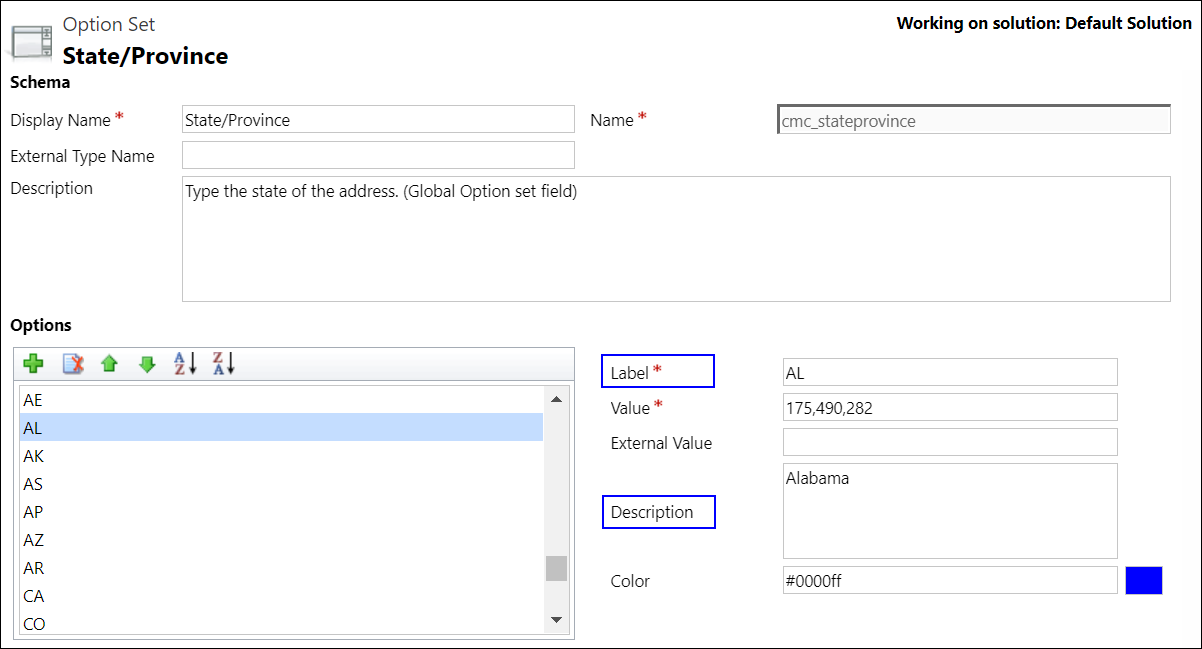
This enables states of the country United States of America to be displayed in their abbreviated form, i.e., they can be selected in the State/Province drop-down with 2 characters denoting the name of each state. For instance, Alabama is represented as AL.
If the default value is changed from Label to Description in the above forms, the full name of the states will be displayed instead of the 2-character abbreviation.
While this framework is implemented out-of-the-box for states of the country United States of America, it can also be implemented for states of other countries in the cmc_stateprovince global option set. Prior to selecting Label or Description in this PCF control, administrators will need to specify values for each state in the Label and Description fields. The following image is an example:
- Dependent field
*
Select an appropriate option based on whether the configuration is for a parent or child field.
Click
, and in the option Bind to static options, select the value No. .
Click , and in the option Bind to static options, select the value Yes.- Also Store Value In
Click and in the option Bind to a value on a field, select another field in the entity in which the value selected in step 1 will also be stored. Global Optionset Schema name
Click
and in the option Bind to a static value, select the schema of the field from which the global option set will be consumed and will then render in the field selected in step 1.Note: Configuration for the parent field is complete. Go to step 5. Perform steps 4f-4i if you are configuring a child field.
- Parent field
Click
, and in the option Bind to a value on a field, select the parent field that must be mapped with this child field.
Example
If the parent field displays countries based on which its states are displayed in the State field, then select the schema name of the Country field.
- Web resource
Click
, and in the option Bind to a static value, type the web resource URL component in red that contains the mapping of the parent and child fields. It can be obtained from the URL field of the web resource (Solution > Web Resources grid). For example, the web resource URL is https://<organization>//WebResources/<file name and path>.js.
- Parent field name
Select the schema name of the parent field from the above web resource file. - Child field name
Select the schema of the child field from the above web resource file. - Click the Hide Default Control option if your institution’s Dynamics 365 application supports custom controls. The configured controls and data will be displayed.
- Click OK to close the Field Properties dialog, and then click Publish, Save and Close.
The created controls will be available to users in your Anthology Reach implementation.
Note: In the address entity, a framework is implemented out-of-the-box to display the states of the country United States of America in their abbreviated form, i.e., they can be selected in the State/Province drop-down with 2 characters denoting the name of each state. For instance, Alabama is represented as AL.