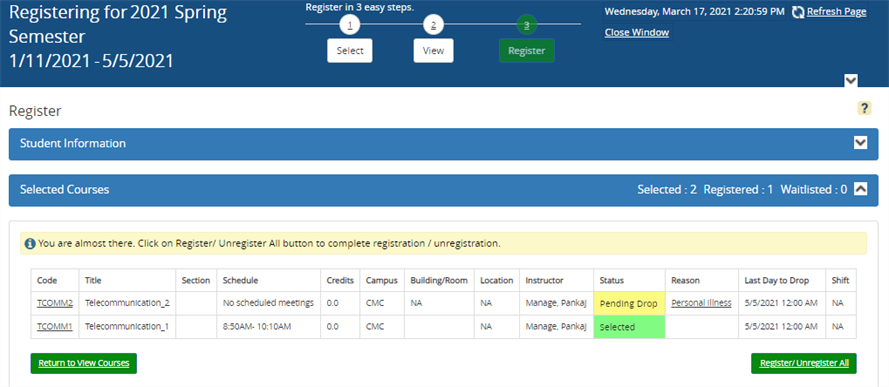
Step 3 - Register
Step 3 of the Registration process allows you to complete the course registration and, if applicable, make a payment for the course fees.
Information About Registration Locks: If there is a Maximum Limit Lock or a Minimum Limit Lock violation due to any activity in Step 1 or Step 2, you cannot complete the registration in Step 3. A message is displayed, and the Register / Drop All button is disabled.
Note: During the term pre-registration window, the Register page is disabled.
Page Sections Overview
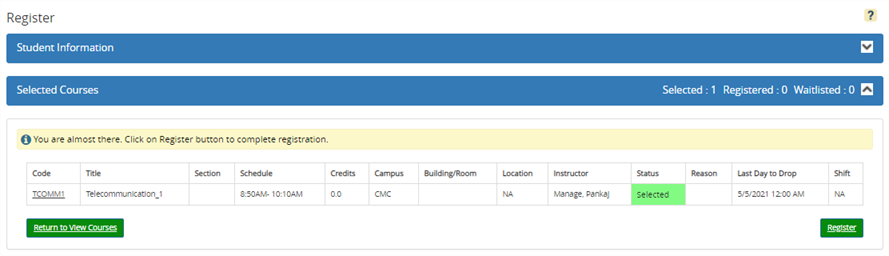
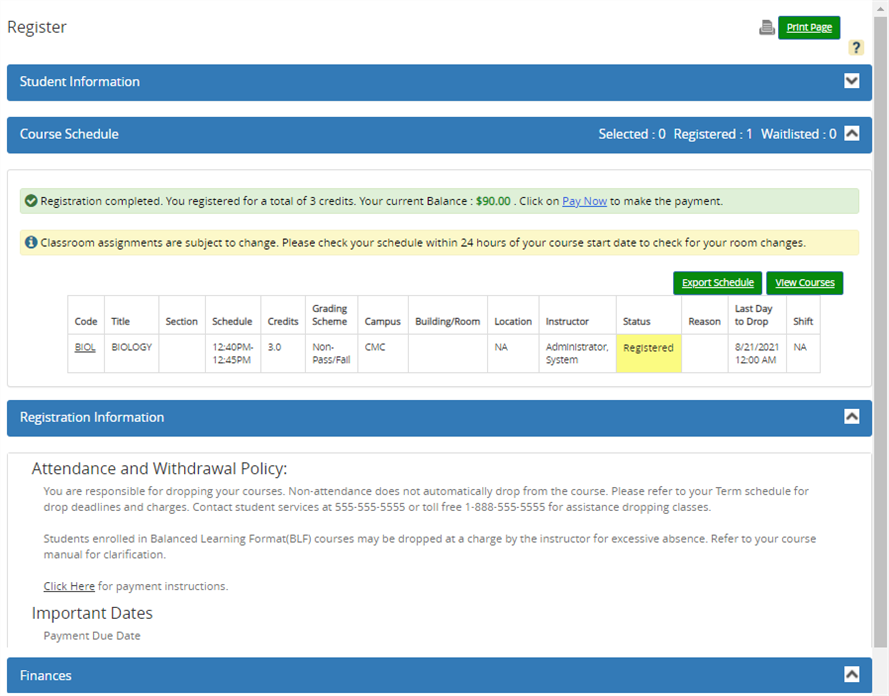
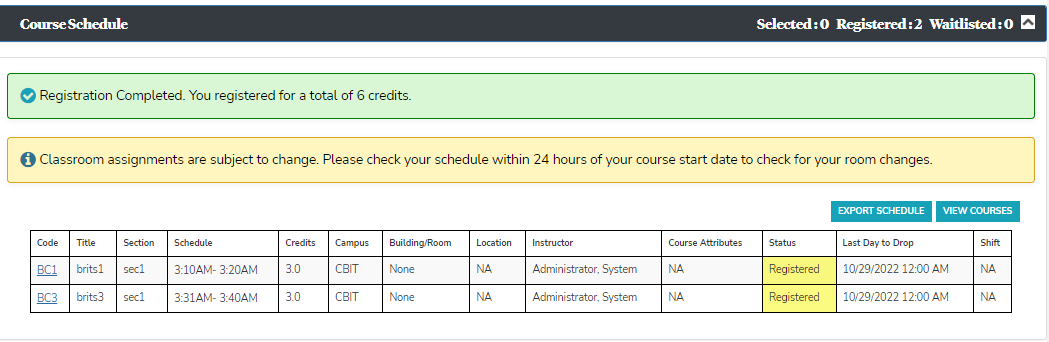
Step 3 has four sections that provide details about Student Information, Class Schedule, Registration Information, and Finances.
The Student Information section displays the following information:
- Student name
- Address
- Program
- Start Date
- Student ID
- Student Status
- Enrollment ID
- Enrollment Status
The Registration Information and Finances sections will be displayed once the registration process is complete.
To Complete the Registration
-
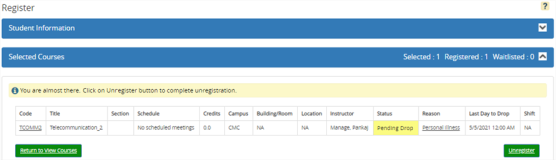
Verify that your course additions and (if applicable) drops are displayed accurately on the page. If necessary, select Return to View Courses to change your selections (see Step 2 - View Courses).

-
If you selected courses for registration, select Register. All courses selected for registration will be registered. The page will display the results of the register action.

If you selected courses for unregistration, select Unregister. All courses selected for unregistration will be dropped. The page will display the results of the unregister action.
-
If online payment is configured by the institution, a message similar to the following may appear in the Course Schedule section.


If your current balance is $0.00, the Pay Now link will not be displayed.
When you select the Pay Now link, the Billing Information page is displayed. Continue with Make a Payment tab.
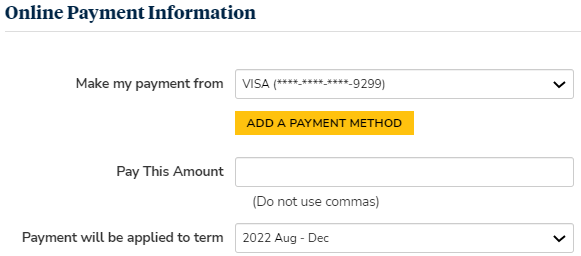
Note: By managing the settings in the Portal Configuration tool, you can now show or hide the Pay Now button and the current balance amount.

-
Select Export Schedule to download a calendar file named event.ics. The browser will display a message like the following:

Select Open to add the schedule to Microsoft Outlook or import the schedule into other standard calendars.
-
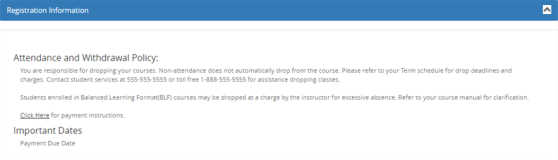
Expand Registration Information and review the details provided by your institution.
-
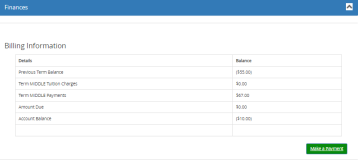
Expand and review the Finances section and select Make Payment to pay your course fees.
-
Select Print Page to print the statement for your records if desired.
-
To go back to Step 2 - View Courses, select Return to View Courses.