Step 1 - Select Courses
In Step 1 of the Registration process, you select the courses you wish to add or drop. The page has multiple sections. Click the ![]() and
and ![]() buttons to expand and collapse the sections.
buttons to expand and collapse the sections.
Page Sections Overview
Icon Legend
Select ![]() in the header section to view the legend for the icons used on the registration pages.
in the header section to view the legend for the icons used on the registration pages.

In some cases, the course schedule and course details will have a Class Type column or field. These values are used internally by your institution.
Search Courses and Quick Add
This section has two tabs: Course Search and Quick Add.
The page initially displays the Course Search tab which enables you to specify criteria for the course search.
Click on the  icon to add search criteria that helps you to filter the courses by clicking the Search button.
The search criteria can be the Course Code or/and the values under Choose Filters.
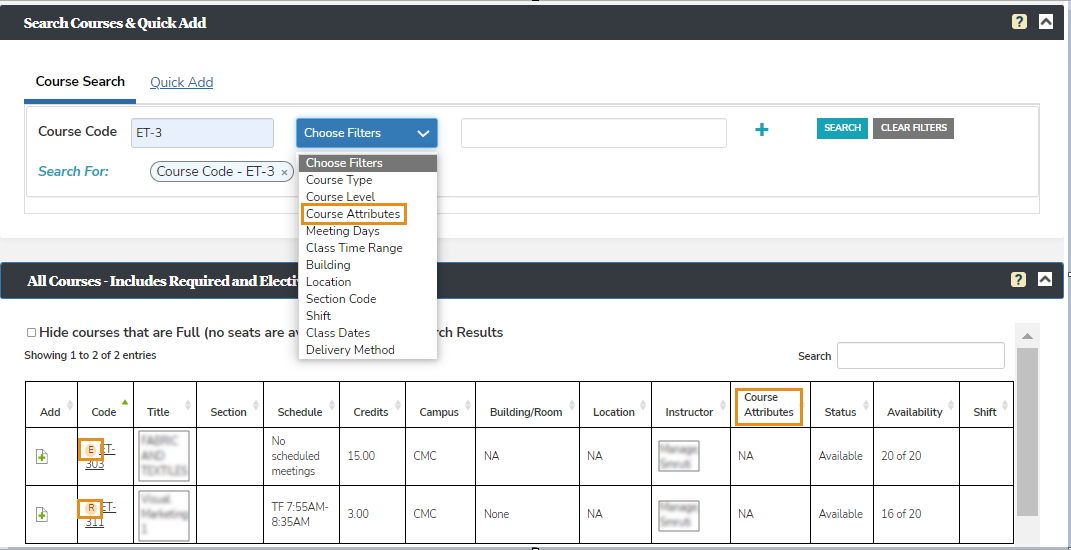
Note: The  icon indicates elective course. The
  icon indicates required courses. Courses that are neither elective nor required, do not have an icon.
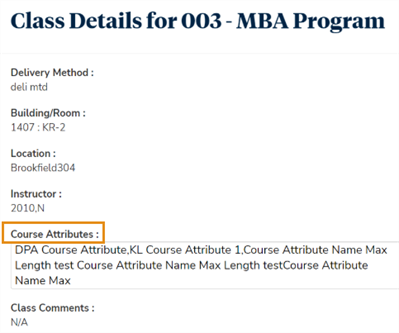
You can see course attributes in the grid and in the course details popup in Course Search.
Note: Under Select the Processes tile > locate Academic Records in the tree > select Online Registration Configuration, if the flag for Allow Registration Outside Program is set to Yes, then only courses outside the program version are displayed. By default, the flag is set to No.
The Quick Add tab enables you to specify a Course Code and Section to add to Selected Courses section.
Use the Quick Add tab if you know the Course Code (required) and Section identifier of a course you wish to register for. Select Add Course to insert the course into the Selected Courses section.
If found and all applicable prerequisites or corequisites are met, the desired course is added to the Selected Courses grid. Once the course is added, a confirmation message is displayed
If any prerequisites and/or corequisites are not met, a message appears below the Add Course button indicating why registration is not allowed.
You can return to the Course Search tab to look up more courses, or, if you know the course codes, remain on the Quick Add tab to add more courses.
All Courses
The page initially displays All Courses for your program. Generally, courses that you have already taken and passed are not displayed. Courses that you failed are available for registration if you did not attempt the course more than the maximum number of times allowed by your institution.
Required Courses
The Required Courses section replaces the All Courses section if you selected Required and clicked Search on the Course Search tab.
Elective Courses
The Elective Courses section replaces the All Courses section if you selected Elective and clicked Search on the Course Search tab.
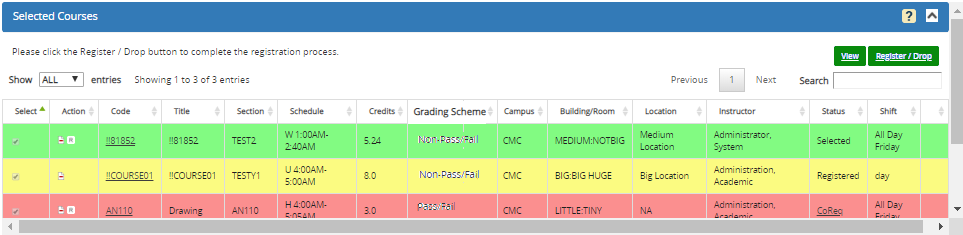
Selected Courses
If you previously selected courses for registration, those courses appear in the Selected Courses section.
Note: You can change the credits for variable credit course in the credits column and also update the credits for future waitlisted variable credit courses.
During the pre-registration window, the Selected Courses grid displays the list of courses you can save for future registration when the registration opens for the term. You can modify the list by selecting/unselecting the courses using Step 1-Select OR Step 2-View Courses.
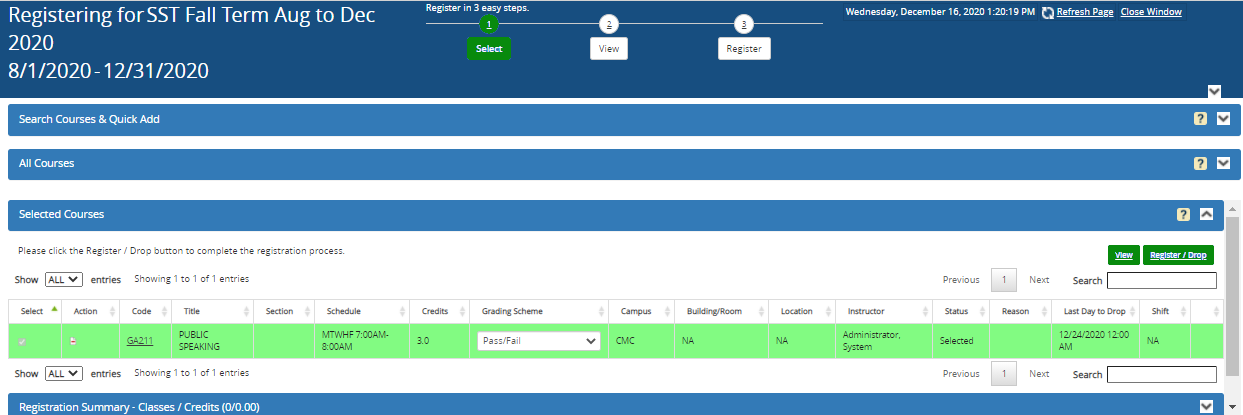
Registration Summary - Classes / Credits
The Registration Summary - Classes / Credits section shows the number of classes and credits based on your selections. For example, if you are registered for 1 class and 4 credits, the section label will be Registration Summary - Classes / Credits (1/4.00). When you expand the section, you will see the number of classes and credits in Selected, Reserved, Registered, Audited, and Waitlist status.

About Registration Locks
The Schedule Change Lock and the Maximum Limit Lock registration lock statuses are evaluated upon adding a course from the Course Search section or the Quick Add section.
-
If there is a Schedule Change Lock on a Child Term when Term Relationship is ON, the Add button is disabled in the Search Results grid for course sections belonging to the Child Term.
-
If the Maximum Limit Lock is exceeded by adding a course, a message is displayed. If you opt to add a course, the course is added to the Selected Courses section and you cannot register the course on Step 3; however, you can audit/reserve the course.
Note: When the new Add/Drop dates are displayed for each course section level on Step 1, the Registration launch page displays the text Please see the course section for Add/Drop End Date (in the Registration Status section) and hides the 'Last Day to Add' and 'Last Day to Drop' columns.
To Select Courses
-
In the Course Search section search for courses select appropriate options from the following search criteria:
- Display (Required or Elective)
- Type (for example, Lecture, Lab, Externship, or *All*)
- Level (for example, Undergraduate, Freshman, Senior, or *All*)
- Course Code (specify at least 3 characters)
- Meeting Days (days of the week)
- Class start time
- Class end time
- Term Period — This field is displayed only if a Parent term was selected on the Registration page. Select a Child term associated with the Parent term or *All*.
Select Reset to change the search criteria.
-
Select Search. Depending on your selection on the Course Search tab, the courses meeting the search criteria are listed in the Required Courses section or in the Elective Courses section.
Note: If you are enrolled in a term -based program and you add a course through selection or Quick Add, the following verification occurs:
-
If your enrollment is in a term-based program, and
-
If you have taken the course earlier, and if so,
-
If you meet one of the following conditions:
- You passed the course twice.
- You failed the course the first time and passed it two times after failing it.
- You passed the course the first time and failed the course the second time.
- You dropped the course twice.
- You passed the course the first time and dropped the course the second time.
- You dropped the course the first time and passed the course the second time.
- You passed the course the first time and the course is in Current status the second time.
- You dropped the course the first time and the course is in Current status the second time.
If you meet one of these conditions, a message indicates that retaking the course will cause you to receive '0' enroll status credits. Once you register for the course, the enroll status credits value is set to '0' and the Retake TIV 2nd Credit Earned Zeroed field is set to '1'. The Retake TIV 2nd Credit Earned Value field will have the value that was previously in the Enroll Status Credits field.
Some institutions may offer the option to re-register for courses such as Music or P.E. that are configured as repeat courses. If you select a course you have already taken that is designated as a repeat course, a message indicates that you have already taken the course. If you select "Yes" to continue, you can re-register for the repeat course without needing the assistance of an advisor.
Note: Some institutions offer the option of searching only for course sections that are currently open for registration instead of viewing all scheduled course sections. This can significantly reduce the time you spend looking for course sections that meet your schedule.
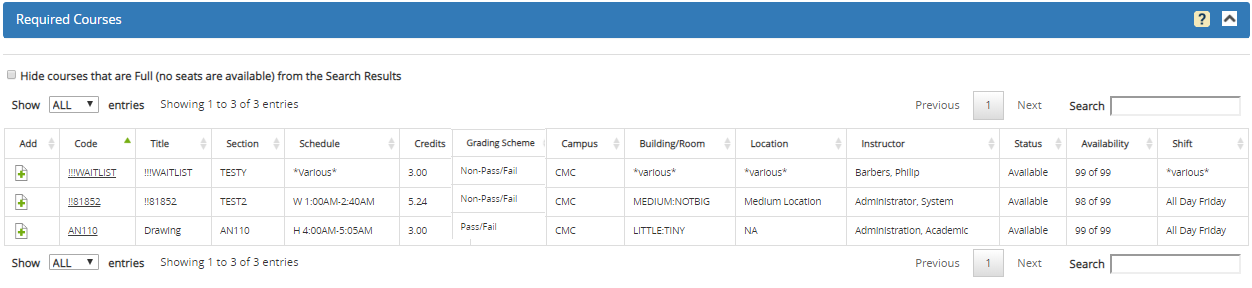
If your institution offers this option, select Hide courses that are Full (no seats are available) from the Search Results. When this option is selected, the page only shows courses with an Available or Waitlist status.
-
-
Select the Add
 icon next to the desired course sections in the Required / Elective Courses grid. The selected course sections will be added to the Selected Courses grid.
Use the Show _entries drop-down list to set the number of rows displayed in the grid. Use the Search option to locate specific items within the grid. Click the column headers to sort the data.
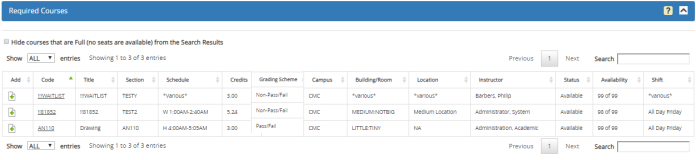
Required/Elective Courses Grid Columns Column Description Add The  icon is displayed for course sections that are available
for registration or waitlisting. The icon is not displayed for course sections with a Status of Full.
icon is displayed for course sections that are available
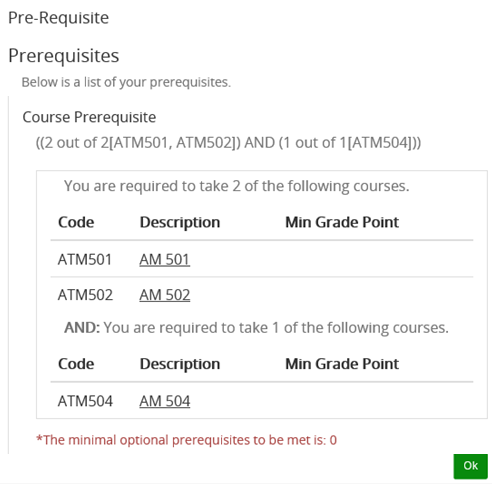
for registration or waitlisting. The icon is not displayed for course sections with a Status of Full. If there are prerequisites or corequisites for a course section and you click the
icon, a popup window displays details about prerequisite or corequisite courses. You cannot register
into the course or be waitlisted unless all prerequisite rules including required
courses, minimum grades (if required), and any testing requirements (if
applicable) are met.
When
registering in a course that has corequisites, you must register in all
corequisite courses at the same time before proceeding.
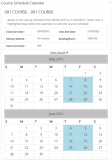
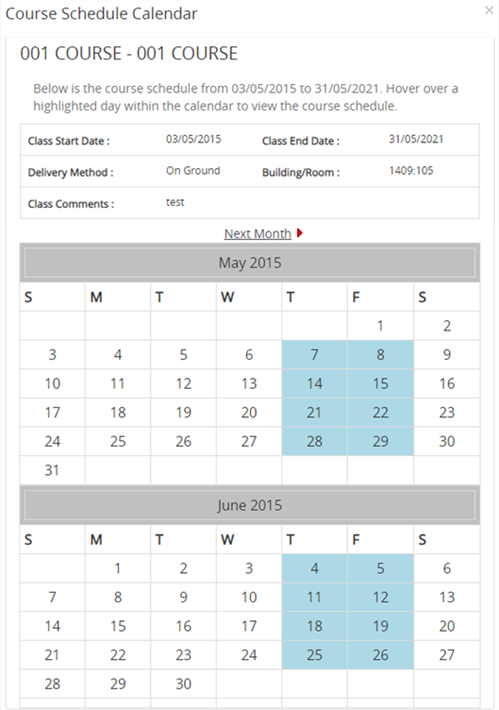
Code The course code used to identify a class. Click the Code link to view the class start and end dates, delivery method, location, comments, and schedule for the class.
The Building/Room field displays the code, N/A if no building and room are assigned, or *various* if multiple rooms/buildings are assigned.
You can also hover over a class in the calendar view to see the class time, building, room, and instructor.
The
icon before the course code indicates elective courses. The icon indicates required courses. Courses that are neither elective nor required, do not have any icon.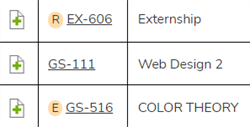
Title Course title
A book icon
 is displayed if the books are configured for the class section.
On clicking the
icon, book list for the class section is displayed.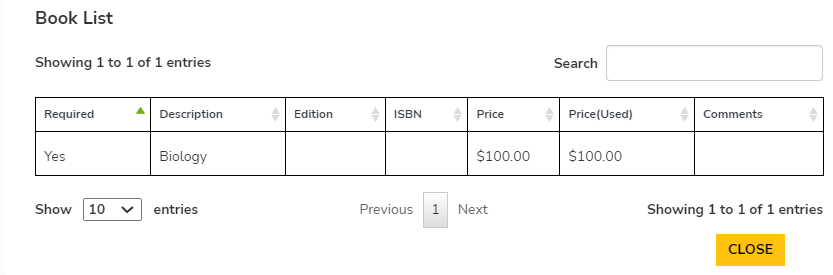
Section Section identifier for the course Schedule Days and times the class section meets. For online classes and classes with variable schedules, the field displays "No scheduled meetings".
When a class section is configured with multiple meeting periods, the Schedule column in the Courses grids in Student Portal > Registration > Steps 1, 2, and 3 displays the class scheduling days/times as semicolon separated string. If the complete scheduling days/times cannot be displayed within the Schedule column, a tooltip shows the details on hover. On mobile devices, users can click to view the schedule details. The weekdays can be configured with 1-letter or 2-letter notation.
Examples:
For multiple periods on different days:
MT 8.00 am to 9.00 am; WF 11.00 am to 11.30 am
— OR —
MoTh 8.00 am to 9.00 am; WeFr 11.00 am to 11.30 am
For multiple periods on the same day with different times:
MT 8.00 am to 9.00 am, 11.00 am to 11.30 am; W 9.00 am to 10.00 am
— OR —
MoTh 8.00 am to 9.00 am, 11.00 am to 11.30 am; We 9.00 am to 10.00 am
Credits Number of credits the section offers If the section is configured to allow the student to select a variable number of credits, the value is displayed in a drop-down list from which the desired credit value may be selected. The initial value is the "normal" credit value for the section.
Grading Scheme If a course is configured to allow students to choose a Grading Scheme, select Pass/Fail or Non-Pass/Fail. The default option indicates the setting associated with the course. Textbook information Elective Pool Name of the elective pool Campus Name of the campus Building/Room Building or room where the class section meets. If a class section is held in multiple buildings or rooms, the field displays *various*. Location Location where the class section meets. If a class section is held in multiple locations, the field displays *various*. Instructor Name of the instructor teaching the section Status The class status can be Available, Waitlist, or Full. Available indicates that seats are available in the class.
Waitlist indicates that there is a waitlist for the class and waitlisted seats are available.
Full indicates that no seats are available.
Availability The numbers in the column indicate the total number of seats available in the class or on the waitlist and the number of students registered or waitlisted. Examples:
If the Status = Available and the Availability = 19 of 20, there are 20 seats in the class and 1 student has registered.
If the Status = Waitlist and the Availability = 3 of 5, there are 5 seats in the waitlist and 2 students have been waitlisted.
Shift Shift when the class section meets. If a class section meets in multiple shifts, the field displays *various*. Notes:
-
In some cases, a course may have a retake fee. The following message is displayed before you can continue to add the course:
"You will be charged a retake fee after registering for this course. Continue to add this course?"
-
In some cases, a cross referenced course may be displayed. A cross referenced course is a course that has a different course title than the course specified in the student's program requirements. For example, a student may register in a course that is offered at another campus location to satisfy the course requirements of the program on the student's campus. When the cross referenced course is displayed, an additional note appears indicating that the cross referenced course satisfies the required course listed.
<Cross Referenced Course Title> (Satisfies <Required Course Title>)
Cross referenced courses may be taken because of a previous failure, but students cannot repeat a cross referenced course, even if the institution allows repeats.
When cross referenced courses are on a student's schedule for a given term, the student can register for a cross referenced course or the main course. A popup window will display the details of cross referenced course sections with check boxes for selection and Yes/No buttons.
If the student selects a cross referenced course and clicks Yes:
-
Portal registers the student in the selected cross referenced course section (Course B) and indicates that the course is a cross referenced course, e.g., "Course B satisfies Course A".
-
On the student schedule, the cross referenced course (Course B) is moved to 'Scheduled' status while the main course (Course A) remains in 'Future' status and available for registration.
If the student does not select a cross referenced course and clicks No:
-
Portal registers the student in the main course (Course A).
-
On the student's schedule, the main course (Course A) is moved to 'Scheduled' status while the cross referenced course (Course B) remains in 'Future' status and available for registration.
The logic described above also applies when Quick Add is used to select courses.
-
-
Review your selections in the Selected Courses grid and select Register/Drop.
-
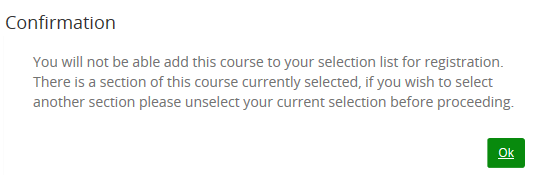
If the selected course section was previously added to the selection list, the following message is displayed. Click OK and select a different course section.

-
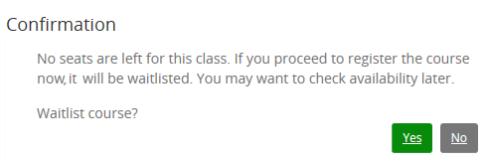
If you click the Add button in the waitlist status course, the following message is displayed. Select Yes to be waitlisted or No to close the pop up.
-
If the waitlist has reached its maximum credit and you want to add one more courses from the All Courses grid, then on click of Add button of waitlist status course, the following warning message will be displayed and the course cannot be added to waitlist.
If the waitlist has reached its maximum credits and you click the
 icon of waitlist status course displayed in the selected grid, a warning message is displayed and the course cannot be added to waitlist.
-
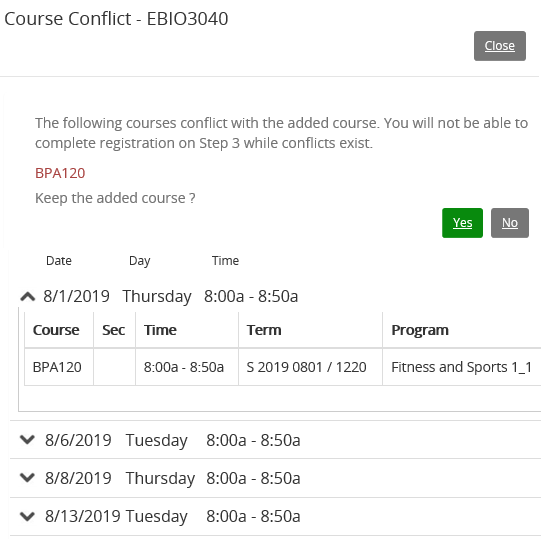
If the schedule of the selected course section conflicts with other courses, the following message is displayed. Select
 to view details of a conflict. Select Yes to keep the added course on the selection grid or No to select a different section.
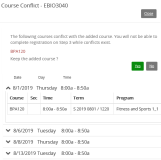
-


Once you have confirmed the courses available in the Selected Courses section, you have two options:
-
Select Register/Drop if you want to skip "Step 2 - View Courses" and go directly to Step 3 - Register to register/drop courses.
Preregistration
During the term pre-registration window, the Register/Drop button label changes to "Save Courses" and "Step 3 - Register" is disabled. Select Save Courses to save your course selection for the actual term registration period. Select OK to confirm.
— OR —
-
Select View to go to Step 2 - View Courses.
To View Document Prerequisites
Registration prerequisite documents or permits are authorizations that allow a student to register for a selected course or course section. Courses that typically require permits for registration are internships, upper-level courses, and independent studies. A written permission is required for a student to register for such a course.
If document authorization is required for any course, a PreReq link is displayed in the Add column. The link is displayed only if you submitted all required documents and the necessary prerequisites are satisfied.
Select the PreReq link to view a list of all document prerequisites required for the course. Click OK to close the dialog.
You cannot register for a course that does not satisfy document type prerequisite rules.
-
If you have a non-section specific permit on file, you may register for any section of the course to which the permit applies provided the permit has not expired, the course has remaining seats available, the drop/add date has not expired, and there are no additional prerequisites.
-
If you have a section specific permit on file, you may only register for the sections of the course to which the permit applies provided the permit has not expired, the course has remaining seats available, the drop/add date has not expired, and there are no additional prerequisites.
Once a permit is approved, you need to register for the course on or before the expiration date. After the expiration date, the permit document is not considered to be approved and registration fails. The following message is displayed "Expired = Submit again".
If you add a course that has a prerequisite requirement using the Quick Add feature, the following is displayed "One or more Pre-Requisites have not been met".
To Unregister from Courses
When the Step 1 - Select Courses screen is first displayed, the Selected Courses section shows all courses for that term in which you are currently registered.
In most cases, you can unregister from courses
in which you are currently registered by selecting the ![]() icon next to the desired course in the
Selected Courses section. The course will be removed
from the Selected Courses section
and returned to the Required Courses
section.
icon next to the desired course in the
Selected Courses section. The course will be removed
from the Selected Courses section
and returned to the Required Courses
section.
If, however, the course that you are trying to unregister is a prerequisite to another course you are registered for, or a corequisite to a course in which you are already registered, a message shows the prerequisite/corequisite dependencies. This message indicates the reasons preventing you from unregistering.
You are not allowed to unregister from a course with prerequisite or corequisite dependencies unless you perform the following:
-
For a course that is a prerequisite to another course, you must first unregister from the course that has the prerequisite requirement. You may then unregister from the course that was the prerequisite to the course that you just unregistered from.
-
For a course that is a corequisite to another course that you are already registered for, you must unregister from all corequisite courses at the same time. When you select
 for the first corequisite course, a warning message is displayed. Select
for the remaining corequisite courses and then select Register/Drop to complete
the unregistration.
for the first corequisite course, a warning message is displayed. Select
for the remaining corequisite courses and then select Register/Drop to complete
the unregistration.