Save Forms and Form Properties
In Forms Builder individual Fields and/or Components are assembled in the Layout pane and saved as a Form. Forms are then grouped into sequences. End users view the saved sequences.
To create a form:
-
Access the Form Designer workspace.
-
Click the New Form button.
-
Select the number of Columns you want to use for each row on the form.
-
Drag one or more Fields or Components into the Layout pane. Position the Fields/Components in the selected column/row grid.
-
Select or specify values in the Control Property Settings pane for each Field/Component. For more information, see Fields and Components.
-
Select or specify values in the Form Properties pane. For more information, see Form Property Settings.
-
Click Save Sequence. The Unsaved Changes dialog is displayed.
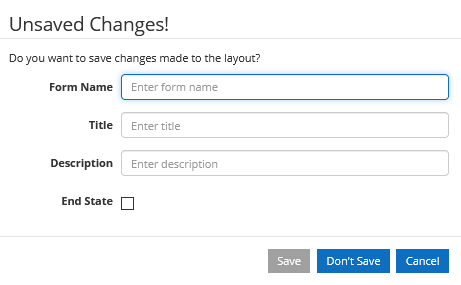
Unsaved Changes Dialog
Each form in a sequence has a Form Name and optional properties such as Title, Description, and End State. You specify these properties in the Unsaved Changes dialog when saving a form.
-
Specify a Form Name (required).
-
Specify the Title (optional) you want users to see on the webpage when the form is rendered.
-
Specify a Description (optional) that helps you identify the form.
The Form Name, Title, and Description are displayed in the Sequence List and can be used as search and filter criteria.
-
Select the End State (optional) check box if the form is used as a Confirmation form in a sequence. See Welcome and Confirmation Forms.
-
Click Save.
The form is validated before it is saved. For more information, see Validation on Form Save.
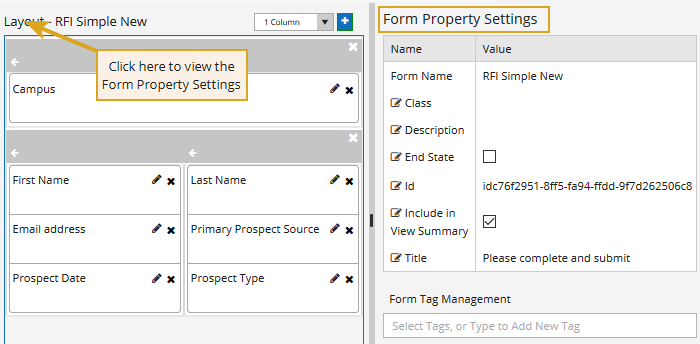
Form Property Settings
You can assign additional form properties in the Form Property Settings pane which is displayed when:
-
A form is loaded from the Forms fly-out tab.
-
A form title is clicked above the Layout pane.
| Property | Required | Description |
|---|---|---|
| Form Name | Yes | The Form Name will be the name of the State in a workflow. The Form Name is not editable after the initial save. Specify the value in the Property Settings pane or in the Unsaved Changes dialog. |
| Id | Yes | Globally unique identifier (GUID) for the form. It is automatically created by Forms Builder. |
| Title | No | Displayed at the top of the form when the form is rendered. Specify the value in the Property Settings pane or in the Unsaved Changes dialog. |
| Class | No | CSS class (or space separated classes) specific to the form. The class must be defined in a Renderer CSS file. For more information, see Custom Styles. |
| Description | No | This is a convenience field to describe a form. Specify the value in the Property Settings pane or in the Unsaved Changes dialog. |
| End State | No | Set to false (cleared) by default. Specify the value in the Property Settings pane or in the Unsaved Changes dialog. If you select this check box, the form will be available in the list of End State forms for a sequence. Clearing the check box does not affect sequences where the form is defined as an End State form. This only adds or removes it from the End State form list in Sequence Designer. For more information, see Welcome and Confirmation Forms. |
| Include in View Summary | Yes | Set to true (selected) by default. If the View Summary component is present in a sequence, the form will be included in the forms rendered by the component. Clear this check box if you do not want to include this form in the View Summary. Forms Builder 3.4 and later provides enhanced validation when saving a sequence. A sequence cannot be saved if at least one form in the sequence has a View Summary component, but the Include in View Summary property is not selected on any of the forms in the sequence. |
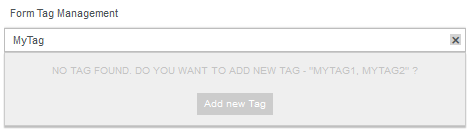
| Form Tag Management | No | Use this field to create a tag or associate an existing tag with the form. The assigned tags are available for selection in the Forms flyout and make it easier to locate forms. To create a tag, type the tag name in the Form Tag Management field, click Add Tag, and save the form.
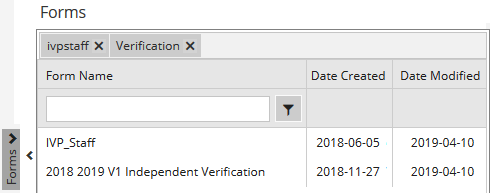
To find a tagged form, on the Forms fly-out menu, click the Select Form Tags to Search field, and select a tag. The tag will be used to filter the list of forms.
|