Fields
The Fields tab in Form Designer enables you to find the database fields from the CampusNexus object model that can be used when building forms.
To use fields:
-
Select a database provider. See Select the Database Provider.
-
Select an entity. See Find Fields in an Entity.
-
Locate the desired field in the Field Properties pane. See Search for Fields and Show All Fields.
-
Drag the field into the Layout pane.
Note: You must drag a control/field over another control. You cannot drag a control over an empty space in the Layout pane. If you drag a control over the top half of an existing control, it will be inserted before the existing control; if you drag it over the bottom half, it will be inserted after. -
Edit the property settings as needed. See Control Property Settings.
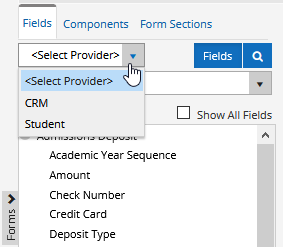
Select the Database Provider
If Forms Builder is used with multiple database providers, the first step is to select the provider. Select CRM for CampusNexus CRM or Student for Anthology Student. The database provider selection determines which fields are available for use when building forms. If only one database provider is available, the <Select Provider> list will not be displayed.
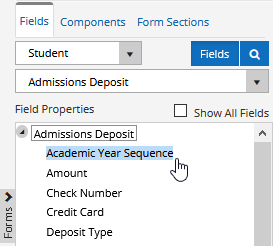
When Anthology Student is the database provider, the list of entities on the Fields tab shows entities such as Admissions Deposits, Applicant Areas of Study, Applicants, and so on.
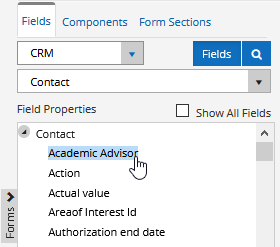
When CampusNexus CRM is the database provider, the list of entities on the Fields tab shows entities such as Address Type, Area, Area of Interest, and so on.
In Forms Builder 3.5 and later, the list of entities displayed for the Student and CRM databases is configured using the Entity and Entity Properties Visibility option. See Settings.
Find Fields in an Entity
-
Click the Fields button. The Entities drop-down list is activated (replacing the Search field).
-
Select an entity from the Entities drop-down list. The Field Properties pane displays the fields associated with the entity.
Depending on the selected entity, navigation properties may be available. Navigation properties signify a relationship between the selected entity and another entity in the data model. Click
 to expand the navigation property entity.
Search for Fields
- Click
 next to the Fields button. The Search field is activated (replacing the Entities drop-down list).
 -
Enter the first 3 characters of a field name in the Search field. The Field Properties pane displays all instances of the field grouped by entities.
Depending on the selected entity, navigation properties may be available. Navigation properties signify a relationship between the selected entity and another entity in the data model. Click
to expand the navigation property entity.
Show All Fields
The Show All Fields check box controls whether a subset or the entire list of fields (categorized by entities) in the CampusNexus data model is exposed.
The Show All Fields check box is cleared by default. When cleared, a prescribed list of entities is exposed. The prescribed list of entities is aligned as much as possible with what is exposed in Forms Builder 2.x.
In Forms Builder 3.5 and later, the list of entities displayed for the Student and CRM databases is configured using the Entity and Entity Properties Visibility option. See Settings.