A single instance of Workflow Composer can be used to work with Anthology Student, CampusNexus CRM, and Forms Builder.
To enable this behavior in CampusNexus CRM:
-
In the Web.config file of CampusNexus CRM Web Client, change the database details of the ‘dbconnection’ key of Workflow Composer to the value that’s set in Anthology Student:
<add name="dbConnection" providerName="System.Data.SqlClient" connectionString="data Source=<Name of the Anthology Student database>;initial catalog=<Name of the CampusNexus CRM database>;Integrated Security=SSPI;Persist Security Info=False;Pooling=True;MultipleActiveResultSets=True;Application Name=Workflow Composer;"/>
-
Make the same change in the Web.config file of the following iServices:
- Account Iservice
- Cof Iservice
- Contact Iservice
- HEFoundation Iservice
- Report Iservice
- Portal Iservice
- Utils Iservice
- Interaction Iservice
-
Ensure that Application Pool Identity Users of CampusNexus CRM Web Client and iServices are available in Anthology Student’s database. They must have login permissions in Anthology Student and read permissions to its database. For more information, see Application Pool Identity and Integrated Security.
-
To consume events triggered from Web Client and iServices in Workflow Composer, set the value of the Workflow Integrated parameter to True in the Web.config file (Web Client and iServices). By default, its value is False.
Workflow Composer Updates
Workflow Composer 25.x or later:
-
Is required with Activities and Contracts for Anthology Student 25.2.1 and later.
-
Is deployed via Installation Manager and ClickOnce.
-
Requires users to configure connections. For more details, see Configure Workflow Composer.
Workflow Composer 4.x or 24.0.0:
-
Is required with Activities and Contracts for Anthology Student 25.2.0 and earlier.
-
Is deployed via Installation Manager and ClickOnce.
-
Requires users to configure connections. For more details, see Configure Workflow Composer.
Prerequisites
-
Due to significant architectural changes needed to support cloud deployments, refer to Compatibility Matrix.
-
V1 workflow activities will no longer be supported. Note- Use V2 activities. Details about required actions are provided in Workflow help.
-
Workflow Composer 4.x requires Microsoft .NET Framework 4.8. For more details, see
-
If Workflow Composer is configured to connect directly to the database, Insert and Update permissions for the following database tables are required:
- WorkflowDefinition
- WorkflowDefinitionVersion
The permissions are required for the logged in user when using integrated security and for the login credentials (user name and password) specified if installing via Installation Manager and integrated security is not used.
-
If Workflow Composer is configured to use the Workflow Web API, users will need to be associated with either the Reader or Contributor role for the Workflow Web API enterprise application in the Ellucian Cloud 2.0 Azure Active Directory.
Note: Mac OS does not support Workflow Composer.
Install Workflow Composer
Install Using Installation Manager
Ellucian 1.x customers install the Workflow Composer from DevOps pipeline (Standalone pipeline or clubbed with Student and FormsBuilder pipeline).
Ellucian Cloud on-premises customers install Workflow Composer from Installation Manager.
-
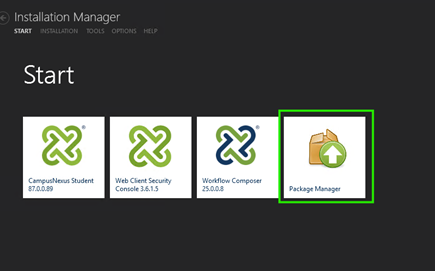
Click the Package Manager tile in the Start screen of Installation Manager.
-
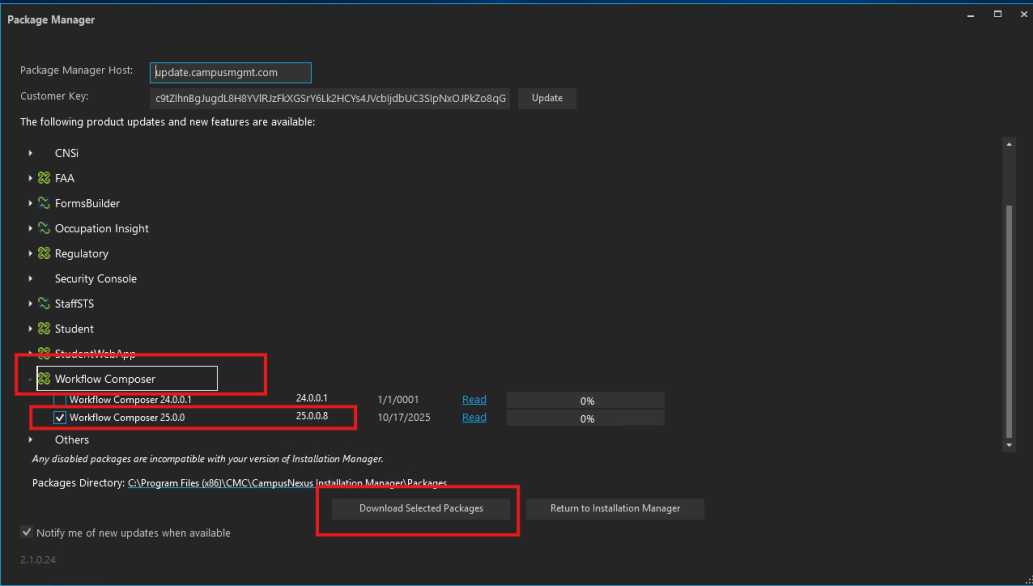
Download the package for Workflow Composer.
-
When the download is completed, return to the Start screen of Installation Manager.
-
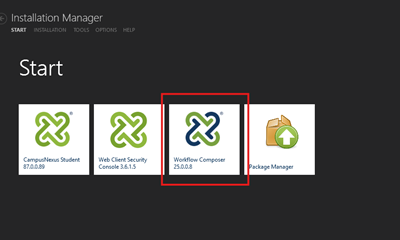
Click the Workflow tile in the Start screen. File Manager displays the SetupFiles folder containing the Workflow Setup.exe file.
After retrieving the installer, you can run the Workflow Setup.exe directly or copy and distribute it to other users within your organization.
-
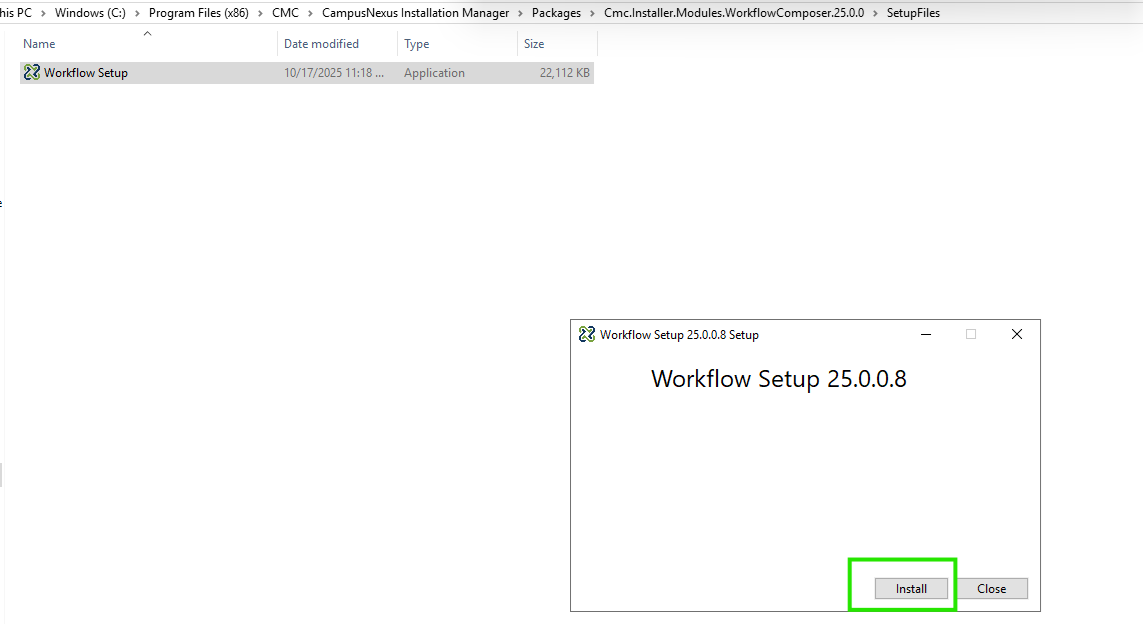
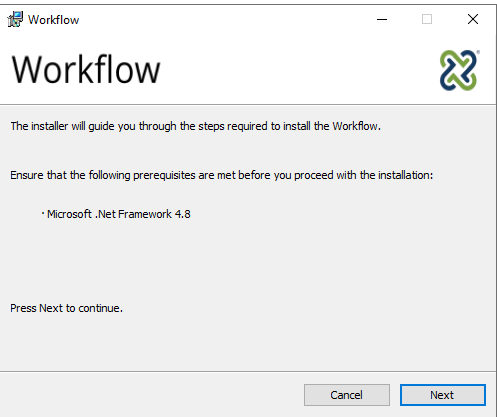
Double-click the Workflow Setup.exe file. The Workflow Setup screen is displayed.

-
Click Install. The Setup Progress screen is displayed. You are notified if a previous installation of Workflow Composer is detected.
-
Click Next to continue. The API key and database settings screen is displayed.
-
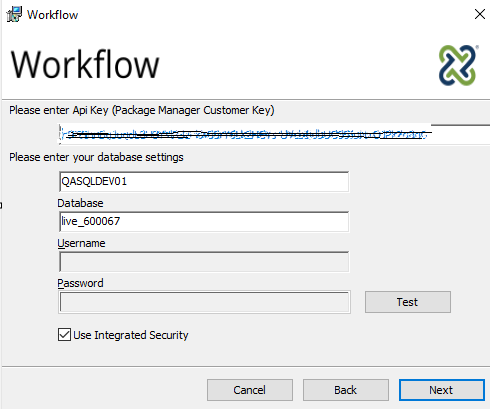
In the API key database settings screen, specify the following:
-
Api Key (Package Manager Customer Key) - This is the same key that is used in the Package Manager screen of Installation Manager.
-
Database Server
-
Database
Select Use Integrated Security or specify the Username and Password for the database.
Click Test to verify database access. If the test was successful, click Next to continue.
-
-
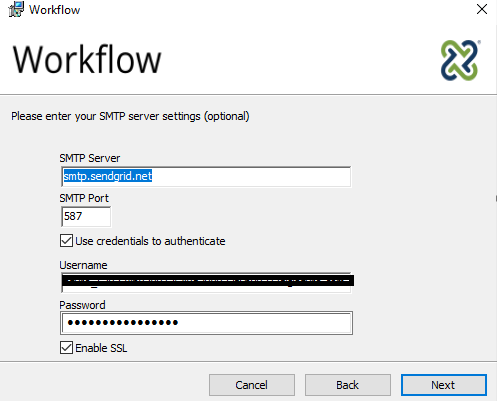
(Optional) In the SMTP settings screen, specify the following if you want the application to be able to send emails to the intended recipients:
-
SMTP Server
-
SMTP Port (default: 25)
-
If applicable, select Use credentials to authenticate and specify the Username and Password.
-
If applicable, select Enable SSL.
-
-
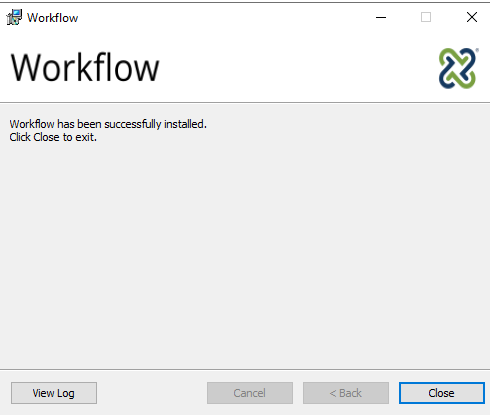
Click Next. The installation process starts. Click Close when Workflow Composer has been successfully installed.
-
Click the Workflow icon on your desktop to open Workflow Composer. Note that the status bar at the bottom left indicates the Workflow Composer version and database connection.
Install Using ClickOnce
Ellucian Cloud 2.0 customers install Workflow Composer using a ClickOnce application. ClickOnce allows self-updating Windows-based applications to be installed and run with minimal user interaction. Users install Workflow Composer with one click on the Install button or launch it from a website.
For details about the ClickOnce URL and login credentials, refer to https://filetransfer.campusmgmt.com > softwareupdates > Workflow Composer > WF_ComposerInstallationSteps.pdf. (VERIFY)

|
Depending on the settings and antivirus/malware software installed on your machine and your corporate policies, you may see a warning when installing Workflow Composer and its Activities and Contracts packages. |
Troubleshooting
During installation of Workflow Composer, you may encounter errors if a previous version is still installed on the system. To resolve this, uninstall the earlier version before installing the latest release using the below steps.
-
Uninstall the Previous Version.
-
Open the Control Panel
-
Navigate to Programs and Features
-
Locate Workflow Composer (version 24.0)
- Right-click on it and select Uninstall to remove the existing version
-
-
Delete Old File References (Cloud 2.X customers)
-
Navigate to the following path on your system: C:\Users\<logged-in user>\AppData\Local\2.0\
-
In this directory, you will find folders with random names along with a folder named Data
-
Delete all folders except the “Data” folder to remove residual references from the previous installation
-
-
Delete Old File References (On-Prem customers)
-
Navigate to the following path on your system: C:\Program Files (x86)\CMC\Workflow
-
In this directory, you will find folders with random names along with a folder named Data
-
Delete all the files and folders to remove residual references from the previous installation.
-
After completing above steps, proceed to install the latest version of Workflow Composer.
Run Workflow Composer. Upon startup, Workflow Composer 4.x and later displays the Configuration window.
Continue with Configure Workflow Composer and then Install Activities and Contracts.
Configure Workflow Composer
Once Workflow Composer is installed, you need to specify whether it accesses the databases via direct connections or via a Workflow Web API.
-
In an Ellucian Cloud 2.0 environment, configure the Workflow Web API Connection. The Workflow Web API replaces the Citrix connections used previously in cloud environments.
-
In on-premises or Azure (non-Ellucian Cloud 2.0) environments, configure Direct Database Connections.
The configuration needs to be done only once when Workflow Composer is installed the first time. The settings are retained during upgrades.
Workflow Composer has the option to change the configuration upon launching the application. You can choose to Connect to the previously configured environment or change the configuration to access a different environment.
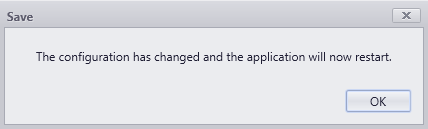
If you change the configuration, the following message appears. When you click OK, Workflow Composer will restart and connect to the newly configured host. It will take a few seconds to start.
If you click the  button at the top of the Configuration window, you can open the Configuration window again and change the configuration details again.
The System tab in the ribbon of Workflow Composer provides a Configuration option that enables you to change the initial configuration.
Direct Database Connections
If you are using Workflow Composer with on-premises databases connections:
-
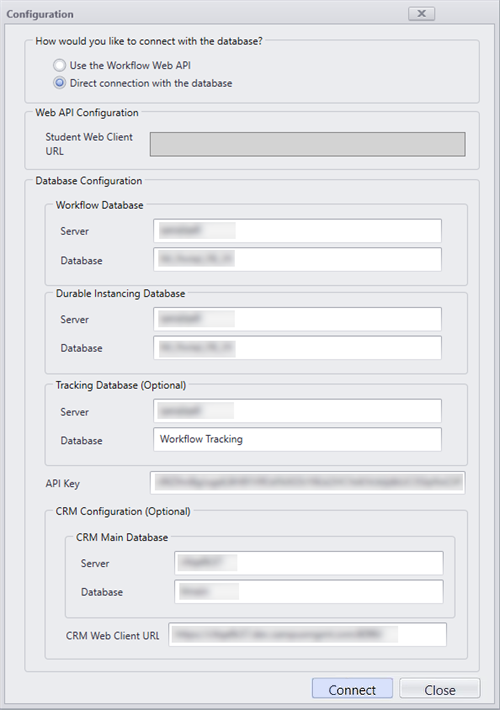
Select Direct connection with the database.
-
Specify the server names and database names for your database connections.
-
The Workflow Database is the database that supplies values to your workflow activities. It can be the Anthology Student or CampusNexus CRM database.
-
The Durable Instancing Database typically uses the same server and database as the Workflow Database.
- (Optional) The Tracking Database is named "WorkflowTracking" by default. It can be on the same server as the Workflow Database and the Durable Instancing Database.
-
-
The API Key field is an optional field in (Undefined variable: wf-variables.WC) 26.0 version.
If you want to configure (Undefined variable: wf-variables.WC) with CRM, you must have the API Key.
-
The ApplicationKey field will be available in the Configuration section from (Undefined variable: wf-variables.WC) 26.0 version and will be displyed as disabled or greyed out.
Note: The ApplicationKey will be generated and updated in the app config based on the Server and Database details provided in the configuration section.
-
(Optional) In the CRM Configuration section, specify the following:
-
CRM Main Database Server and Database
-
CRM Web Client URL
By default, the CRM Configuration section will be blank.
Integrated security will be used for the connection information.
When the Server and Database are populated under the CRM Main Database, a connection string will be created in the Workflow configuration file named CRMdbconnection.
<connectionStrings> <clear /> <add name="LocalSqlServer" connectionString="data source=.\SQLEXPRESS;Integrated Security=SSPI;AttachDBFilename=|DataDirectory|aspnetdb.mdf;User Instance=true" providerName="System.Data.SqlClient" /> <add name="dbConnection" connectionString="Data Source=<server>;Initial Catalog=<database>;Integrated Security=True;Application Name="Workflow Composer"" providerName="System.Data.SqlClient" /> <add name="WorkflowDurableInstancingConnection" connectionString="Data Source=<server>;Initial Catalog=<database>;Integrated Security=True;Pooling=True;MultipleActiveResultSets=True;Application Name="Workflow Composer"" providerName="System.Data.SqlClient" /> <add name="WorkflowTrackingConnection" connectionString="Data Source=<server>;Initial Catalog="Workflow Tracking";Integrated Security=True;Persist Security Info=False;Pooling=True;MultipleActiveResultSets=True;Application Name="Workflow Composer"" providerName="System.Data.SqlClient" /> <add name="CrmDbConnection" connectionString="Data Source=<server>;Initial Catalog=<database>;Integrated Security=True;Persist Security Info=False;Pooling=True;MultipleActiveResultSets=True;Application Name="Workflow Composer"" providerName="System.Data.SqlClient" /> </connectionStrings>When the CRM Web Client URL is populated, an additional appSettings key will be added in the Workflow configuration file.
<appSettings file=""> <clear /> <add key="DataMapperAssembly" value="Cmc.CampusLink.BusinessEntities, Culture=neutral, PublicKeyToken=<token>" /> <add key="ConfigureCampusNexusWcfProxy" value="true" /> <add key="ConfigureCVueNexusWcfProxy" value="true" /> <add key="apiKey" value="<key>" /> <add key="StudentWebClientUrl" value="https://<server>.<domain>:<port>" /> <add key="CrmWebClientUrl" value="https://<server>.<domain>:<port>/" /> </appSettings> -
-
Click Save.
-
Click Yes to confirm that you want to proceed. Workflow Composer will restart.
Workflow Web API Connection
If you are using Workflow Composer in an Ellucian Cloud 2.0 environment :
-
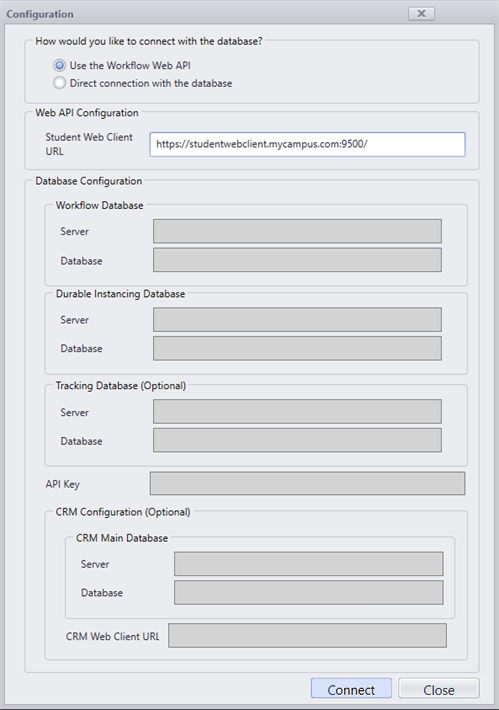
Select Use the Workflow Web API.
-
Specify your Anthology Student Web Client URL, i.e., https://<server>.<domain>:<port>. This URL provides access to the server where the Workflow Web API is deployed.
The remaining fields are disabled.
Workflow Composer supports dual tenancy in Azure AD. This enables Ellucian support staff to log in to a customer environment to diagnose an issue. CMC staff append account/login/cmc to the Student Web Client URL value in order to use a different authentication context for the same environment.
Tenant Student Web Client URL Sign in Logo Azure AD Tenant (Customer) https://<server>.<domain>:<port>.campusnexus.cloud/ 
Support Tenant (Ellucian Staff) https://<server>.<domain>:<port>.
campusnexus.cloud/account/login/cmc
-
Click Save.
-
Click Yes to confirm that you want to proceed. Workflow Composer will restart.
When you use the Workflow Web API, you must log in to your Ellucian Cloud 2.0 account in the Azure Active Directory (AAD).
In case of a service interruption or incorrect configuration, a message similar to the following will be displayed.
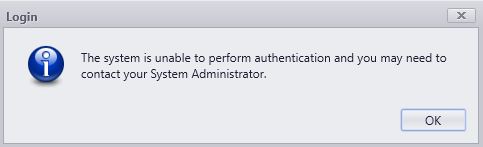
After you click OK, you can launch Workflow Composer again and the Configuration window will be displayed again. You can change the Web API Configuration and log into your account.
Your user profile in the Ellucian Cloud 2.0 AAD is associated with a role.
-
The Contributor role allows you to add/publish, delete, and edit workflows.
-
The Reader role allows you to view workflows.
As a Reader, you can modify a workflow and save it to the file system. But you cannot publish it. If you try to publish or delete a workflow or persisted instance, Workflow Composer returns the message: "You are not authorized to perform this action."
If you are not associated with either role, you will need to contact a System Administrator as you will not have access to the application.
Install Activities and Contracts
After installing Workflow Composer, you need install Activities and Contracts that match the versions of Anthology Student, CampusNexus CRM, and/or Forms Builder in your environment.
Note: If you installed Workflow Composer using ClickOnce with auto update, previously installed packages are removed and need to be reinstalled.
-
In the ribbon of Workflow Composer, click Package Manager. Click Yes to close Workflow Composer.
-
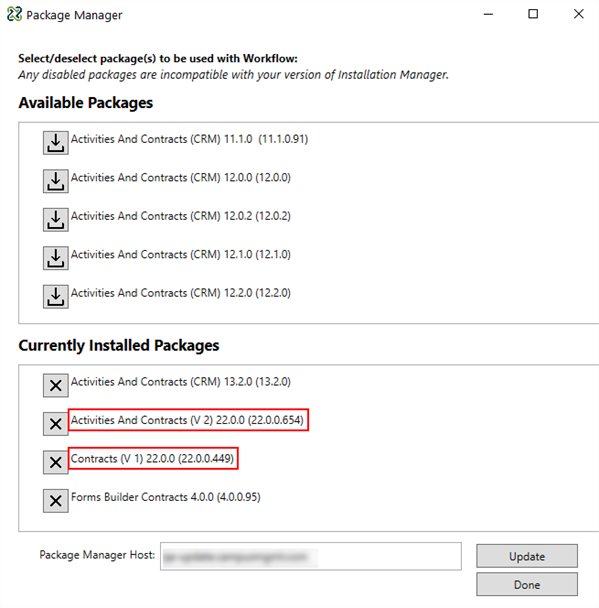
In the Package Manager screen, check the address of the Package Manager Host. If necessary, edit the address and click Update.

-
In the Available Packages section, locate the Activities and Contracts to be used with Workflow Composer in your environment. The packages are product and version specific.
You can install only one version of a specific package type.
Anthology Student requires two packages. For example, if your Anthology Student environment is at version 25.3.0, install Activities and Contracts (V1) 25.3.0 and Activities and Contracts (V2) 25.3.0.
With Workflow Composer 4.x and Anthology Student 25.x and later, you need to install both the V2 Activities and Contracts and the V1 Contract packages.
If you have workflows with V1 Activities, warning messages will be displayed when you select or run a workflow. See Run Time Messages About V1 Activities in Workflow Help.
If workflows that contain V1 Activities have not been updated prior to upgrading to Anthology Student 25.x and installing 25.x Activities and Contracts packages, perform the following steps:
-
Uninstall the V1 and V2 packages for 25.x.
-
Import an earlier version of V1 and V2 packages.
-
Update the workflows to replace the V1 activities.
-
Re-import the 25.x packages.
The packages for Anthology Student 25.x and later will only contain the V1 Contracts and not the Activities.
-
-
Click
 to install each package. The installed packages will be listed in the Currently Installed Packages section.
 To remove a package, click
 in the Currently Installed Packages section.
 -
Click Done to close Package Manager.
Troubleshooting
If Workflow Composer 25.0 does not launch after installation, follow the steps below to resolve the issue:
-
Open the Package Manager Console inside Workflow Composer.
-
Uninstall any previously installed packages (if present).
-
Reinstall the required packages.
-
Once the installation is complete, click on the Done button.
Upon completing the above steps, Workflow Composer will launch successfully.
