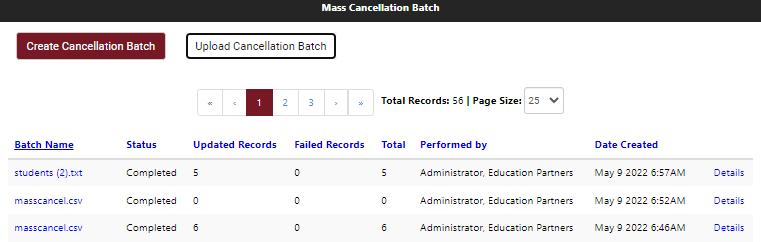
Mass Cancellation Batch
The Mass Cancellation Batch page enables users with the required permissions to create batches of student records whose statuses need to be changed to Cancelled because the students did not accept their offer of admissions.
When a mass cancellation batch file is uploaded, the ISIR Processor processes all records in the batch. The batch is assigned the Completed status regardless of whether records within the batch failed or the batch was cancelled. When the ISIR processor starts again, it changes the batch status from Pending to In Progress. The ISIR processor reprocesses batches that didn't achieve the Completed status. The ISIR processor runs every half hour or hour depending on the client’s needs.
The mass cancellation process cannot cancel student records with the following ISIR verification statuses:
- Cancelled
- Complete
- SelectedQualifiedExclusion
- ComplianceVerificationComplete
- ComplianceSelectedQualifiedExclusion
- ComplianceReview
If you have identified students eligible for cancellation in an external system (SIS), you can collect all Student Ids in a .csv or .txt file and then upload the cancellation batch file.
Required Permission: Can Perform Mass Cancellation of ISIR Verification
The Mass Cancellation Upload Batch Column Option enables administrators to select whether the Portal ID (default) or SIS Student ID is uploaded for batch records.
Create a Cancellation Batch
-
On the Home page, select the Mass Cancellation link.
-
On the Mass cancellation Batch page, select the Create Cancellation Batch button.
-
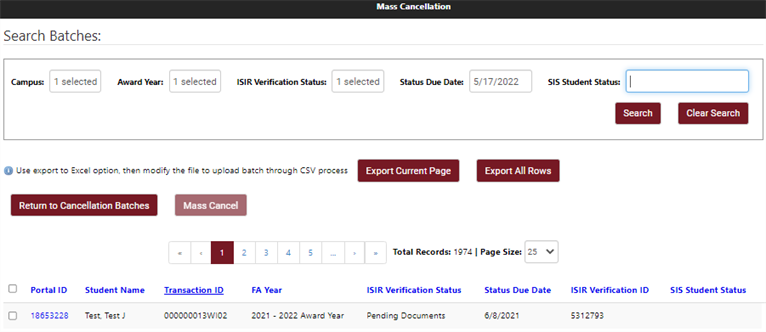
In the Search Batches fields, specify the following values to search for student records to be updated:
-
Campus – Select one, multiple, or all campuses.
-
Award Year – Select one, multiple, or all award years.
-
ISIR Verification Status – Select one, multiple, or all status values. 14 status values are available for selection:
- Pending ISIR
- Pending Documents
- Pending Required Document Approval
- Pending Conflicting Information
- Required Document Reject
- Pending Verification
- Pending ISIR Correction
- Pending Second Level Approval
- Second Level Reject
- Stop Verification Rejected ISIR
- No Verification
- Pending Comment Code Review
- Pending Professional Judgment Review
- Rejected ISIR
-
Status Due Date – Specify the date. The current date is displayed by default.
-
SIS Student Status - Specify the status value used in the Student Information System (SIS).
-
-
Select the Search button to retrieve the selected records.
-
You have the option to export the search results to Excel.
-
Select Export Current Page to export only the records displayed on the current page.
-
Select Export All Rows to export the records displayed on all pages.
-
-
In the search results, select the records to be updated.
Best Practice
-
When you select all records (by selecting the check box in the column header), use the Export All Rows option, then modify the .cvs file in Excel and upload it to process the cancellation.
-
When you select individual students, expand the Page Size to see more records, select applicable students on one page, then process the cancellation. Once cancelled, proceed to the next page, and repeat.
-
-
Select the Mass Cancel button and select Confirm to proceed.
-
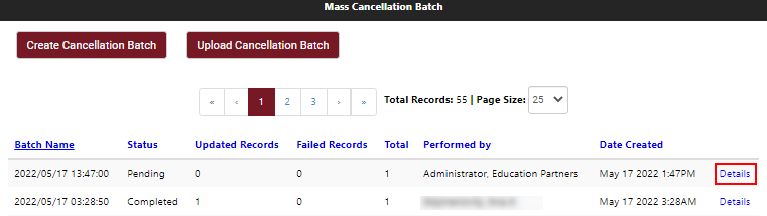
After the batch is created, you are redirected to Mass Cancellation Batch page. Review the Status of your batch job.
-
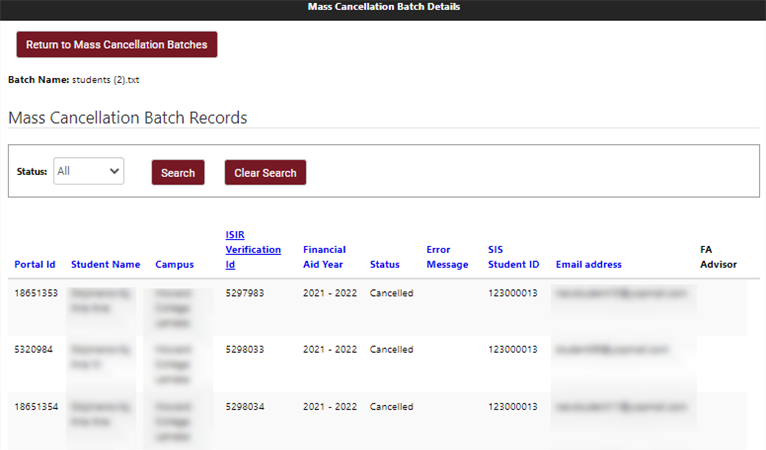
Select the Details link to confirm the record details.
-
Select Return to Mass Cancellation Batches.
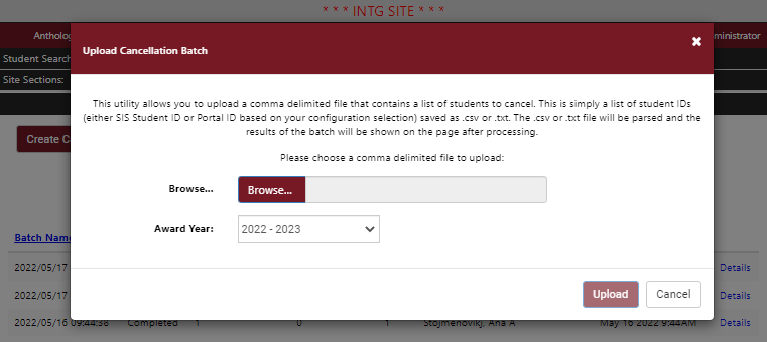
Upload a Cancellation Batch File
-
On the Home page, select the Mass Cancellation link.
-
On the Mass cancellation Batch page, select the Upload Cancellation Batch button.
-
Select the Browse button and select the mass cancellation file. The file must be a .csv or .txt file.
-
Select the Award Year.
-
Select the Upload button.
-
After uploading a valid file, the file content is saved in the database and the IsirVerificationProcessor should be run to create pending batches to be processed. If this process fails, the batch status will stay in Pending status. In the next run, the processor will try again to create the cancellation records.