Configuring Scheduled File Imports
Before importing data files, the administrator must perform the following configurations:
Review the Mappings in the Import Templates
Prerequisite
CSV files with field mappings of the data source to be imported.
-
The file name of the CSV file should not exceed 160 characters.
- Contact Anthology Client Services to obtain the latest predefined templates.
-
If a predefined template is not available for a specific data source, create import template mappings by copying the mappings from another template and modify accordingly, or create new template mappings.
-
EDI data files can be parsed to CSV files using the ParseEDIFileToCSV flow. For details, see Parsing EDI Files to CSV Format.
Working with mappings in Excel is an efficient way to view and edit your template mappings. Download the import template mappings using Advanced Find, work with the mappings in the Excel workbook, and then reload by importing to Integration Mappings again with your changes.
The predefined template mappings in the CSV file are mapped to out-of-the-box fields where available, and in many cases it is based on the vendor provided choice list values, which need to be reviewed and updated to suit a customer's configured environment.
In the template mapping CSV file, review the following types of mappings and add or change the mappings accordingly:
-
Field mappings
-
Virtual Field mappings
-
Dataset mappings
-
Default Field Value mappings
-
Advanced settings (Import Batch Size, Import Row Batch Size, Enable Statistics)
Import Template Mappings From CSV File
After reviewing and updating the template mappings, import the excel files into the target environment.
-
In the Anthology Reach environment, navigate to Settings > Integration > Integration Mappings.
-
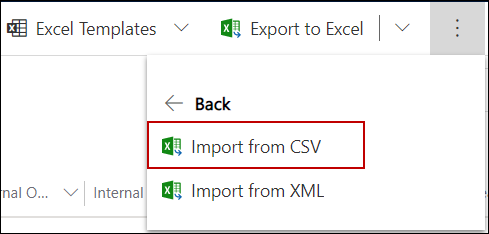
Click the Import from CSV option.

-
In the Import from CSV page, click Choose File to select the required file, and click Next.
-
Click Review Mapping and verify that fields are mapped.
-
Click Finish Import.
After the import has completed, check that your template mappings are all imported successfully.
Create Azure File Storage folders
In Microsoft Azure, following sample folder structure is available for reference in the Common\inbound folder:
-
Sample-drop
-
Sample-processing
-
Sample-processed
-
Sample-error
For each data source, create separate folders for the import.
Steps to create Azure storage folders for Import
-
Log into Azure Storage Explorer
-
Navigate to common\inbound\
-
Create new folders using the following pattern. Replace "sample" with your import template name, or desired name.
-
Sample-drop
-
Sample-processing
-
Sample-processed
-
Sample-error
-
-
Click New Folder on the toolbar, and in the New Folder dialog box add the required folder name.
Create Import Trigger Flow
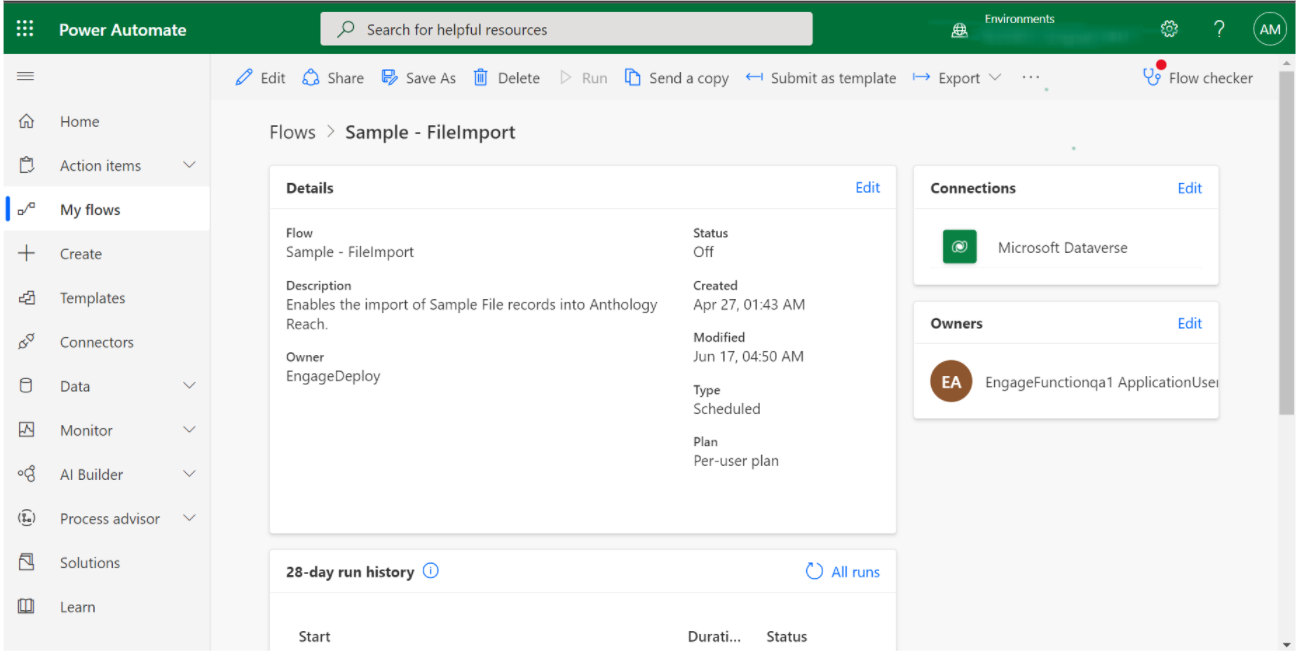
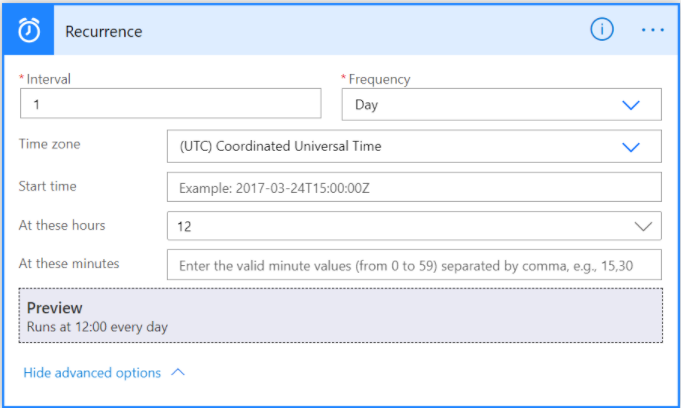
The trigger flow contains the scheduling (recurrence) settings as well as template name, Azure folder names, and other parameter values used for the import.
An example "Sample - FileImport" flow is included in the Anthology Import Export solution to copy from.
Note
It is recommended to not edit default logic in the default flow, Sample - FileImport. Instead:
- Copy the flows and edit logic in the copied flows.
- Save and publish the copied flows in your institution’s implementation. This will ensure, the original flow with its default functionality is available if the copied flow needs to be discarded. Additionally, as concurrency in the default flow is set to 1, it is recommended to retain this value in the copied flows because performance of the operation may be compromised if it is changed.
Steps to Create the Trigger Flow for Import
-
Log on to make.powerapps.com, and select the required environment and click the Solutions tab.
-
In the Anthology Import Export solution, locate the Sample - FileImport flow.
-
Create a copy of the Sample - FileImport flow and give it a desired name.
Note: You cannot do a Save As on this flow as it includes a step which calls a child flow. Instead, create a new Cloud flow in your unmanaged solution and use the clipboard option in Edit mode to copy the steps in order from the Sample – FileImport flow to your new flow.
Follow a similar naming convention for better organization and clarity in your target environment. E.g. MyNewImport - FileImport
-
Edit your new copy of the trigger flow, and review and update the following steps:
-
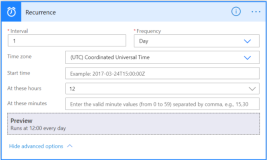
Recurrence
-
Get Integration Mapping
Change the names for the highlighted items to match the import template mappings.
Note: If you are not using CustomFlow as part of your import you will not need to specify a value for this.

-
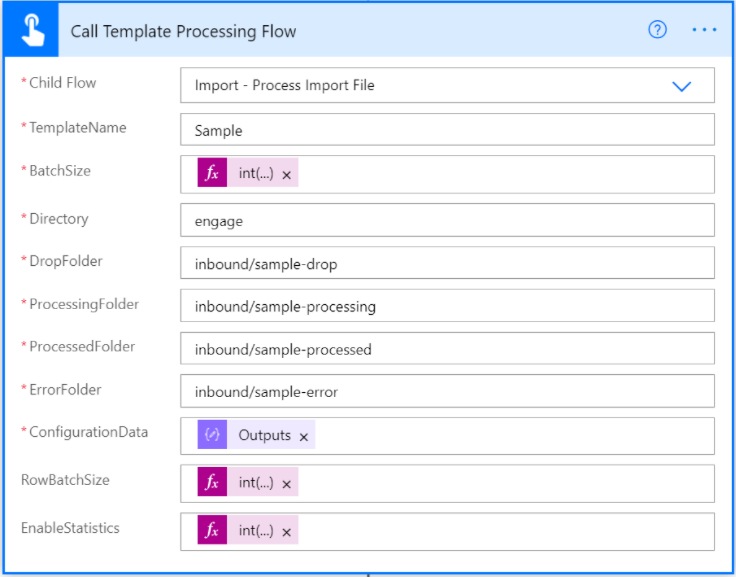
Check Configuration > Call Template Processing Flow
Update the following parameters to match the import template settings:
-
TemplateName
-
Directory
-
DropFolder
-
ProcessingFolder
-
ProcessedFolder
-
ErrorFolder

Edit the expression values for the following parameters and set the names to match your import template.
-
BatchSize
-
RowBatchSize
-
EnableStatistics
ExampleClick on the BatchSize property, the Expression tab will open.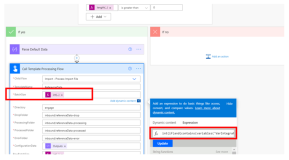 Update this expression value by replacing the proper Import Batch Size name.Exampleint(if(and(contains(variables('VarIntegrationMappingData'),'Sample Import Batch Size'),not(empty(variables('VarIntegrationMappingData')['Sample Import Batch Size']))),variables('VarIntegrationMappingData')['Sample Import Batch Size'],100))
 -
-
-
Save the trigger flow.


Configure the 'Overwrite with Blank' Field
The Overwrite with Blank field in the Integration mapping record of the field must be configured to determine whether the existing value in Anthology Reach must be retained or overwritten with blank, when no value is available for the field in the imported data:
- Yes - Indicates the field value will be overwritten to blank.
- No - Indicates the field value will not be overwritten to blank. It is the default value.
If Overwrite with Blank value is not specified for a field mapping, the import process will default to No and will not overwrite existing data if the field value in the data being imported is blank.
Enable Statistics
Summary counts of records created during an import can be optionally enabled to display in the integration log for the import job. The import statistics include the number of records created, updated, and unchanged for the imported entities, and is displayed in the Additional Details field of the Integration log record created for each file import.
-
To enable import statistics for an import template:
-
Include a mapping record in the template with name = Import Statistics
-
Set the Internal Option Value field to 1 in the file import template of a file import to enable the counts to display.
Note: By default, predefined templates have enable statistics turned off (i.e., the Internal Option Value field is set to 0 to turn off the counts).
-
Turn On the Trigger Flow and Test Import
-
Turn ON the new trigger flow created for the import in the Create Import Trigger Flow.
-
Drop your test file in the drop folder and then run your trigger flow and review results.