Parsing EDI Files to CSV Format
Application data files that are in EDI format can be translated to CSV using the sample flow, ParseEDIFileToCSV, which can then be imported into Reach using the standard scheduled (flow) import framework.
The ParseEDIFileToCSV sample flow is shipped with the Anthology Import Export solution.
Steps to Parse the EDI Files to CSV Format
-
Create the following Azure file storage folders (in red text) under the common/inbound folder:
-
common/inbound/edi/sample-edi-drop
-
common/inbound/edi/sample-edi-configuration
-
common/inbound/edi/sample-edi-archive
-
common/inbound/edi/sample-edi-processed
For steps to create Azure file storage folders, see Configuring Scheduled File Imports.
-
-
Add the XML configuration file in the sample-edi-configuration folder.
-
Log on to make.powerapps.com, and select the required environment and click the Solutions tab.
-
In the Anthology Import Export solution, locate the ParseEDIFileToCSV flow.
-
Create a copy of the ParseEDIFileToCSV flow and give it a desired name.
-
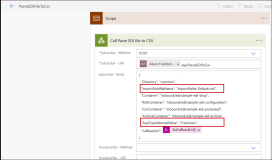
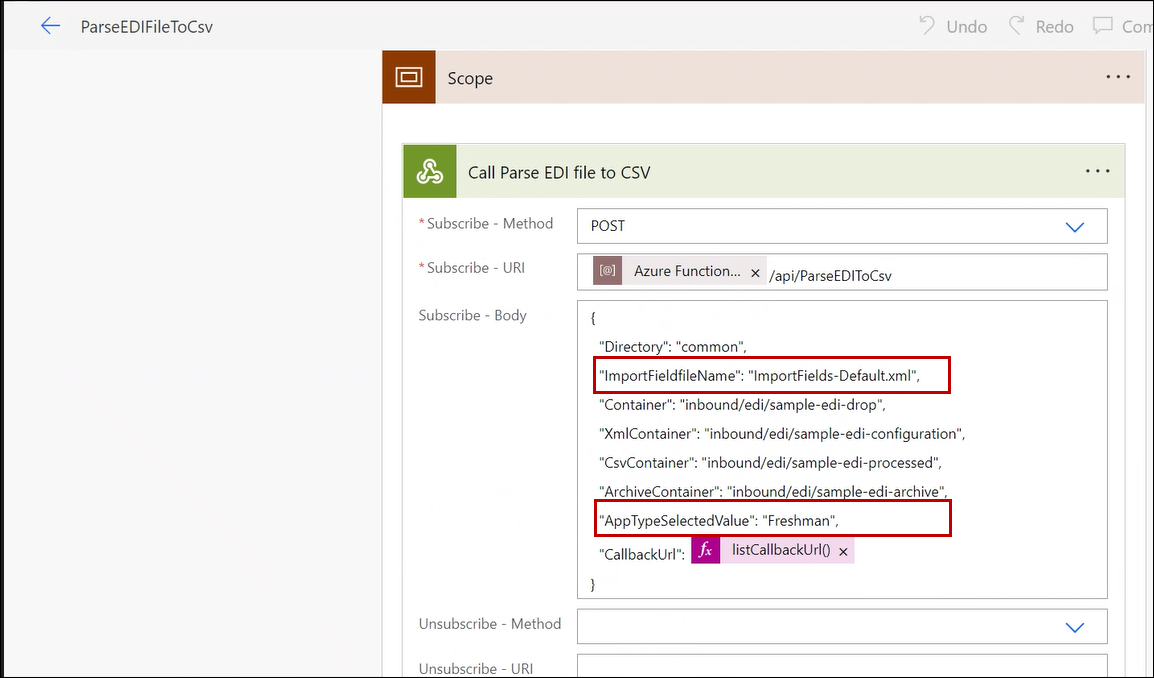
Edit your new copy of the ParseEDIFileToCSV flow, and review and update the following Call Parse EDI file to CSV step as follows:
-
Set the ImportFieldfileName parameter to the XML configuration file that is added in the sample-edi-configuration folder.
-
Set the AppTypeSelectedValue parameter to the required application type for parsing the application types to the CSV format. If an application type is not specified, all application types will be parsed to the CSV file.
-
-
Run the ParseEDIFileToCSV flow.
The CSV file will be available in the common/inbound/edi/sample-edi-processed folder.
For performing file imports using the generated CSV file, see Configuring Scheduled File Imports.