Scheduling an Appointment in Reach
The appointments feature enables staff members to reach out to students so that the process of student engagement is positive and continuous.
Before scheduling an appointment, it is critical that administrators fully understand the creation of User Location and Office Hour records and their relation with the Staff Calendar feature, and other settings described in the topic Settings Prior to Working With Appointments.
To Schedule an Appointment
- In the My Appointments page, click Book Appointment. The Schedule Appointment page will be displayed.
- In the left pane, select options in the following fields to shortlist configured appointment slots:
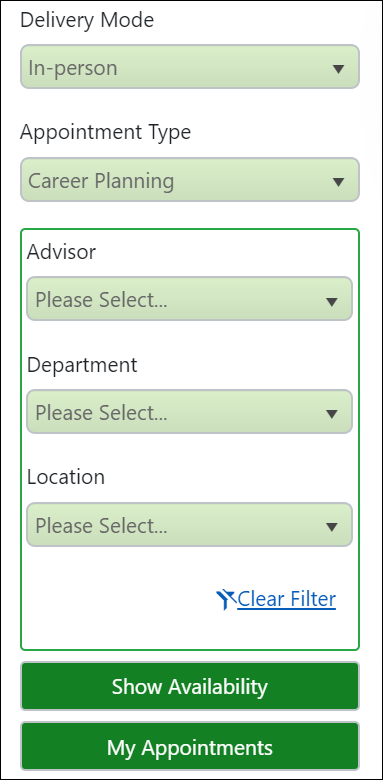
- On clicking Show Availability, shortlisted appointments will be displayed in the right pane.
- Click
 . The Quick Create: Appointment form will be displayed.
 - If the appointment is virtual, in the Delivery Mode field, select Telephone or Online Meeting. This will determine the kind of virtual appointment. Also, this field will not be displayed in In-person appointments.
- Type appropriate text in the Title field.
- In the Regarding field, select a student with whom you want to schedule the appointment.
- Specify information in other fields and then save the record.
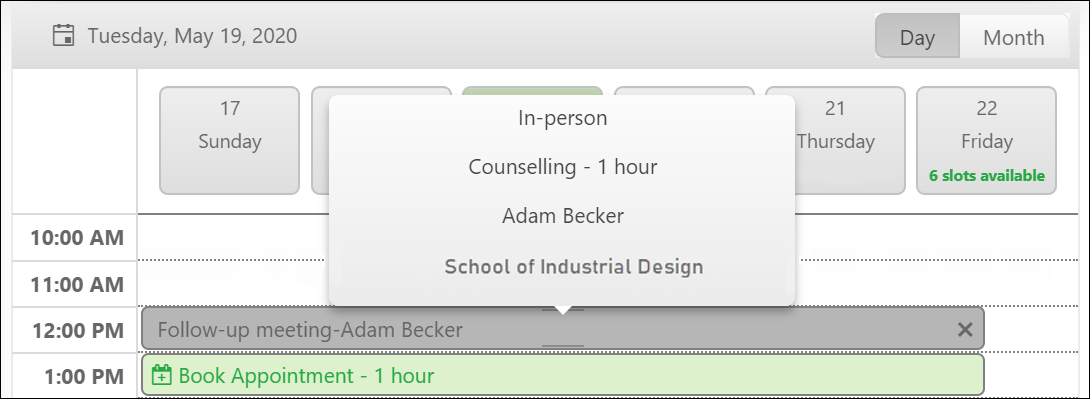
The scheduled appointment will be displayed in gray as follows:
Advisors can then view the appointment record that gets created in their Activities grid and click Accept or Decline. Appropriate emails will be sent to the student indicating the advisor's decision.
Additionally, on the institution's portal, the student can view available slots in a similar interface and book an appointment. For more information, see Booking an Appointment on the Portal.
Notes:
- Appointment details of advisors/students will also be displayed in their records in the Appointment tab in the Interaction Overview area.
- As an advisor or staff member, when you receive an appointment from a student, it will also be displayed in the Interaction Overview area of the student's record. Double-click the appointment record and then click the Accept button. This will result in a confirmation email being sent to the student. You can view the email in the Interaction Overview area of the student's record.