Configurations for Time Management
This topic provides information on configuring the prerequisites for using the Time Management feature.
Before beginning to work on a project, the parameters to setup and maintain the projects need to be configured in the Project management and accounting parameters page.
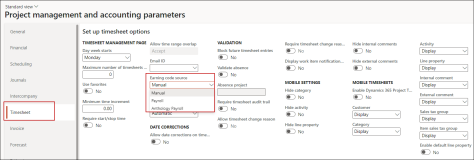
To work with the Time Management feature, in the Project management and accounting parameters page > Timesheet tab, configure the following field:
-
Earning code source field - It can be set to one of the following values, which determine the source for earning codes and the target where the approved time sheets will be processed:
-
Manual - Indicates the earning code needs to be entered manually which will be used by a third party payroll system.
-
Payroll - Indicates the earning code will be retrieved from D365 Finance & Operations, and pushes approved timesheet lines to Earning statements in D365 F&O Payroll. It is the default value.
-
Anthology payroll - allows Earning code to be read from Anthology Payroll, and pushes approved timesheet lines to Advanced payroll Earnings.
Anthology Payroll can be selected ONLY when Enable integration with Anthology Payroll = Yes in Human resources > Human resources shared parameters > Anthology Payroll.
-
For details on configuring other project management and accounting parameters, see Microsoft Documentation.
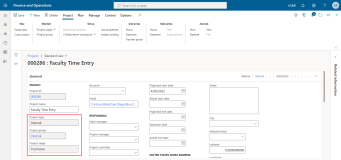
Configure the following field values in a project record, which will be used in the downstream processing for the Time Management feature:
For details on creating and updating a project, see Microsoft Documentation.
Configurations for the Category Group
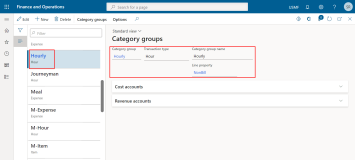
Create a Category group with the following field values:
Configurations for the Project Category
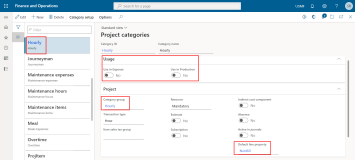
Create a project category for hourly transaction type with the following field values:
-
Under the Usage section:
-
Use in Expense as No
-
Use in Production as No
-
-
Under the Project section:
-
Category group - Select the category group that was created for the transaction type as Hour.
-
Default line property as NonBill.
-
For details on creating project categories and category groups, see Microsoft Documentation.
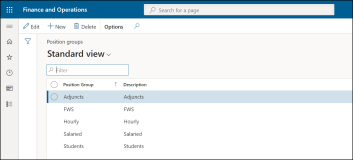
A position group enables categorizing positions into various groups, such as, Salaried, Hourly, or other specialty groups.
To create a position group perform the following steps:
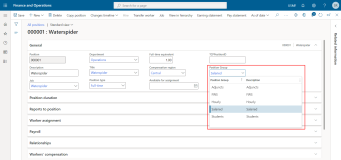
Associating a position group for a position, enables categorizing the positions for generating reports.
To associate a position group for a position:
Mapping an earning code to a position and position category enables identifying appropriate earnings for the combination of position and position category for an employee for payroll processing.
View the Earning Codes stored in timsheet when:
-
A timesheet is sent to Anthology Payroll.
-
A timesheet is sent to Anthology Payroll with processed timesheet lines.
-
A timesheet is sent to Anthology Payroll. with unprocessed timesheet lines derived based on mapping.
-
A combination of processed and unprocessed timesheet lines is sent to Anthology Payroll.
For steps to map an earning code to a position or position group, and position category, see Map Earning Code to a Position and a Project Category
To interact with timesheets, each employee in a project must be defined as a Project Resource.
Perform the following configurations for a project resource, which will be used in the downstream processing for the Time Management feature:
-
Ensure the following fields are configured for the Resource:
-
Calendar
-
Period types
-
Source legal entity
-
Effective dates
-
-
Assign the project that was previously configured with the following field values:
-
Project type as Internal
-
Project group as Internal
-
-
Assign the category that was previously configured with the Transaction type as Hourly and is mapped to an earning code.
For details on configuring a project resource, see Microsoft Documentation.
The following two workflows available in the Project management and accounting modules need to be configured for timesheet approvals:
-
Review timesheet workflow
It is the main workflow for approving timesheets. The following two workflow elements can be configured depending on the level of approval required:
-
Approve timesheet: It is used to define the approval at document level or timesheet header level.
-
Timesheet line-item workflow: It is used to define the approval at the detail line level. In this case, you should set up a new workflow of type Review timesheet line workflow and join the new workflow to the Timesheet line-item workflow element.
-
-
Review timesheet line workflow - For approving project timesheets at the line item level.
-
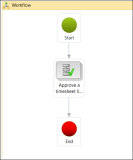
Navigate to the Review timesheet line workflow page .
-
From the Workflow elements pane > Approvals section > select the Approve a timesheet line element and add it to the workflow.
-
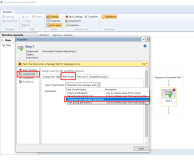
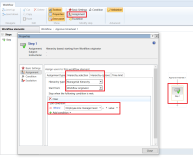
Double-click the Approve a timesheet line element > select Step 1, and click the Assignment menu option.
-
In the Assignment type tab, select Participant.
-
In the Role based tab, configure the following values:
-
In the Type of participant field, select Timesheet line manager participant.
-
In the Participant field, select Position Report to.
-
-
Save and close the workflow.
-
Navigate to the Review timesheet workflow page.
-
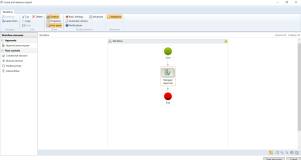
From the Workflow elements pane > Approvals section > select the Approve timesheet element and add it to the workflow.
-
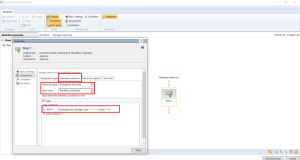
Double-click Approve timesheet element > select Step 1, and click the Assignment menu option.
-
In the Hierarchy Selection tab, configure the following values:
-
In the Hierarchy type field, select Managerial hierarchy.
-
In the Start from field, select Workflow originator.
-
Click Add condition, and in the Where condition select Employee.Line manager level and specify the required value.
-
-
Click Close.
-
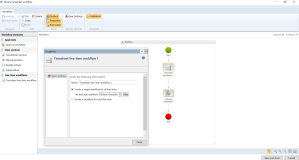
In the Workflow, drag and drop Timesheet line-item workflow.
-
Right-click Timesheet line-item workflow, and click Properties.
-
Select the option, Invoke a single workflow for all line items, and select the Review timesheet line workflow.
-
Save and close the workflow page.
For details on configuring workflows with a line item workflow element, see Microsoft Documentation.
The following workflow is available in the Leave and Absence module will need to be configured for Leave and Absence request approvals:
-
Leave and Absence request workflow
It is the main workflow for approving Leave and Absence. The following workflow element can be configured depending on the level of approval required:
-
Approval Leave request: It is used to define the approval at manager level .
-
-
Navigate to the Leave and Absence request workflow page .
-
From the Workflow elements pane > Approvals section > select the Approval Leave request element and add it to the workflow.
-
Double-click the Manager Approval element > select Step 1, and click the Assignment menu option.
-
In the Assignment type tab, select Hierarchy.
-
In the Hierarchy Selection tab, configure the following values:
-
In the Hierarchy Type field, select Managerial Hierarchy.
-
In the Start From field, select Workflow Originator.
-
In the Stop when the condition is met: field, select Employee.Line Manager Level = value 1.
-
-
Save and close the workflow.
Following workflows should be configured:
Access Method: Click Modules > Project management and accounting > Setup > Project management and accounting workflows
-
Review timesheet workflow
-
Review timesheet line workflow
To configure timesheets, please refer Configure Timesheet Workflows.
For details on configuring workflows with a line item workflow element, see Microsoft Documentation.
