Contact Manager
Contact Manager is a tool for recording, tracking, and managing your appointments, events, and activities related to your tasks. Activities include entrance interviews, incoming and outgoing telephone calls, and other events that affect your daily tasks at your campus.
Staff members with appropriate permissions can add activities, messages, and files to Contact Manager. For instance, a staff member in the admissions department may record new leads and assign them to admissions representatives for follow-up. Staff members who have appropriate permission can also view other staff member's activities and re-assign them to other staff members.
Some automatic activities such as call student, set up an entrance test, arrange entrance interview, may be assigned to you based on events that are monitored by Anthology Student. These activities are displayed on the Contact Manager page as a result of decisions made by your institution's management.
The Contact Manager page enables you to manage your administrative activities. You can view, search, add, or modify activities, and send messages.
Manage Activities in Contact Manager
-
Navigate to Contact Manager > Contact Manager. The Contact Manager page is displayed.
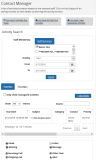
By default, the Activities tab is selected. You can perform the following operations in the Activities tab:
-
Click one of the following links at the top of the page to view the relevant activities in the Activities tab.
- Number of Activities Due Today
- Number of Past Due Activities
- Number of New Reassigned Activities
-
Click the column headers to sort the data. Use the Show _entries drop-down list to set the number of rows displayed in the grid. Use the Search option to locate specific items within the grid. When you scroll down, an arrow icon appears next to the scroll bar. Click
 to return to the top of the page.
 -
Click Only show reassigned activities to view only reassigned activities.
-
-
To search activities in Contact Manager:
-
Select staff members in the Staff Members area.
-
Select an Activity.
-
Click
 and specify start and end dates for the activity search criteria in the From and To fields.
 -
Click Search. Activities of the selected staff members are displayed in the Activities tab.
-
-
To add activities in Contact Manager:
-
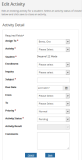
Click Add Activity. The Edit Activity page is displayed.
-
In the Recent Students list, select the student to whom you want to assign the activity. Alternatively, search the student in the database. The name of the selected student is displayed in the Student field.
-
Specify the following details for the activity. Items marked with an asterisk are required.
-
In the Assign To list, select the staff member to whom you want to assign the activity. By default, the activity is assigned to you.
-
Select an Activity.
-
Select an Enrollment.
-
Select the inquiry for the activity in the Inquiry list.
-
Type the subject of the activity in the Subject field.
-
Click
and specify the Due Date. -
Select the Start and End time of the activity.
-
Select the Priority and Activity Status.
-
Select the Activity Result.
-
Type comments in the Comments field.
-
-
Click Save. The activity for the selected student is created and assigned to you or the selected staff member.
-
-
To edit activities in Contact Manager:
-
Click the subject of an activity in the Activities tab. The Edit Activity page for the selected activity is displayed.
-
Modify the required details.
-
Click Save. Details of the activity are modified.
-


Send Messages in Contact Manager
-
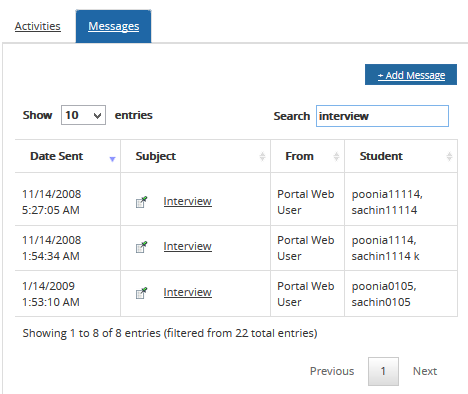
Click the Messages tab. Your received messages are displayed.
Click the column headers to sort the data. Use the Show _entries drop-down list to set the number of rows displayed in the grid. Use the Search option to locate specific items within the grid. When you scroll down, an arrow icon appears next to the scroll bar. Click
to return to the top of the page.
-
Click Add Message. The Add Message page is displayed.
-
In the Recent Students list, select the relevant student. Alternatively, search the student in the database. The name of the selected student is displayed in the Contact field.
-
Specify the following details for the messages. Items marked with an asterisk are required.
-
In the To list, select the staff member to whom you want to send the message.
-
Click
and specify the date of the message in Date field. -
Type the subject of the message in Subject field.
-
Type the body of the message in Message field.
-
-
Click Save. The message is sent.
-
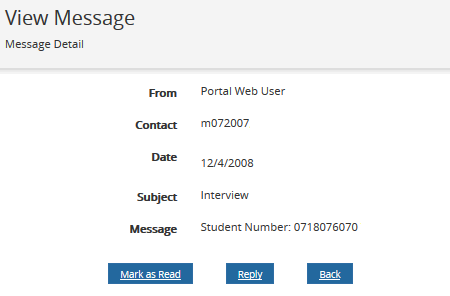
Click the subject of a message in the Messages tab. The View Message page for the message is displayed.
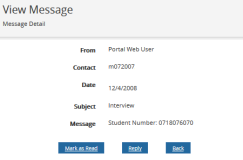
You can perform the following operations on the View Messages page:
-
Click Mark as Read to acknowledge the message.
-
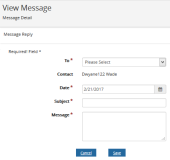
Click Reply to view the Message Reply section in the View Message page. Specify the required details for your reply. Items marked with an asterisk are required. Click Save. The draft of your reply is saved.
-
Click Back to view the Messages tab.
-