Creating a Duplicate Check Configuration for Leads
You can create a new Configuration for the Lead Object through the Duplicate Criteria Manager.
To Create a Duplicate Check Configuration
1. Open the Duplicate Criteria Manager.
2. Select Lead in the Select Base Object list.
3. To proceed with creating the Configuration, perform steps 3 - 7 of Creating a Duplicate Check Configuration for Contacts. The Duplicate Criteria Manager will be displayed.
|
Note • If individual Properties are listed on each row in the Duplicate Check Groups area, while performing the duplicate check, Talisma identifies the newly created Lead as duplicate by checking if the value in the corresponding Properties of the Lead match with one of the property values of the Lead that already exists in Talisma. For example, the Name, City, and Phone Lead properties are individually specified on rows 1, 2, and 3 respectively, in the Duplicate Check Groups area. While performing a duplicate check for Leads, Talisma is first checked for duplicate Leads based on the Name property value. If the Name property value of an existing Lead matches with the name of the Lead being imported, Talisma recognizes the imported Lead as a duplicate, and does not import the record into Talisma. If a match is not found on the first property (Name, in this example), the duplicate check is performed based on the City property, and then on the Phone property. This procedure is repeated for individual properties listed on subsequent rows. A Lead is not created in Talisma if any of the values in the Name, or City, or Phone properties are found matching in the Duplicate Check Groups area. Also, if there are multiple rows that are specified (three, as in the above example), and there is a matching entry found in one of the rows (for example, the City property, which is the second row in the configuration), then the duplicate check is not performed on subsequent rows. • When you simultaneously select multiple Properties in the Talisma Properties list and move them to the Duplicate Check Groups area, the Properties are grouped and displayed in a single row. In this scenario, Talisma identifies a new Lead as duplicate if all values in the corresponding Properties of the Lead match with every value of the Properties specified in the row in the Duplicate Check Groups area. For example, you simultaneously select the Name, City and Mobile Lead Properties and move them to the Duplicate Check Groups area. Talisma identifies a new Lead as a duplicate if the Name, and City, and Mobile Property values of the Lead being imported match with the Name, and City, and Mobile Property values of a Lead available in the Talisma system. Although matching values may be found, the Lead being imported will be created in Talisma regardless of whether Lead Property values are specified uniquely on each row, or collectively on a single row. The value of the Duplicate Property of such a Lead will be set to Yes. |
To Associate a Configuration with a Campus
1. In the Duplicate Criteria Manager, select the Campus(es) tab.
The available Campuses, and the Configurations associated with them are displayed. For a Campus that is not associated with a Configuration, the value None is displayed in the Active Configuration column.
2. Select the row of the Campus you want to associate with a Configuration.
3. Click Change Configuration.
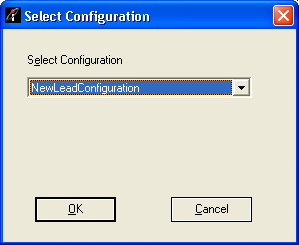
The Select Configuration dialog box is displayed.

4. In the Select Configuration list, select the Configuration you want to associate with the Campus.
5. Click OK.
The selected Configuration is displayed in the Active Configuration column of the Campus(es) tab in the Duplicate Criteria Manager.
|
Note You can associate only one Configuration with a Campus. However, multiple Campuses can be associated with the same Configuration. |
6. Click Exit. The Duplicate Check Configuration is created for the Lead Object.
To Remove the Association of a Campus with a Duplicate Check Criteria
1. From the Duplicate Criteria Manager, select the Configuration whose association with a Campus must be removed.
2. Click Apply to Talisma Components.
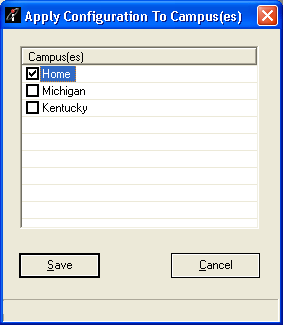
The Apply Configuration To Campus(es) dialog box will be displayed.

All Campuses associated with the selected Configuration will be displayed.
3. Clear the check box of the Campus that must be disassociated with the Campus.
4. Click Save.
The association of the Campus with the selected Configuration is removed.