Create a Long Running Workflow
When the "Approve Drop Request" Contact Manager activity is added to a student’s record, this workflow detects the event and waits for the activity to be closed before executing the logic in the Pick activity.
-
In Anthology Student, navigate to Lists > Contact Manager > Activities > New.
-
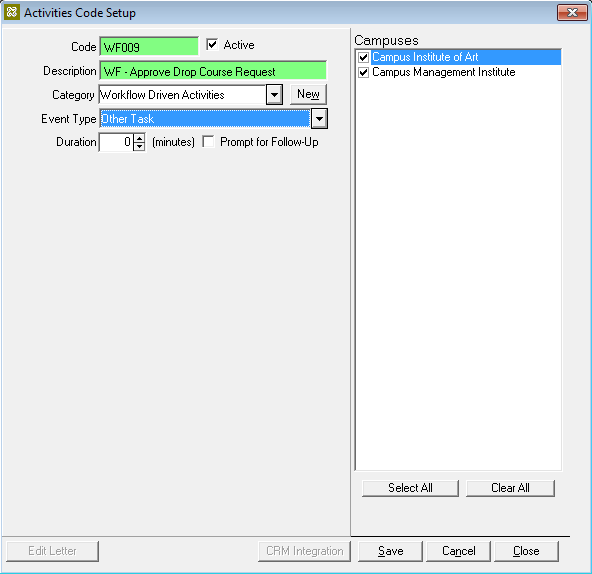
Add a new Contact Manager activity for the workflow. In this example, we created the Other Task activity with the name WF – Approve Drop Course Request.
-
Navigate to Lists > Contact Manager > Activity Result > New.
-
Create the following Contact Manager activity results:
- Approve Drop Course Request
- Deny Drop Course Request
Make sure these activity results are assigned to Other Task types.
-
Launch Workflow Designer.
-
On the Home tab, click New Event Workflow.
-
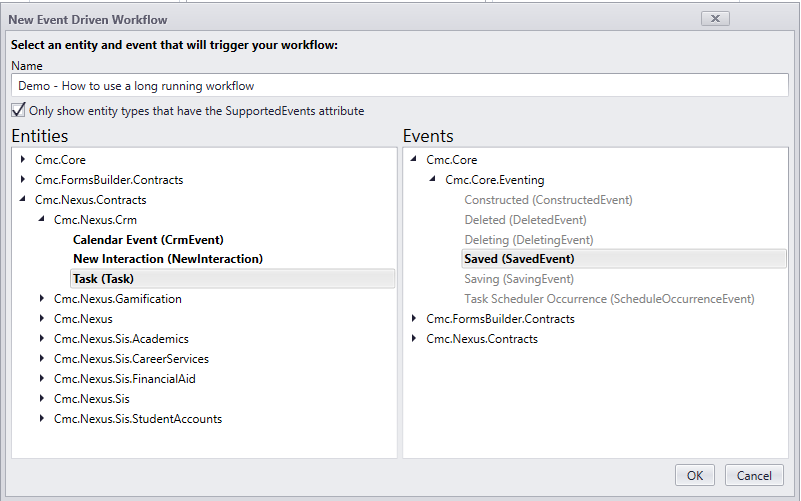
In the Name field, type Demo - How to use a long running workflow.
-
In the Entities area, expand Cmc.Nexus.Contracts > Cmc.Nexus.Crm and select Task {Task).
-
In the Events area, expand Cmc.Core.Eventing and select Saved (SavedEvent).
-
Click OK.
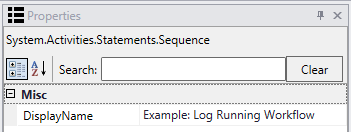
In the Properties pane, set the DisplayName to Example: Log Running Workflow.
-
In the Variables pane, create a variable named DropActivity. This variable will store the Contact Manager activity we created in Anthology Student.
-
In the Variable type field, click Browse for Types and navigate to Cmc.Nexus.Contracts > Cmc.Nexus > LookupItem. This type is required because we are going to look up the Contact Manager activity using a workflow activity
-
Create a second variable named WorkflowId. This variable will store the workflow instance Id.
-
In the Variable type field, click Browse for Types and navigate to mscorlib > System > Guid.

-
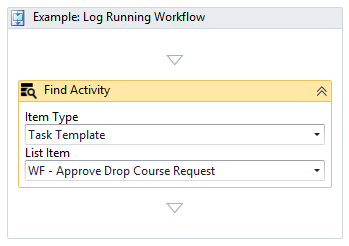
In the Toolbox under CMC.Nexus.Workflow, find the LookupListItem activity and drag it into the sequence.
-
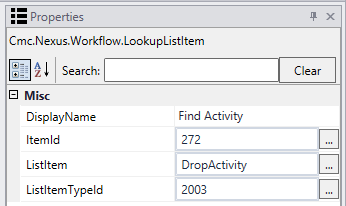
In the Properties pane, change the DisplayName to Find Activity.
-
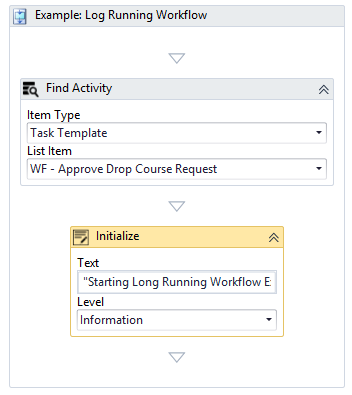
In the Item Type field, select Task Template.
-
In the List Item field, select WF – Approve Drop Course Request. This is the Contact Manager activity you created earlier.
-
In the Properties pane, set the ListItem to the DropActivity variable.
-
In the Toolbox under CMC.Core.Workflow.Activities, find the LogLine activity and drag it into the sequence under the LookupListItem activity.
The LogLine activity writes to the log file as the workflow goes a long. It is a great way to see what is happening with the workflow and helps during troubleshooting while learning or building your workflow. It is similar to commenting your code.
-
In the Properties pane, change the DisplayName to Initialize.
-
In the Text field, write any text that you want to show up in the log, for example,
"Starting Long Running Workflow Example - The Activity we are looking for is " + DropActivity.Name + " with the TaskTemplateId = " + entity.TaskTypeId.ToString
-
Leave the Level set to Information. Depending on how your
Nlog.configfile is set up, different levels are logged in different ways.
-
In the Toolbox under Control Flow, find the If activity and drag it into the sequence under the LogLine activity.
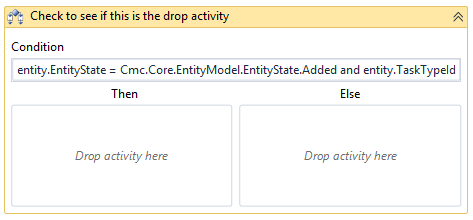
The If condition will check if the event that occurred is the one we are looking for. We are looking for the ListItem event DropActivity (see step 5).
-
In the Properties pane, change the DisplayName to Check to see if this is the drop activity.
-
In the Condition field, type the following:
entity.EntityState = Cmc.Core.EntityModel.EntityState.Added and entity.TaskTypeId = DropActivity.Id
When a Contact Manager activity is added, this condition checks if the activity is a drop activity; if it is, the workflow continues, else the workflow ends.
-
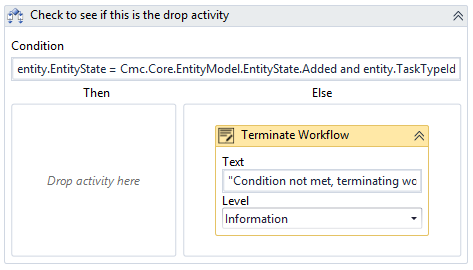
In the Toolbox under CMC.Core.Workflow.Activities find the LogLine activity and drag it into the Else block of the If activity.
-
In the Properties pane, change the DisplayName to Terminate Workflow.
-
In the Text field, type “Condition not met, terminating workflow”
-
Leave the Level set to Information.
-
In the Toolbox under Control Flow, find the Sequence activity and drag it into the Then block of the If activity.
You can only have one activity inside the Then and Else blocks of the If activity. But a Sequence is an activity that allows you to have multiple workflow activities.
-
In the Properties pane, change the DisplayName to Save WorkflowId.
-
In the Toolbox under CMC.Core.Workflow.Activities, find the GetWorkflowInstanceId activity and drag it into the sequence.
-
In the Properties pane, set the Result field to the variable WorkflowId.
-
Optional: In the DisplayName field, add a space between Get and WorkflowInstanceId to make it easier to read.
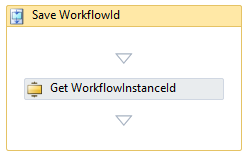
We are going to save the WorkflowInstanceId to the CmEvent record in the Anthology Student database so that we can recall this workflow later. Since we are working with Anthology Student, we will not need a connection to the database. We just need to update the WorkflowInstanceID column that was added as part of Anthology Student 16.1.0.
-
In the Toolbox under Control Flow, find the ExecuteNonQuery activity and drag it into the sequence under the GetWorkflowInstanceId activity.
-
In the Properties pane, change the DisplayName to Save the Workflow Instance.
-
In the Command field, type the following:
"UPDATE CmEvent SET WorkflowInstanceId =" & WorkflowID.ToString & " WHERE CmEventID =" & entity.Id
Note: SQL commands need to be strings, that is, quotes are required.

-
In the Toolbox under CMC.Core.Workflow.Activities, find the LogLine activity and drag it under the ExecuteNonQuery activity.
-
In the Properties pane, change the DisplayName to Update Log.
-
In the Text field, type the following:
“The workflow instance - " +WorkflowId.ToString+ " was added to the CmEventID-" + entity.Id.ToString”

-
Leave the Level set to Information.
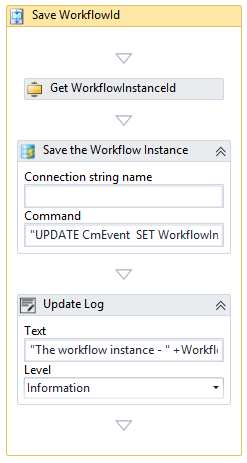
Because we only have two conditions, approved or denied, we will use the Pick activity to pick which business process will resume once the approver closes the Contact Manager activity with an approved or denied result.
-
In the Toolbox under Control Flow, find the Pick activity and drag it under the If activity.
The Pick activity uses PickBranch activities, one for each branch of the business process that will execute when the workflow resumes.
-
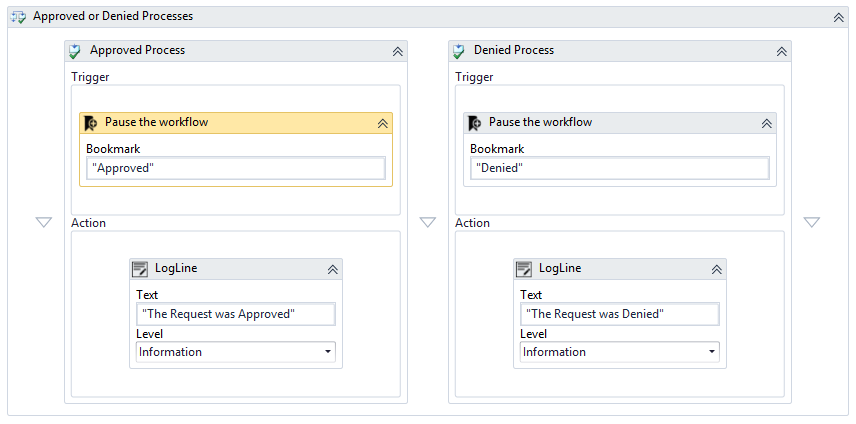
In the Properties pane, change the DisplayName to Approved or Denied Process.
-
In the Toolbox under Control Flow, find the PickBranch activity and drag it into the Pick activity.
-
In the Properties pane, change the DisplayName to Approved Process.
-
In the Toolbox under Cmc.Core.Workflow.Activities, find the CreateBookmark activity and drag it into the Trigger section of the PickBranch.
The CreateBookmark activity is saved and referenced later based on the approvers actions.
-
In the Properties pane, change the DisplayName to Pause the workflow.
-
Set the BookmarkName property to “Approved”.
-
Drag a LogLine activity into the Action section of the PickBranch.
-
In the Text field, type “The Request was Approved”.
-
Right-click the PickBranch activity and select Copy .
-
Right-click next to the PickBranch activity and select Paste. We now have two pick branches.
-
In the Properties pane of the copied PickBranch, change the DisplayName to Denied Process.
-
Drag a LogLine activity into the Action section of the copied PickBranch.
-
In the Text field, type “The Request was Denied”.
-
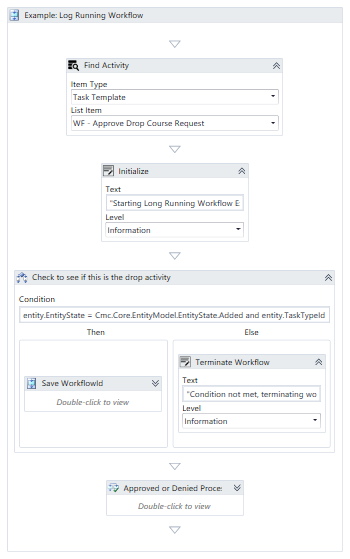
Check your workflow. Scroll through the workflow or use the fit to screen button located at the bottom of the Designer pane to see the whole workflow based on your screen resolution.
-
Click Publish. The New Workflow Definition Version window is displayed.
-
Select Enable This Workflow Version
-
Click Publish, then Cancel to close the publisher window.
We now need to create another workflow that will resume this workflow when the Contact Manager activity is closed.
Continue with Wake up the Long Running Workflow.