Add or Update Extracurricular Activities
This workflow sends an email to a staff member when a value for extracurricular activities on a student record is added or updated.
Note: The label for this field and the values it contains are configured by your institution.
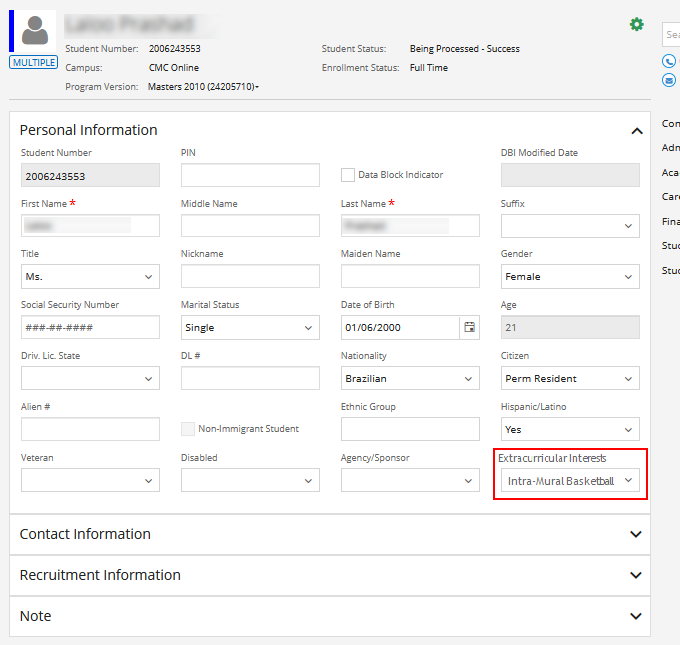
The standard Anthology Student interface shows the Extracurricular Interests field on the student profile.

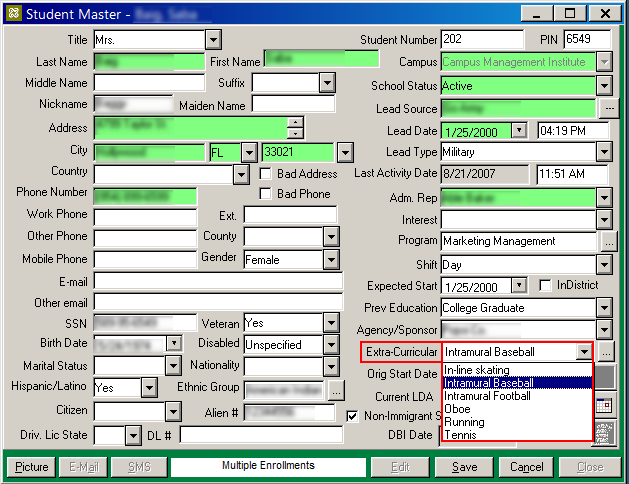
The legacy Anthology Student interface shows the Extra-Curricular field on the Student Master form.

-
Start the Workflow application from your desktop.
-
On the Home tab, click New Event Workflow.
-
In the Entities area:
-
Click
 next to Cmc.Nexus.Contracts.
 -
Click
 next to Cmc.Nexus.Sis.
 -
Click Student Extra Curricular (StudentExtraCurricular).
-
-
In the Events area, click Saved (SavedEvent).
-
Specify a Name for the workflow and click OK.
-
Drop a LookupListItem activity into the sequence.
-
In the Item Type list, select Extra Curricular.
-
In the ItemId field of the Properties pane, specify the entity to be looked up: entity.ExtraCurricularId.
-
In the Variables pane, create a variable for the list item lookup.
Name the variable, e.g., ExtraCurr, and select the Variable type of LookupItem.
-
In the ListItem field of the Properties pane, specify the name of the variable created above, e.g., ExtraCurr.

-
-
Drop a CVueIdToPersonIdActivity activity into the sequence.
-
In the CVueId field of the Properties pane, specify entity.StudentId.
-
In the Variables pane, create a variable for the CVueId to PersonId conversion activity.
Name the variable, e.g., PersId, and select the Variable type of Int32.
-
In the PersonId field of the Properties pane, specify the name of the variable created above, e.g., PersId.
-
In the PersonType field of the Properties pane, specify the entity to be converted: Cmc.Nexus.Converters.CVuePersonType.SyStudent.

-
-
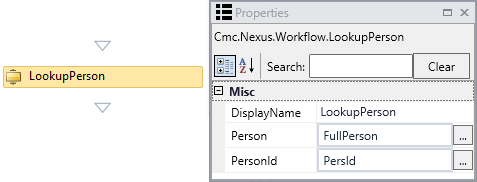
Drop a LookupPerson activity into the sequence.
-
In the Variables pane, create a variable for the Lookup Person activity.
Name the variable, e.g., FullPerson, and select the Variable type of Person.
-
In the Person field of the Properties pane, specify the name of the variable created above, e.g., FullPerson.
-
In the PersonId field of the Properties pane, specify the name of the variable created above, e.g., PersId.

-
-
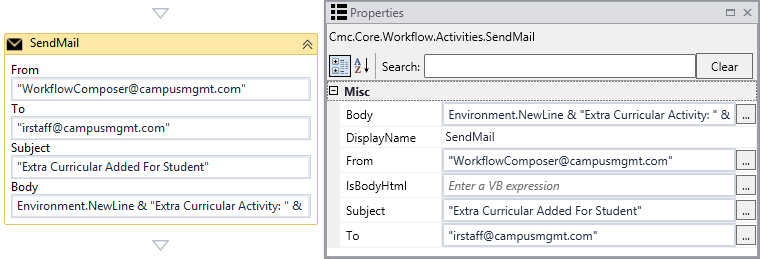
Drop a SendMail activity into the sequence.
-
In the From field, specify the email address of the sender, e.g., "WorkflowComposer@campusmgmt.com".
-
In the To field, specify the email address of the recipient, e.g., "irstaff@campusmgmt.com".
-
In the Subject field, specify the subject of the email, e.g., "Extra Curricular Added For Student".
-
In the Body field, specify the content of the message using the attributes retrieved by the workflow. Use Environment.NewLine to format the message text, e.g.,
Environment.NewLine & "Extra Curricular Activity: " & ExtraCurr.Name & Environment.NewLine & [Enum].GetName(gettype(EntityState), entity.EntityState) & " for student - " & FullPerson.FirstName & " " & FullPerson.LastName.

-
-
Check your workflow. Scroll through the workflow or use the 'fit to screen' button located at the bottom of the Designer pane to see the whole workflow.
-
Click Publish. The New Workflow Definition Version window is displayed.
-
If you want the workflow to be run as soon as the event occurs on the entity, select Enable This Workflow Version, otherwise leave the check box cleared.
-
Click Save, then Cancel to close the publisher window.