Configure a Channel Provider
Ideally, Live Assist should be made available in a unified interface, i.e., as a dedicated space or channel within the Anthology Reach user interface so that the Anthology Reach user does not need to switch windows (Alt -Tab) while working in Anthology Reach and answering a chat.
-
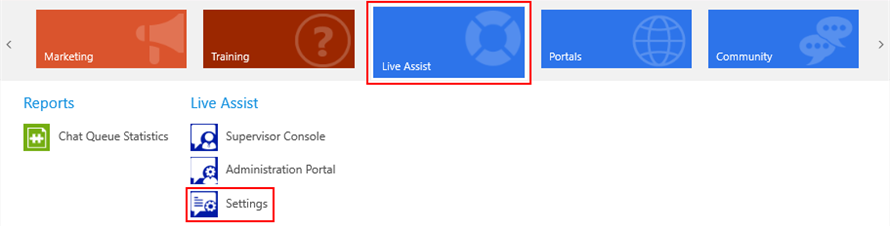
In the Anthology Reach drop-down ribbon, select Live Assist > Settings.

-
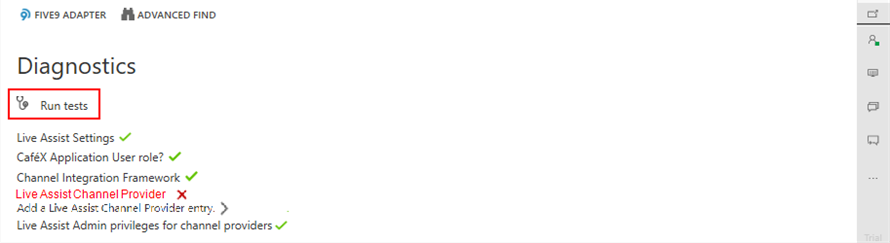
Click on Run tests.
The test results will show an option to add a Live Assist Channel Provider if does not exist.
-
Click the Add a Live Assist Channel Provider link.
A record will be created with all required information.
-
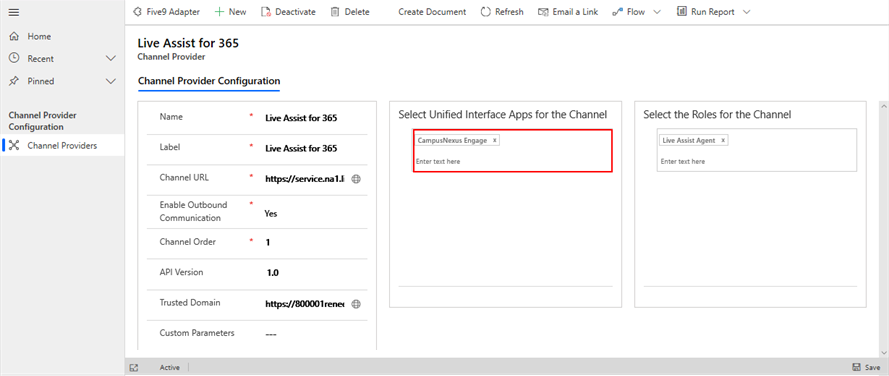
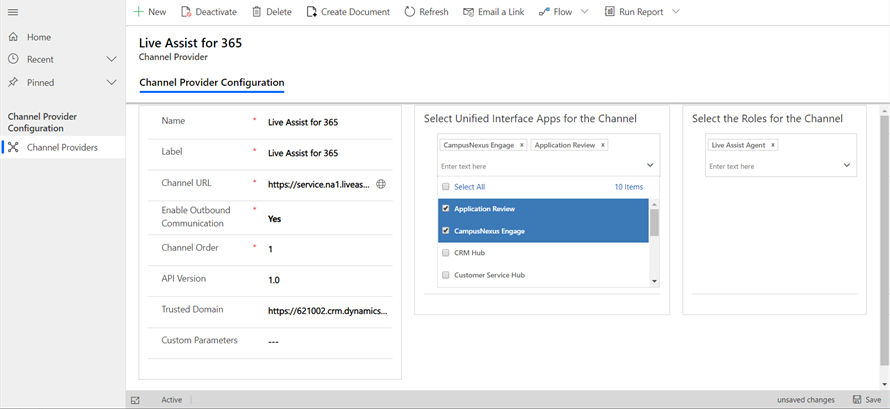
Select the Unified Interface Apps where you need Live Assist to be enabled, i.e., Application Review and Anthology Reach. Select Live Assist Agent as the role for the channel .
-
Click Save at the bottom right of the page.
Review/Edit Channel Provider
The Microsoft Dynamics 365 Channel Integration Framework enables integration of multiple third-party channel providers such as Live Assist and Five9 Adapter. If your Anthology Reach environment uses multiple channels, e.g., Five9 Adapter for Microsoft Dynamics 365 and Live Assist for the Digital Assistant, you will need to configure the Anthology Reach page to be associated with Live Assist. If not, you will need to configure specific pages where you want to see Live Assist.
To review or edit the channel provider configuration, perform the following steps.
-
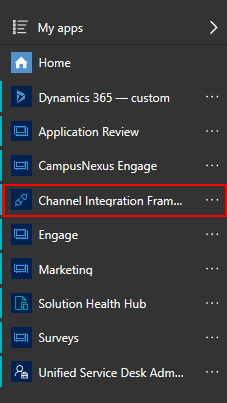
Click the drop-down next to Anthology Reach in the menu bar to switch to another app and select Channel Integration Framework.
-
The Active Channel Provider page is displayed. This page has options to configure, create, or delete a channel provider. The example below has two channel providers: Five9 Adapter and Live Assist. Click the Live Assist for 365 link.
-
The Live Assist for 365 Channel Provider Configuration page is displayed. For Anthology Digital Assistant we recommend configuring the Live Assist channel shown below.
-
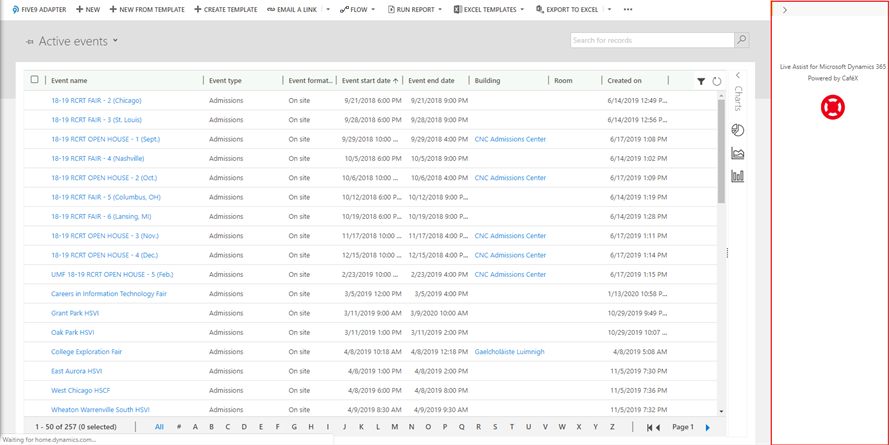
With this configuration, the Live Assist for Anthology Digital Assistant is integrated with Anthology Reach and displayed on the right of user interface.