Welcome and Confirmation Forms
The first form in a form sequence is often designed as a Welcome form. It contains only one navigation button (Next) and is the first state in a workflow. When it is added to a form sequence, the Form Names column in the Sequence List includes the Welcome form.
The last form in a sequence is the end state in a workflow. It is the form chosen as the End State Form in the Sequence Properties pane in Sequence Designer. You must choose an End State Form (no default). In Forms Builder 3.5 and later, the names of forms with 'End State' property appear in the Form Names column of the Sequence List. Previously, they were not listed.
A Default-Confirmation form is available; however, this form will be overwritten when Forms Builder is updated. Either create a new form or make a copy of this form in Form Designer and update it as appropriate (branding, links to other sites or sequences, etc.). Save it and select “End State” in the Save dialog. This will make it appear in the “End State Form” property list for a sequence. It will not appear in the Forms list in Sequence Designer.
If, at some later time, you want to:
-
Change the end state form, you must update the End State Form property in the sequence for the new form and re-save the sequence.
-
Use the end state form as a regular form, re-save it with the “End State” property cleared. This will remove it from the “End State Form” list in the Sequence Properties and put it in the Forms list in Sequence Designer. This will not affect any previous sequences where it is used as an End State. Doing this in reverse is also true.
You can also add a new State in the workflow or rename an existing State to use an End State form without consequences.
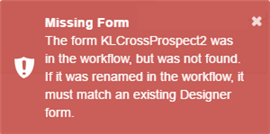
When editing a workflow definition, keep in mind that a state in the state machine workflow equates to a form within the sequence. The name of a State must match the name of a Form to be rendered properly. If Renderer encounters a State in workflow definition that does not match name of any Form created in Form Designer, an error similar to the following will be generated.
Create a Custom Welcome Form
In Form Designer, select the Welcome form and click Save As. Then modify the new form.
— OR —
-
In Form Designer, click New, and drag the controls you want to use to the Layout pane. Typically, the HTML component will be used to display a 'Welcome' statement.
-
In the Control Property Settings pane, specify the desired properties.
-
Save the form with a new name.
Create a Custom Confirmation Form
In Form Designer, select the Default-Confirmation form and click Save As. Then modify the new form.
— OR —
-
In Form Designer, click New and drag the controls you want to use to the Layout pane. Typically, the HTML component will be used to display a "Thank You" statement.
-
In the Control Property Settings pane, specify the desired properties.
-
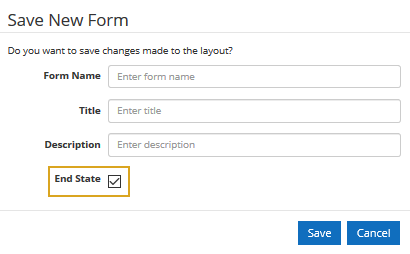
Click Save and complete the dialog. Be sure to select the End State option.

Note: The form is saved and added to the Forms list in Form Designer. You can modify the form as needed. If you save the form again without the End State attribute (after previously saving the form with the attribute), the form appears in the Forms column in Sequence Designer but remains available as an End State Form in existing workflows that already contain the form.
-
In Sequence Designer, select the sequence that will use your new form.
-
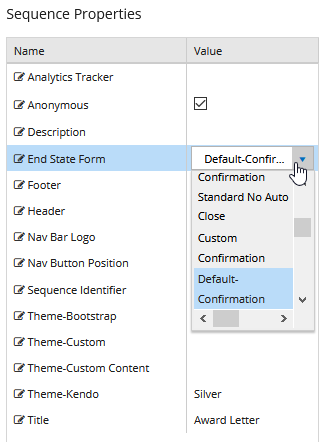
In the Sequence Properties pane, in the Value field of the End State Form property, select an End State Form.
Do not select the Default-Confirmation form in sequences that will be moved to production because the Default-Confirmation will be overwritten during the next upgrade.
-
Save the sequence.
-
Navigate to the Sequence List and test the sequence.
|
|
Do not leave the Default-Confirmation as the End State Form for sequences that are moved to production. This form will be overwritten during the next upgrade. In all sequences that are exported to production, replace the Default-Confirmation form with a custom confirmation form. |