Build Queries Using Views for Anthology Student
Anthology Student provides the Views feature which enables you to create OData queries that can be used to populate the Lookup Query value for list Fields or Components in Form Designer.
To access Anthology Student, open the About Forms Builder window, and copy the Student Base URL into a browser.
Create a View and Export a Query
-
Log in to Anthology Student at the Student Base URL.
-
Click the Views tile.
-
Click the New View button.
-
Add data to the view by selecting appropriate values from the following categories:
-
Modules (e.g., Academics, Admissions, Career Services, Common.)
-
Objects (e.g., Programs, Buildings)
-
Properties (e.g., Active, Number of Rooms, Contact Name)
Click
 to move your selections to the Selected Properties box.
 -
-
In the Selected Properties box, select the property you want to sort and click
to move your selection to the Sort Order box. -
Select appropriate Conditions in the query to filter the data in the view (e.g., And/Or, Property, Operator, Value).
-
Click Run Query in the toolbar and review the results.
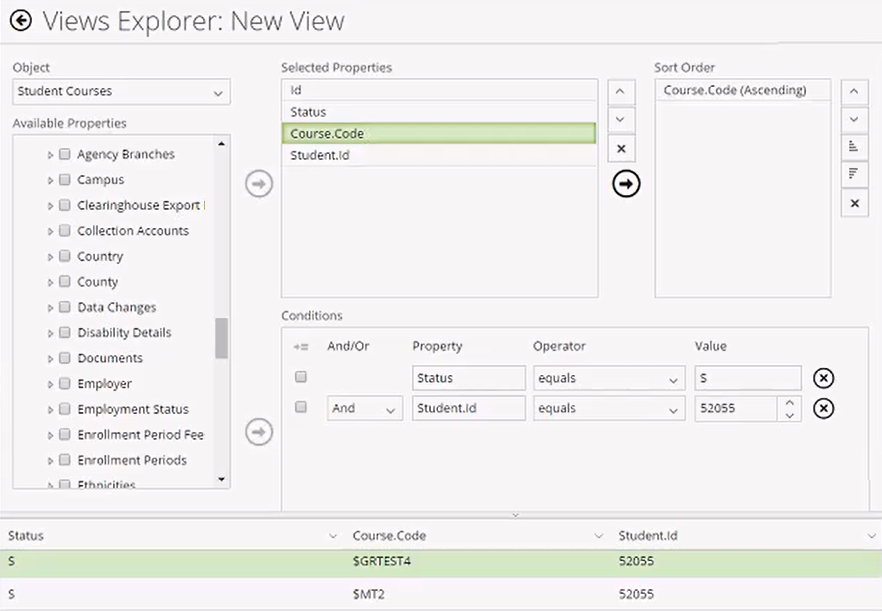
In our example, the following query was constructed and executed:
- The StudentCourses object was selected.
- The Id, Status, Course.Code and Student.Id properties were selected.
- The Sort Order is by Course.Code.
- The Conditions filter by Status (S=scheduled) and StudentId.
The query returns all scheduled student courses.

-
Click
 at the top right of the toolbar to access the Query URL. The Copy the URL to the clipboard window is displayed.
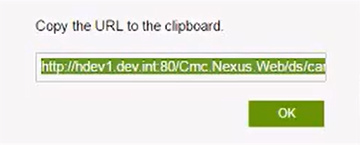
-
Click OK and paste the URL into Notepad.
In our example, the URL is as follows:
http://cltqafb7.campusmgmt.com:80/Cmc.Nexus.Web/ds/campusnexus/StudentCourses?$filter=Status eq 'S' and Student/Id eq 52055&$orderby=Course/Code&$select=Id,Status&$expand=Course($select=Code),Student($select=Id)The URL contains both the Student Base URL and the OData query (highlighted).
You can validate this query by pasting it in any browser window.
-
Paste the OData query into the Lookup Query field in Form Designer.
Notes:
Replace the StudentId value (52055) with an expression representing the
studentEntity.Idin the data model so that the query for student courses will be applicable to any student.StudentCourses?$filter=Status eq 'S' and Student/Id eq{{vm.models.studentEntity.Id}}$orderby=Course/Code&$select=Id,Status&$expand=Course($select=Code),Student($select=Id)The above OData query assumes that
{{vm.models.studentEntity.Id}}is populated before this query is being executed. The value of such variable can be populated in Workflow, in a previous form or even in the same form.
Populate the Lookup Query in Form Designer
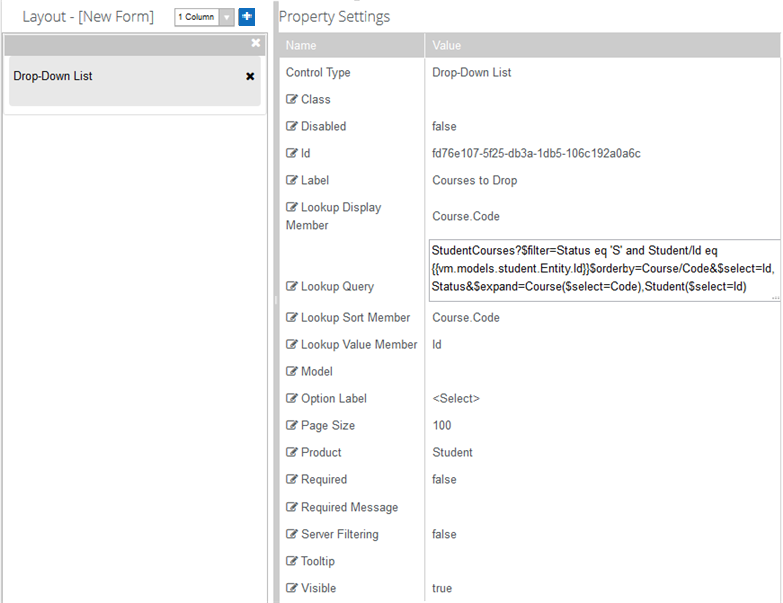
After testing the OData query, paste it in the Lookup Query field of the list control in the Property Settings pane in Form Designer. ![]()
Notes:
-
Depending on the columns retrieved by the query, adjust the Lookup Display Member, Lookup Sort Member, and Lookup Value Member properties. The default values "Name" and "Id" are not applicable if the query does not retrieve "Name" and "Id" values.
-
The Product specified in the Property Settings pane is the query provider. When you are customizing a Lookup Query, make sure that the Product value (e.g., "Student") matches the database that is being queried.
Lookup Queries for CampusNexus CRM Metadata
For any drop-down or search controls that will be populated via a lookup query, the CampusNexus CRM user needs to enter values for the Lookup Display Member and Lookup Sort Member attributes. The Lookup Query and Lookup Value Member property settings should have default values (if applicable for the selected property) as these are currently specified in the metadata.