FTP Import Schedule and Settings
As an administrator with the required permissions, you can define a preset schedule to automatically transmit specific message class files received from the Department of Education to the designated server.
To configure automated incoming file transfers:
-
On the Settings page, select Set FTP Import Schedule and Settings.
-
Set the FTP Settings for the incoming file transfers:
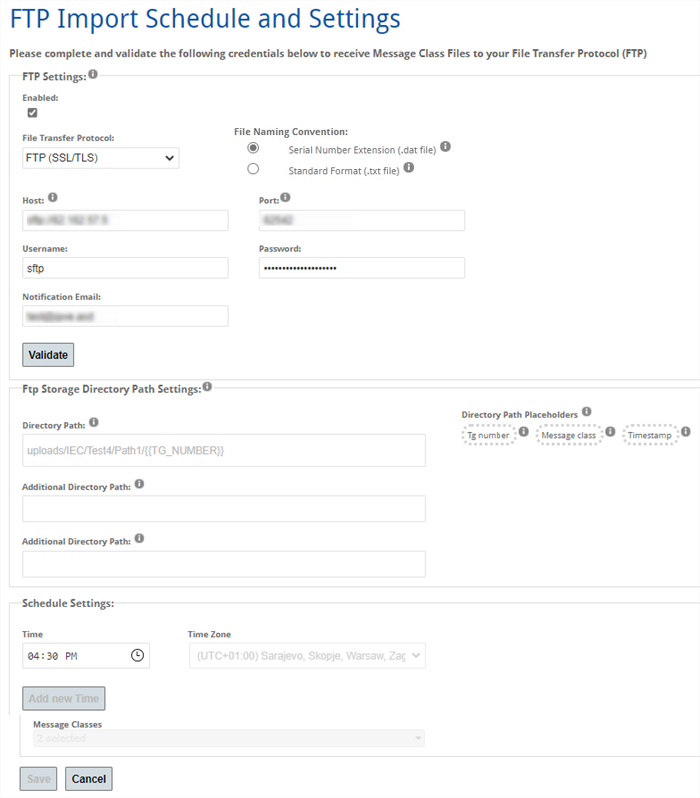
Field Description Enabled Select this check box to enable automated file transfers from the Department of Education to the designated server.
You can clear this option at any point in the future to disable automated incoming transfers.
Please validate the FTP Settings prior to selection of the Enabled check box.
File Transfer Protocol Select the protocol used for the file transfers:
-
SSH: SSH File Transfer Protocol (SFTP) is a network protocol that provides access, file transfer, and file management functionality over a secure connection.
-
FTP (SSL/TLS): File Transfer Protocol (FTP) is a standard network protocol used to transfer computer files between a client and server on a computer network.
File Naming Convention Select the naming convention used for the file shares:
- Serial Number Extension (.dat file)
- Standard Format (.txt file)
Host Enter the registered host name or IP address of your FTP or FTPS server. Port Enter the port number set for your FTP or FTPS server. The valid range is 1-65535. Username, Password Enter the credentials used to access your FTP or FTPS server. Notification Email Enter the email address that is used by the system to send notifications of scheduled incoming file transfer events (success and failure). -
-
Select the Validate button to perform a validation against the specified FTP parameters.
Important: If you make any revisions after the initial validation, you must repeat this step to connect to the configured server.
-
Use the Ftp Storage Directory Path Settings fields to configure a custom Ftp storage directory structure. Enter the directory path structure on your FTP or FTPS server used to save and store the incoming files.
-
Use the Schedule Settings to specify the occurrence of the automated incoming file transfers. You can add another time slot by selecting the Add new Time button.
The system requires a minimum of one time slot a has maximum of seven for enabling inbound automatic file transfer. For each time slot, specify the following parameters:
Field Description Time Specify the time at which the system executes the scheduled file transfer each day.
You can clear this option at any point in the future to disable automated incoming transfers.
Time Zone Set the time zone for the clock time. This is typically the time zone of your institution. -
Select the Message Classes that you want to include in the automatic transfer.
-
Select Save.
This button is not available if you do not have a successful validation against the configured FTP setting and at least one time slot and message class selected.