Localizing PCF Controls
Microsoft Power Apps component framework (PCF) enables developers and app makers to create reusable code components for model-driven and canvas apps. For more information about Microsoft PCF, see Microsoft Documentation.
The following steps enable an administrator of Anthology Reach to override the translation of an existing language or install the translation for a new language in a PCF control.
-
Create a copy of the web resource (.RESX) file associated with the PCF control with the required language code (LCID). For example, to translate the addressautocomplete PCF control to spanish, create a copy of the addressautocomplete.1033.resx file and change the LCID (1033) to 3082 in the RESX file name as addressautocomplete.3082.resx.
To create a copy of the .RESX file, perform the following steps:
-
In the Anthology Reach environment, navigate to Settings > Customizations > Customize the System.
-
In the Solution: Default Solution page, click Components > Web Resources.
-
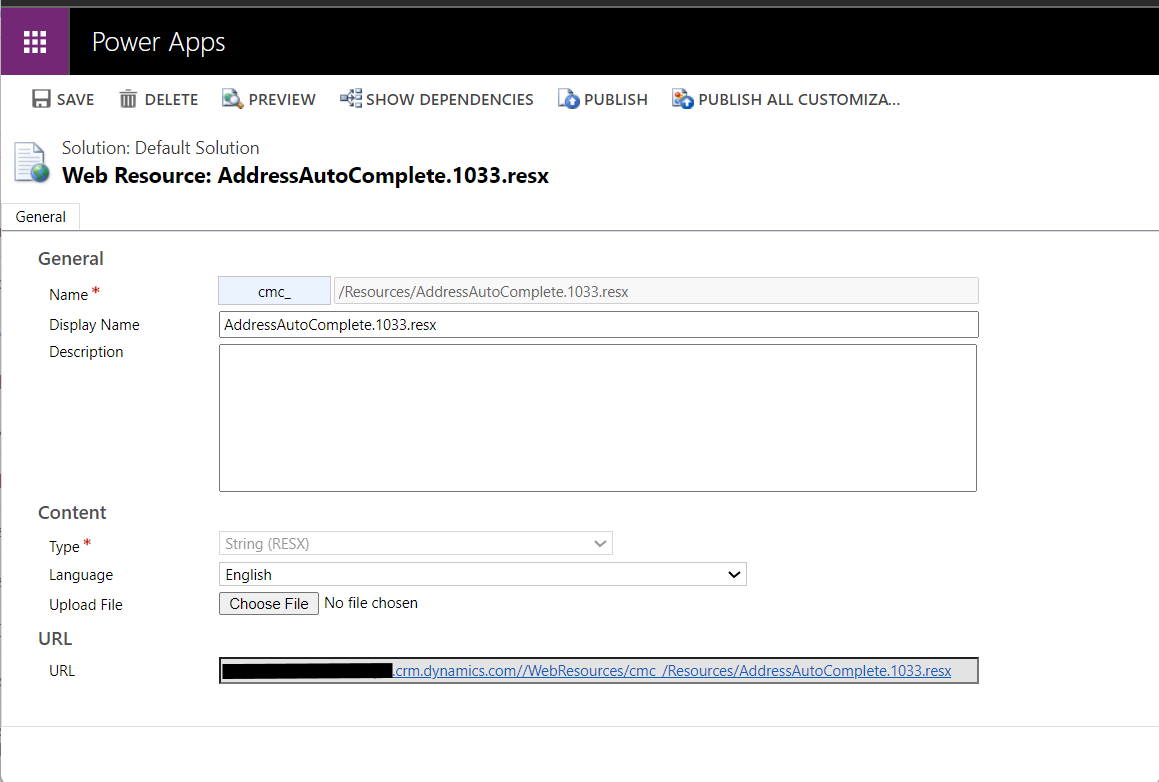
Locate the RESX file of the PCF control that needs to be translated, and click to view the resource file details.
-
From the Web Resource page, copy the path of the RESX file from the URL field and paste it in a browser.
-
Copy the content of the RESX file displayed in the browser to an editor, translate the <value> of each <name> record, and rename the RESX file with the required language ID.
-
-
In the Solution: Default Solution page, click Components > Web Resources, click New.
-
In the Web Resource: New page, specify the following details:
-
In the Name field, specify a name for the RESX file.
-
In the Type field, select String (RESX).
-
In the Upload File, upload the new RESX file created in step 1 above.
-
Click Save.
The new RESX file for the PCF control is created in the Reach environment.
-
-
Copy the resource path of the newly created RESX file from the URL field.
-
Open the entity form where the PCF control is added.
-
Select and click the field for which the PCF control configured.
-
In the Field Properties dialog box, click the Controls tab.
-
In the Control area, select the PCF control name.
-
Locate the Localization Resource File Path and click the edit icon.
-
In the Configure Property "Localization Resource File Path" dialog:
-
Select the Bind to a static value option
-
Select SingleLineText and specify the path of the new RESX file copied in Step 4.
-
-
Click OK to save and close the Field Properties dialog.
-
In the Form page, click the Form Properties icon from the ribbon.
-
In the Form Properties dialog box, click the Events tab.
-
In the Event List area, select a javascript (.js) file such as Localization.js to add the dependency of the newly created resource.