Importing Anthology Finance & HCM Entities Data
This topic describes the process of importing entities data into Anthology Finance & HCM using the Data management workspace of Microsoft Dynamics 365 for Finance and Operations.
Prerequisite
-
Log on to the required Anthology Finance & HCM environment with the System administrator role.
-
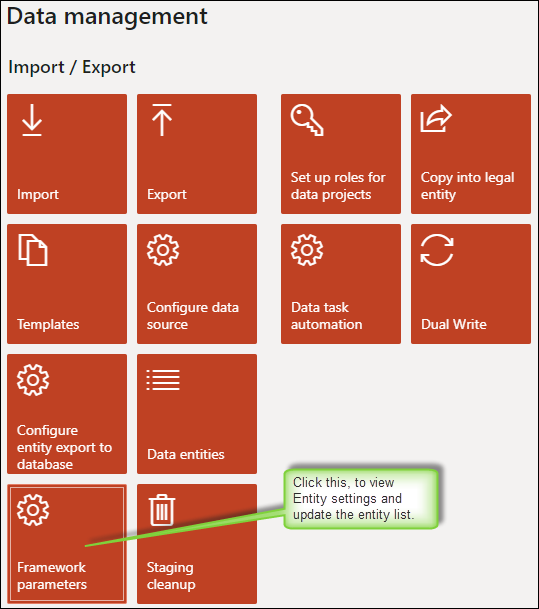
On the dashboard, click the Data management workspace.
The Data import/export framework parameters page is displayed.
-
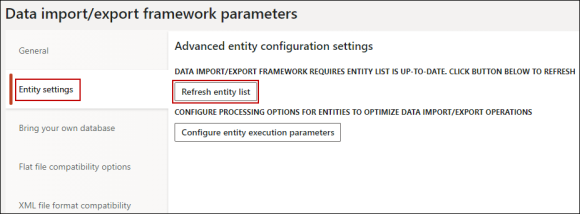
In the Entity settings tab, click the Refresh entity list button.
The entity list is updated.
Procedure to Import the Master Data of Anthology Finance & HCM Entities
Importing the master data of the Anthology Finance & HCM entities consists of the following steps:
Step 1 - Create an Excel Template to Add Entity Data for Import
The Export feature of the Data management workspace can be used to create an excel template for adding entity data that needs to be imported.
-
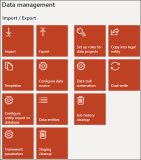
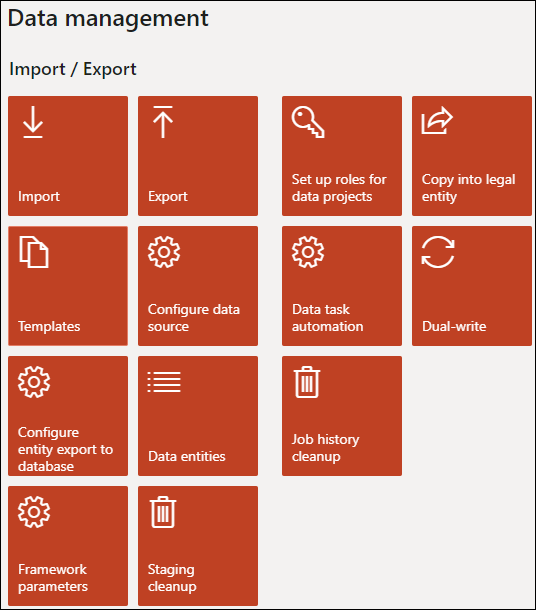
Go to System administration > Workspaces > Data management.
-
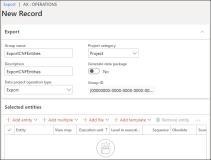
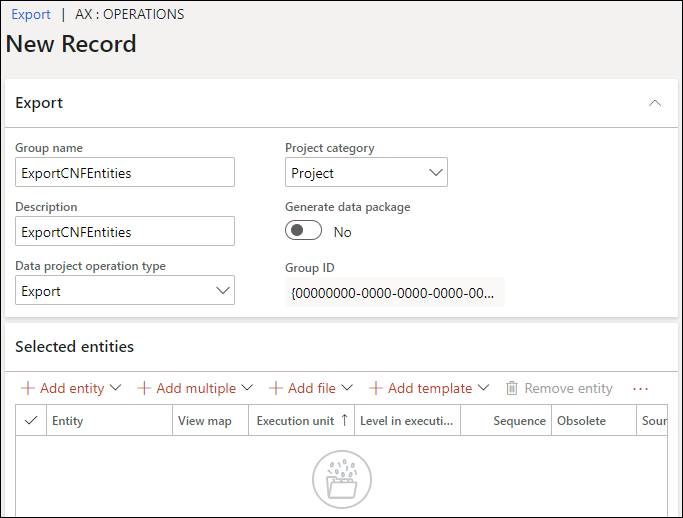
Click the Export tile to view the Export form.
-
In the Export section, in the Group name field, specify a name for the export package.
-
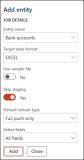
In the Selected entities section, click Add entity to view the Add entity page.
-
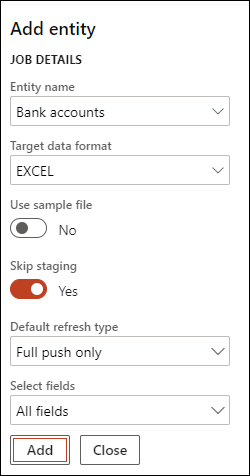
In the Add entity form, specify the following details:
-
In the Entity name, select an entity name. Example: Bank accounts/ User Information.
-
In the Target data format, select EXCEL.
-
Click Add.
A message is displayed that the entity mapping has completed successfully.
-
Click Close to close the Add entity form.
-
-
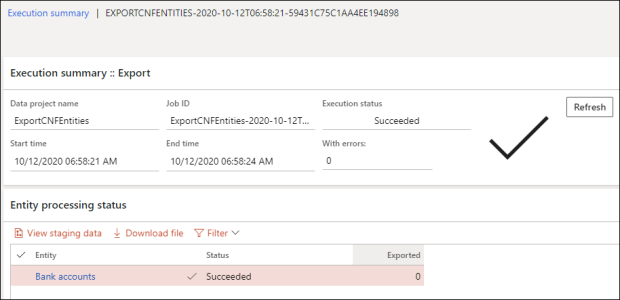
In the Selected entities section, select the check box next to the entity record (Bank accounts) and click the Export menu option.
-
A message is displayed to refresh the form, click Close and refresh the form.
The export package with the data entity information is created.
-
Click the Download package menu option to download the export package.
- Or -
In the Entity processing status section, select the check box next to the entity record (Bank accounts) and click Download file.
-
A prompt to open or save the file appears. Save the file to your local computer.
-
Navigate to the location where the file is saved and extract the files from the export package.
Use the Microsoft Excel file from the extracted files to add the data that needs to be imported into Anthology Finance & HCM.
-
Repeat steps 4 through 10 to create excel files for all the entities that must be imported.
Note: Use the CMCStudentTransEntity data entity for importing summary transaction records, and in the excel file created for import, set the TRANSIDINSIS field blank and the value of the SUMMARYTRANS field as Yes.
Step 2 - Import Entities Data From an Excel File
You can import the entity data from System Administration via
-
 Data Management
After adding the entity data in the excel file, created in the Step 1 - Create an Excel Template to Add Entity Data for Import section, you can import the entity data using the Import feature of the Data management workspace.
-
Go to System administration > Workspaces > Data management.
-
Click the Import tile to view the Import form.
-
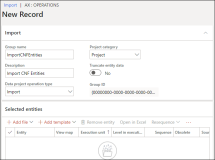
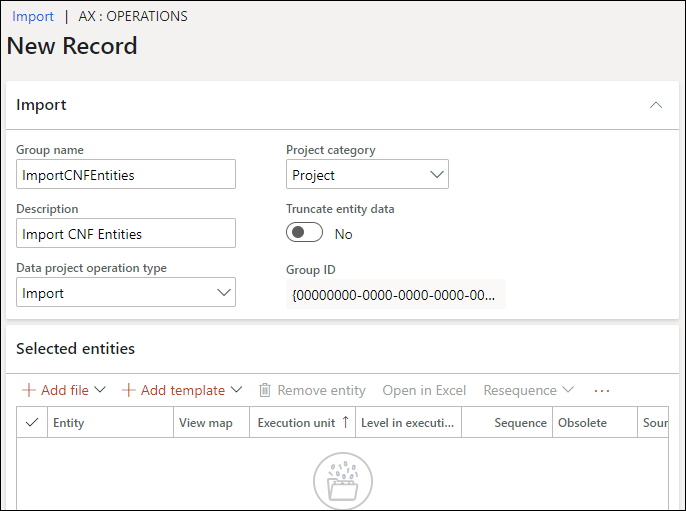
In the Import section, in the Group name field, specify a name for the import package.
-
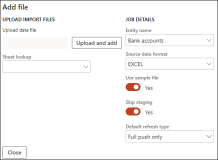
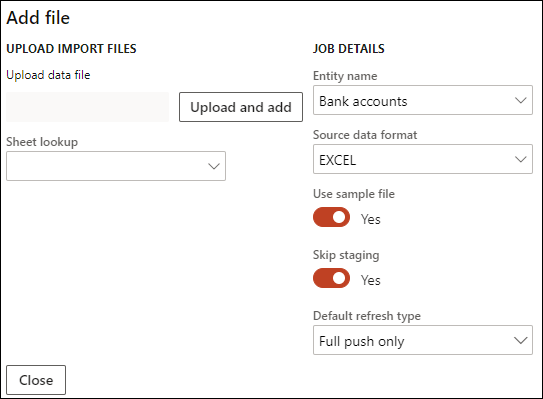
In the Selected entities section, click Add file to view the Add file page.
-
In the Add file page perform the following steps:
-
In the Entity name field, select the entity name.
-
In the Source data format field, select EXCEL.
-
Click the Upload and add button and select the entity excel file that has the data for import.
Note: The size of the messages that are sent are dynamically retrieved from the table and not set as a static value.The file for data import is added and displayed in the Selected entities section.

-
-
Select the Bank accounts record.
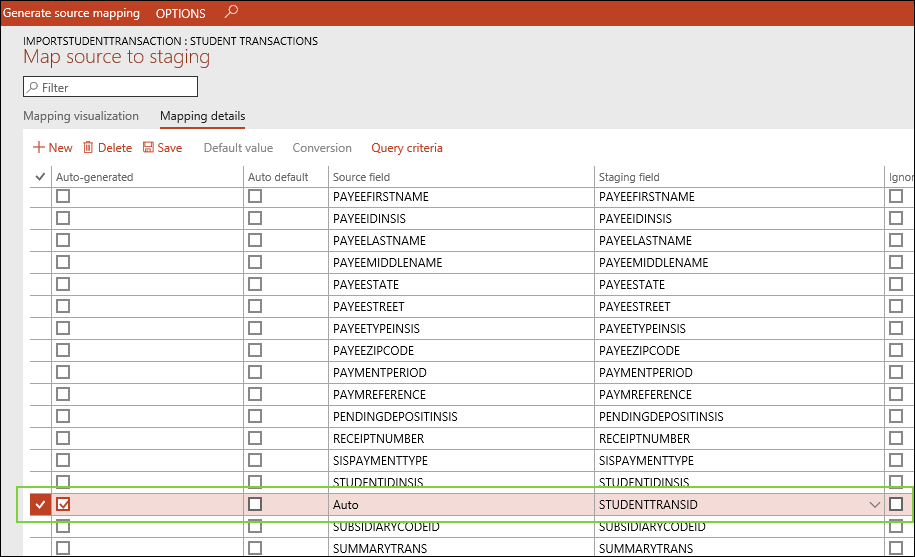
Note: For importing new records of the Student transactions entity, perform the following steps after adding the excel file in Step 5:In the Selected entities section, for the Student transactions entity, click
 in the View map column.
In the Map source to staging page, click the Mapping details tab and select the Auto-generated check box for the STUDENTTRANSID field.
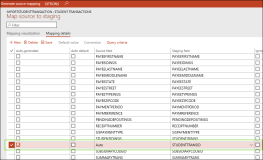
- Click Save and close the page.
-
Click Import.
-
A message is displayed to refresh the form, click Close and refresh the form.
The import process is completed.
-
Open the required data entity form to verify whether the data was imported successfully.
-
Repeat steps 4 through 9 to import data for other Anthology Finance & HCM entities.
Note: After importing the Student transaction entity records, before running the Ledger journals batch creating and posting job, the Synchronize imported transactions batch job must be run to synchronize and validate the imported student transaction records with the corresponding records existing in Anthology Student. For more information, see Periodic Tasks.
-
-
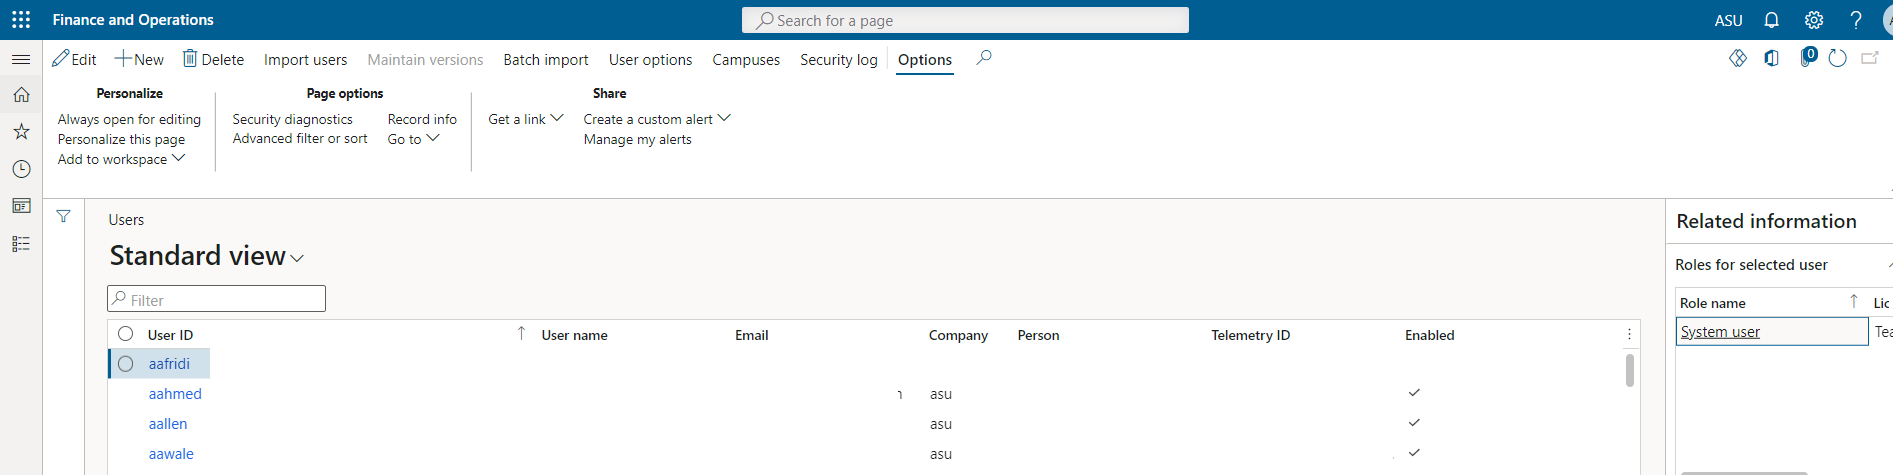
Users
After adding the entity data in the excel file, created in the Step 1 - Create an Excel Template to Add Entity Data for Import section, you can import the entity data using the Import feature of the System Administration workspace.