Create a Bank Account and Set Up a Check Layout
A bank account is a financial account held at a bank or similar institution that allows an individual or organization to deposit, store, and withdraw money, as well as conduct transactions such as payments and transfers.
For integration with Anthology Student, it is necessary to specify which bank accounts from Anthology Finance & HCM are to be used in Anthology Student.
The check layout defines the appearance of the checks and needs to be set up for each bank account.
To create a bank account, perform the following steps:
-
Navigate to Cash and bank management > Bank accounts > Bank accounts.
-
Select New to create a new bank account record.
-
In the Bank account field, enter the unique ID that you use to identify the bank account on printed reports and throughout the system.
Note: Do not use hyphen (-) and underscore (_) symbols in the Bank account field to prevent validation errors while integrating with Anthology Student.
-
In the Bank account number field, enter the bank account number that is specified by your bank.
-
In the Bank groups field, select the bank group that applies to the bank account.
-
In the Main account field, select the main account to which all bank account transactions will be automatically posted.
-
In the Currency field, select the currency code for the bank account.
-
Expand the Financial dimensions FastTab, and specify valid values in the BusinessUnit, CostCenter, and Department fields based on the account structure configured for the legal entity.
-
Expand the Student FastTab and set the Bank account used in Student to Yes.
This indicates that the bank account will be used in Anthology Student.
-
Select Save and close the form.
The Bank account record is created.
To set up the check layout, perform the following steps:
-
Navigate to Cash and bank management > Bank account > Bank accounts.
-
Select the required Bank account record and select Edit.
-
Select the SET UP tab.
-
In the Layout section, select Check.
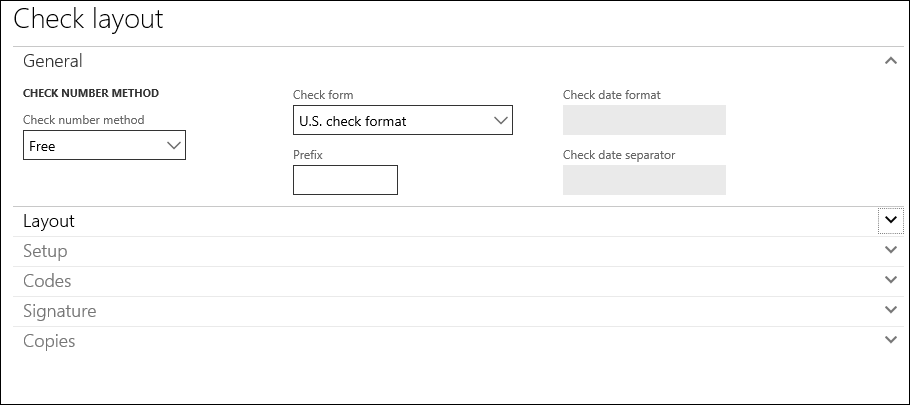
The Check Layout page is displayed.
-
On the Check layout page, perform the following steps:
-
In the Check number method field, select the method to use for generating check numbers.
-
In the Check form field, select the check format in which checks will be printed.
-
Enter required information in the fields.
-
Select Save and close the form.
-
To select Large or Last check numbers, perform the following steps:
-
Navigate to Cash and bank management > Bank account > Bank accounts.
-
Create a new Bank Account
— OR —
Select the required Bank account record and select Edit.
-
Select the Payment Management FastTab.
-
Select Check Numbers selection drop-down to select the option
-
Begin with Largest Check Number will use the next largest check number in the bank register for each check run. For example, if the following ranges exist 1-100 and 1000-1100, by default, 1101 will appear as the next check number to print. Current and subsequent check runs will use the check range starting at 1101.
— OR —
-
Begin with Last Check Number will allow the printing of checks in previously skipped check ranges. For example, if the following check ranges exist, 1-100 and 1000-1100, by default, check 1101 will appear as the next check number to print. When manually changed to 101, current and subsequent check runs will default to using the check range starting at 101.
-
-
Enter required information in the fields.
-
Select Save and close the form.