Creating Donation Records from a Batch
When a Donation record is created using a batch, the default values configured in the Batch Defaults tab is used to automatically populate the fields in the Donation record.
For creating a Batch record, see Create a Batch Record.
Create a Donation Record from a Batch
-
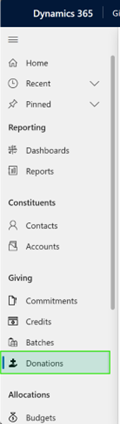
Select the Donations entity in the left navigation. If you are unable to find “Donations” under the “Giving” group, you may be in the incorrect area, or incorrect application. Depending on your institution’s Raise configuration, this may be located in an area called “Gift Processing,” which can be accessed from the very bottom of the left navigation menu. Alternatively, this may be an entirely separate model-driven application designated for gift entry specialists on the team.
- Click the “+ New” button in the command bar.

Populate the required fields with the provided data. At minimum, required fields include the following:
Source Information
Donor Type (dropdown)
Constituent OR Organization ID
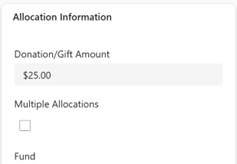
Allocation Information
Donation/Gift Amount
Fund
If the donation will be split between two or more funds, check the box for “Multiple Allocations.” When performing this action, the option to select a fund on this tile will disappear.
Kind
Received In
Depending on the option selected in the “Kind” Field, this dropdown for “Received In” will display different options.
-
The gift processer may also enter a related proposal or commitment for the donation. If a donor has an active proposal or commitment in the “Awaiting Fulfillment” status, a lightbulb icon will appear next to the commitment field. The gift processor may click in the field to view those commitments and select one to apply the donation towards.
-
Selecting a commitment will automatically apply the donation/gift amount, fund information, and other information associated with the installment from the commitment. The gift processer can choose to alter the amount if the payment is greater or less than the amount on the installment
-
More information on Commitments and Installments <Link>
-
-
Click the Save button in the command bar. This will activate the record and display additional options for available actions that can be taken on the record.
-
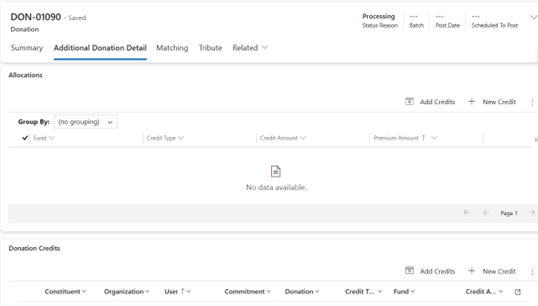
One of the actions that can be taken upon saving the donation is to add additional designations, should the box for “Multiple Allocations” be checked.
-
Selecting “Multiple Allocations” allows a single gift to be divided into multiple funds. To add designations, select “Additional Donation Detail” from the tabs at the top.
-
The user is able to add a related credit record, right from the donation form, by clicking “New Credit” under Allocations. Selecting “Add Credits” will open a menu that can add multiple credit records at a time, though they all must be individually modified.
-
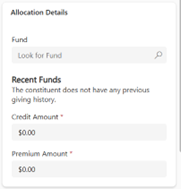
On the credit record, modify the Fund and Credit Amounts under Allocation Details. Certain information from the donation will automatically populate on the credit record so the user does not need to.
-
Credit Amount should be equal to the amount that the donor wishes to allocate to the fund listed on the credit.
-
Premium Amount must be populated and can be equal to $0. Premium amount = value of benefits received by the donor which is not taxable. Taxable amount= Total Gift Amount minus Premium Amount. The total premium amount allocated of all the credits should equal the Donation premium amount.
-
-
Once the credit details have been entered, click “Save & Close” in the top ribbon to return to the donation. The credit can be viewed now on the “Allocations” tile.
-
The total value of the Hard Credits added to the donation record must add up to the donation amount on the Summary tab.
b. If the constituent has set up a Credit Share, soft credits may be automatically generated for a spouse or other individual designated to receive a soft credit.
-
Soft Credit can also be applied to an individual donor in the case of a donor advised fund being the source of a gift. Please visit the help documentation for Soft Credits for more information.
-
-
When the Donation record has been saved, the initial Status Reason will update to Processing. The other status reasons are listed below.
-
Processing – initial status reason after Gift Processor enters provided data into the system
-
Posted – data has been entered and will be sent to finance feed for translation to the general ledger
-
Void – donation is no longer viable (donations cannot be deleted)
-
Complete – final status for a record when the donation has been posted and added to the finance feed to be transmitted.
NOTE: For clients utilizing the finance integration, only hard credits that have a status reason of “Completed/Satisfied” will be picked up by the finance process that generates the Finance File and uploads it into the Azure BLOB. <link to help documentation for Finance Integration>